

Tutorials
-
Aug 29, 2026
Get Ticket Data from Freshdesk API using Python
Read more


Use Knit's tutorials to quickly get started on your integrations journey.
In this article, the focus is narrow and execution-driven: how to retrieve ticket data using the Freshdesk API. If you're building support analytics, syncing customer interactions, or operationalizing ticket workflows, this is a foundational use case.
Before you start, ensure the basics are in place:
requests)GET /api/v2/ticketsGET /api/v2/tickets?requester_id=[customer_id]Freshdesk uses API key-based authentication. The API key is passed as the username, with a placeholder password.
import requestsapi_key = 'yourapikey'domain = 'yourdomain.freshdesk.com'headers = {'Content-Type': 'application/json'}auth = (api_key, 'X')
Fetch all tickets using the base tickets endpoint.
url = f'https://{domain}/api/v2/tickets'response = requests.get(url, headers=headers, auth=auth)tickets = response.json()print(tickets)
Filter tickets by requester ID to retrieve customer-specific data.
customer_id = '12345'url = f'https://{domain}/api/v2/tickets?requester_id={customer_id}'response = requests.get(url, headers=headers, auth=auth)customer_tickets = response.json()print(customer_tickets)
Freshdesk returns 30 tickets per page by default and caps per_page at 100. Use the link response header to detect whether another page exists, then follow it until the header is no longer set.
tickets = []url = f'https://{domain}/api/v2/tickets?per_page=100'while url: response = requests.get(url, headers=headers, auth=auth) tickets.extend(response.json()) next_url = None link_header = response.headers.get('link') if link_header and 'rel="next"' in link_header: next_url = link_header[link_header.find('<') + 1:link_header.find('>')] url = next_urlprint(len(tickets))
Check the status code before trusting the response body. A 401 means the API key or auth header is wrong, 403 means the agent isn't authorized for that resource, and 429 means the account's rate limit has been exhausted.
response = requests.get(url, headers=headers, auth=auth)if response.status_code == 200: tickets = response.json()elif response.status_code == 429: print('Rate limited, back off and retry')else: print(f'Request failed: {response.status_code} {response.text}')
Most integration failures are not technical; they are operational oversights. Avoid these:
429 status once your domain's limit is exhausted.?status=[status].per_page, signaling additional pages through the response's link header.429 status code once your plan's limit is exhausted. Knit centralizes rate-limit handling and backoff across the APIs it connects to, so a single integration doesn't have to reimplement retry logic per vendor.PUT method for updates.If you're scaling beyond basic scripts, direct API integration becomes a maintenance burden: auth handling, retries, schema changes, and edge cases stack up fast.
Knit abstracts this complexity. A single integration gives you managed authentication, standardized data access, and ongoing maintenance coverage.
.webp)
Sage 200 is a comprehensive business management solution designed for medium-sized enterprises, offering strong accounting, CRM, supply chain management, and business intelligence capabilities. Its API ecosystem enables developers to automate critical business operations, synchronize data across systems, and build custom applications that extend Sage 200's functionality.
The Sage 200 API provides a structured, secure framework for integrating with external applications, supporting everything from basic data synchronization to complex workflow automation.
In this blog, you'll learn how to integrate with the Sage 200 API, from initial setup, authentication, to practical implementation strategies and best practices.
Sage 200 serves as the operational backbone for growing businesses, providing end-to-end visibility and control over business processes.
Sage 200 has become essential for medium-sized enterprises seeking integrated business management by providing a unified platform that connects all operational areas, enabling data-driven decision-making and streamlined processes.
Sage 200 breaks down departmental silos by connecting finance, sales, inventory, and operations into a single system. This integration eliminates duplicate data entry, reduces errors, and provides a 360-degree view of business performance.
Designed for growing businesses, Sage 200 scales with organizational needs, supporting multiple companies, currencies, and locations. Its modular structure allows businesses to start with core financials and add capabilities as they expand.
With built-in analytics and customizable dashboards, Sage 200 provides immediate insights into key performance indicators, cash flow, inventory levels, and customer behavior, empowering timely business decisions.
Sage 200 includes features for tax compliance, audit trails, and financial reporting standards, helping businesses meet regulatory requirements across different jurisdictions and industries.
Through its API and development tools, Sage 200 can be tailored to specific industry needs and integrated with specialized applications, providing flexibility without compromising core functionality.
Before integrating with the Sage 200 API, it's important to understand key concepts that define how data access and communication work within the Sage ecosystem.
The Sage 200 API enables businesses to connect their ERP system with e-commerce platforms, CRM systems, payment gateways, and custom applications. These integrations automate workflows, improve data accuracy, and create seamless operational experiences.
Below are some of the most impactful Sage 200 integration scenarios and how they can transform your business processes.
Online retailers using platforms like Shopify, Magento, or WooCommerce need to synchronize orders, inventory, and customer data with their ERP system. By integrating your e-commerce platform with Sage 200 API, orders can flow automatically into Sage for processing, fulfillment, and accounting.
How It Works:
Sales teams using CRM systems like Salesforce or Microsoft Dynamics need access to customer financial data, order history, and credit limits. Integrating CRM with Sage 200 ensures sales representatives have complete customer visibility.
How It Works:
Manufacturing and distribution companies need to coordinate with suppliers through procurement portals or vendor management systems. Sage 200 API integration automates purchase order creation, goods receipt, and supplier payment processes.
How It Works:
Organizations with multiple subsidiaries or complex group structures need consolidated financial reporting. Sage 200 API enables automated data extraction for consolidation tools and business intelligence platforms.
How It Works:
Field sales and service teams need mobile access to customer data, inventory availability, and order processing capabilities. Sage 200 API powers mobile applications for on-the-go business operations.
How It Works:
Financial teams spend significant time matching bank transactions with accounting entries. Integrating banking platforms with Sage 200 automates this process, improving accuracy and efficiency.
How It Works:
Sage 200 API uses token-based authentication to secure access to business data:
Implementation examples and detailed configuration are available in the Sage 200 Authentication Guide.
Before making API requests, you need to obtain authentication credentials. Sage 200 supports multiple authentication methods depending on your deployment (cloud or on-premise) and integration requirements.
Step 1: Register your application in the Sage Developer Portal. Create a new application and note your Client ID and Client Secret.
Step 2: Configure OAuth 2.0 redirect URIs and requested scopes based on the data your application needs to access.
Step 3: Implement the OAuth 2.0 authorization code flow:
Step 4: Refresh tokens automatically before expiry to maintain seamless access.
Step 1: Enable web services in the Sage 200 system administration and configure appropriate security settings.
Step 2: Use basic authentication or Windows authentication, depending on your security configuration:
Authorization: Basic {base64_encoded_credentials}
Step 3: For SOAP services, configure WS-Security headers as required by your deployment.
Step 4: Test connectivity using Sage 200's built-in web service test pages before proceeding with custom development.
Detailed authentication guides are available in the Sage 200 Authentication Documentation.
IIntegrating with the Sage 200 API may seem complex at first, but breaking the process into clear steps makes it much easier. This guide walks you through everything from registering your application to deploying it in production. It focuses mainly on Sage 200 Standard (cloud), which uses OAuth 2.0 and has the API enabled by default, with notes included for Sage 200 Professional (on-premise or hosted) where applicable.
Before making any API calls, you need to register your application with Sage to get a Client ID (and Client Secret for web/server applications).
Step 1: Submit the official Sage 200 Client ID and Client Secret Request Form.
Step 2: Sage will process your request (typically within 72 hours) and email you the Client ID and Client Secret (for confidential clients).
Step 3: Store these credentials securely, never expose the Client Secret in client-side code.
✅ At this stage, you have the credentials needed for authentication.
Sage 200 uses OAuth 2.0 Authorization Code Flow with Sage ID for secure, token-based access.
Steps to Implement the Flow:
1. Redirect User to Authorization Endpoint (Ask for Permission):
GET https://id.sage.com/authorize?
audience=s200ukipd/sage200&
client_id={YOUR_CLIENT_ID}&
response_type=code&
redirect_uri={YOUR_REDIRECT_URI}&
scope=openid%20profile%20email%20offline_access&
state={RANDOM_STATE_STRING}2. User logs in with their Sage ID and consents to access.
3. Sage redirects back to your redirect_uri with a code:
{YOUR_REDIRECT_URI}?code={AUTHORIZATION_CODE}&state={YOUR_STATE}4. Exchange Code for Tokens:
POST https://id.sage.com/oauth/token
  Content-Type: application/x-www-form-urlencoded
  Authorization: Basic {BASE64(client_id:client_secret)}

  grant_type=authorization_code
  &code={AUTHORIZATION_CODE}
&redirect_uri={YOUR_REDIRECT_URI}5. Refresh Token When Needed:
POST https://id.sage.com/oauth/token
  Content-Type: application/x-www-form-urlencoded
  Authorization: Basic {BASE64(client_id:client_secret)}

  grant_type=refresh_token
&refresh_token={YOUR_REFRESH_TOKEN}Sage 200 organizes data by sites and companies. You need their IDs for most requests.
Steps:
1. Call the sites endpoint (no X-Site/X-Company headers needed here):
Headers:
Authorization: Bearer {ACCESS_TOKEN}
Content-Type: application/json
2. Response lists available sites with site_id, site_name, company_id, etc. Note the ones you need.
Sage 200 API is fully RESTful with OData v4 support for querying.
Key Features:
No SOAP Support in Current API - It's all modern REST/JSON.
All requests require:
Authorization: Bearer {ACCESS_TOKEN}
X-Site: {SITE_ID}
X-Company: {COMPANY_ID}
Content-Type: application/json
Use Case 1: Fetching Customers (GET)
GET https://api.columbus.sage.com/uk/sage200/accounts/v1/customers?$top=10Response Example (Partial):
[
  {
    "id": 27828,
    "reference": "ABS001",
    "name": "ABS Garages Ltd",
    "balance": 2464.16,
    ...
  }
]
Use Case 2: Creating a Customer (POST)
POST https://api.columbus.sage.com/uk/sage200/accounts/v1/customers
Body:
{
  "reference": "NEW001",
  "name": "New Customer Ltd",
  "short_name": "NEW001",
  "credit_limit": 5000.00,
  ...
}Success: Returns 201 Created with the new customer object.
1. Use Development Credentials from your registration.
2. Test with a demo or non-production site (request via your Sage partner if needed).
3. Tools:
4. Test scenarios: Create/read/update/delete key entities (customers, orders), error handling, token refresh.
5. Monitor responses for errors (e.g., 401 for invalid token).
Building reliable Sage 200 integrations requires understanding platform capabilities and limitations. Following these best practices ensures optimal performance and maintainability.
Sage 200 APIs have practical limits on data volume per request. For large data transfers:
Implement robust error handling:
Ensure data consistency between systems:
Protect sensitive business data:
Choose the right approach for each integration scenario:
Integrating directly with Sage 200 API requires handling complex authentication, data mapping, error handling, and ongoing maintenance. Knit simplifies this by providing a unified integration platform that connects your application to Sage 200 and dozens of other business systems through a single, standardized API.
Instead of writing separate integration code for each ERP system (Sage 200, SAP Business One, Microsoft Dynamics, NetSuite), Knit provides a single Unified ERP API. Your application connects once to Knit and can instantly work with multiple ERP systems without additional development.
Knit automatically handles the differences between systems: different authentication methods, data models, API conventions, and business rules, so you don't have to.
Sage 200 authentication varies by deployment (cloud vs. on-premise) and requires ongoing token management. Knit's pre-built Sage 200 connector handles all authentication complexities:
Your application interacts with a simple, consistent authentication API regardless of the underlying Sage 200 configuration.
Every ERP system has different data models. Sage 200's customer structure differs from SAP's, which differs from NetSuite's. Knit solves this with a Unified Data Model that normalizes data across all supported systems.
When you fetch customers from Sage 200 through Knit, they're automatically transformed into a consistent schema. When you create an order, Knit transforms it from the unified model into Sage 200's specific format. This eliminates the need for custom mapping logic for each integration.
Polling Sage 200 for changes is inefficient and can impact system performance. Knit provides real-time webhooks that notify your application immediately when data changes in Sage 200:
This event-driven approach ensures your application always has the latest data without constant polling.
Building and maintaining a direct Sage 200 integration typically takes months of development and ongoing maintenance. With Knit, you can build a complete integration in days:
Your team can focus on core product functionality instead of integration maintenance.
A. Knit's Sage 200 connector works with both cloud and on-premise deployments, so this compatibility question mostly falls away when you integrate through Knit. Sage 200 provides API support for both cloud and on-premise versions. The cloud API is generally more feature-rich and follows standard REST/OData patterns. On-premise versions may have limitations based on the specific release.
A. Knit uses Sage 200's own webhook support to keep data in sync in near real time rather than polling. Yes, Sage 200 itself supports webhooks for certain events, particularly in cloud deployments. You can subscribe to notifications for created, updated, or deleted records. Configuration is done through the Sage 200 administration interface or API. Not all object types support webhooks, so check the specific documentation for your requirements.
A. Knit manages rate-limit handling and retry logic for you across all its integrations, including Sage 200. Direct integrations need to handle this themselves: Sage 200 Cloud enforces API rate limits to ensure system stability:
On-premise deployments may have different limits based on server capacity and configuration. Implement retry logic with exponential backoff to handle rate limit responses gracefully.
A. Knit lets you test your integration against a connected Sage 200 sandbox or demo company before going live. For a direct integration, Sage itself provides several options for testing:
A. Knit normalizes error handling across the ERP systems it connects to, including Sage 200, so you're not building separate logic per platform. Direct integrations work with Sage 200's own detailed error responses, including:
Enable detailed logging in your integration code and monitor both application logs and Sage 200's audit trails for comprehensive troubleshooting.
A. Since Knit exposes Sage 200 through its own unified REST API, you don't need a Sage-specific SDK at all; you can use any language capable of making HTTP requests. For a direct integration, you can use any programming language that supports HTTP requests and JSON parsing. Sage provides SDKs and examples for:
Community-contributed libraries may be available for other languages. The REST/OData API ensures broad language compatibility.
A. Knit handles pagination and batching for large Sage 200 data pulls automatically, so you don't have to implement this yourself. For a direct integration, for large data operations:
A. If you're integrating through Knit, Knit's own support and documentation are your first stop for Sage 200-specific questions. Beyond that, multiple Sage support channels are available:

This article is part of our in-depth series exploring the ADP Workforce Now HRIS API, a powerful interface that allows developers to access and manage employee information programmatically. In this edition, we’ll walk through how to retrieve employee data from ADP Workforce Now using Python, including authentication setup, key endpoints, and example code snippets.
If you’re looking for other use cases or a deeper dive into ADP Workforce Now’s authentication, rate limits, and integration methods, explore our complete guide here.
Before you begin, ensure the following:
requests library installed./hr/v2/workers/hr/v2/workers/{aoid}import requests
auth_url = 'https://accounts.adp.com/auth/oauth/v2/token'
client_id = 'YOUR_CLIENT_ID'
client_secret = 'YOUR_CLIENT_SECRET'
auth_response = requests.post(
auth_url,
data={'grant_type': 'client_credentials'},
auth=(client_id, client_secret)
)
access_token = auth_response.json().get('access_token')
headers = {
    'Authorization': f'Bearer {access_token}',
    'Content-Type': 'application/json'
}
response = requests.get('https://api.adp.com/hr/v2/workers', headers=headers)
all_employees = response.json()
aoid = 'SPECIFIC_ASSOCIATE_OID'
response = requests.get(f'https://api.adp.com/hr/v2/workers/{aoid}', headers=headers)
employee_data = response.json()Q1: How can I obtain OAuth credentials for ADP Workforce Now?
A: Knit connects to ADP Workforce Now without requiring you to manage this process yourself. If you’re building a direct integration instead, register your app with ADP and contact ADP Developer Support to get your client ID and secret.
Q2: What does AOID stand for?
A: Knit maps to ADP’s own identifiers when syncing employee records, and AOID (Associate Object ID) is the unique identifier ADP Workforce Now assigns to each employee.
Q3: How do I handle API rate limits?
A: Knit handles rate limiting automatically across the HRIS platforms it connects to, including ADP Workforce Now. For a direct integration, implement retry logic with exponential backoff and respect the API’s rate-limit headers.
Q4: Can I filter or query employee data?
A: Knit supports filtered, field-level data retrieval across its integrations. ADP Workforce Now’s own API also supports OData query parameters such as $filter and $select for customized retrieval.
Q5: What content type does the API use?
A: Knit’s unified API returns employee data in a consistent JSON format regardless of the underlying HRIS. ADP Workforce Now’s own API also expects and returns data in application/json format.
Q6: How can I handle API errors gracefully?
A: Knit normalizes error handling across the HRIS systems it connects to, so you don’t need separate logic per platform. If you’re calling ADP directly, check the HTTP response status codes (e.g., 400, 401, 429) and build custom error-handling functions.
Q7: Is there a sandbox for testing integrations?
A: Knit lets you test integrations against connected HRIS platforms before going live. ADP also provides its own sandbox environment that mirrors production behavior for safe testing.
Integrating directly with HRIS APIs like ADP Workforce Now API can be time-consuming due to authentication management, version updates, and ongoing maintenance.
Knit API simplifies this process. By integrating once with Knit, you can securely access ADP Workforce Now API and other HRIS systems without worrying about token management or infrastructure maintenance. Knit handles authentication, authorization, and data synchronization, enabling you to focus on your application logic instead of backend complexity.
.png)
Xero is a leading cloud-based accounting and financial management platform widely adopted by small- and medium-sized enterprises (SMEs) globally. Its API lets developers automate financial operations such as invoicing, payroll, bank reconciliation, expenses, and reporting, and integrate that data with other business systems.
The Xero API offers a modern, secure, and extensible framework optimized for developers building custom integrations and applications.
In this guide, you’ll learn how to integrate with the Xero API: setup, authentication, key endpoints, real-world use cases, and best practices for building a production-grade integration.
Xero is a cloud-based accounting software designed to manage core financial operations like bookkeeping, invoicing, payroll, and reporting, all in one place.
What Xero Does
Xero has become a cornerstone for modern financial management by combining automation, real-time visibility, and broad third-party integration into a single cloud-based solution. It helps businesses eliminate manual work, improve accuracy, and make smarter financial decisions with ease.
Xero automates repetitive accounting workflows such as invoicing, bank reconciliations, payroll processing, and report generation. This not only saves valuable time for finance teams but also reduces manual errors, ensuring smoother and faster accounting operations.
By synchronizing information across multiple systems, including CRM, e-commerce, and payroll, Xero maintains accurate and consistent financial data. This ensures that every update or transaction is reflected in real time, minimizing discrepancies and improving audit readiness.
With dynamic dashboards and customizable reports, Xero provides clear insights into a company’s financial health. Business owners and accountants can easily track cash flow, expenses, and profitability, empowering them to make data-driven decisions with confidence.
Xero integrates with hundreds of third-party applications, from sales and payment platforms to inventory and HR systems. This ecosystem connectivity eliminates data silos, allowing businesses to run all key operations in sync through a single, connected platform.
Whether it’s a freelancer, small business, or global enterprise, Xero scales effortlessly with organizational needs. Its multi-user access, role-based permissions, and API-driven extensibility make it adaptable to growing financial complexity without sacrificing performance or compliance.
Before integrating with the Xero API, it’s important to understand a few key terms that define how authentication, data access, and communication work within the Xero ecosystem.
x-xero-signature header (an HMAC-SHA256 hash computed with your app's webhook signing key), and validating that signature before processing the payload is required to confirm the notification genuinely came from Xero. See Xero Webhooks Overview for setup, supported events, and the full signature validation steps.The Xero API enables businesses and developers to connect accounting workflows with other tools, from CRM and payroll to e-commerce and expense systems. These integrations eliminate manual work, improve data accuracy, and create real-time financial visibility across platforms.
Below are some of the most impactful Xero integration scenarios and how they can transform your business processes.
Businesses that operate e-commerce platforms or SaaS billing systems often need to record every customer transaction inside their accounting platform. By integrating your order management system with the Xero API, invoices and payments can be automatically created and reconciled without manual entry.
How It Works:
Companies often rely on business intelligence (BI) tools like Power BI, Tableau, or Looker to visualize their financial health. With the Xero API, financial data such as revenue, expenses, or cash flow can be fetched in real time to populate live dashboards.
How It Works:
HR departments or payroll management software often need to ensure that salary updates, bonuses, and deductions are accurately reflected in Xero’s payroll module. Integrating your HR platform with the Xero API keeps employee pay data synchronized between the two systems automatically.
How It Works:
Sales teams manage leads and customer relationships inside a CRM (like Salesforce, HubSpot, or Zoho), while accounting teams work in Xero. A two-way integration between these systems ensures that customer data, billing details, and transaction history are always up to date.
How It Works:
Businesses that use tools like Expensify or Zoho Expense can streamline financial operations by automatically logging employee expenses into Xero. This ensures all company expenditures are captured, approved, and reimbursed in one place.
How It Works:
Retailers or e-commerce companies can integrate their store systems with Xero to automate stock, order, and sales data synchronization.
How It Works:
Explore complete architectural details in the official API Overview.
Xero's API uses industry-standard OAuth 2.0 authorization to authenticate apps and users securely:
Deep dive and implementation examples are available in the Xero OAuth 2.0 guide.
The Xero API suite allows developers to connect accounting, payroll, payments, and other financial data to third-party applications securely using RESTful APIs and OAuth 2.0.
All Xero APIs return responses in JSON format and are designed to help businesses automate workflows, maintain data accuracy, and integrate with other software tools like CRMs, HR systems, and e-commerce platforms.
Each Xero API has a predictable REST-based structure that follows standard HTTP conventions (GET, POST, PUT, DELETE).
Base URL:
https://api.xero.com/api.xro/2.0/Example Endpoints:
Each endpoint corresponds to a specific resource (e.g., Contacts, Invoices, Accounts), and responses are returned in JSON format with consistent data structures.
Xero exposes a suite of endpoints to programmatically manage core accounting and business resources:
These endpoints utilize complex, nested resource models incorporating line items, contacts, payment details, tax information, and attachments, enabling end-to-end financial automation and reporting.
Before you can start making API requests, you must first obtain your Xero Client ID and Client Secret. These credentials allow you to exchange them for an Access Token, which you’ll include in your API requests to verify your identity and permissions.
Follow the steps below to generate your credentials:
Step 1: To start, visit the Xero Developer Portal. If you don’t already have a developer account, you’ll need to sign up first.
Once logged in, click “New App” to begin the setup process. This will allow you to register your application and connect it to Xero’s API environment.
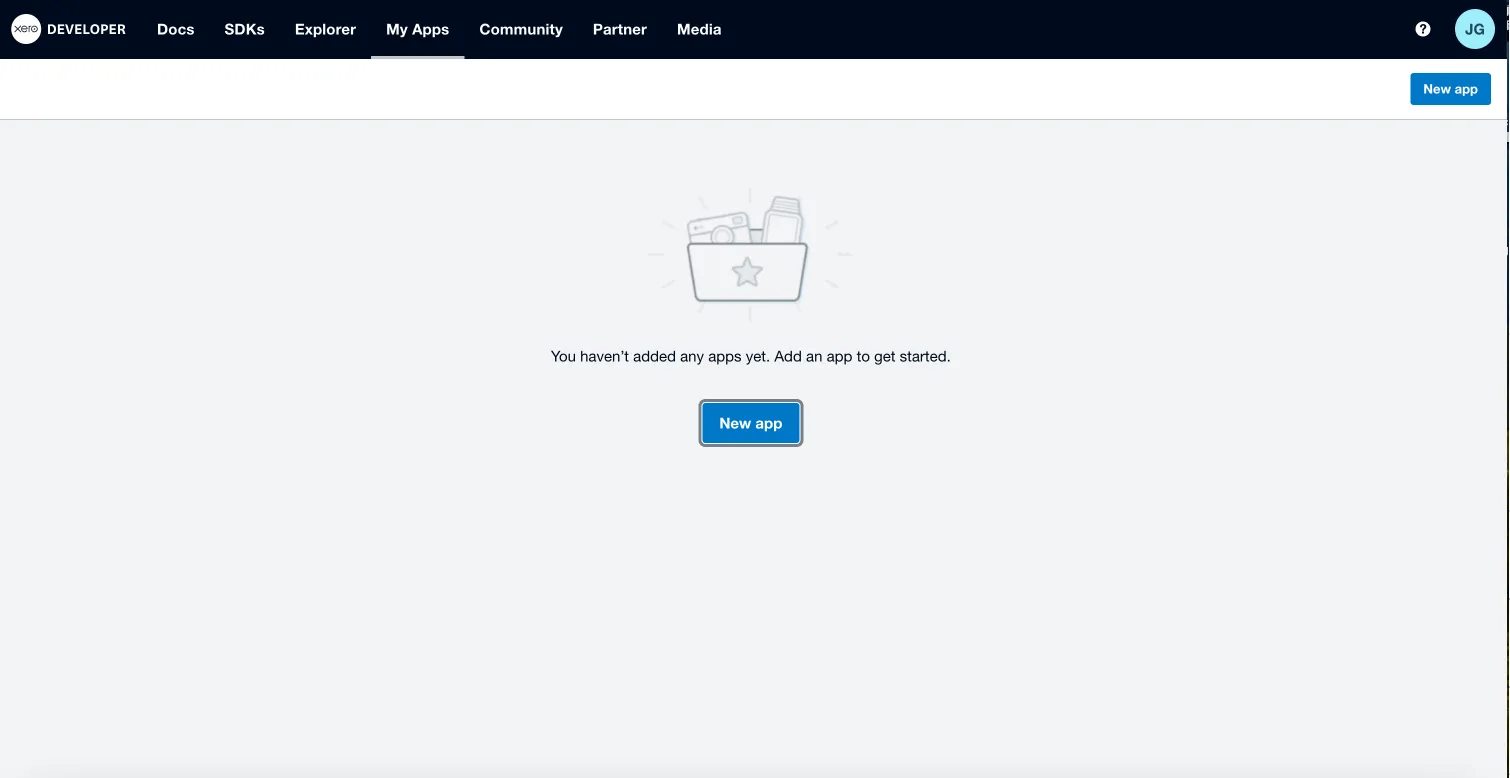
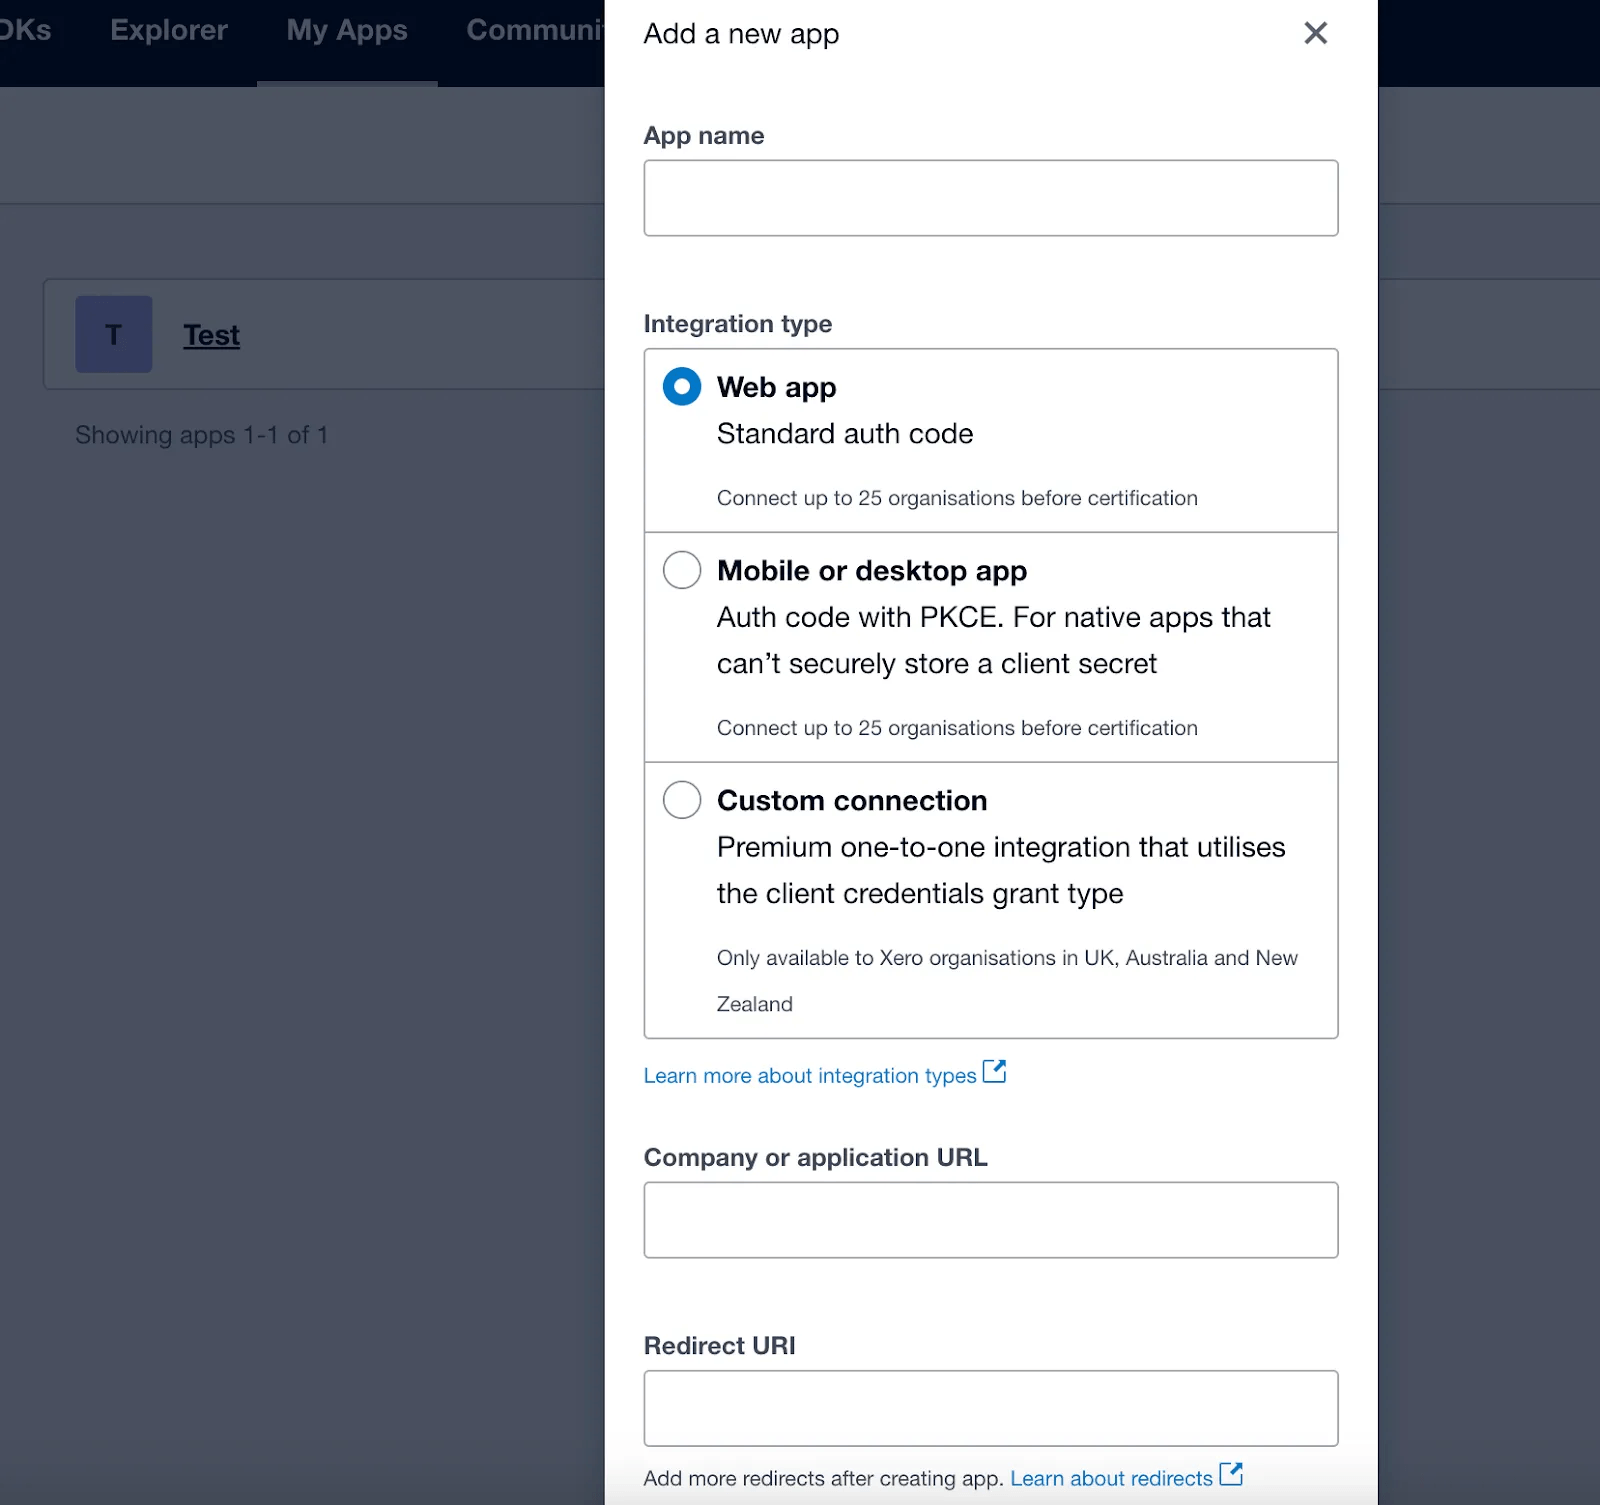
Step 2: Next, you’ll be prompted to provide essential details about your app. Carefully fill out each field as follows:
Once all fields are completed, review Xero’s Terms and Conditions and click “Create App.”
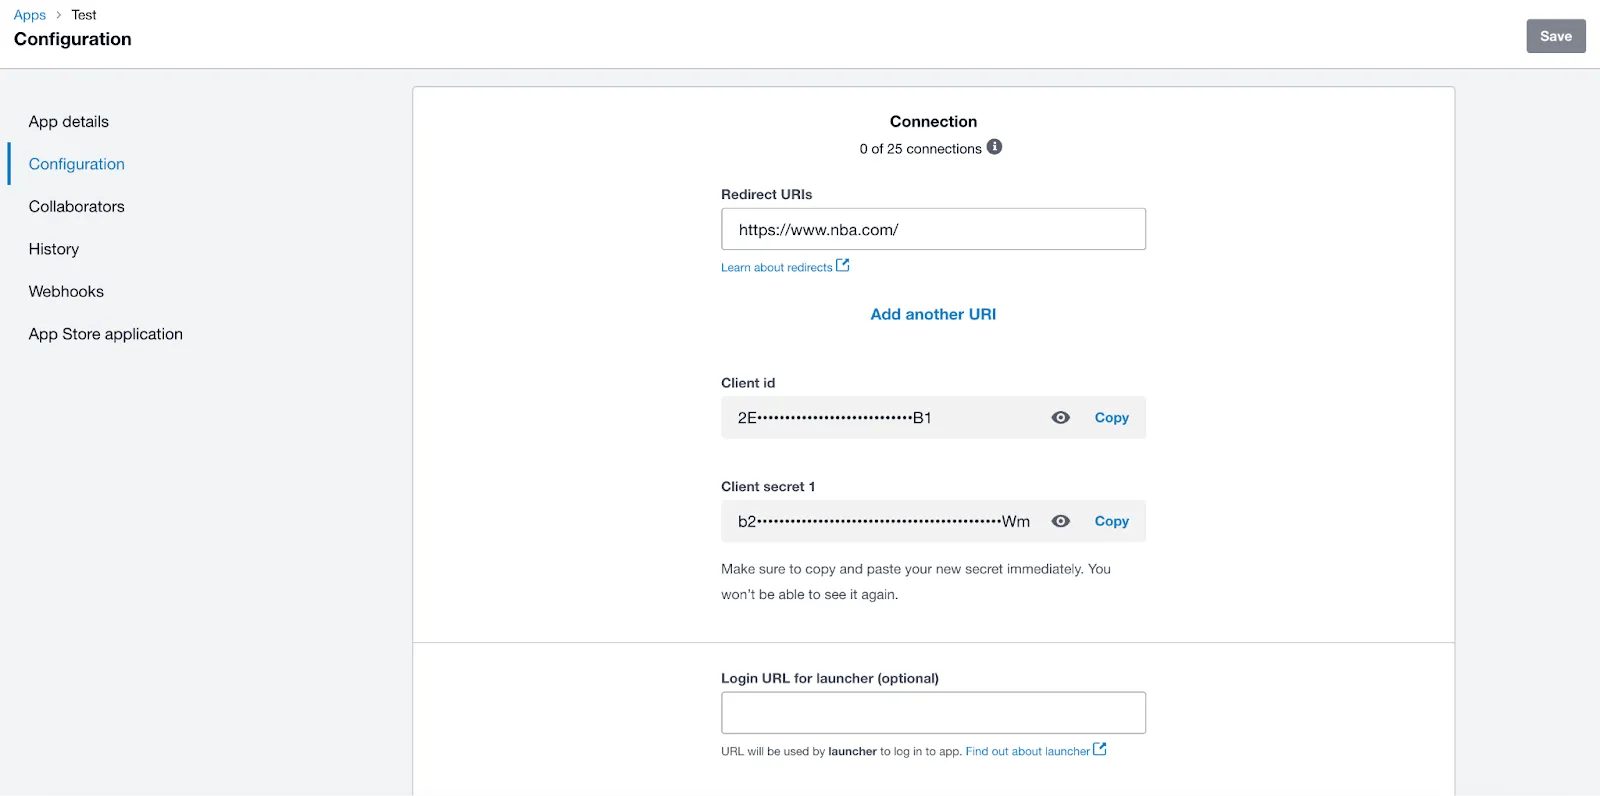
Step 3: After creating the app, Xero will generate two important credentials for you:
Important: Copy and securely store both credentials immediately. Xero will not display the Client Secret again.
Step 4: With your Client ID and Client Secret ready, the next step is to exchange them for an Access Token.
You can do this by making a POST request to Xero’s OAuth 2.0 token endpoint:
https://identity.xero.com/connect/tokenOnce your request is successful, Xero will return an Access Token (and sometimes a Refresh Token) in the response body.
Step 5: Once you receive your access token, include it in the Authorization header of your API requests to authenticate successfully.
For detailed instructions on formatting the request and understanding the response, refer to Xero’s Token API documentation.
The Xero API allows businesses and developers to connect Xero’s powerful accounting features with other applications. By integrating Xero with systems such as Jira, Box, or custom analytics and AI tools, companies can automate workflows, improve collaboration, and gain deeper insights from financial data.
This guide explores real-world Xero API integration examples and the most important best practices to help you build secure, efficient, and scalable integrations.
Late invoice payments can create delays for finance teams and affect cash flow. By integrating Xero with Jira, you can automate the tracking and management of unpaid invoices.
For example, when an invoice remains unpaid after its due date in Xero, an issue can automatically be created in Jira. The issue includes details about the customer, invoice number, due date, and total amount. It is then assigned to the right Customer Success Manager (CSM) to follow up with the client. As updates are made to the Jira tickets, such as customer responses or payment confirmations, updates can sync back into Xero automatically.
This type of integration keeps both finance and customer success teams in sync, eliminates manual monitoring, and ensures that overdue invoices are handled efficiently and transparently.
Finance teams often deal with critical files like purchase orders, bank statements, and receipts. Integrating Xero with a secure file storage platform such as Box helps centralize and automate document management.
Whenever a document is added, updated, or deleted in Xero, the corresponding file in Box is automatically updated. This real-time synchronization ensures all financial documents are securely stored, properly organized, and always up-to-date. It also removes the need for manual uploads or duplicate copies, making retrieval faster and reducing versioning errors.
Through this integration, finance teams can maintain a single, trusted repository of all financial documents with the confidence that every file mirrors the latest version in Xero.
If your organization uses analytics or business intelligence software, connecting it with the Xero Accounting API can bring real-time financial insights directly into your dashboards.
For instance, your analytics platform can automatically pull data such as invoices, payments, and expenses from Xero at regular intervals or through event-driven updates using Xero webhooks. This data can then feed into your reporting dashboards, giving finance and leadership teams a live view of key metrics such as revenue trends, expense ratios, and profit margins.
With this setup, decision-makers can access accurate, real-time data without relying on manual exports or spreadsheets. The result is faster, data-driven decision-making and improved business forecasting.
Artificial Intelligence is reshaping the financial technology landscape, and integrating Xero’s API into your AI-driven applications can make them significantly smarter.
For example, an AI copilot or chatbot integrated with Xero can pull live financial data to answer user questions such as “Why did our expenses rise this quarter?” or “Which customers have overdue payments?”. The AI system can access Xero’s transactional, journal, and expense data in real time through the Accounting API endpoints.
This integration allows your AI engine to generate accurate, context-aware responses and insights instantly. It enhances the user experience and empowers teams to analyze financial performance naturally through conversational interaction.
Before building with Xero’s API, it’s important to understand the platform’s technical limitations and recommended development strategies. Following best practices helps prevent errors, improves efficiency, and ensures long-term reliability.
The Xero API enforces a rate limit of 5,000 calls per day per organization. It’s easy to exceed this threshold if your system makes frequent requests or background syncs. To stay within limits, structure your integration to pull only the data that’s necessary.
You can use date filtering to request only records that have changed since the last synchronization. Alternatively, rely on Xero Webhooks to get real-time updates when data changes, reducing the need for repetitive polling. These methods minimize unnecessary API calls and ensure consistent performance.
Xero imposes high-volume thresholds on certain endpoints, like invoices and payments, to protect performance. To manage this efficiently, design your integration to work with pagination and query parameters.
For example, when retrieving large datasets of invoices, you can filter the results by amount or date range. You might first fetch invoices where the amount due is above a specific figure and then make another request for those below that value. This approach breaks large responses into smaller, manageable chunks and keeps your integration running smoothly.
Detailed guidance on rate limits and thresholds can be found in the Xero API Limits documentation.
Most Accounting API list endpoints support paging through a page query parameter (e.g. ?page=2), returning up to 100 records per page; keep incrementing page until a response comes back empty. For filtering, Xero uses a where query parameter with its own expression syntax, for example ?where=Status=="AUTHORISED" to return only authorised invoices, or a date comparison like ?where=Date>=DateTime(2026,01,01). Combine where with page to pull large, filtered datasets in manageable chunks instead of one large unfiltered pull. Full syntax and supported fields per endpoint are documented in Xero's requests and responses guide.
Xero provides two distinct journal endpoints, and knowing when to use each one is crucial. The Manual Journals endpoint is designed for journals entered manually by users, whereas the Journals endpoint retrieves all journals, including system-generated entries.
When you need to create, update, or retrieve manually added journal entries, use the Manual Journals endpoint. For broader reporting or audits that include automatic journal records, use the Journals endpoint. Understanding this difference helps ensure your financial data remains accurate and contextually relevant.
Integrating with the Xero API opens up powerful automation and financial data capabilities. However, building a direct integration requires handling complex OAuth 2.0 authentication, rate limits, data normalization, and ongoing API maintenance.
Knit simplifies all of this by acting as a unified integration platform that connects your application to Xero and dozens of other accounting, HR, and payroll systems through a single, standardized API. With Knit, you no longer need to write, test, and maintain separate integrations for each platform. Instead, you can connect once and access multiple systems through the same integration.
Traditionally, integrating directly with Xero requires managing multiple endpoints such as Invoices, Contacts, and Payments. Each endpoint has its own schema, authentication flow, and pagination rules.
Knit replaces all of this complexity with a single Unified Accounting API that automatically handles the underlying differences between accounting systems like QuickBooks Online, Sage Intacct, and Xero.
With one integration to Knit, your app can instantly connect to multiple accounting systems without writing additional code for each provider. Knit automatically maps and transforms the data, so your developers can focus on building product features instead of managing API variations.
Implementing OAuth 2.0 for Xero requires multiple steps, including handling authorization codes, refresh tokens, and scopes. Knit makes this simple through its prebuilt Xero connector, which manages the entire authentication process automatically.
When a user connects their Xero account through Knit, the platform securely handles authentication, token exchange, and ongoing token refreshes. Your application then receives a unified access token from Knit’s API, allowing you to retrieve Xero data without dealing with the complexities of OAuth directly.
All sensitive credentials are encrypted and securely stored by Knit using enterprise-grade security and SOC 2-compliant infrastructure. This approach not only saves development time but also ensures your app stays compliant with modern data protection standards.
Every accounting system structures its data differently; for example, how Xero represents invoices, payments, or accounts may differ from QuickBooks or FreshBooks. Knit eliminates these inconsistencies by normalizing all data into a consistent schema across platforms.
Through the Knit Unified Data Model, your application can read and write data using a single, predictable format, regardless of which accounting software the customer uses. Once your integration works with Knit’s schema, it automatically works with any supported accounting platform, including Xero, without requiring additional mapping or transformation logic.
Polling Xero’s API frequently to detect changes can quickly hit its API rate limits. Knit avoids this by offering real-time webhooks that notify your app whenever data changes in Xero.
For example, if a new invoice is created, updated, or paid in Xero, Knit instantly pushes an update to your system. This ensures that your platform always reflects the latest financial data without constant polling or delay.
Knit’s Webhook API allows you to subscribe to specific data events such as invoices, payments, or contacts. This keeps your application synchronized and reduces unnecessary API calls, improving performance and reliability.
Building and maintaining a direct Xero integration can take weeks or even months. Knit’s plug-and-play integration model significantly shortens this timeline. Using Knit’s SDKs, sandbox testing environments, and detailed developer documentation, you can build, test, and launch a complete Xero integration in just a few days.
This means your team can focus on core product functionality instead of spending time maintaining authentication logic, handling pagination, or debugging API errors. Knit continuously monitors API changes across platforms and automatically updates its connectors, ensuring your integration never breaks when Xero updates its endpoints.
If you still have questions about using or integrating with the Xero API, we’ve answered some of the most common ones below to help you get started smoothly.
A. Knit exposes these same Xero objects (invoices, credit notes, purchase orders, and more) through a single unified endpoint, so you don't need to call each Xero endpoint separately if you're integrating through Knit. If you're calling Xero directly, some of the most popular native endpoints include:
For a full list of available endpoints and parameters, refer to Xero’s official API documentation.
A. Knit's own API and SDKs sit on top of Xero (and other accounting platforms), so you only need to integrate with Knit's SDK once rather than picking a language-specific Xero SDK. Xero's own official SDKs, if you're integrating directly, are available in several popular languages, including:
Each SDK comes with libraries, authentication helpers, and example scripts to help you interact with Xero’s API endpoints quickly and securely.
A. The Xero API itself doesn't carry a separate charge, but it requires an active Xero account and, past the 30-day free trial, a paid Xero subscription; Knit's own pricing for connecting to Xero (and other accounting platforms) is separate from whatever Xero plan your end customer is on. Access to the Xero API requires a valid Xero account. While the API is available at no additional cost, it can only be used freely during your 30-day free trial of Xero. Once your trial ends, continued access to the API requires an active paid Xero subscription. However, developers can still test integrations within the trial window before deploying to production.
A. Knit handles request pacing and retry-with-backoff automatically for connected Xero accounts, so integrators using Knit don't need to track these limits themselves. For direct integrations, Xero enforces API rate limits at multiple levels; the limits currently stand as follows:
If you’re managing multiple Xero accounts within one organization, a global limit of 10,000 calls per minute is applied across all tenants combined. You can learn more about these limits and strategies to manage them by reviewing Xero’s rate limit documentation.
A. If you're integrating through Knit, this is handled for you: Knit paces requests and retries with backoff automatically, so you don't need to design around Xero's limits directly. If you're integrating directly, it's important to design your integration efficiently. Here are a few best practices:
These approaches help you stay under the limits while ensuring your integration performs smoothly.
A. Yes, and Knit relays these same Xero webhook events to connected apps as part of its own webhook system, so you get real-time updates without registering and managing Xero's webhooks directly. Natively, Xero provides a Webhook API that allows your application to receive real-time notifications when key events occur, such as when an invoice is created, updated, or paid. Webhooks are a great way to reduce API calls and ensure your system stays in sync without frequent polling.
A. Yes, and Knit provides its own sandbox test mode as well, so you can validate a Xero integration end-to-end in Knit before switching a connection to production. Xero itself also offers a developer sandbox environment through the Xero Developer Portal. You can register a free developer account, create a test app, and experiment with all available API endpoints safely before connecting to live business data. This allows you to build, test, and refine your integration without affecting real accounts or financial records.
A. If you're integrating through Knit, Knit's own support team can help directly with the Xero connection itself. For issues specific to Xero's native API, you can get help from several official and community sources:
These resources include FAQs, troubleshooting tips, and examples shared by other developers working with the Xero API.
This guide is part of our ongoing series exploring HRIS APIs in depth. In this edition, we’ll walk through how to retrieve employee data from the HR One API , from setup to execution, and help you avoid common integration mistakes.
This guide covers both fetching a single employee’s record and syncing a full employee database, with practical Python examples for each.
To get more details on HR One API, click here.
The HR One API provides endpoints to fetch both standard and custom employee data. You can use it to retrieve information for one employee or all employees, depending on your business needs.
Before you begin, ensure you have:
employees:read permission).requests library installed.https://hronemanagedapi.hrone.cloud/dev/api/external/employeeshttps://hronemanagedapi.hrone.cloud/dev/api/external/getempinfo1. Set up your environment
import requests
2. Define your request payload
The payload must include pagination details and any filters (like employee code or department).
payload = {
  "pagination": { "pageNumber": 1, "pageSize": 10 },
  "employeeCode": "EMP123"
}
3. Make the API request
Use the requests library to send a POST request with your payload and authorization token.
url = "https://hronemanagedapi.hrone.cloud/dev/api/external/employees"
headers = {
  "Content-Type": "application/json",
  "Authorization": "Bearer YOUR_ACCESS_TOKEN"
}
response = requests.post(url, json=payload, headers=headers)
4. Handle the response
Always check the status code before parsing the data.
if response.status_code == 200:
    employee_data = response.json()
    print(employee_data)
else:
    print("Error:", response.status_code, response.text)
/employees or /getempinfo depending on the type of data you need.1. What’s the default page size?
Usually 10, but you can define a custom value in the payload under pageSize. Knit paginates through HR One’s employee data automatically when syncing large datasets, so integrators don’t need to tune this value themselves.
2. How do I authenticate?
Use a Bearer token in the Authorization header and refresh it regularly to avoid 401 errors. Knit generates and refreshes this token behind the scenes for connected HR One accounts, so integrators authenticate through Knit’s own credentials instead of managing HR One tokens directly.
3. Can I filter employees by department or location?
Yes, add filters like department or location in your request payload. Knit exposes equivalent filtering through its own unified query parameters, so the filtering syntax stays the same even if you're pulling from a different HRIS.
4. What date format should I use?
The HR One API uses the RFC3339 (ISO 8601) date format. Knit normalizes dates to this same format across every connected HRIS, so date handling stays consistent regardless of which underlying system the data came from.
5. How can I handle large datasets?
Use pagination and process results in batches to manage performance efficiently. Knit handles this batching automatically for connected HR One instances, so integrators syncing a full employee database don’t need to build their own pagination loop.
6. Can I retrieve custom employee fields?
Yes, use the /getempinfo endpoint to fetch additional or custom data attributes. Knit surfaces these custom fields alongside standard employee data in the same unified response, so integrators don’t need to call a separate endpoint to get the full picture.
7. What should I do if I get a 429 or 401 error?
Knit automatically retries with backoff on 429 rate-limit responses and refreshes expired tokens on 401s for connected HR One instances, so integrators rarely see either error directly. If you’re integrating with HR One directly: a 429 means you’ve hit the rate limit, retry after the suggested interval; a 401 indicates an invalid or expired token, refresh your access token.
If you want to skip the hassle of manual HR One API setup, authentication, and maintenance, you can use Knit, a unified HRIS API that connects to HR One (and dozens of other HR systems) with a single integration.
Knit handles token management, data normalization, and version maintenance behind the scenes, so your team can focus on building great employee experiences, not maintaining complex integrations.
.webp)
Enterprise Resource Planning (ERP) systems, like Microsoft Dynamics, NetSuite, and SAP, form the backbone of modern operations, from finance and procurement to supply chain and human resources. But in a digital world where companies rely on countless specialized apps, simply having an ERP isn’t enough. ERP API integration ensures these systems exchange data seamlessly, reducing manual tasks, improving accuracy, and creating a single source of truth across the organization.
In this guide, we’ll show you the benefits of ERP API integrations, the key data models to know, real-world use cases, and a roadmap to help you build and manage these integrations more effectively.
You can use Knit, the leading unified API platform, to connect your product with several ERP systems through the platform’s Accounting Unified API.
ERP API integration is the process of connecting ERP systems with other software platforms, like CRM, HRIS, or eCommerce, using application programming interfaces (APIs). By tapping into an ERP’s API, businesses can synchronize data (e.g., inventory levels, invoices, orders) in real time or near-real time without the hassle of repetitive manual entry.
Fun Fact: According to Gartner’s ERP Insights, ERP adoption is rising rapidly as businesses seek more cohesive data management. However, unlocking its full potential requires robust integration with other tools.
While exact fields vary across ERP systems, here are common entities you’ll likely encounter:
Pro Tip: Always plan for data validation and mapping. Even slight differences (like date formats) can break your integration if not handled properly.
Here’s how ERP APIs fit into real-world scenarios:
Many businesses start with direct connectors, building one-off integrations for each ERP. While that works for a small number of systems, it can quickly become a maintenance nightmare.
Unified ERP API platforms, such as Knit, streamline this process by allowing you to integrate with multiple ERPs (like NetSuite, SAP, Microsoft Dynamics) through a single API.
This approach is:
Learn more about Unified APIs in our in-depth guide.
Follow these steps to launch a successful ERP API integration:
Q1: What is the difference between ERP integration and ERP API integration?
ERP integration can happen through APIs, custom scripts, or file-based exchanges, while ERP API integration specifically means connecting systems through the ERP’s own application programming interface for near-real-time data sync. Knit’s unified API sits on top of each ERP’s native API, so integrating through Knit gets you real-time, API-based sync without building and maintaining the ERP-specific connection yourself.
Q2: Which ERP APIs are most popular?
NetSuite, Microsoft Dynamics 365, SAP, Oracle ERP Cloud, Odoo, and ERPNext are the most commonly integrated ERP APIs; your choice depends on your target market and existing customer demand. Knit connects to many of these ERPs through a single Accounting Unified API, so you don’t have to evaluate and build against each one’s API individually.
Q3: How much time does an ERP API integration usually take?
A single custom-built ERP connector can take several weeks, or even months, depending on API complexity, documentation, and testing. Knit customers typically go live with a new ERP connection in days rather than months, since Knit has already built and maintains the underlying API integration for you.
Q4: Are there security risks in ERP API integration?
Yes, especially when the data involved is sensitive, financial records, customer information, or payroll data, so strong authentication, encryption, and ongoing monitoring matter. Knit handles this layer for connected ERPs with encrypted data in transit and at rest and enforced authentication, so integrators aren’t building that security posture from scratch for every ERP they support.
Q5: How do I decide whether to build or buy ERP integrations?
Consider the number of ERP systems you need, engineering resources, time to market, and long-term maintenance; if you need many connectors or want to move quickly, a unified API or embedded iPaaS is usually the better fit. Knit is built for exactly this case, letting you support multiple ERPs through one integration instead of building and maintaining a direct connector for each.
ERP API integrations allow organizations to automate financial, operational, and customer workflows by connecting their ERP system(s) with other critical software.
If you’re looking to integrate multiple ERP systems at once, and free your developers from building endless connectors, Knit’s Unified API is here to help. We handle the heavy lifting of data normalization, webhook-based syncing, and ongoing maintenance while you focus on your core product.
Book a Demo to discover how Knit can power your ERP integrations faster, more securely, and at a fraction of the usual cost.
Oracle Cloud HCM (Human Capital Management) offers a robust REST API that allows organizations to access, manage, and synchronize employee data efficiently. Whether you’re automating HR workflows, integrating with third-party tools, or building analytics dashboards, the Oracle HCM API provides the flexibility to do it all.
This article walks you through how to get employee data from the Oracle Cloud HCM API, both for a single employee and for all employees, using Python. It’s part of our in-depth Oracle HCM API series, which also covers authentication, rate limits, and advanced integrations.
Before you start, ensure you have:
requests installed.To retrieve data for a specific employee, use the endpoint below:
GET /hcmRestApi/resources/latest/emps/{employeeId}
Replace {employeeId} with the actual employee’s ID.
To fetch information for all employees, use:
GET /hcmRestApi/resources/latest/emps
import base64
import requests

def get_access_token(client_id, client_secret, scope):
    url = "https://your-instance.oraclecloud.com/oauth2/v1/token"
    credentials = f"{client_id}:{client_secret}"
    encoded_credentials = base64.b64encode(credentials.encode()).decode()
    payload = {
        'grant_type': 'client_credentials',
        'scope': scope,  # e.g. the HCM connected app's registered resource URL
    }
    headers = {
        'Authorization': f'Basic {encoded_credentials}',
        'Content-Type': 'application/x-www-form-urlencoded',
    }
    response = requests.post(url, data=payload, headers=headers)
    response.raise_for_status()
return response.json().get('access_token')def get_employee(employee_id, access_token):
url = f"https://your-instance.oraclecloud.com/hcmRestApi/resources/latest/emps/{employee_id}"
headers = {'Authorization': f'Bearer {access_token}'}
response = requests.get(url, headers=headers)
return response.json()def get_all_employees(access_token):
url = "https://your-instance.oraclecloud.com/hcmRestApi/resources/latest/emps"
headers = {'Authorization': f'Bearer {access_token}'}
response = requests.get(url, headers=headers)
return response.json()Integrating with Oracle Cloud HCM can be tricky if you overlook small details. Here are some common pitfalls to avoid:
Pro Tip: Always test endpoints in Oracle’s sandbox environment before moving to production.
1. How do I find my Oracle Cloud HCM instance URL?
Check your Oracle Cloud dashboard or contact your system administrator; the instance URL is specific to your organization's tenant. Knit resolves and manages this per-tenant routing automatically for connected Oracle HCM instances, so integrators querying through Knit don't need to track individual customer instance URLs themselves.
2. What if I get a 401 Unauthorized error?
Your access token may be invalid or expired; regenerate the token and double-check your credentials. Knit handles token generation and renewal automatically for connected Oracle HCM instances, so integrators don't see 401 errors from expired tokens the way a direct integration would.
3. Can I filter employee data?
Yes, you can add query parameters (e.g., ?q=department=IT) to filter responses from Oracle's native API. Knit exposes equivalent filtering through its own unified query parameters, so the filtering syntax stays consistent even when the underlying HRIS changes.
4. How do I handle pagination?
Use the next link in the API response to fetch additional pages of employee records. Knit handles this pagination automatically when syncing large datasets from Oracle HCM, batching requests behind the scenes so integrators don't implement this logic themselves.
5. Is the data returned in JSON format?
Yes, Oracle Cloud HCM APIs return structured JSON responses. Knit normalizes this JSON into a consistent schema alongside other HRIS platforms, so the shape of Oracle HCM data matches what integrators get from Workday, BambooHR, and similar systems.
6. Does Oracle provide a sandbox environment?
Yes, you can request access to a sandbox for safe testing and development before moving to production. Knit's own test mode mirrors this, so you can validate an Oracle HCM integration end-to-end in Knit's sandbox before switching a connection to production.
Manually managing authentication, data mapping, and maintenance for Oracle Cloud HCM API can quickly become complex. Knit API simplifies this process through a unified integration layer.
By integrating once with Knit HRIS API, you can:
With Knit, teams can focus on innovation while we handle the integration complexity, making your Oracle Cloud HCM data accessible, secure, and reliable.
.png)
Oracle Financials is a comprehensive cloud-based enterprise resource planning (ERP) and financial management platform widely adopted by large and medium-sized enterprises globally. Its strong API ecosystem empowers developers to automate complex financial operations such as general ledger accounting, accounts payable/receivable, fixed asset management, procurement, and regulatory reporting, facilitating seamless integrations with other enterprise systems.
The Oracle Financials API offers an enterprise-grade, secure, and scalable framework optimized for developers building custom integrations and applications.
In this guide, you'll learn how to integrate with the Oracle Financials API, from setup and authentication to real-world use cases and best practices. Whether you're new to enterprise APIs or building complex financial integrations, this guide will help you implement Oracle Financials API integration the right way.
Oracle Financials Cloud (part of Oracle Fusion Applications) is a cloud-based financial management software designed to manage enterprise financial operations like general ledger, accounts payable, accounts receivable, fixed assets, expenses, and financial reporting, all in one unified platform.
Oracle Financials has become essential for enterprise financial management by combining global compliance capabilities, real-time analytics, and extensive automation into a single cloud-based solution. It helps organizations eliminate manual work, ensure regulatory compliance, and make data-driven financial decisions with confidence.
Oracle Financials automates complex financial workflows such as intercompany reconciliations, period-end closing, invoice matching, and asset depreciation. This not only saves valuable time for finance teams but also reduces manual errors, ensuring accurate and efficient accounting operations.
With built-in support for local regulatory requirements across 200+ countries, Oracle Financials maintains accurate and compliant financial data. This ensures that multinational organizations meet statutory reporting requirements while minimizing compliance risks.
With unified financial data and embedded analytics, Oracle Financials provides real-time insights into an organization's financial health. Finance leaders can easily track performance metrics, cash flow, and profitability across business units, empowering them to make data-driven decisions with confidence.
Oracle Financials integrates effortlessly with other Oracle Cloud applications (SCM, HCM, CX) and hundreds of third-party applications through standardized APIs. This ecosystem connectivity eliminates data silos, allowing enterprises to run all key operations through a single, connected platform.
Whether it's a growing mid-market company or a global enterprise, Oracle Financials scales effortlessly with organizational needs. Its multi-entity support, role-based security, and API-driven extensibility make it adaptable to growing financial complexity without sacrificing performance or compliance.
Before integrating with the Oracle Financials API, it's important to understand a few key terms that define how authentication, data access, and communication work within the Oracle ecosystem.
The Oracle Financials API enables enterprises and developers to connect accounting workflows with other systems, from procurement and HR to e-commerce and analytics platforms. These integrations eliminate manual work, improve data accuracy, and create real-time financial visibility across the enterprise.
Below are some of the most impactful Oracle Financials integration scenarios and how they can transform your business processes.
Enterprises that receive thousands of invoices from suppliers often need to automate invoice processing and three-way matching. By integrating your procurement systems with the Oracle Financials API, invoices can be automatically created, matched to purchase orders, and routed for approval without manual entry.
How It Works:
Multinational corporations need to consolidate financial data from multiple subsidiaries for reporting. With the Oracle Financials API, financial data such as journal entries, balances, and transactions can be synchronized in real time for consolidated reporting.
How It Works:
Companies using corporate card programs or travel management systems need seamless expense reconciliation. Integrating these systems with the Oracle Financials API allows for automatic expense reporting and reimbursement.
How It Works:
Organizations with significant capital assets need to track depreciation, maintenance, and disposal. Integrating IoT systems and maintenance platforms with Oracle Fixed Assets provides complete asset tracking.
How It Works:
Billing systems and collection agencies need real-time access to accounts receivable data. A two-way integration between these systems ensures that customer data, billing details, and payment history are always up to date.
How It Works:
Enterprises can create seamless procurement-to-pay processes by integrating Oracle Financials with procurement systems.
How It Works:
RESTful API: The API follows RESTful conventions with predictable, resource-oriented URLs and uses HTTP verbs (GET, POST, PUT, PATCH, DELETE) to manipulate data.
JSON Payloads: Request and response bodies are structured in JSON, providing language-agnostic compatibility.
API Versioning: The API version number (e.g., 11.13.18.05) is specified in endpoint URLs, enabling backward compatibility and a smooth transition to newer API versions.
Rate Limiting: Oracle enforces tier-based rate limits to maintain service quality. Handling 429 Too Many Requests responses with retry logic is essential.
Error Reporting: HTTP status codes indicate general success or failure. Detailed error information and validation messages are provided in JSON response bodies.
Multi-Tenant Support: Integrations can connect to multiple Oracle instances (tenants), each requiring separate authentication and handling distinct data scopes.
Business Object Model: Uses the Fusion Applications Core (FA Core) data model providing consistent patterns across all Oracle Cloud applications.
Explore complete architectural details in the official Oracle Financials API Overview.
Oracle Financials API uses industry-standard OAuth 2.0 authorization to authenticate apps and users securely:
App Registration: Developers create applications in Oracle Cloud Console to receive Client ID and Client Secret credentials.
Authorization Flows: Supports multiple OAuth 2.0 grant types including Client Credentials (for server-to-server) and Authorization Code (for user context).
Token Exchange: Applications exchange credentials for short-lived access tokens and longer-lived refresh tokens.
Role Management: Apps require specific roles and privileges like GL_JOURNAL_ENTRY_IMPORT_DUTY or AP_INVOICE_IMPORT_DUTY to obtain least-privilege access.
Token Management: Access tokens expire in 3600 seconds and require leveraging refresh tokens to maintain sessions without user intervention.
Security Best Practices: Secure client secrets and tokens; always use HTTPS, store secrets server-side, and avoid exposing credentials in client code.
Deep dive and implementation examples are available in the Oracle OAuth 2.0 guide.
The Oracle Financials API suite allows developers to connect accounting, procurement, assets, and other financial data to third-party applications securely using RESTful APIs and OAuth 2.0.
All Oracle Financials APIs return responses in JSON format and are designed to help businesses automate workflows, maintain data accuracy, and integrate seamlessly with other enterprise systems like CRM, HR systems, and supply chain platforms.
Here is your content converted into a clean table:
Each Oracle Financials API has a predictable REST-based structure that follows standard HTTP conventions (GET, POST, PUT, PATCH, DELETE).
Base URL:
https://{your-domain}.oraclecloud.com/fscmRestApi/resources/11.13.18.05/
Example Endpoints:
Get all suppliers: GET
https://{domain}.oraclecloud.com/fscmRestApi/resources/11.13.18.05/suppliers
Create a new invoice: POST
https://{domain}.oraclecloud.com/fscmRestApi/resources/11.13.18.05/invoices
Fetch journal entries: GET
https://{domain}.oraclecloud.com/fscmRestApi/resources/11.13.18.05/journalEntries
Each endpoint corresponds to a specific business object (e.g., invoices, suppliers, journals), and responses are returned in JSON format with consistent data structures.
Before you can start making API requests, you must first obtain your Oracle Client ID and Client Secret. These credentials allow you to exchange them for an Access Token, which you'll include in your API requests to verify your identity and permissions.
Follow the steps below to generate your credentials:
Step 1: To start, visit the Oracle Cloud Console. If you don't already have an Oracle Cloud account, you'll need to sign up first.
Once logged in, navigate to Identity & Security → Domains → {Your Domain}. Click "Add Application" to begin the setup process. This will allow you to register your application and connect it to Oracle's API environment.
Step 2: Next, you'll be prompted to provide essential details about your app. Carefully fill out each field as follows:
Once all fields are completed, review the configuration and click "Save."
Step 3: After creating the application, Oracle will generate two important credentials for you:
Note: Copy and securely store both credentials immediately. Oracle will not display the Client Secret again.
Step 4: With your Client ID and Client Secret ready, the next step is to exchange them for an Access Token.
You can do this by making a POST request to Oracle's OAuth 2.0 token endpoint:
https://{identity-domain}.identity.oraclecloud.com/oauth2/v1/tokenExample request:
curl -X POST https://idcs-xxx.identity.oraclecloud.com/oauth2/v1/token \
  -H "Content-Type: application/x-www-form-urlencoded" \
  -d "grant_type=client_credentials&scope=urn:opc:resource:consumer::all" \
  -u "<client_id>:<client_secret>"
Once your request is successful, Oracle will return an Access Token (and sometimes a Refresh Token) in the response body.
Step 5: Once you receive your access token, include it in the Authorization header of your API requests to authenticate successfully.
Example:
curl -X GET https://{domain}.oraclecloud.com/fscmRestApi/resources/11.13.18.05/invoices \
  -H "Authorization: Bearer <access_token>" \
  -H "Content-Type: application/json"
For detailed instructions on formatting the request and understanding the response, refer to Oracle's OAuth 2.0 Token API documentation.
Integrating with the Oracle Fusion Cloud Financials REST API provides powerful access to enterprise financial data and operations. This comprehensive, beginner-friendly guide (updated December 2025) covers setup to production, based on the latest Oracle documentation at REST API for Oracle Fusion Cloud Financials.
Note: Access requires an active Oracle Fusion Cloud Financials subscription. Server-to-server integrations commonly use OAuth 2.0 Client Credentials grant.
Gather your instance details first.
1. Log in to your Oracle Cloud Console (My Services dashboard).
2. Note your Financials REST base URL from your welcome email or service overview: typically
https://{your-pod}.fa.{data-center}.oraclecloud.com (e.g., https://yourcompany.fa.us2.oraclecloud.com).
3. The full REST path is: {base-url}/fscmRestApi/resources/{version}/ (current version often 11.13.18.05 or latest, e.g., /fscmRestApi/resources/11.13.18.05/).
For quick starts, see Get Started with REST APIs.
Register an app in Identity Cloud Service (IDCS) or IAM to obtain credentials.
Steps (detailed in Retrieving Bearer Token Using IDCS OAuth):
1. Sign in to Oracle Cloud Console as an administrator.
2. Navigate to Identity & Security > Domains > Your Identity Domain.
3. Go to Applications > Add Application > Select Confidential Application.
4. Provide:
5. Assign necessary roles/privileges (e.g., for invoices: AP_ACCOUNTS_PAYABLE_INVOICES_DUTY).
6. Save, generate Client ID and Client Secret (store securely; secret shown once).
For role details, see Security Reference.
✅ You have Client ID and Secret.
Exchange credentials for a Bearer token.
1. Identify your IDCS token endpoint: https://{identity-domain}.identity.oraclecloud.com/oauth2/v1/token.
POST request (example with cURL):
curl -X POST https://idcs-your-guid.identity.oraclecloud.com/oauth2/v1/token \
  -H "Content-Type: application/x-www-form-urlencoded" \
  -u "{CLIENT_ID}:{CLIENT_SECRET}" \
  -d "grant_type=client_credentials&scope=urn:opc:resource:consumer::all"

Response: { "access_token": "JWT_TOKEN", "token_type": "Bearer", "expires_in": 3600 } (token ~1 hour).
For full examples, see Authentication Guide.
Token Management: Refresh before expiry (no refresh token in Client Credentials; re-request).
Oracle Financials uses standard REST with JSON payloads.
Key Features:
Full endpoints: All REST Endpoints.
Tools: cURL, Postman, or Oracle's examples.
All requests include:
Authorization: Bearer {ACCESS_TOKEN}
Content-Type: application/json
Use Case 1: Fetching Payables Invoices (GET)
GET https://{base}/fscmRestApi/resources/11.13.18.05/invoices?limit=10See Invoices GET Example.
Use Case 2: Creating a Payables Invoice (POST)
POST https://{base}/fscmRestApi/resources/11.13.18.05/invoices
Body: { "BusinessUnit": "Your BU", "Supplier": "Supplier Name", "InvoiceNumber": "INV-001", ... }Integrating with the Oracle Financials API opens up powerful automation and financial data capabilities. However, building a direct integration requires handling complex OAuth 2.0 authentication, rate limits, data normalization, and ongoing API maintenance.
Knit simplifies all of this by acting as a unified integration platform that connects your application to Oracle Financials and dozens of other ERP, accounting, HR, and payroll systems through a single, standardized API. With Knit, you no longer need to write, test, and maintain separate integrations for each platform. Instead, you can connect once and access multiple systems seamlessly.
Traditionally, integrating directly with Oracle Financials requires managing multiple endpoints such as Invoices, Suppliers, Journals, and Payments. Each endpoint has its own schema, authentication flow, and pagination rules.
Knit replaces all of this complexity with a single Unified Accounting API that automatically handles the underlying differences between ERP systems like Oracle Financials, SAP S/4HANA, Microsoft Dynamics 365, and NetSuite.
With one integration to Knit, your app can instantly connect to multiple ERP systems without writing additional code for each provider. Knit automatically maps and transforms the data, so your developers can focus on building product features instead of managing API variations.
Implementing OAuth 2.0 for Oracle Financials requires multiple steps, including handling client credentials, token management, and role assignments. Knit makes this simple through its prebuilt Oracle Financials connector, which manages the entire authentication process automatically.
When a customer connects their Oracle Financials instance through Knit, the platform securely handles authentication, token exchange, and ongoing token refreshes. Your application then receives a unified access token from Knit's API, allowing you to retrieve Oracle Financials data without dealing with the complexities of OAuth directly.
All sensitive credentials are encrypted and securely stored by Knit using enterprise-grade security and SOC 2-compliant infrastructure. This approach not only saves development time but also ensures your app stays compliant with modern data protection standards.
Every ERP system structures its data differently; for example, how Oracle Financials represents invoices, payments, or journal entries may differ from SAP or Microsoft Dynamics. Knit eliminates these inconsistencies by normalizing all data into a consistent schema across platforms.
Through the Knit Unified Data Model, your application can read and write data using a single, predictable format, regardless of which ERP software the customer uses. Once your integration works with Knit's schema, it automatically works with any supported ERP platform, including Oracle Financials, without requiring additional mapping or transformation logic.
Polling Oracle Financials' API frequently to detect changes can quickly hit its API rate limits. Knit avoids this by offering optimized synchronization strategies that balance timeliness with API efficiency.
For example, if a new invoice is created or updated in Oracle Financials, Knit can detect this change through intelligent polling and instantly push an update to your system. This ensures that your platform always reflects the latest financial data without constant polling or delay.
Knit's synchronization engine allows you to configure sync frequency and change detection strategies. This keeps your application synchronized while reducing unnecessary API calls, improving performance and reliability.
Building and maintaining a direct Oracle Financials integration can take months for enterprise-grade implementations. Knit's plug-and-play integration model significantly shortens this timeline. Using Knit's SDKs, sandbox testing environments, and detailed developer documentation, you can build, test, and launch a complete Oracle Financials integration in weeks instead of months.
This means your team can focus on core product functionality instead of spending time maintaining authentication logic, handling pagination, or debugging API errors. Knit continuously monitors API changes across platforms and automatically updates its connectors, ensuring your integration never breaks when Oracle updates its endpoints.
If you still have questions about using or integrating with the Oracle Financials API, we've answered some of the most common ones below to help you get started smoothly.
A. Oracle Financials provides a wide range of REST API endpoints across its financial modules. Knit connects to the most commonly used ones, Invoices, Suppliers, Journals, and Payments, through a single unified accounting API, so integrators working through Knit don't need to learn each module's individual schema. The most frequently used Oracle-native endpoints include:
For the complete list of parameters and modules, refer to Oracle’s official Financials REST API documentation.
A. The REST APIs are fully language-agnostic; any language that supports HTTP requests and JSON handling works. Knit adds a layer on top so your app doesn't need to make direct HTTP calls to Oracle Financials at all, since Knit's own SDKs and unified endpoints work the same way regardless of which language you're using. If you're calling Oracle's API directly, common choices include:
While Oracle does not offer dedicated SDKs for Financials, OCI SDKs can still help with authentication and cloud resource interactions.
A. The API itself is included as part of an Oracle Financials Cloud subscription, with no separate API fee. Knit's own pricing covers the integration layer on top and is separate from your Oracle subscription, so factor both in if you're connecting through Knit rather than building a direct integration. Production usage still requires an active paid Oracle subscription; developers can use sandbox or test environments before going live.
A. Oracle doesn't publish a fixed, universal rate limit for the Fusion Financials REST API; limits are tied to your specific subscription tier and contract, and Oracle's own community forums show customers getting inconsistent answers when they ask support directly for a number. Knit handles request pacing and retry-with-backoff automatically for connected Oracle Financials instances, so integrators don't need to reverse-engineer their tenant's specific limits. If you're integrating directly, build in exponential backoff for 429 responses and confirm your exact limits with your Oracle account team rather than assuming a number from any single source, since Oracle doesn't consistently publish one.
A. Knit already builds in most of the standard mitigations, fetching only changed data, paginating results, caching responses, and spreading out requests instead of sending them in bursts, so integrators connecting through Knit don't need to implement this themselves. If you're integrating directly, the same principles apply: fetch only updated data, use pagination, cache responses, and use Oracle's bulk data features for large volumes instead of many small requests.
A. No, Oracle Financials doesn't offer traditional webhooks; the closest alternatives are Business Events through Oracle Integration Cloud, filtering by last-update date, or scheduled extracts. Knit works around this by using optimized polling with change detection, so apps connected through Knit get near real-time updates without your integration needing to manage OIC event flows directly. For many use cases, this kind of optimized polling is the practical recommendation even for teams integrating directly, including:
A. Yes, Oracle offers sandbox environments, test tenants, demo instances, and limited access through the Oracle Cloud Free Tier. Knit mirrors this with its own test mode, so you can validate an Oracle Financials integration end-to-end in Knit's sandbox before switching a connection to production. Testing in a sandbox first catches most integration issues before they reach live financial data.
A. If you run into issues connecting Oracle Financials through Knit, Knit's support team can help troubleshoot anything specific to that integration. For everything else, Oracle offers several official and community channels:
.png)
Zoho Books is a comprehensive cloud-based accounting and financial management platform designed for small and medium businesses. It enables organizations to automate invoicing, manage expenses, track inventory, reconcile bank transactions, and generate financial reports, all through an intuitive and scalable interface.
Its modern, secure API ecosystem empowers developers to integrate accounting workflows directly into their applications, automate financial processes, and synchronize data across business systems with precision.
In this guide, you’ll learn how to integrate with the Zoho Books API, from setup and authentication to real-world use cases and best practices. Whether you’re new to APIs or building enterprise-grade integrations, this guide will help you implement Zoho Books API integration the right way.
Let’s get started 🚀
Zoho Books is an end-to-end accounting solution that streamlines essential finance operations such as invoicing, billing, payments, reporting, and compliance. Businesses use Zoho Books to automate routine tasks, gain real-time visibility into finances, and eliminate manual errors.
Zoho Books is a core component of many financial ecosystems because it brings automation, accuracy, real-time visibility, and scalability into a single cloud-based platform.
Zoho Books automates recurring invoices, approvals, payment reminders, bank feeds, expense categorization, and reconciliation. This reduces manual work for finance teams and improves operational efficiency.
Zoho Books integrates with sales, CRM, payroll, and inventory systems to synchronize data in real time. This reduces discrepancies, maintains clean financial records, and improves audit readiness.
With dashboards and customizable reports, Zoho Books gives teams real-time visibility into revenue, expenses, cash flow, and projections.
It supports deep integration with hundreds of platforms, from e-commerce to CRM and HR systems, removing data silos and creating a connected financial ecosystem.
Zoho Books supports multi-organization setups, role-based permissions, automation rules, and an extensible API framework that scales with business needs.
Before integrating with Zoho Books API, it’s important to understand a few foundational concepts:
Zoho Books offers multiple API modules that enable your application to interact with nearly every aspect of the accounting system.
The table below lists all available modules along with a short description of what each one does.
Zoho Books API powers a wide range of automation, synchronization, and reporting workflows across industries. Below are impactful, real-world integration scenarios.
Businesses that run SaaS billing systems, order management platforms, or subscription engines often need to reflect every financial transaction inside Zoho Books.
How it works:
This eliminates manual data entry and improves reconciliation accuracy.
Zoho Books API can feed financial data into BI tools such as Power BI, Tableau, Looker, or custom dashboards.
How it works:
This enables decision-makers to track KPIs in real time.
Although Zoho Books is not a payroll system, many HR or payroll platforms integrate it for:
How it works:
This ensures accurate and compliant financial reporting.
CRMs like Zoho CRM, Salesforce, HubSpot, and Pipedrive integrate with Zoho Books to sync:
How it works:
This keeps sales and finance aligned.
Tools like Expensify, Fyle, or Zoho Expense integrate with Zoho Books for automated expense recording.
How it works:
Zoho Books API is widely used in e-commerce ecosystems.
How it works:
Retailers and marketplaces rely on this for seamless order-to-accounting synchronization.
Before you start integrating with Zoho Books, you must create an account and configure your organization.
Follow these steps:
Step 1: Go to the Zoho Books website and click Sign Up.
Step 2: Enter your details, such as email, business name, and country, then click Get Started.
Step 3: Verify your email address using the verification link sent by Zoho.
Step 4: Log in to Zoho Books and navigate to Settings → Organization Profile.
Step 5: Fill in your business details, including company name, address, tax information, and base currency.
Step 6: Click Save to complete the organisation setup.
Once these steps are done, your Zoho Books organisation is ready to be used for API-based integrations.
Step 1: Visit the Zoho API Console and log in with your Zoho account.
Step 2: Create a new OAuth client (you can use Self Client for testing or server-side flows).
Step 3: Choose the appropriate client type and enter the required details (redirect URL, app name, etc.).
Step 4: Add the necessary Zoho Books scopes to your client so the integration can access the required resources.
Required Zoho Books permissions/scopes (minimum):
ZohoBooks.contacts.CREATE
ZohoBooks.contacts.READ
ZohoBooks.invoices.CREATE
ZohoBooks.invoices.READ
ZohoBooks.invoices.UPDATE
ZohoBooks.settings.CREATE
ZohoBooks.settings.READ
These scopes ensure your integration can create and read contacts, manage invoices, and access relevant settings in Zoho Books.
After configuring the OAuth client and obtaining an authorization code, you must exchange it for an access token and refresh token. The refresh token is critical for long-term integration, as it allows you to generate new access tokens without asking the user to log in again.
Use the following API call to exchange the authorization code:
curl --location --request POST 'https://accounts.zoho.in/oauth/v2/token?code=YOUR_AUTH_CODE&client_id=YOUR_CLIENT_ID&client_secret=YOUR_CLIENT_SECRET&grant_type=authorization_code' \
--header 'Cookie: _zcsr_tmp=YOUR_COOKIE; iamcsr=YOUR_COOKIE; zalb_6e73717622=YOUR_COOKIE'
Replace the placeholders with your actual values:
The response will include an access_token and a refresh_token.
Make sure you store the refresh_token, as it will be used to generate new access tokens during ongoing integration.
After you successfully obtain the refresh token, securely store the following configuration values (for example, in environment variables, a secrets manager, or a secure properties file):
These values are required for your application to authenticate against Zoho Books and perform API operations reliably without asking the user to re-authorize frequently.
Before we dive into Knit, you should understand the technical challenges developers run into when they implement Zoho Books on their own:
Zoho Books requires a strict OAuth setup:
This entire authentication pipeline takes time, security review, and maintenance.
Zoho Books schemas are not standard across categories.
For example:
Normalising these is time-consuming.
Developers must implement:
Zoho enforces per-minute and per-hour throttling.
If you hit rate limits:
When Zoho changes fields or endpoints, your integration breaks. You must maintain compatibility continuously.
Integrating directly with Zoho Books requires managing OAuth, rate limits, pagination, schema differences, syncing, and ongoing maintenance. Knit removes this complexity by offering a single, unified accounting API that works across Zoho Books, Xero, QuickBooks, and many other platforms.
Instead of building and maintaining separate integrations for each accounting system, Knit gives you one standardized accounting schema. Your application sends and receives data in one consistent format, and Knit automatically converts it into Zoho Books’ structure behind the scenes.
Knit handles the entire OAuth process for Zoho Books—including authorization, token exchange, refresh logic, and secure token storage. Your app only needs to work with a simple integration_id, eliminating the need to manage credentials or authentication errors.
Every accounting platform structures invoices, payments, contacts, and expenses differently. Knit normalizes Zoho Books data into a clean, uniform model so you don’t need to write custom mapping logic or manage inconsistent field formats.
Knit automatically syncs Zoho Books data using webhooks and delta updates. It manages retries, pagination, and rate limits so your system always stays up to date without constant polling or complicated sync logic.
A full Zoho Books integration can take weeks to build and maintain. With Knit’s prebuilt connectors and unified API, teams can ship accounting integrations in days—while avoiding future maintenance when Zoho updates its API.
Knit enables a wide range of real-world workflows when connected with Zoho Books.
Below is a table summarizing the key use cases.
Fetch Payments: Sync accounting_payments and use GET /accounting/payments to see all payment transactions for reconciliations.
These are just examples; Knit’s integration supports all Zoho Books use cases (as listed in our docs) without custom code.
Knit provides simple unified endpoints to authenticate users, manage syncs, and retrieve Zoho Books data.
The table below lists the key endpoints and what each one does.
Important:
If you encounter any issues, check Knit’s logs and the webhook payloads (they include error details). The Knit support team can also help diagnose integration hiccups.
Integrating Zoho Books with your product is much faster with Knit. Our unified APIs mean you don’t have to write custom code for every Zoho endpoint, and Knit will handle OAuth, retries, and schema differences automatically. Ready to get started? Connect with us to launch your Zoho Books integration in minutes!
Q1: Do I still need to manage Zoho Books access and refresh tokens when using Knit?
A: No, Knit handles the OAuth2 flow end-to-end for you. Once a user authorises via the Knit UI or link, you receive an integration_id, and Knit stores and refreshes tokens internally. You never need to store access/refresh tokens yourself. (Source: Zoho OAuth docs on token expiry and refresh)
Q2: What scopes should I request in Zoho Books when setting up the integration with Knit?
A: You should request only the scopes relevant to your workflows, typically things like invoices, contacts, expenses, payments etc., according to Zoho’s OAuth scope list. If you request too many scopes, you may confuse users or increase risk. To view the available scopes, check Zoho’s documentation.
Q3: How does Knit support data sync for Zoho Books?
A: Knit supports three synchronization modes:
Q4: What if I need a Zoho Books API endpoint that Knit doesn’t cover in its unified model?
A: Use Knit’s Passthrough API. With it, you can send a request to a raw Zoho Books endpoint via Knit (e.g., /invoices/123/approve) and Knit forwards it, handling authentication and request forwarding for you. This allows flexibility for advanced or niche Zoho operations.
Q5: Which data models does Knit currently support for Zoho Books via the unified API?
A: Knit supports major accounting models such as: customers/contacts, invoices, expenses (bills), payments, and items. For Zoho Books, you’ll find these covered out of the box. If you need a custom object or module, you may use the Passthrough method.
Q6: What are common errors or pitfalls when integrating Zoho Books with Knit, and how do I avoid them?
A: Some common issues:
Q7: Can I test the integration in a sandbox or development environment before going live?
A: Yes - it’s a best practice. For Zoho Books, you can use development or sandbox orgs (or a test account) and configure Knit integration in test mode. Make sure you simulate data flows and webhooks to verify everything before switching to production.
Jira is one of those tools that quietly runs how teams work. It's used by NASA to track space-bound bugs and by two-person startups shipping sprints on Mondays. Over 300,000 companies use it to keep projects on track.
This guide covers how to get started with Jira's API: authentication, issue management, projects and boards, webhooks, error handling, and a set of real-world use cases. It's written for developers building an integration for the first time as well as those going deeper into specific use cases.
Jira is a tool for tracking issues and managing projects. The Jira API extends that so external systems can talk to Jira programmatically: creating tickets, updating statuses, pulling reports, and adjusting workflows without anyone using the UI.
The API is RESTful, well-documented, and covers the core Jira data model: issues, projects, boards, users, and workflows.
Most B2B customers already use Jira to manage bugs, tasks, or product sprints. Integrating with it lets them:
Users save time by avoiding duplicate data entry, and the integration becomes a genuine part of their workflow rather than a bolt-on. Once the integration is in place, it also opens up automation: auto-updating statuses, triggering alerts, or creating tasks based on events in your own product.
Before working with the API, it helps to understand how Jira is structured:
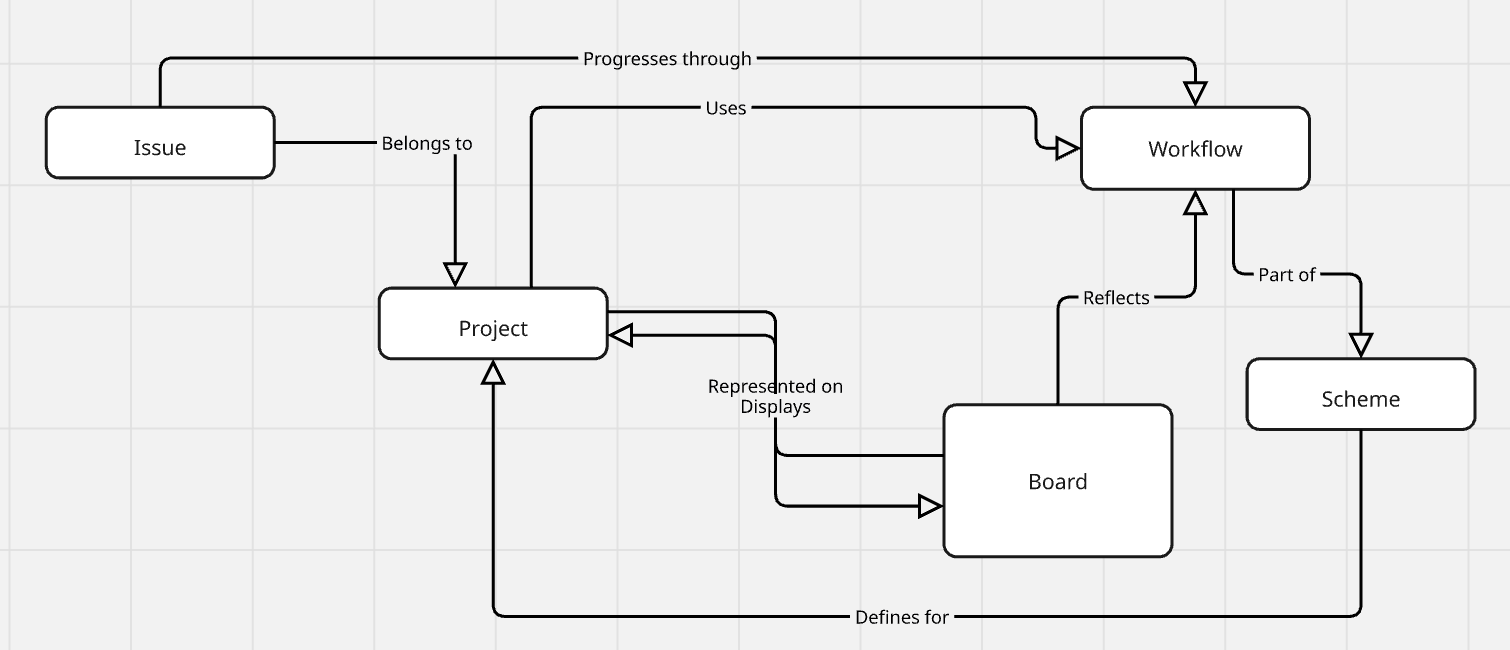
Each of these maps to specific API endpoints. Knowing how they relate helps you design cleaner, more effective integrations.
To start building with the Jira API, you'll want:
If you're using Jira Cloud, you're working with the current API. If you're on Jira Server/Data Center, expect some differences in endpoints and legacy behavior.
Before pointing anything at production, set up a test instance of Jira Cloud. It's free to try and gives you a safe place to test changes.
You can:
Testing in a sandbox first catches most integration bugs before they reach production.
The official Jira API documentation is the primary reference for building an integration. It's hosted by Atlassian and covers endpoints, request and response bodies, and error messages in detail. Use the interactive API explorer and bookmark the Authentication, Issues, and Projects sections.
Jira supports several ways to authenticate API requests. Here's how they compare.
Basic authentication is now deprecated but may still be present in legacy systems. It passes a username and password with every request. It's simple but lacks strong security features, which is why Atlassian is phasing it out.
OAuth 1.0a has been replaced by more secure protocols. It was previously used for authorization but is now deprecated.
For most modern Jira Cloud integrations, API tokens are the standard choice:
For the full walkthrough, scoped vs. un-scoped tokens, the cloud ID routing detail, and a working curl example, see Knit's guide on how to get a Jira API token.
It's simple, reasonably secure, and works well for most use cases.
If your app needs to access Jira on behalf of users, with their explicit permission, use 3-legged OAuth:
It requires more setup than an API token, but it gives you scoped, permissioned access tied to an individual user.
For apps built inside the Atlassian ecosystem, use:
Both support deeper integrations and more control, at the cost of additional setup.
Whichever method you use:
Most integration issues during setup come down to misconfigured auth, so it's worth checking that first before debugging the rest of the code.
Once authenticated, the next step is usually interacting with Jira issues directly: create, read, update, delete (CRUD).
To create a new issue, call the `POST /rest/api/3/issue` endpoint with a few required fields:
{
  "fields": {
    "project": { "key": "PROJ" },
    "issuetype": { "name": "Bug" },
    "summary": "Something's broken!",
    "description": {
      "type": "doc",
      "version": 1,
      "content": [
        {
          "type": "paragraph",
          "content": [
            { "type": "text", "text": "Details about the bug go here." }
          ]
        }
      ]
    }
  }
}
At minimum, you need the project key, issue type, and summary. Description, labels, and custom fields are optional but useful.
Log the responses so you can debug failures, and add retry logic for rate limits or flaky network conditions.
To fetch an issue, use a GET request:
GET /rest/api/3/issue/{issueIdOrKey}
The response is a JSON object with summary, description, status, assignee, comments, history, and more, useful for syncing with another system or building a custom dashboard.
To update an issue's status, add a comment, or change priority, use PUT for full updates or PATCH for partial ones.
A common example is adding a comment:
{
"body": "Following up on this issue, any updates?"
}
Avoid overwriting fields unintentionally; check exactly what you're sending in the payload before you send it.
Deleting issues is irreversible. Confirm the deletion is intentional, and make sure your API token has the right permissions before calling this endpoint.
Good practice here includes:
Confirming the issue should be deleted, ideally with a soft-delete flag first
Keeping an audit trail
Handling deletion errors explicitly
Jira includes a query language called JQL (Jira Query Language) for precise issue searches, for example all open bugs assigned to a specific user, or tasks due this week.
Example: project = PROJ AND status = "In Progress" AND assignee = currentUser()
When using the search API, paginate your results. Atlassian has moved this to a new endpoint: POST /rest/api/3/search/jql, which returns a nextPageToken instead of using startAt/maxResults. Pass the token back on your next request until it's empty. (The older GET /rest/api/3/search endpoint shown in some docs is being phased out; see Knit's Jira API guide for the current request shape.)
This matters once you're dealing with hundreds or thousands of issues.
The API also lets you create and manage Jira projects, useful for automating new customer onboarding.
Use the `POST /rest/api/3/project` endpoint to create a new project, passing in the project key, name, lead, and template.
You can also update project settings and connect them to workflows, issue type schemes, and permission schemes.
For customers using Jira for agile work, the API supports boards and sprints:
- Fetch boards (`GET /board`)
- Retrieve or create sprints
- Move issues between sprints
This is useful for syncing sprint timelines or mirroring status in an external dashboard.
Jira Workflows define how an issue moves through statuses. You can:
- Get available transitions (`GET /issue/{key}/transitions`)
- Perform a transition (`POST /issue/{key}/transitions`)
This lets you automate flows like moving an issue to "In Review" after a pull request is merged.
Beyond basic CRUD, the API supports a few features worth knowing about once your integration matures. The `expand` query parameter lets you pull in extra detail, like changelogs or rendered fields, in a single request instead of making follow-up calls. Bulk endpoints (for example, bulk issue creation and bulk transitions) reduce round-trips when you're processing many issues at once. And custom fields, defined per Jira instance, need to be looked up by their field ID (e.g., `customfield_10032`) rather than by display name, so your integration should fetch the field schema for a project before assuming a given field exists.
You can link related issues (like blockers or duplicates) via the API. This is useful for tracking dependencies or duplicate reports across teams.
Example:
{
"type": { "name": "Blocks" },
"inwardIssue": { "key": "PROJ-101" },
"outwardIssue": { "key": "PROJ-102" }
}
Validate the link type you're using and make sure it fits your project configuration.
To upload logs, screenshots, or files, use the attachments endpoint with a multipart/form-data request.
Keep in mind:
For integrations that need to react instantly to changes in Jira, webhooks are the standard approach.
You can subscribe to events like issue creation, status changes, or comments. When triggered, Jira sends a JSON payload to your endpoint.
Make sure to:
Understanding the differences between Jira Cloud and Jira Server matters for any integration targeting both:
Keep track of changes by monitoring Atlassian's release notes and documentation.
Even with a solid setup, requests will sometimes fail. Here's how to plan for it.
Jira's API returns standard HTTP response codes. The most common ones you'll encounter:
Log error responses with enough context (request, response body, endpoint) to debug quickly.
Jira Cloud rate-limits requests through a few overlapping systems: a points-based hourly quota (a default Global Pool of 65,000 points/hour for most apps), burst limits of 100 requests/second for GET/POST and 50/second for PUT/DELETE, and per-issue write caps of around 20 writes in 2 seconds and 100 writes in 30 seconds. A 429 response includes a RateLimit-Reason header telling you which limit you hit. Here's how to handle it safely:
If you're building a high-throughput integration, test with realistic volumes and plan for throttling from the start.
To keep your integration fast and reliable:
These add up to keep your integration stable under real load.
Visibility into your integration matters as much as the code itself. Here's how to keep it observable and testable.
Good logging makes debugging faster:
Solid logs save significant debugging time when something breaks.
When something isn't working:
If your app logs are tied to user sessions or sync jobs, make those searchable by ID.
Testing your Jira integration keeps it reliable as it changes over time:
The goal is confidence in every deploy, not shipping and hoping nothing breaks.
A few examples of what this looks like in practice:
Trigger issue creation when a bug or support request is reported:
curl --request POST \
  --url 'https://your-domain.atlassian.net/rest/api/3/issue' \
  --user 'email@example.com:<api_token>' \
  --header 'Accept: application/json' \
  --header 'Content-Type: application/json' \
  --data '{
    "fields": {
      "project": { "key": "PROJ" },
      "issuetype": { "name": "Bug" },
      "summary": "Bug in production",
      "description": {
        "type": "doc",
        "version": 1,
        "content": [
          {
            "type": "paragraph",
            "content": [
              { "type": "text", "text": "A detailed bug report goes here." }
            ]
          }
        ]
      }
    }
}'Read issue data from Jira and sync it to another tool:
bash
curl -u email@example.com:API_TOKEN -X GET \ https://your-domain.atlassian.net/rest/api/3/issue/PROJ-123
Map fields like title, status, and priority, and push updates as needed.
Use a scheduled script to move overdue tasks to a "Stuck" column:
import requests
import json

jira_domain = "https://your-domain.atlassian.net"
api_token = "API_TOKEN"
email = "email@example.com"
headers = {"Content-Type": "application/json", "Accept": "application/json"}

# Find overdue issues
jql = "project = PROJ AND due < now() AND status != 'Done'"
response = requests.post(
    f"{jira_domain}/rest/api/3/search/jql",
    headers=headers,
    auth=(email, api_token),
    data=json.dumps({"jql": jql})
)

for issue in response.json().get("issues", []):
    issue_key = issue["key"]
    payload = {"transition": {"id": "31"}}  # Replace with correct transition ID
    requests.post(
        f"{jira_domain}/rest/api/3/issue/{issue_key}/transitions",
        headers=headers,
        auth=(email, api_token),
        data=json.dumps(payload)
    )
Note: this endpoint doesn't paginate results in this example, if PROJ regularly has more overdue issues than fit in one page, handle the nextPageToken field the same way described in the JQL search section of the article body.
A few basics that matter more than they seem:
Treat API keys like passwords.
Secure secrets reduce the blast radius if something else goes wrong.
If your integration touches user data:
Client libraries (Java, Python, etc.) can help with common tasks and reduce boilerplate. They're generally a good fit for standard use cases and a worse fit when you need full control over request behavior.
Automate testing and deployment for the integration itself:
At this point, you have what you need to build a Jira integration that handles authentication, issue management, webhooks, and rate limiting correctly. The checklist below is a quick way to confirm you haven't missed a step.
1. Does Jira have a free API?
Yes, the Jira REST API itself is free to use, though you still need a Jira Cloud or Server license to access an instance. Knit connects to Jira's API as part of its unified project management integration layer, so teams building on Knit don't need to manage Jira-specific auth or rate limiting themselves. Most rate limits and endpoint access depend on your Jira plan rather than the API access itself.
2. What is the base URL for the Jira Cloud REST API?
For Jira Cloud, it's `https://your-domain.atlassian.net/rest/api/3/`, where `your-domain` is your site's subdomain. Knit resolves and manages this per-tenant routing automatically for connected Jira instances, so integrators querying through Knit don't track individual customer domains themselves. Jira Server and Data Center use a different base path, so always confirm which product a customer is on before assuming the Cloud format.
3. Is Basic Authentication still supported for the Jira API?
Basic authentication with a raw password is deprecated and shouldn't be used for new integrations. Knit authenticates to Jira using currently supported methods (API tokens and OAuth 2.0) behind the scenes, so integrators don't need to track which auth methods Atlassian has deprecated. API tokens combined with your account email are the current recommended replacement for most integrations.
4. What are Jira's API rate limits?
Jira Cloud enforces a default Global Pool of 65,000 points per hour for most apps, burst limits of 100 requests/second for GET and POST and 50/second for PUT and DELETE, and per-issue write caps of about 20 writes in 2 seconds and 100 writes in 30 seconds. Knit handles request pacing and retry-with-backoff automatically for connected Jira instances, so integrators don't build this throttling logic themselves. A 429 response includes a RateLimit-Reason header identifying which specific limit was hit.
5. How do I search for issues using the Jira API?
Use JQL (Jira Query Language) with the search endpoint to filter issues by project, status, assignee, and other fields. Knit exposes equivalent filtering through its own unified query interface, so integrators get consistent search behavior across Jira and other connected project management tools. Note that Atlassian has moved the current search endpoint to `POST /rest/api/3/search/jql`, which paginates with a `nextPageToken` rather than the older `startAt`/`maxResults` pattern.
6. Can I use the Jira API to build a custom integration without OAuth?
Yes, API tokens with basic auth (email plus token) work for most server-to-server integrations that don't need to act on behalf of individual end users. Knit uses this same token-based model for direct Jira connections while reserving OAuth 2.0 (3LO) for integrations where end users need to authorize access themselves. OAuth 2.0 becomes necessary when your app needs scoped, user-specific permissions rather than a single service-level credential.
Jira is constantly evolving, and so are the use cases around it. To go further:
- Follow the Atlassian Developer Changelog
- Explore the Jira API Docs
- Join the Atlassian Developer Community
And if you're building on top of Knit, we're here to help.
Drop us an email at hello@getknit.dev if you run into a use case that isn't covered.
This article is part of our in-depth series on the SAP SuccessFactors API, focusing on how to retrieve employee data efficiently and securely.
If you’re working with SAP SuccessFactors for HR management or employee records, understanding how to interact with its API is essential.
We’ll walk through authentication, fetching single or bulk employee data, common errors, and best practices.
You can also explore our comprehensive guide to the SAP SuccessFactors API here.
Before you begin, ensure the following:
requests library installed./odata/v2/PerPerson({employeeId})/odata/v2/PerPersonSuccessFactors' OData API does not accept a standard client_credentials request with a client ID and secret. It requires the SAML 2.0 bearer assertion grant: you sign a SAML assertion with the private key matching the X.509 certificate registered on your OAuth client, then exchange that signed assertion for an access token. There is no separate refresh token in this flow. When a token expires, you sign and exchange a new assertion.
import requests

token_url = 'https://your-instance.successfactors.com/oauth/token'
client_id = 'your_client_id'          # the OAuth client ID registered in Admin Center
company_id = 'your_company_id'
signed_saml_assertion = 'your_signed_saml_assertion'  # obtained from your IdP or a signing routine

response = requests.post(
    token_url,
    data={
        'client_id': client_id,
        'company_id': company_id,
        'grant_type': 'urn:ietf:params:oauth:grant-type:saml2-bearer',
        'assertion': signed_saml_assertion,
    }
)

access_token = response.json().get('access_token')
Generating and signing the SAML assertion itself typically means either pulling it from your identity provider or using a small XML-signing routine with your certificate's private key (SAP publishes a reference implementation for this). The snippet above assumes you already have a valid signed assertion string; it is not something a few lines of requests code can generate on its own.
Use the employee’s ID to fetch their details.
employee_id = '12345'
headers = {'Authorization': f'Bearer {access_token}'}
url = f'https://your-instance.successfactors.com/odata/v2/PerPerson({employee_id})'

response = requests.get(url, headers=headers)
employee_data = response.json()Fetch a list of all employees within your organization.
url = 'https://your-instance.successfactors.com/odata/v2/PerPerson'
response = requests.get(url, headers=headers)
all_employees_data = response.json()
$top and $skip parameters.1. What is the base URL for SAP SuccessFactors API?
The base URL depends on your instance and data center region, usually in the format:https://<your-instance>.successfactors.com.
2. How do I obtain API credentials?
Register an OAuth client in SuccessFactors Admin Center and upload an X.509 certificate for it. SuccessFactors uses this certificate to verify signed SAML assertions rather than issuing a plain client secret for the OData API.
3. What data format does the API return?
The API returns data in JSON format, which is easy to parse in most programming languages.
4. Can I filter employee data?
Yes. Use OData query options like $filter, $select, and $orderby for granular results.
5. How do I handle pagination for large datasets?
Use $top and $skip parameters to fetch results in batches.
6. Is there a rate limit for API calls?
Yes. Rate limits vary by license type; refer to the official SAP SuccessFactors API documentation.
7. How do I refresh an access token?
There is no refresh token grant in the SAML bearer flow. Sign a new SAML assertion with your certificate's private key and exchange it at the token endpoint the same way you did to get the original token.
Integrating directly with SAP SuccessFactors can be time-consuming, from managing tokens to maintaining ongoing API updates.
With Knit, you can connect once and access SAP SuccessFactors data effortlessly through a unified, secure interface. Knit automates authentication, authorization, and ongoing maintenance, allowing your teams to focus on building experiences instead of managing integrations.
Explore how Knit simplifies SAP SuccessFactors integration here.
.webp)
Forbes listed QuickBooks as one of the best accounting software tools in the world. Many
organizations and individual accounting professionals rely on QuickBooks for their accounting
tasks.
At the heart of QuickBooks is Intuit, a company that people recognize for its most popular
product.
QuickBooks Online is a hero for small businesses. It is a cloud-based accounting software that
manages and keeps track of all your accounting needs, from expenses to income. It organizes
your financial information, provides insights into project profitability reports, and encourages you
to make informed decisions.
QuickBooks is significantly popular for its bookkeeping software but offers more than this. It
is a solution to many financial problems, making it prominent among businesses of all sizes.
QuickBooks Online users are present in diverse industries such as construction and real estate,
education, retail, non-profit, healthcare, hospitality, and many others.
Professionals in the services industry widely use QuickBooks Online, and it is a popular option
for government contractors to meet the accounting and auditing requirements of DCAA.
Businesses often use multiple software or tools to fulfill their requirements. QuickBooks Online API integration benefits businesses as it allows proper management of finances and automates tasks such as payroll, invoice, expense tracking, and reporting. You can create custom workflows for your integration and synchronize data among all your platforms—which enhances overall efficiency.
When it comes to accounting, keeping track of cash flow, debt, payroll, and expenses and
driving real-time insights are crucial for the smooth running of a business. Let’s look at some of
the key features that QuickBooks Online offers to fulfill these requirements in detail:
It is an unsung hero. QuickBooks expense tracking captures receipts on the go, which makes reporting and reimbursements easy!
Companies emphasize tracking their invoices, as it is important for record-keeping, but it is more of a strategic tool for accurate accounting and is crucial for business success. QuickBooks Online can simplify the process of invoices as it creates, sends, and tracks invoices with ease.
It is not feasible to keep track of daily business transactions manually. QuickBooks integration with banks allows you to track and categorize transactions.
This feature is developed to smartly manage employee compensation in a unified platform (payroll and accounting in one place), such that it has automated calculations for gross pay, tax deductions, and net pay.
With accurate reporting, you can monitor performance, ensure compliance with regulatory requirements, maintain investor relations, allocate resources, plan long-term, and make informed decisions based on insights.
Businesses all over the world use QuickBooks because it streamlines their accounting processes.
Direct integration with the QuickBooks Online API leads to various points of data interaction, which increases the chances of incorrect or uneven data flow. With a Unified API, there is a single source of truth and a single point of data interaction, ensuring consistency.
Direct integration with the QuickBooks Online API requires managing various aspects, but with a unified API like Knit, you gain immediate access and synchronization capability for new integrations without writing additional code.
Integrated workflows are important for maintaining harmony between multiple systems. It reduces human intervention and automates data transfer between systems, eliminating the need for manual data re-entry.
Unified APIs like Knit abstract the complexities of data integration, providing a simplistic interface that shields users from the underlying data structure and minimizes potential security hazards.
Authentication and Authorization are important steps you must ensure before you start your integration. Authentication, in simple terms, is verifying the user's identity, and authorization is verifying if the user has access and permissions to what they are accessing.
First, you need to sign up with Intuit to create a developer account. Once you sign in, you can access the developer portal and tools required to develop your app.
Authentication and Authorization using OAuth 2.0 is a standard industry protocol. OAuth 2.0 allows users to log into their QuickBooks account via the OAuth 2.0 flow.
Once you log in to your Intuit developer account, create an app and select the QuickBooks Online Accounting scope. This app will provide the credentials you’ll need for authorization requests.
Once the user grants permission, Intuit sends the user back to the application with an authorization code. Check out the OAuth Playground to preview each step.
OpenID Connect is an identity layer that provides an extra layer of protection for your app, giving user information such as name and email address. It is an optional step, but we recommend it for extra security.
Setting up authentication with Intuit single sign-on is an alternative way to handle the UI for authorization to simplify the user signing-in experience. You need to implement the following steps:
As of November 2025, Intuit introduced the App Partner Program which tiers API access by scale. Writes (create/update) remain free. Reads (queries, reports, fetches) are metered against a monthly "CorePlus credit" allowance that varies by tier
Developers building production integrations serving multiple companies need to account for this when planning API call volume, especially for read-heavy use cases like financial reporting sync.
It is important to understand the data models of the API we are going to integrate, as they are the backbone of accurate integration.
Data models are abstract representations of data structures. Data models show you the format for storing and retrieving data from the database. Understanding the structure of data before API integration is crucial for several reasons:
The data model encapsulates business rules and logic, ensuring that data exchange follows these rules and logic.
The API endpoint structure and parameter definitions (data types, optional or required) become clear with data models.
Key components of a data model include entities, attributes, relationships, and constraints. QuickBooks has many entities; some of the most commonly used are:
Businesses use accounts to track transactions of income and expenses. It also includes assets and liabilities. Accountants often call accounts "ledgers".
Attributes: AcctNum, SubAccount, AccountType, and many more.
It is an Accounts Payable (AP) transaction that represents a request for payment from a third party for goods or services they render, receive, or both.
Attributes: VendorRef, TotalAmt, Balance, and more.
Customers are the consumers of services or products offered by businesses. QuickBooks includes parent and sub-customer entities for simple and detailed classification.
Attributes: DisplayName, GivenName, PrimaryEmailAddr, etc.
It records the payment for customers against single or multiple invoices and credit memos in QuickBooks. It can be a full update or a sparse update.
Attributes: TotalAmt, PaymentMethodRef, Unapplied Amt, and more.
It is a seller from whom the company purchases any service or product. QuickBooks applies certain business rules to this entity.
Attributes: DisplayName, GivenName, PrimaryEmailAddr, etc.
An invoice represents a sales form where customers pay for a product or service. QuickBooks applies specific business rules to this entity in QuickBooks.
Attributes: DocNumber, BillEmail, TrackingNum, etc.
The Profit and Loss Summary report from the QuickBooks Online Report Service provides information regarding profit and loss through the object named ProfitAndLoss.
Attributes: Customer, item, vendor, and more.
There are various benefits of API integration with a Unified API. Let’s look into one such Unified
API that is ruling the market.
Knit covers all your integration needs in one API. It is rated number one for ease of integration. QuickBooks API integration with a Unified API bridges gaps between multiple platforms and enables synchronized data flow. Knit helps you build your QuickBooks integration 10X faster using the Unified Accounting API.
To correctly implement the integration, you should have an understanding of QuickBooks Objects and their corresponding Knit Objects. Get an overview with the below examples:
QuickBooks offers both pre-built and custom workflows that automate repetitive tasks related to accounting requirements.
Pre-built workflows automate common business needs, while users design custom workflows to
fulfill conditions and logic specific to their business needs.
The QuickBooks Online API offers effective financial management and automation in several time-consuming, repetitive tasks, giving you more time to focus on what matters.
As companies grow, managing data becomes harder, leading to human errors and data inaccuracies. These inaccuracies can result in misleading insights that might cause problems for businesses. Companies use the QuickBooks API to solve these issues at their core. Integrating with a Unified API simplifies the process, as you only need to manage one API integration, saving you time.
Managing invoices and payments is essential for smooth accounting in any business. Creating invoices quickly leads to faster payments from customers, and offering flexible payment options improves customer relations and cash flow, enhancing the overall financial health of the business.
QuickBooks Online API understands your business needs and ensures real-time data synchronization across all your systems. For example:
Sync inventory levels between QuickBooks and warehouse management systems.
Automatically import expense data from corporate cards or receipt capture apps.
Generate custom reports and visualizations based on QuickBooks data.
Seamlessly integrate payroll data with QuickBooks for accurate calculations and tax filings.
For the Implementation steps, we will implement the Accounting API use case.
QuickBooks Online Accounting API offers various features such as create, send, read invoices in user’s QuickBooks online companies.
The first step is to outline integration goals, identify specific QuickBooks data, actions, endpoints and map workflows (visualize how data will flow between your application and QuickBooks).
The core components of API requests include:
Learn more about body parameters, rules or conditions, request and response body
You can test your integration in different testing environments which QuickBooks support.
Webhooks are a cost-efficient way to reduce constant API calls, as they provide real-time information (in the form of notifications) when your event occurs.
Webhooks can automatically notify you whenever data changes in your end-users QuickBooks
Online company files. Webhooks allow QuickBooks to proactively send notifications when the event occurs.
Once an invoice is created, webhook sends a notification with details of the invoice, which in turn triggers the invoice processing workflow.
Get payment reminders when invoice status becomes overdue.
Processing large datasets efficiently is crucial for many applications. QuickBooks API offers features to handle bulk operations, providing several advantages:
Reduces API call overhead by processing multiple records in a single request.
Streamlines data transfer and processing.
Optimizes API usage and potentially reduces costs.
With growing business, it’s essential to work with smart tools that save you time. Batch processing is one such tool that QuickBooks Online Advanced offers.
You can generate multiple invoices from a single-entry input.
You can create an expense once and duplicate it while changing some of the underlying details, like vendor or amount.
You can create templates for those you write often. It gives you more control over the company’s check writing.
When dealing with extensive data, pagination is essential. QuickBooks API provides mechanisms to retrieve data in manageable chunks. Use pagination to fetch data in pages, allowing you to process it incrementally without overwhelming your application.
To optimize performance, divide large datasets into smaller, manageable chunks. Process these chunks sequentially, avoiding overwhelming the API or your application.
You can minimize requests by planning to make API calls to fetch only necessary data and utilize filters to refine your data requests.
Performance is key for any successful API integration. To control the load on the system and ensure great performance, rate limits are applied to APIs.
QuickBooks applies rate limits to restrict the number of requests in a specified timeframe. If you exceed these limits, your application requests may be temporarily blocked due to throttling.
Effective error handling significantly improves your API integration. Here are some best practices:
QuickBooks Online API imposes rate limits, so you need to adjust your application's request frequency accordingly.
Understand your error codes and look for them in QuickBooks-defined Error Codes.
To optimize API usage and reduce the number of API calls, group multiple requests into a single batch.
Offload time-consuming tasks to background jobs or queues to avoid blocking the main application thread.
Once you complete your QuickBooks API integration, you must actively secure the financial data and integration.
To secure your data, make sure to use data encryption methods to encrypt data both at rest and in transit. Enhance security by adding proper input validation to prevent incorrect data from being entered into your database.
Unauthorized access due to poorly managed credentials poses a threat to your application and integration. To ensure that your users are authorized, implement regular token rotation, avoid hard-coding credentials, and utilize multifactor authentication.
Conduct vulnerability scans, simulate attacks with penetration testing, and perform regular security audits.
References for Verification
1. Security Requirements for QuickBooks API Integration
2. QuickBooks Online Accounting API
6. Schema & Data formats for QuickBooks
7. Use Cases
9. Implement Intuit Single Sign-On
10. OAuth 2.0
11. QuickBooks Integration Basics
13. Overview of QuickBooks API integration
14. QuickBooks API Data models
15. Batch Processing
16. Accounting Processes with QuickBooks
18. Features
22. More about features and benefits
Yes. QuickBooks Online has a REST API maintained by Intuit, accessible through the Intuit Developer Portal at developer.intuit.com. The API uses OAuth 2.0 for authentication and supports JSON payloads. It covers the full accounting data model — customers, invoices, bills, payments, vendors, accounts, and profit/loss reports — with endpoints for create, read, update, delete, and query operations. Webhooks are also supported for real-time event notifications when data changes in a QuickBooks company file.
QuickBooks Online API authentication uses OAuth 2.0 via Intuit's identity platform. Create an app in the Intuit Developer Portal, select the QuickBooks Online Accounting scope, and obtain a Client ID and Client Secret. Use the Authorization Code flow to prompt user consent: direct the user to Intuit's /authorize endpoint, receive an authorization code, then exchange it at the /token endpoint for an access token and refresh token. Access tokens expire after one hour — use the refresh token to obtain a new one without requiring the user to re-authenticate.
QuickBooks Online imposes rate limits to protect system performance. The standard limit is 500 requests per minute per company (realm ID). Exceeding this returns an HTTP 429 or 403 with a throttling error — implement exponential backoff and respect the Retry-After header. For bulk operations, use batch requests to group multiple entity operations into a single API call, reducing total request volume. Always check Intuit's current developer documentation for the latest rate limit thresholds, as these can change between API versions.
The QuickBooks Online API covers the full accounting data model. The most commonly used entities are: Invoice (sales transactions billed to customers), Customer (consumers of products/services), Payment (records payments against invoices), Bill (accounts payable transactions from vendors), Vendor (sellers from whom the company purchases goods/services), Account (ledgers for tracking income, expenses, assets, and liabilities), and ProfitAndLoss (summary report object for profit/loss data). Each entity supports full and sparse update operations; some apply specific business rules documented in Intuit's API reference. Knit normalises these QuickBooks entities into a unified schema shared with Xero, NetSuite, and Sage Intacct, so you build one integration rather than one per accounting platform.
QuickBooks Online webhooks deliver real-time notifications when data changes in a connected company file — no polling required. Subscribe by registering a webhook endpoint URL in the Intuit Developer Portal and specifying which entities and event types to monitor (create, update, delete, void, merge). When an event occurs, Intuit sends a POST request to your endpoint with a payload containing the entity type, operation, and company ID. Validate the payload using the verifier token provided in the portal. Note that webhook payloads do not include the changed data — use the notification as a trigger to fetch the updated record via a subsequent API call.
Yes. The Model Context Protocol (MCP) provides a standardized interface for AI agents to call external tools, including accounting APIs like QuickBooks Online. With an MCP server wrapping the QuickBooks API, an agent can invoke tools like query_invoices(), create_customer(), or get_profit_and_loss() as part of a multi-step workflow — without custom integration code per agent framework. Knit provides a unified accounting MCP server that normalises QuickBooks alongside other accounting platforms (Xero, NetSuite, Sage Intacct) into a consistent schema, so agents work with the same tool definitions regardless of which accounting system a customer uses.
QuickBooks Online uses OAuth 2.0 rather than a static API key. To get your credentials: create an account at developer.intuit.com, create a new app, and select the QuickBooks Online Accounting scope. The portal will provide a Client ID (equivalent to an API key for identifying your app) and a Client Secret (used to securely exchange authorization codes for access tokens). These credentials are environment-specific — Intuit provides separate credentials for sandbox and production. Never expose your Client Secret in client-side code; it should only be used in server-side token exchange requests.
Yes, it can cost money, but it depends on your usage.
Writing data to QuickBooks (Core API calls) remains free. However, reading or pulling data (CorePlus calls) is now metered under a new tiered pricing model.
The Builder tier gives you 500,000 read calls per month for free. If your application exceeds that limit or requires premium features, you must upgrade to a paid tier—Silver ($300/mo), Gold ($1,700/mo), or Platinum ($4,500/mo)-otherwise, your API access will be blocked.
Zoho CRM has become one of the most trusted platforms for sales, marketing, and customer relationship management. This system records the customer data of thousands of organizations, from startups to enterprises. Most businesses use Zoho CRM alongside marketing automation tools, support platforms, e-commerce systems, accounting software, communication tools, and more.
The challenge? Making all these systems talk to each other.
That's where the Zoho CRM API comes in. Integrating with Zoho CRM's APIs, companies can automate processes, reduce manual work, and ensure accurate, real-time data flows between systems.
In this guide, we'll walk you through everything you need-whether you're a beginner just learning about Zoho CRM APIs or a developer looking to build an enterprise-grade integration. We'll cover terminology, use cases, step-by-step setup, code examples, and FAQs.
Zoho CRM is an end-to-end customer relationship management solution that streamlines essential sales and marketing operations such as lead management, contact management, deal tracking, workflow automation, and analytics. Businesses use Zoho CRM to automate routine tasks, gain real-time visibility into their sales pipeline, and eliminate manual errors.
Zoho CRM is a core component of many sales and marketing ecosystems because it brings automation, visibility, intelligence, and scalability into a single cloud-based platform.
Before diving deeper, here are the key terms commonly used in Zoho CRM APIs.
Zoho CRM offers multiple API modules that enable your application to interact with nearly every aspect of the CRM system.
Zoho CRM primarily offers REST APIs that use standard HTTP methods (GET, POST, PUT, DELETE) and return JSON. Zoho's original (v1) XML/JSON-based API framework has been phased out in favor of the REST framework - if you're building new, REST is the only path.
Zoho CRM has iterated through several API versions (v2, v2.1, v3, v4, v5, v6, v7). v8 is the current version and the one this guide is written against - it added workflow-automation APIs, data-sharing-rule APIs, blueprint and kiosk APIs, calendar management, and OpenAPI 3.0 spec support on top of the earlier core CRUD/bulk/metadata APIs. Older integrations built on v2/v2.1 generally continue to work, but new builds should start on v8 to get the full current feature set and documentation support.
https://www.zohoapis.{domain}/crm/v8/{module_api_name}
{domain} is your data center (com, eu, in, com.au, jp, com.cn, ca).{module_api_name} is the module you're working with (Leads, Contacts, Deals, etc.).Example:https://www.zohoapis.com/crm/v8/Leads
Setup → Company Details and fill in organization information.Zoho CRM uses OAuth 2.0 for secure authentication.
Required scopes (minimum):ZohoCRM.modules.ALL, ZohoCRM.users.READ, ZohoCRM.org.READ, ZohoCRM.settings.ALL
Common scope options:
ZohoCRM.modules.leads.READ) over broad access.https://api-console.zoho.com.✅ Your developer account is now ready. You can access documentation, test APIs, and create client applications.
After creation, you'll receive:
Scopes define what data your application can access. Follow least privilege.
Example scope string (comma-separated):
ZohoCRM.modules.leads.ALL,ZohoCRM.modules.contacts.READ,ZohoCRM.modules.deals.ALL
Generate Authorization URL:
https://accounts.zoho.{domain}/oauth/v2/auth?response_type=code&client_id={CLIENT_ID}&scope={SCOPES}&redirect_uri={REDIRECT_URI}&access_type=offlineExample Authorization URL:
https://accounts.zoho.com/oauth/v2/auth?response_type=code&client_id=1000.ABC123XYZ&scope=ZohoCRM.modules.leads.ALL,ZohoCRM.modules.contacts.READ&redirect_uri=https://yourapp.com/oauth/callback&access_type=offlineHandle the Callback: Zoho redirects to your redirect URI with a code parameter.
https://yourapp.com/oauth/callback?code=1000.abcd1234efgh5678&location=us&accounts-server=https://accounts.zoho.com
Exchange Code for Tokens:
curl --location --request POST \ 'https://accounts.zoho.{domain}/oauth/v2/token' \ --header 'Content-Type: application/x-www-form-urlencoded' \ --data-urlencode 'code={AUTHORIZATION_CODE}' \ --data-urlencode 'client_id={CLIENT_ID}' \ --data-urlencode 'client_secret={CLIENT_SECRET}' \ --data-urlencode 'redirect_uri={REDIRECT_URI}' \ --data-urlencode 'grant_type=authorization_code'Example Response:
{ "access_token": "1000.abc123def456.xyz789", "refresh_token": "1000.refresh123token456", "api_domain": "https://www.zohoapis.com", "token_type": "Bearer", "expires_in": 3600}curl --location --request POST \ 'https://accounts.zoho.{domain}/oauth/v2/token' \ --header 'Content-Type: application/x-www-form-urlencoded' \ --data-urlencode 'refresh_token={REFRESH_TOKEN}' \ --data-urlencode 'client_id={CLIENT_ID}' \ --data-urlencode 'client_secret={CLIENT_SECRET}' \ --data-urlencode 'grant_type=refresh_token'Response:
{ "access_token": "1000.new_access_token_here", "api_domain": "https://www.zohoapis.com", "token_type": "Bearer", "expires_in": 3600}Example: Fetch All Leads
curl --location 'https://www.zohoapis.com/crm/v2/Leads' \ --header 'Authorization: Bearer {ACCESS_TOKEN}'Response (sample):
{ "data": [ { "Owner": { "name": "Patricia Boyle", "id": "554023000000235011" }, "Company": "Acme Corp", "Email": "john.doe@acme.com", "Last_Name": "Doe", "First_Name": "John", "Lead_Status": "Not Contacted", "Phone": "555-1234", "Lead_Source": "Web Form", "id": "554023000002383003", "Created_Time": "2024-01-15T10:30:00+00:00" } ], "info": { "per_page": 200, "count": 1, "page": 1, "more_records": false }}curl --location 'https://www.zohoapis.com/crm/v2/Leads' \ --header 'Authorization: Bearer {ACCESS_TOKEN}' \ --header 'Content-Type: application/json' \ --data-raw '{ "data": [ { "Last_Name": "Smith", "First_Name": "Jane", "Company": "Tech Innovations Inc", "Email": "jane.smith@techinnovations.com", "Phone": "555-9876", "Lead_Source": "Website", "Lead_Status": "Not Contacted", "Description": "Interested in Enterprise plan", "Website": "https://techinnovations.com" } ] }'curl --location --request PUT \ 'https://www.zohoapis.com/crm/v2/Contacts/{CONTACT_ID}' \ --header 'Authorization: Bearer {ACCESS_TOKEN}' \ --header 'Content-Type: application/json' \ --data-raw '{ "data": [ { "Phone": "555-1111", "Mobile": "555-2222", "Description": "Updated contact information after January meeting" } ] }'Setup → Developer Space → Sandbox.https://crmsandbox.zoho.{domain}/crm/v2/{module}Zoho CRM supports native webhooks to enable real-time integrations and reduce polling.
Webhooks are HTTP callbacks triggered by events in Zoho CRM. When an event occurs (like a new lead created or deal won), Zoho CRM sends an HTTP POST request to a URL you specify with relevant data about the event.
Event TypeDescriptionModule EventsRecord created, updated, deleted in any moduleWorkflow EventsTriggered by workflow rulesBlueprint EventsState transitions in blueprintsApproval EventsApproval requested, approved, rejectedSchedule EventsTime-based triggers
// Example Node.js endpointapp.post('/webhooks/zohocrm', (req, res) => { const webhookData = req.body; console.log('Webhook received:', webhookData); // Process the webhook data // e.g., create user, send notification, update database // Always respond with 200 OK res.status(200).send('Webhook received');});Setup → Developer Space → Webhooks.{ "module": "Leads", "operation": "create", "resource_uri": "https://www.zohoapis.com/crm/v2/Leads/554023000002487001", "ids": ["554023000002487001"], "timestamp": "2024-01-15T10:30:00+00:00", "token": "webhook_verification_token"}Integrating directly with Zoho CRM requires managing OAuth, rate limits, pagination, module differences, data syncing, and ongoing maintenance. Knit removes this complexity by offering a single, unified CRM API that works across multiple CRM platforms.
Create a Lead
POST /crm/leads{ "first_name": "John", "last_name": "Smith", "email": "john.smith@example.com", "company": "Acme Corp", "phone": "+1-555-0123", "lead_source": "Website", "status": "New"}Fetch All Deals
GET /crm/deals?page=1&limit=50
Update Deal Stage
PUT /crm/deals/123456{ "stage": "Proposal Sent", "amount": 50000, "close_date": "2026-02-15"}invalid_clientinvalid_token / INVALID_TOKENOAUTH_SCOPE_MISMATCH / INSUFFICIENT_PRIVILEGEINVALID_DATA / MANDATORY_NOT_FOUNDRATE_LIMIT_EXCEEDED / API_LIMIT_EXCEEDEDINVALID_MODULE / RECORD_NOT_FOUNDQ. What is a Zoho CRM integration?
A. A connection between Zoho CRM and another system that allows data to flow between them (typically via APIs, webhooks, or pre-built connectors).
Q. What types of APIs does Zoho CRM provide?
A. REST APIs for all modules and functionalities. SOAP APIs exist as legacy, but REST is recommended.
Q. How do I authenticate with Zoho CRM API?
A. Use OAuth 2.0: register an app to get Client ID/Secret, then implement the OAuth flow to obtain tokens.
Q. What are Zoho CRM API rate limits?
A. Limits depend on your Zoho CRM edition and API. Daily limits vary (e.g., 5,000 to 100,000+ calls/day). Refer to Zoho's official documentation for current limits.
Q. Does Zoho CRM support webhooks?
A. Yes—webhooks can notify your app on record create/update/delete events.
Q. How long do access tokens last?
A. Typically ~1 hour. Refresh tokens last longer (self-clients may have shorter durations) and can generate new access tokens.
Q. Can I use Zoho CRM APIs for custom modules?
A. Yes—CRUD operations work for standard and custom modules.
Q. How do I handle errors in Zoho CRM API?
A. Implement comprehensive handling for token expiration (401), rate limiting (429), invalid data (400), and server errors (500). Use error codes/messages to guide resolution.
Q. Is there a sandbox environment for testing?
A. Yes—Zoho CRM provides a sandbox environment for safe testing.
Q. How do I choose the right API domain?
A. Use the domain for your data center: .com (US), .eu (Europe), .in (India), .com.au (Australia), .com.cn (China), etc.
Q. Can I perform batch operations?
A. Yes—Zoho supports batch operations to create/update/delete multiple records in one call for better performance.
If you're building an HR data pipeline, automating payroll syncs, or powering internal dashboards, UKG Pro (UKG HRIS) is one of the more sophisticated HRIS platforms you'll encounter. This guide breaks down, how to retrieve employee data from the UKG HRIS API.
It’s part of a larger deep-dive series unpacking HRIS authentication, rate limits, scopes, and best practices. You can explore the full guide here.
Before you begin, make sure you have the following:
service2.ultipro.com, service5.ultipro.com, or yourcompany.ultipro.com. If you're unsure of your hostname, check with your UKG Pro administrator or UKG Support.requests library installed (pip install requests)Note:api.ukg.com is not the base URL for UKG Pro HCM. Every UKG Pro company gets a dedicated hostname. Using the wrong hostname will result in a 404 or connection error, not an auth error.UKG Pro HCM uses a token-based authentication flow that requires three separate credentials: a Customer API Key (per company), a User API Key (per service account), and the service account's username and password. All four are required.
import requests

# Your company-specific UKG Pro hostname — NOT api.ukg.com
# Example: "service2.ultipro.com" or "yourcompany.ultipro.com"
HOSTNAME = "your-company.ultipro.com"
CUSTOMER_API_KEY = "your_customer_api_key"
USER_API_KEY = "your_user_api_key"       # Also called ClientAccessKey

auth_url = f"https://{HOSTNAME}/authentication/login"

auth_headers = {
    "US-Customer-Api-Key": CUSTOMER_API_KEY,
    "Content-Type": "application/json"
}

auth_body = {
    "UserName": "service_account@yourcompany.com",
    "Password": "your_service_account_password",
    "ClientAccessKey": USER_API_KEY
}

try:
    response = requests.post(auth_url, json=auth_body, headers=auth_headers)
    response.raise_for_status()
    token = response.json().get("access_token")
    if not token:
        raise ValueError("Authentication succeeded but no access_token returned")
except requests.HTTPError as e:
    print(f"Auth failed: {e.response.status_code} — {e.response.text}")
    raise
Important: The US-Customer-Api-Key header is required on the authentication call itself, not just on subsequent requests. Without it, the auth call will return 401 even with valid credentials.
Token format: Unlike standard OAuth, UKG Pro tokens are used WITHOUT a Bearer prefix. See Step 2 for the correct header format.
def get_employee(employee_id: str, token: str, hostname: str, customer_api_key: str) -> dict:
    """
    Retrieve a single employee record from UKG Pro.

    Args:
        employee_id: The UKG Pro internal employee ID (not the employee number)
        token: Bearer token from the authentication step
        hostname: Your UKG Pro hostname
        customer_api_key: Your Customer API Key

    Returns:
        Employee record as a dict
    """
    url = f"https://{hostname}/personnel/v1/employees/{employee_id}"

    headers = {
        "Authorization": token,              # No "Bearer" prefix — raw token
        "US-Customer-Api-Key": customer_api_key,
        "Content-Type": "application/json"
    }

    try:
        response = requests.get(url, headers=headers)
        response.raise_for_status()
        return response.json()
    except requests.HTTPError as e:
        if e.response.status_code == 401:
            print("Token expired or invalid — re-authenticate and retry")
        print(f"Error fetching employee {employee_id}: {e.response.status_code}")
        raise


# Usage
employee = get_employee(
    employee_id="12345",
    token=token,
    hostname=HOSTNAME,
    customer_api_key=CUSTOMER_API_KEY
)
print(employee)
Critical: The Authorization header value is the raw token string — no "Bearer " prefix. UKG Pro's auth scheme is not standard OAuth Bearer. Prepending Bearer will result in a 401 on every call.
The US-Customer-Api-Key header must be included on every API call, not just the auth call.
UKG Pro paginates employee responses. A bare call to /personnel/v1/employees returns only the first page. For any production use, implement pagination from the start.
def get_all_employees(token: str, hostname: str, customer_api_key: str, per_page: int = 100) -> list:
    """
    Retrieve all employees from UKG Pro with automatic pagination.

    Args:
        token: Access token from authentication
        hostname: Your UKG Pro hostname
        customer_api_key: Your Customer API Key
        per_page: Number of records per page (max typically 100)

    Returns:
        List of all employee records
    """
    url = f"https://{hostname}/personnel/v1/employees"
    headers = {
        "Authorization": token,
        "US-Customer-Api-Key": customer_api_key,
        "Content-Type": "application/json"
    }

    all_employees = []
    page = 1

    while True:
        params = {
            "page": page,
            "per_page": per_page
        }

        try:
            response = requests.get(url, headers=headers, params=params)
            response.raise_for_status()
            batch = response.json()
        except requests.HTTPError as e:
            print(f"Error on page {page}: {e.response.status_code} — {e.response.text}")
            raise

        if not batch:
            break

        all_employees.extend(batch)
        print(f"Fetched page {page}: {len(batch)} records (total so far: {len(all_employees)})")

        # If we got fewer records than requested, we've hit the last page
        if len(batch) < per_page:
            break

        page += 1

    return all_employees


# Usage
employees = get_all_employees(
    token=token,
    hostname=HOSTNAME,
    customer_api_key=CUSTOMER_API_KEY
)
print(f"Total employees fetched: {len(employees)}")
For large employee populations (5,000+), consider adding a small delay between pages (time.sleep(0.5)) to stay within UKG Pro's rate limits.
1. Using the wrong hostname or base URL -The most common first-attempt failure. api.ukg.com is not the base URL for UKG Pro HCM. Your hostname is company-specific and provided by UKG during onboarding. If you're not sure, check with your UKG Pro administrator — it's usually in the URL when you log in to UKG Pro in a browser.
2. Missing the US-Customer-Api-Key header - This header must be present on every single call — both the authentication call and all subsequent API calls. Omitting it on data calls returns 401 even with a valid token.
3. Prepending "Bearer" to the Authorization token - UKG Pro tokens are not standard OAuth Bearer tokens. The Authorization header value should be the raw token string. Authorization: Bearer {token} will fail; Authorization: {token} is correct.
4. Token expiry with no refresh logic - UKG Pro tokens expire (typically after a few hours). For long-running jobs or scheduled processes, add logic to detect 401 responses and re-authenticate. Do not cache tokens across days.
5. No pagination on employee fetches - UKG Pro paginates by default. A call to /personnel/v1/employees without page parameters returns only the first page — usually 25–100 records. Any production integration that pulls all employees must implement the pagination loop shown in Step 3.
6. Deeply nested JSON structures - UKG Pro employee records are complex. Fields like employment status, pay rates, and job assignments are nested multiple levels deep. Map the full schema before building your data pipeline — do not assume a flat structure.
7. Inconsistent field population across customers - Certain optional fields are only populated if the UKG Pro administrator has configured them. Build defensively: use .get() for all field access and define defaults for missing values.
8. Version changes breaking integrations - UKG does not always maintain backward compatibility across API versions. Pin to a specific version in your endpoint paths (/v1/) and monitor UKG's release notes for your tenant version.
For any integration that runs continuously or on a schedule, implement token refresh:
import time

class UKGProClient:
    def __init__(self, hostname, customer_api_key, user_api_key, username, password):
        self.hostname = hostname
        self.customer_api_key = customer_api_key
        self.user_api_key = user_api_key
        self.username = username
        self.password = password
        self.token = None
        self.token_fetched_at = None
        self.token_ttl_seconds = 3600  # Adjust to match your UKG Pro token expiry

    def _needs_refresh(self):
        if not self.token or not self.token_fetched_at:
            return True
        return (time.time() - self.token_fetched_at) > (self.token_ttl_seconds - 60)

    def get_token(self):
        if self._needs_refresh():
            auth_url = f"https://{self.hostname}/authentication/login"
            response = requests.post(
                auth_url,
                json={
                    "UserName": self.username,
                    "Password": self.password,
                    "ClientAccessKey": self.user_api_key
                },
                headers={
                    "US-Customer-Api-Key": self.customer_api_key,
                    "Content-Type": "application/json"
                }
            )
            response.raise_for_status()
            self.token = response.json()["access_token"]
            self.token_fetched_at = time.time()
        return self.token

    def get_headers(self):
        return {
            "Authorization": self.get_token(),
            "US-Customer-Api-Key": self.customer_api_key,
            "Content-Type": "application/json"
}What credentials do I need to call the UKG Pro API?
UKG Pro requires four pieces of information: a Customer API Key (assigned to your company environment), a User API Key (assigned to your service account, also called ClientAccessKey), a service account username, and the service account password. You also need your company-specific hostname — a generic base URL like api.ukg.com does not apply to UKG Pro HCM. All four credentials are required on every authentication call.
Why is my UKG Pro authentication returning 401 even with correct credentials?
The most common cause is a missing US-Customer-Api-Key header on the auth call. This header is required on the login request itself, not just on subsequent data calls. The second most common cause is using the wrong hostname — verify that you are using your company-specific UKG Pro hostname rather than a generic URL. Third: check that your service account has Web Services permissions enabled in UKG Pro Administration.
Does UKG Pro use Bearer tokens?
No. UKG Pro's core HCM REST APIs use a token-based scheme where the token is sent as the raw Authorization header value — without the Bearer prefix. Authorization: {token} is correct; Authorization: Bearer {token} will return 401 on all data calls. This is different from standard OAuth 2.0 behavior.
How do I paginate through all employee records?
UKG Pro uses page and per_page query parameters. Start with ?page=1&per_page=100 and increment page until the response returns fewer records than per_page. Do not call the endpoint without pagination parameters in production — you will only receive the first page of results, with no indication that more exist.
What is the difference between the UKG Pro API and the UKG Ready API?
UKG Pro is the enterprise HCM platform (formerly UltiPro) with people, payroll, benefits, and talent modules. Its API uses tenant-specific hostnames and the authentication flow described in this guide. UKG Ready (formerly Kronos Workforce Ready) is a separate product for SMB workforce management with a completely different API hosted at secure7.saashr.com. The two products have different endpoints, different authentication flows, and different data models — integrations built for one will not work for the other.
What are the rate limits for the UKG Pro API?
Rate limits are configured per UKG Pro environment and are not published as universal figures — they depend on your contract and tenant configuration. Check your UKG Pro environment documentation or contact UKG Support for your specific limits. Practically, batch your calls, implement pagination at reasonable page sizes (25–100 records), and add a short delay between pages for large data pulls.
Does UKG Pro support webhooks for employee data changes?
Yes. UKG has introduced webhooks through the UKG Webhooks Premium feature (available on the UKG Pro Platform). This lets you subscribe to change events rather than polling the employees endpoint on a schedule. For teams that need near-real-time sync without polling overhead, webhooks are the right architectural choice. See the UKG Developer Hub (developer.ukg.com/proplatform/docs/welcome-to-ukg-webhooks) for setup details.
Does UKG Pro have a sandbox environment?
Yes. Sandbox access must be requested through UKG Support. Your sandbox environment will have a separate hostname and separate credentials from your production environment. Always test new integrations and version updates in sandbox before running against production data.
Monitor UKG’s release notes and test your integration in a sandbox during upgrades.
If you're building a product that needs to integrate with UKG Pro or UKG Ready (and likely other HRIS platforms — Workday, BambooHR, Darwinbox, ADP, HiBob), Knit gives you a single normalized API for all of them.
Instead of managing four separate UKG credentials, tenant-specific hostnames, token refresh logic, pagination, and API version changes for each platform you support, you integrate once with Knit. Knit handles authentication, token management, data normalization, rate limit handling, and API maintenance across 160+ HRIS, ATS, CRM, and accounting platforms.
For UKG specifically, Knit supports UKG Pro and UKG Ready through the same unified API interface — the same code that reads BambooHR employee data reads UKG data without modification.
For AI use cases, Knit MCP Servers give AI agents direct access to UKG employee data through the Model Context Protocol — no API integration code required.
Get started with Knit or book a demo.
Darwinbox ATS sits at the core of hiring operations for many fast-growth companies, but extracting structured, reliable candidate data through the API can quickly turn into a multi-hour engineering effort. This guide breaks down the exact workflow for pulling job application data using the Darwinbox ATS API, without the guesswork.
This article is part of a larger deep-dive series on the ATS API, covering authentication models, rate limits, job postings, candidate records, and more. You can explore the complete guide here.
requestsBulk Candidate Data (V3):https://{{subdomain}}.darwinbox.in/JobsApiv3/BulkCandidatesData
import requests

url = "https://{{subdomain}}.darwinbox.in/JobsApiv3/BulkCandidatesData"
headers = {
    "Content-Type": "application/json"
}
payload = {
    "api_key": "your_api_key",
    "candidate_id": ["candidate_id_here"]
}

response = requests.post(
    url,
    auth=('username', 'password'),
    headers=headers,
    json=payload
)

print(response.json())import requests
url = "https://{{subdomain}}.darwinbox.in/JobsApiv3/BulkCandidatesData"
headers = {
"Content-Type": "application/json"
}
payload = {
"api_key": "your_api_key",
"created_from": "start_date_here", # dd-mm-yyyy hh:mm:ss
"created_to": "end_date_here"
}
response = requests.post(
url,
auth=('username', 'password'),
headers=headers,
json=payload
)
print(response.json())Getting the API to behave consistently requires precision. Here are the biggest tripwires:
Even minor typos in username/password cause silent 401 failures.
Darwinbox keys may be environment-specific. Validate you’re using the right one.
Teams often confuse sandbox vs production subdomains.
Darwinbox is strict about dd-mm-yyyy hh:mm:ss. Anything else breaks the request.
Bulk fetches may need pagination, retries, or queueing on your side.
Multiple bulk requests back-to-back can get throttled.
Candidate objects come with deeply nested sections — mapping them into your system requires a proper schema plan.
1. What format does the Darwinbox API key follow?
A string token issued by the Darwinbox team. It must be included in every call.
2. How do I authenticate?
Use Basic Auth (username + password) along with the API key in the payload.
3. Can I fetch multiple candidates in one call?
Yes, pass a list of candidate IDs in candidate_id.
4. What date format is required for bulk fetch?dd-mm-yyyy hh:mm:ss. Anything else is rejected.
5. How do I troubleshoot error responses?
Check:
6. Is there a limit to bulk fetching?
Darwinbox may throttle heavy loads. Check with your account team for exact limits.
7. How do I keep the integration secure?
Use HTTPS, rotate API keys, and store credentials in a secrets manager.
If you want to avoid maintaining the entire integration lifecycle, authentication, retries, throttling, schema handling, and version upgrades, Knit abstracts all of it. A single integration with Knit unlocks seamless access to Darwinbox ATS API data, removes ongoing maintenance overhead, and ensures the API behaves reliably at scale. It’s the fastest way to productionize a Darwinbox integration.
%20(3).png)
This guide is part of our growing collection on CRM integrations. We’re continuously exploring new apps and updating our CRM Guides Directory with fresh insights.
Salesforce offers more than seven distinct APIs. REST, SOAP,Bulk, Streaming, Metadata, GraphQL, Connect — each designed for a differentjob. Most developers starting out pick one and assume it covers everything. It doesn't.
OAuth 2.0 setup trips people up the first time. API calllimits catch teams by surprise in production. And if you're building acustomer-facing integration — where your product connects to your customers' Salesforce orgs — there's a whole additional layer of complexity around schemanormalisation and per-org auth that most guides don't address at all.
This guide covers the full picture: which Salesforce API touse for which job, how authentication and licensing work, what the rate limitsactually are, and how to build integrations that hold up in production —whether you're writing internal automation or shipping a Salesforce integration as a product feature.
Salesforce API integration involves connecting your business applications to Salesforce's APIs. This enables a smooth exchange of data and automated workflows. It helps you leverage the powerful functionality of all connected platforms.
There are two distinct contexts where Salesforce API integration comes up:
• Internal integrations: connecting Salesforce to other tools your team uses — syncing leads from Salesforce into a marketing platform, pushing closed-won deals into your billing system, or keeping your HRIS and Salesforce user records in sync. You control both ends.
• Customer-facing integrations: you're building a SaaS product and your customers want to connect it with their Salesforce org — pulling contact or deal data into your platform, or pushing activity data back into Salesforce. You don't control the customer's org configuration, field schema, or API version.
The right approach, tooling, and architecture differ significantly between the two. This guide covers both.
Salesforce has seven primary APIs. Most developers default to the REST API — which is correct for most use cases — but understanding when to use each one will save you from building something that breaks at scale
Overview of Salesforce APIs
Salesforce offers several APIs for different integration needs:
Knowing these APIs helps you choose the right tools for your integration goals.
Looking for a quick start with Salesforce Integrations? Check our Salesforce API Directory for common Salesforce API endpoints
Use case drives the choice. Here's the quick decision guide:
For most integrations, REST API is the right starting point. Switch to Bulk API 2.0 the moment you're dealing with record volumes above 10,000 — the REST API will hit rate limits fast at that scale, and Bulk API 2.0 is explicitly designed for it.
Integrating Salesforce APIs is essential for modern businesses to stay agile and customer-focused. Here’s why it’s so important:
Salesforce API Integration ensures a seamless flow of data via Salesforce and other
business applications. This integration improves communication and collaboration by
ensuring all members have access to real-time data
Salesforce brings customer data from diverse sources into a centralized repository. Data such as sales interactions, support tickets, social media engagement, and marketing campaigns provide insights into customer's needs and behavior. With this understanding engagement strategies can bring a major impact.
Integrating Salesforce APIs isn’t just about making systems talk to each other—it’s about unlocking valuable insights, optimizing processes, and creating a responsive, customer-centered organization.
To start integrating with Salesforce APIs, you need to create a Salesforce Developer Account. Here you can create and test your custom application:
After logging in, you’ll have full access to your Salesforce Developer Organization, where you can begin building and testing your API integrations.
Proper authentication is essential for secure API interactions.
Security tokens are only needed if you're still using the Username-Password OAuth flow described above, which Salesforce is retiring. New integrations should use the Client Credentials flow instead, which doesn't require a security token at all. If you're maintaining an older integration that still needs one:
Salesforce supports OAuth 2.0 for authentication through a Connected App's Consumer Key and Consumer Secret. For server-to-server integrations, use the Client Credentials flow:
Note: the older Username-Password flow (grant_type=password, with username/password plus security token) is disabled by default on new Salesforce orgs as of Salesforce's security policy change and is being retired - don't build new integrations on it. If your integration needs to act as a specific Salesforce user rather than a dedicated service account, use the Web Server (Authorization Code) flow instead.
By authenticating, you receive an access token and an instance_url - send the access token in the Authorization header of subsequent API requests. For the full setup walkthrough and a working curl example, see Knit's guide on How to Get a Salesforce API Key
One of the most common blockers after getting OAuth working is hitting an "API_CURRENTLY_DISABLED" error. This usually means the integration user's profile doesn't have API access enabled — not an auth problem, a licensing one.
• Enterprise, Unlimited, Performance, and Developer editions include API access by default.
• Professional edition does not include API access by default — you need the API Access add-on (available at extra cost from Salesforce).
• Essentials edition does not support API access.
1. Go to Setup → Users → Profiles
2. Select the profile assigned to your integration user
3. Under System Permissions, check "API Enabled"
4. Save the profile
Rather than modifying a shared profile, create a dedicated permission set for API access and assign it to your integration user. This keeps your profile settings clean and makes it easy to audit which users have API access.
5. Setup → Permission Sets → New
6. Under System Permissions, enable "API Enabled"
7. Save, then assign to your integration user via Manage Assignments
Salesforce introduced a dedicated Integration User license designed for API-only access. Unlike a standard user license, it restricts the user to API access only (no UI login) and is priced lower. If you're setting up a dedicated service account for your integration, this is the right license to use. Find it under Setup → Users → New User → User License → Salesforce Integration.
Manage potential customers using the Lead object:
Handle user accounts and permissions:
Salesforce provides an Open API specification for its REST API, enabling:
Manage company and organisation records:
- Create an Account: POST /services/data/vXX.X/sobjects/Account/
- Retrieve an Account: GET /services/data/vXX.X/sobjects/Account/{AccountId}
- Update an Account: PATCH /services/data/vXX.X/sobjects/Account/{AccountId}
- List all Accounts (SOQL): GET /services/data/vXX.X/query/?q=SELECT+Id,Name,Industry+FROM+Account
To see how many API calls you have left before hitting your daily limit:
• GET /services/data/vXX.X/limits
• Look for "DailyApiRequests" in the response — it returns both the daily limit and the remaining count.
• Call this endpoint at the start of batch operations to confirm you have sufficient headroom.
Ensure you use the correct method and endpoint for each operation to avoid errors.
Salesforce APIs typically return JSON responses:
Contain fields like id, success, and errors.
Example:
{
"id": "00Q1I000004W2XxUAK",
"success": true,
"errors": []
}
Provides error codes and messages. Properly parsing these responses is crucial for handling the results of your API calls.
Example:
{
"message": "Required fields are missing: [LastName]",
"errorCode": "REQUIRED_FIELD_MISSING",
"fields": ["LastName"]
}
Hitting Salesforce's API limits in production is one of the most common integration failures — and one of the easiest to avoid if you planfor them upfront.
These limits reset every 24 hours on a rolling basis, not at midnight. Your Salesforce org's limit details are visible under Setup → Company Information → API Requests, Last 24 Hours.
Bulk API 2.0 limits (separate from REST limits)
• Bulk API 2.0 jobs do not count against your daily REST API call limit — they have their own governor.
• Max 10,000 Bulk API 2.0 jobs per rolling 24-hour period per org.
• Max 150 million records processed per rolling 24-hour period.
• Use Bulk API 2.0 any time you're processing more than 2,000 records — it's purpose-built for it.
Streaming API limits
• Max 1,000 concurrent clients per org (across all channels).
• Max 100 PushTopic or StreamingChannel objects per org.
• Message delivery guaranteed for clients connected within the 24-hour replay window.
Best practices to stay within limits
• Cache responses where the data doesn't change frequently — don't call the API on every page load.
• Use SOQL queries with specific field lists (SELECT Id, Name FROM Contact) rather than retrieving full objects to reduce payload and processing time.
• Implement exponential backoff when you receive REQUEST_LIMIT_EXCEEDED — wait, then retry with increasing delays.
• Switch to Bulk API 2.0 for any batch operation above 2,000 records.
• Monitor usage via GET /services/data/vXX.X/limits and set up API Usage Notifications in Setup to alert you before you hit 80% of your daily limit.
If you're a SaaS developer, there's a version of this problem that's harder than it looks: you need to let your customers connect your product to their Salesforce org. Not just one org — potentially hundreds of different customer orgs, each with different custom fields, different object configurations, and different API versions.
The challenge with direct Salesforce connectors
Building a direct connector to Salesforce works fine for the first customer. By the tenth, you start running into problems:
• Every customer's Salesforce schema is different. Custom fields, custom objects, different field names for the same concept ("Deal Value" in one org, "Opportunity Amount" in another).
• OAuth token management per customer org — you need to store, refresh, and handle expiry for each customer's credentials separately.
• API version drift — Salesforce releases three major API versions per year. Connectors built against v57.0 may behave differently against v66.0.
• Support load — when a customer's integration breaks (and it will), you're debugging their specific Salesforce configuration.
The unified API alternative
Knit's unified CRM API lets you integrate once and support Salesforce plus other CRMs (HubSpot, Pipedrive, Zoho) through a single normalised data model. Instead of writing against each CRM's different schema, you work with consistent Knit objects — Contact, Account, Deal, Activity — and Knit handles the translation to each underlying CRM.
• One integration covers Salesforce + other CRMs your customers use
• Knit handles OAuth per customer org — your platform never stores raw Salesforce credentials
• Normalised schema: a Knit Contact object has the same fields regardless of whether the source is Salesforce, HubSpot, or Pipedrive
• Real-time sync via Knit webhooks — no polling required
When to build direct vs. when to use a unified API
Documentation for Knit's CRM API: developers.getknit.dev
Here is an Authenticate using the OAuth 2.0 Username-Password flow. You can use the username-password flow to authorize a client via a connected app that already has the user’s credentials.
Steps for the username password flow:
Understanding the parameter description, request, and response of access tokens in the salesforce API authentication flow is crucial.
Creating a new Account:
curl https://MyDomainName.my.salesforce.com/services/data/v66.0/sobjects/Account/ -H "Authorization: Bearer token" -H "Content-Type: application/json" -d "@newaccount.json"
Example of request body
{
"Name" : "Express Logistics and Transport"
}
Example response body after successfully creating a new Account
{
"id" : "001D000000IqhSLIAZ",
"errors" : [ ],
"success" : true
}Programmatically manage user accounts:
Enhance sales processes:
Use the Open API specification to:
Trigger: a new Lead is created or updated in Salesforce. Action: create or update the corresponding contact in HubSpot, Marketo, or another marketing platform. Implementation: use Streaming API (PushTopic on Lead) to detect changes in real-time, then REST API to read the full Lead record and push it to the marketing platform.
Trigger: an Opportunity is marked Closed Won in Salesforce. Action: generate an invoice or contract record in the billing system (e.g., Zuora, QuickBooks, NetSuite). Implementation: PushTopic on Opportunity.StageName, REST API to read deal details, then push to billing via that system's API. Use Bulk API 2.0 for end-of-month reconciliation syncs.
Sync Salesforce Cases to Zendesk or Intercom, or let support agents see Salesforce account and deal data in the helpdesk without leaving it. Implementation: Streaming API on Case object to detect new/updated cases, REST API to read case details, push to support tool API. Reverse sync: support tool webhooks trigger REST API PATCH on the Salesforce Case.
Your SaaS product needs to pull contact, deal, or account data from a customer's Salesforce org and display it or act on it within your product. The customer connects their Salesforce account via OAuth, and your platform syncs their CRM data. At scale across many customers (each with different Salesforce schemas), this is where a unified API like Knit adds the most value — you receive normalised Contact and Deal objects regardless of how each customer's org is configured.
AI agents (built on Claude, GPT-4, or other LLMs) increasingly need access to live CRM data for sales intelligence, pipeline analysis, and customer context. Knit's MCP Server exposes Salesforce contact, account, and deal data in a format AI agents can query directly — without requiring the agent to understand Salesforce's SOQL query language or API structure.
Moving 500K+ records from a legacy CRM into Salesforce. Always use Bulk API 2.0 for this — never REST API. Upload CSV batches of up to 150 million records per 24h. Monitor job status via GET /services/data/vXX.X/jobs/ingest/{jobId} and handle failed record batches via the failedResults endpoint.
Knit offers a unified API platform that simplifies integration with Salesforce and other services.
Knit simplifies authentication by managing tokens and sessions internally. You only need to use your Knit API key for requests.
By leveraging Knit, you can:
Best Practices:
Understanding how fields map between Salesforce and Knit is crucial. Here's a table illustrating common mappings:

Using this mapping ensures that data is correctly transferred between systems.
If you're building a customer-facing Salesforce integration, API versioning is a more significant concern than for internal tools — because you can't control when your customers' orgs upgrade or how their Salesforce admins configure API version settings.
• Always specify an explicit API version in your endpoint paths (e.g., /services/data/v66.0/) rather than using "latest" — this prevents silent behaviour changes when Salesforce ships a new version.
• Test against new Salesforce releases in a developer sandbox before your customers' orgs auto-upgrade. Salesforce publishes a release calendar 90 days in advance.
• If using a unified API provider like Knit, API versioning is handled by the platform — your integration code stays stable as Salesforce versions change.
Salesforce's API surface is broad, but the decision of which API to use for which job follows a clear pattern: REST for standard operations, Bulk for large datasets, Streaming for real-time events, Metadata for configuration. Get authentication right upfront — use a dedicated integration user with the correct license and permission set — and plan for rate limits before you hit production.
If you're building an internal Salesforce integration, the Salesforce REST API and the resources in this guide are everything you need to get started. The official Trailhead module and Salesforce Developer Documentation are the authoritative references for anything not covered here.
If your SaaS product needs to connect to customers' Salesforce orgs — pulling contacts, deals, account data, or activities — Knit's unified CRM API handles the hard parts: OAuth per customer org, schema normalisation across Salesforce and other CRMs, and real-time sync without polling.
• One Knit integration → Salesforce + HubSpot + Pipedrive + more through a single normalised CRM data model
• Knit handles token storage and refresh per customer org — your platform never holds raw Salesforce credentials
• Consistent Contact, Account, Deal, and Activity objects regardless of each customer's Salesforce schema
• Real-time sync via webhooks with a 99.9% uptime SLA
Documentation: developers.getknit.dev Schedule a demo: getknit.dev/book-demo
Salesforce API integration is the process of connecting external applications to Salesforce using one of its APIs — REST, SOAP, Bulk, Streaming, Metadata, GraphQL, or Connect. This allows external systems to read, create, update, or delete Salesforce records, subscribe to real-time data changes, or deploy configuration changes. Integrations can be internal (connecting Salesforce to your own tools) or customer-facing (built into a SaaS product so your customers can connect their Salesforce orgs to your platform).
Salesforce has seven primary APIs: REST API (standard CRUD operations), SOAP API (enterprise XML-based integrations), Bulk API 2.0 (asynchronous batch operations for large datasets), Streaming API / Pub/Sub API (real-time change notifications), Metadata API (deploying configurations and schema changes), GraphQL API (precise field-level queries), and Connect REST API (Chatter, Communities, and Experience Cloud). For most integrations, REST API is the right starting point. Use Bulk API 2.0 for any operation involving more than 10,000 records.
Salesforce uses OAuth 2.0 for API authentication. For server-to-server integrations, use the Client Credentials flow: POST to https://login.salesforce.com/services/oauth2/token with grant_type=client_credentials plus your Connected App's client_id and client_secret. The response includes an access_token and instance_url - send the access token in subsequent API request headers as "Authorization: Bearer {token}" against that instance_url. The older Username-Password flow (grant_type=password) is being retired and is disabled by default on new orgs. For customer-facing integrations where your customers authenticate their own Salesforce orgs, use the Web Server (Authorization Code) flow instead.
Use REST API for standard create, read, update, delete operations on Salesforce objects — it covers the vast majority of integration use cases. Switch to Bulk API 2.0 when processing more than 10,000 records — REST API will hit governor limits fast at that scale. Use Streaming API / Pub/Sub API when you need real-time notifications of record changes rather than polling. Use Metadata API only for deploying configuration changes (custom fields, layouts). If you're building a customer-facing integration across multiple CRMs, a unified API like Knit normalises Salesforce data alongside HubSpot, Pipedrive, and others through a single endpoint.
Salesforce's daily API request limit depends on your edition and license provisioning. Enterprise edition starts at 100,000 requests per 24 hours and increases based on your provisioned licenses. Unlimited and Performance editions have a higher base allocation. Developer orgs get 15,000 per day. The daily limit is a soft limit — Salesforce won't immediately block you at the threshold, but sustained excess will trigger a hard HTTP 403 REQUEST_LIMIT_EXCEEDED. Bulk API 2.0 has separate limits and does not count against the REST API daily quota. Check your remaining calls via GET /services/data/vXX.X/limits and set up API Usage Notifications in Setup to alert you before you hit your limit.
Professional edition does not include API access by default. You need to purchase the API Access add-on from Salesforce. Enterprise, Unlimited, Performance, and Developer editions include API access. If you're setting up a dedicated integration user, the Salesforce Integration User license is designed for API-only access at a lower per-seat cost than a standard user license — configure it under Setup → Users → User License → Salesforce Integration.
If you only need Salesforce, build directly against the Salesforce REST API. If you need to support multiple CRMs (Salesforce plus HubSpot, Pipedrive, or others) for different customers, a unified API like Knit is significantly faster: you integrate once with Knit and get normalised CRM data across all supported platforms through a consistent data model. Knit handles OAuth per customer org, schema normalisation, and API versioning — so your product code stays stable as Salesforce versions change. See developers.getknit.dev for the CRM API documentation.
In today's business world, organizations are constantly looking for ways to optimize workflows, save time, and reduce errors. From document creation and approval to secure signing, status tracking, and payments—it can be a lengthy process. PandaDoc simplifies this by offering a 360-degree agreement management solution that eliminates delays in contract approvals through instant e-signatures and automated approval workflows. By leveraging the PandaDoc API, you can integrate PandaDoc’s powerful functionalities directly into your existing systems, enhancing efficiency and user experience.
If you directly want to jump to building a Pandadoc Integration, you can learn leverage the Pandadoc API directory we wrote.
Over 50,000 fast-growing companies worldwide—including Uber, Stripe, HP, and Bosch—rely on PandaDoc to streamline their document workflows. By integrating PandaDoc, these companies reduce document creation time by up to 80%, accelerate deal closures, and improve client satisfaction.
PandaDoc provides a range of services designed to simplify how businesses handle their document workflows:
By harnessing the PandaDoc API and related PandaDoc integrations, you can embed these services directly into your existing applications.
The PandaDoc API offers a rich set of features that empower developers to build robust document solutions:
By integrating the PandaDoc API, businesses can transform their operations in tangible ways:
PandaDoc CRM Integrations are a game-changer for sales teams and customer relationship managers. With these integrations, you can:
By combining PandaDoc with your favorite CRM, you gain a unified view of each customer and deal, improving efficiency and boosting close rates. For more details, refer to the PandaDoc API Documentation or your CRM’s marketplace for specific integration steps.
Below is a detailed process for integrating PandaDoc into your application or workflows. These steps also mirror many standard processes in the PandaDoc API documentation.
For Python environments:
nginx
pip install requestsTypically involves four sub-steps:
For details, see the PandaDoc OAuth2 documentation.
Templates are the backbone of your document generation:
{{FirstName}} or {{CompanyName}}.Map data fields in your application to tokens in your PandaDoc template.
Use the template and mapped data to create a new document. For full details, see PandaDoc’s “Create Document from Template” guide.
<details><summary>Example Code: Create a Document</summary>
import requests

API_URL = 'https://api.pandadoc.com/public/v1/documents'

data = {
    "name": "Proposal for {{CompanyName}}",
    "template_uuid": "template_uuid_here",
    "recipients": [
        {
            "email": "client@example.com",
            "first_name": "Alice",
            "last_name": "Smith",
            "role": "Signer"
        }
    ],
    "tokens": [
        {"name": "FirstName", "value": "Alice"},
        {"name": "CompanyName", "value": "Acme Corp"},
        {"name": "ProposalAmount", "value": "$10,000"}
    ]
}

headers = {
    "Authorization": "API-Key your_api_key_here",
    "Content-Type": "application/json"
}

response = requests.post(API_URL, headers=headers, json=data)
document = response.json()
print(document)
</details>
Send the newly created document to your recipients:
<details><summary>Example Code: Send a Document</summary>
document_id = document['id']
send_url = f'https://api.pandadoc.com/public/v1/documents/{document_id}/send'

send_data = {
    "message": "Hello Alice, please review and sign the attached proposal.",
    "subject": "Proposal for Acme Corp"
}

send_response = requests.post(send_url, headers=headers, json=send_data)
print(send_response.status_code)  # Expect 202 if successful
</details>
Use the document ID to check if it has been viewed or signed:
status_url = f'https://api.pandadoc.com/public/v1/documents/{document_id}'
status_response = requests.get(status_url, headers=headers)
status_info = status_response.json()
print(f"Document Status: {status_info['status']}")Set up webhooks in Settings > Integrations > Webhooks to receive real-time updates on document events. For more info, see PandaDoc Webhooks Documentation.
Perform unit tests for individual functions and integration tests for the end-to-end workflow.
PandaDoc doesn’t publish an official Python SDK, but its REST API works with any HTTP client,and the requests library covers nearly everything most integrations need. Here’s a minimal example that authenticates with an API key and creates a document from an existing template:
import requests
API_KEY = "your-api-key"
BASE_URL = "https://api.pandadoc.com/public/v1"
headers = {
 "Authorization": f"API-Key {API_KEY}",
 "Content-Type": "application/json"
}
payload = {
 "name": "New Proposal",
 "template_uuid": "TEMPLATE_UUID",
 "recipients": [
 {"email": "client@example.com", "first_name": "Jane",
 "last_name": "Doe", "role": "Client"}
 ]
}
response = requests.post(f"{BASE_URL}/documents", json=payload, headers=headers)
document_id = response.json()["id"]
print(f"Created document: {document_id}")
For larger integrations, community-maintained Python wrappers (search “pandadoc-python” on PyPI) can reduce boilerplate, but most teams find the raw requests approach is enough —PandaDoc’s endpoints map cleanly to standard REST verbs. Be mindful of the rate limits covered in the Troubleshooting section below, especially when looping over /documents calls to create many documents in sequence.
Understanding core endpoints is vital for successful PandaDoc integrations. Below are some frequently used endpoints; you can view more in the PandaDoc API documentation.
POST /documentsGET /documents/{id}POST /documents/{id}/sendGET /documentsFor the complete set of endpoints, refer to the official PandaDoc API reference.
While integrating PandaDoc directly can be straightforward, managing multiple integrations can become complex. Knit, a unified API platform, simplifies this process by allowing developers to integrate PandaDoc and other services seamlessly through a single API.
Knit handles complexities in the background, allowing you to focus on value-adding features.
If your integration starts returning 429 Too Many Requests, you’ve exceeded PandaDoc’s API rate limits. PandaDoc’s default limit is 60 requests per minute for general API usage, but several high-volume endpoints have higher published limits: Create Document from Template(500/min), Get Document Details (600/min), Create Document from PDF (300/min), and Download Document (100/min). If you’re testing in the Sandbox environment, note that limits there are capped separately at 10requests per minute per endpoint - production limits don’t apply until you move to a live account. To avoid 429 errors: batch document creation requests where possible, add exponential backoff and retry logic for failed requests, and cache document or template metadata locally instead of re-fetching it on every call.
The broader market this fits into is growing fast: Grand View Research values the global intelligent document processing market at \$2.30 billion in 2024 and projects it will grow at a CAGR of 33.1% from 2025 to 2030, reaching $12.35 billion by 2030.
Staying ahead of these trends will keep your application competitive and future-proof.
Many companies seek advanced document automation and workflow solutions to reduce manual tasks and deliver greater value to end users. By integrating the PandaDoc API, you can revolutionize how your application handles proposals, contracts, and e-signatures—ultimately improving sales efficiency and client satisfaction.
For a more streamlined process, consider Knit—a unified API that simplifies integrating PandaDoc (along with other services), so your development team can focus on innovating rather than juggling multiple APIs.
Ready to get started with PandaDoc Integrations or PandaDoc CRM Integrations? Book a call with Knit for personalized guidance, and take the first step toward modernizing your document workflows.
Yes — PandaDoc provides a RESTAPI for creating, sending, tracking, and signing documents programmatically, along with SDKs, a Postman collection, and webhooks for real-time status updates. If you need PandaDoc connected alongside other tools in your stack — a CRM, HRIS, or additional e-signature platforms — Knit’s Unified API can bring that data together through a single integration; PandaDoc connectors can be added to Knit’s catalog within days via its AI Connector Builder. The PandaDoc API mirrors most actions available in the PandaDoc app: generating documents from templates, managing recipients and roles, tracking document status, and capturing legally binding eSignatures. A free sandbox account is available for testing before you commit to a paid plan.
PandaDoc’s default API rate limit is 60 requests per minute for general usage. Several high-volumeendpoints have higher published limits: Create Document from Template allows upto 500 requests per minute, Get Document Details up to 600, Create Documentfrom PDF up to 300, and Download Document up to 100. The Sandbox environmenthas a separate, lower cap of 10 requests per minute per endpoint, so don’t usesandbox limits to estimate production capacity. Exceeding any limit returns a429 Too Many Requests error — handle this with exponential backoff and requestbatching. If your integration also needs real-time updates without constantpolling, Knit’s virtual webhooks can deliver normalized change events forplatforms that don’t support native webhooks, reducing the number of API callsyour integration needs to make.
PandaDoc’s API pricing has threetiers: a free plan covering 60 documents per year, 5 templates, 2 recipientsper document, and a full sandbox for testing; an API Developer plan at\$40/month after a 14-day free trial, starting at 40 documents per month andscaling with usage; and a custom Enterprise plan that adds CRM integrations(Salesforce, HubSpot), Notary, SSO, and advanced security. For teams evaluatinga unified API platform alongside PandaDoc, Knit uses flat-tier pricing ratherthan per-document costs, which can make budgeting more predictable as you addintegrations beyond PandaDoc. Always check pandadoc.com/api/pricing directly,since API pricing is updated independently of PandaDoc’s standard plans.
The better choice depends on what you need beyond e-signatures. If your product needs to support customers using either platform without building two separate integrations, Knit’s Unified E-Sign API already includes a pre-built DocuSign connector, with PandaDoc connector support available on request via Knit’s AI Connector Builder. On theplatforms themselves: PandaDoc bundles document generation, proposals, andquotes into its API, making it a strong fit for sales teams that build and senddocuments, not just sign them. DocuSign’s API is more narrowly focused onsigning and agreements, with a larger ecosystem of enterprise compliancecertifications. Most teams choose based on which platform their targetcustomers already use — and for SaaS products supporting multiple e-signaturetools, a unified API removes the need to maintain separate integrations foreach.
The PandaDoc API is a standard REST API, so it works with any programming language that can make HTTP requests— Python, Node.js, Ruby, PHP, Java, Go, and more. PandaDoc maintains official SDKs and a Postman collection to speed up integration, and for Python specifically, most teams use the requests library directly since PandaDoc’s endpoints map cleanly to standard REST verbs (GET, POST, PATCH, DELETE) without needing a dedicated wrapper. Authentication uses either an API key (simplest for server-to-server integrations) or OAuth 2.0 (recommended for apps acting on behalf of multiple PandaDoc users). If you’re building a customer-facing integration that needs to support PandaDoc alongside other document ore-signature tools, Knit’s Unified API normalizes authentication and data models across platforms so your team writes integration logic once.
PandaDoc supports twoauthentication methods: API keys and OAuth 2.0. API keys are the simplestoption — generate one from your PandaDoc developer dashboard and include it inthe Authorization header as “API-Key {your_key}” for server-to-server integrationswhere you control the PandaDoc account. OAuth 2.0 is required if yourapplication needs to act on behalf of other PandaDoc users — for example, ifyou’re building a product that connects to your customers’ PandaDoc accounts.OAuth requires registering an app, implementing the authorization code flow,and handling token refresh, since access tokens expire. For integrations thatspan PandaDoc and other platforms, Knit handles OAuth setup, token storage, andrefresh automatically across every connected app, so your team doesn’t maintainseparate auth flows per integration.
Yes. The PandaDoc API supports afully headless workflow: create a document from a template via the API,populate fields and recipients programmatically, and call the send endpoint —all without a user ever opening the PandaDoc interface. Recipients receive thedocument by email and sign through PandaDoc’s hosted signing experience, or youcan use embedded signing to keep the entire flow inside your own product. Thisis the most common pattern for SaaS products that generate contracts,proposals, or order forms automatically based on data already in their system.If that data lives across multiple platforms — your CRM, billing system, orHRIS — Knit can sync the relevant fields into your product first, so thedocument generation step always has accurate, up-to-date data to work with.
Knit is a unified API platformthat lets SaaS products connect to 100+ HRIS, ATS, CRM, and e-signature toolsthrough a single integration instead of building and maintaining one perplatform. For teams working with PandaDoc, Knit’s most direct fit today is onthe e-signature side: Knit’s Unified E-Sign API already includes pre-builtconnectors for DocuSign, Adobe Sign, Digio, E-Mudhra, and Leegality, so if yourcustomers use a mix of e-signature tools alongside PandaDoc, Knit can handlethe others through one API. PandaDoc itself isn’t yet a pre-built Knitconnector, but Knit’s AI Connector Builder can typically add a new connector —including normalized data models and virtual webhook support — within a coupleof days. If PandaDoc is part of a broader integration need, book a call withKnit’s team to scope it out.
Sage Intacct API integration allows businesses to connect financial systems with other applications, enabling real-time data synchronization and reducing errors and missed opportunities. Manual data transfers and outdated processes can lead to errors and missed opportunities. This guide explains how Sage Intacct API integration removes those pain points. We cover the technical setup, common issues, and how using Knit can cut down development time while ensuring a secure connection between your systems and Sage Intacct.
Sage Intacct API integration integrates your financial and ERP systems with third-party applications. It connects your financial information and tools used for reporting, budgeting, and analytics.
The Sage Intacct API documentation provides all the necessary information to integrate your systems with Sage Intacct’s financial services. It covers two main API protocols: REST and SOAP, each designed for different integration needs. REST is commonly used for web-based applications, offering a simple and flexible approach, while SOAP is preferred for more complex and secure transactions.
By following the guidelines, you can ensure a secure and efficient connection between your systems and Sage Intacct.
Integrating Sage Intacct with your existing systems offers a host of advantages.
Before you start the integration process, you should properly set up your environment. Proper setup creates a solid foundation and prevents most pitfalls.
A clear understanding of Sage Intacct’s account types and ecosystem is vital.
A secure environment protects your data and credentials.
Setting up authentication is crucial to secure the data flow.
An understanding of the different APIs and protocols is necessary to choose the best method for your integration needs.
Sage Intacct offers a flexible API ecosystem to fit diverse business needs.
The Sage Intacct REST API offers a clean, modern approach to integrating with Sage Intacct.
Note (2025): Sage Intacct has designated the XML API as legacy. All new objects and features are now released via the REST API only. The XML API remains supported for existing integrations, but new builds should use the REST API. See developer.intacct.com for the current migration guidance.
Curl request:
curl -i -X GET \ 'https://api.intacct.com/ia/api/v1/objects/cash-management/bank-acount {key}' \-H 'Authorization: Bearer <YOUR_TOKEN_HERE>'Here’s a detailed reference to all the Sage Intacct REST API Endpoints.
For environments that need robust enterprise-level integration, the Sage Intacct SOAP API is a strong option.
Each operation is a simple HTTP request. For example, a GET request to retrieve account details:
Parameters for request body:
<read>
    <object>GLACCOUNT</object>
    <keys>1</keys>
    <fields>*</fields>
</read>
Data format for the response body:
Here’s a detailed reference to all the Sage Intacct SOAP API Endpoints.
Comparing SOAP versus REST for various scenarios:
Beyond the primary REST and SOAP APIs, Sage Intacct provides other modules to enhance integration.
Now that your environment is ready and you understand the API options, you can start building your integration.
A basic API call is the foundation of your integration.
Step-by-step guide for a basic API call using REST and SOAP:
REST Example:
Example:
Curl Request:
curl -i -X GET \
https://api.intacct.com/ia/api/v1/objects/accounts-receivable/customer \
-H 'Authorization: Bearer <YOUR_TOKEN_HERE>'
Response 200 (Success):
{
  "ia::result": [
    {
      "key": "68",
      "id": "CUST-100",
      "href": "/objects/accounts-receivable/customer/68"
    },
    {
      "key": "69",
      "id": "CUST-200",
      "href": "/objects/accounts-receivable/customer/69"
    },
    {
      "key": "73",
      "id": "CUST-300",
      "href": "/objects/accounts-receivable/customer/73"
    }
  ],
  "ia::meta": {
    "totalCount": 3,
    "start": 1,
    "pageSize": 100
  }
}
Response 400 (Failure):
{
  "ia::result": {
    "ia::error": {
      "code": "invalidRequest",
      "message": "A POST request requires a payload",
      "errorId": "REST-1028",
      "additionalInfo": {
        "messageId": "IA.REQUEST_REQUIRES_A_PAYLOAD",
        "placeholders": {
          "OPERATION": "POST"
        },
        "propertySet": {}
      },
      "supportId": "Kxi78%7EZuyXBDEGVHD2UmO1phYXDQAAAAo"
    }
  },
  "ia::meta": {
    "totalCount": 1,
    "totalSuccess": 0,
    "totalError": 1
  }
}
SOAP(Legacy) Example:
Example snippet of creating a reporting period:
<create>
    <REPORTINGPERIOD>
        <NAME>Month Ended January 2017</NAME>
        <HEADER1>Month Ended</HEADER1>
        <HEADER2>January 2017</HEADER2>
        <START_DATE>01/01/2017</START_DATE>
        <END_DATE>01/31/2017</END_DATE>
        <BUDGETING>true</BUDGETING>
        <STATUS>active</STATUS>
    </REPORTINGPERIOD>
</create>Using Postman for Testing and Debugging API Calls
Postman is a good tool for sending and confirming API requests before implementation to make the testing of your Sage Intacct API integration more efficient.
You can import the Sage Intacct Postman collection into your Postman tool, which has pre-configured endpoints for simple testing. You can use it to simply test your API calls, see results in real time, and debug any issues.
This helps in debugging by visualizing responses and simplifying the identification of errors.
Mapping your business processes to API workflows makes integration smoother.
To test your Sage Intacct API integration, using Postman is recommended. You can import the Sage Intacct Postman collection and quickly make sample API requests to verify functionality. This allows for efficient testing before you begin full implementation.
Understanding real-world applications helps in visualizing the benefits of a well-implemented integration.
This section outlines examples from various sectors that have seen success with Sage Intacct integrations.
Industry
Joining a sage intacct partnership program can offer additional resources and support for your integration efforts.
The partnership program enhances your integration by offering technical and marketing support.
Different partnership tiers cater to varied business needs.
Following best practices ensures that your integration runs smoothly over time.
Manage API calls effectively to handle growth.
query, readByQuery, create, update, or delete call — query results are capped at 2,000 per call, so large datasets require multiple queries, each counting separately. Monitor your usage at Company → Admin → Usage Insights → API Usage. Higher tiers are available for additional fees — contact your Sage Intacct Customer Success Manager. Knit manages transaction volume automatically, batching requests and staying within tier limits to avoid unexpected overage charges.Security must remain a top priority.
Effective monitoring helps catch issues early.
No integration is without its challenges. This section covers common problems and how to fix them.
Prepare for and resolve typical issues quickly.
Effective troubleshooting minimizes downtime.
Long-term management of your integration is key to ongoing success.
Stay informed about changes to avoid surprises.
Ensure your integration remains robust as your business grows.
Knit offers a streamlined approach to integrating Sage Intacct. This section details how Knit simplifies the process.
Knit reduces the heavy lifting in integration tasks by offering pre-built accounting connectors in its Unified Accounting API.
This section provides a walk-through for integrating using Knit.
A sample table for mapping objects and fields can be included:
Knit eliminates many of the hassles associated with manual integration.
In this guide, we have walked you through the steps and best practices for integrating Sage Intacct via API. You have learned how to set up a secure environment, choose the right API option, map business processes, and overcome common challenges.
If you're ready to link Sage Intacct with your systems without the need for manual integration, it's time to discover how Knit can assist. Knit delivers customized, secure connectors and a simple interface that shortens development time and keeps maintenance low. Book a demo with Knit today to see firsthand how our solution addresses your integration challenges so you can focus on growing your business rather than worrying about technical roadblocks
Yes. Sage Intacct provides two API interfaces: the REST API (recommended for all new integrations, available at api.intacct.com) and the XML API (legacy, still supported but receiving no new features). The REST API uses standard HTTP verbs and OAuth 2.0 Bearer token authentication. It covers the full financial data model — customers, vendors, invoices, bills, GL accounts, and reporting objects. Knit's Unified Accounting API normalises Sage Intacct alongside QuickBooks, NetSuite, and Xero into a consistent schema, so teams build one integration rather than one per platform.
Sage Intacct enforces API transaction limits under a Performance Tier model (enforced April 2025). The default Tier 1 allows 100,000 transactions per month. Each query, readByQuery, create, update, or delete call counts as one transaction — query results are capped at 2,000 per call, so large datasets require multiple queries. Overages are charged at $0.15 per pack of 10 transactions. Monitor usage at Company → Admin → Usage Insights → API Usage. Knit manages transaction volume automatically to avoid unexpected overage charges.
The Sage Intacct REST API uses OAuth 2.0 Bearer token authentication. Register an application in the Sage Developer Portal to obtain a Client ID and Client Secret, then use the Authorization Code flow for user-delegated access. The legacy XML API uses Web Services credentials — a Sender ID, User ID, and Company ID passed in the XML request body. For new integrations, use OAuth 2.0 via the REST API. Knit handles the full OAuth flow for Sage Intacct; users authorise once and Knit manages token refresh automatically.
The REST API is Sage Intacct's current recommended interface — it uses standard HTTP verbs, JSON payloads, and OAuth 2.0 authentication. All new objects and features are released via REST only. The XML API (also called the SOAP or Web Services API) is the legacy interface — it uses XML request/response structures and Web Services credentials (Sender ID + User ID). It remains supported for existing integrations but receives no new features. New integrations should always use the REST API.
Yes — Sage Intacct provides an openly documented API available to any developer. The REST API documentation is published at developer.sage.com and the legacy XML API reference is at developer.intacct.com. Both are accessible without special partnership status, though production access requires a Sage Intacct subscription or a developer sandbox account. Some advanced modules (multi-entity consolidation, project accounting) require the corresponding Sage Intacct subscription to access via API.
Sage Intacct includes Sage Copilot, an AI assistant embedded natively in the product that proactively analyses financial data, surfaces insights, and responds to natural language queries within the application. For AI agent integrations (external tools calling Sage Intacct programmatically), the REST API provides the data layer — an external MCP server or AI agent can call Sage Intacct endpoints to retrieve invoices, GL balances, or vendor data as part of a multi-step workflow. Knit provides a unified accounting API that enables AI agents to query Sage Intacct alongside other accounting platforms through a consistent interface.
Sage Intacct provides a sandbox environment that mirrors your production account for safe testing. You can request a sandbox via the Sage Intacct Developer Portal at developer.intacct.com. If you don't have an existing Sage Intacct subscription, Sage offers a demo account at sage.com/intacct for proof-of-concept work. The sandbox uses the same API endpoints as production — note that the base URL differs slightly from production and must be configured separately in your integration. Knit might also be able provide access to a Sage Intacct sandbox for testing integrations built on the Knit platform -speak to your account manager to request for it.
Integrating systems isn’t just about connecting data—it’s about driving measurable efficiency. Recognized as a leader in Gartner’s Magic Quadrant, NetSuite is used by 43,000+ companies across 219 countries (Oracle, 2025), making it the dominant cloud ERP for the mid-market. When businesses connect NetSuite to their surrounding systems via API — billing, CRM, HR, analytics — they eliminate the manual export/import cycles that create data lag and errors. This guide covers NetSuite's three API surfaces (REST/SuiteQL, SOAP/SuiteTalk, and SuiteScript), authentication (Token-Based Auth and OAuth 2.0), rate limits, webhook patterns, and the fastest path to a production integration.. With NetSuite API integration, businesses can seamlessly link disparate tools in real-time, paving the way for smarter decisions and faster processes. Leveraging this integration creates a solid foundation for enhanced efficiency, informed decision-making, and measurable business growth.
Looking to quicktart with Nestuite API Integration? We've covered the common NetSuite API endpoints for developers.
NetSuite API integration links your ERP with other business systems. It uses APIs to exchange data automatically. You no longer rely on manual entry or spreadsheets. Data moves fast and stays current. When systems connect, your team makes decisions based on live data. Many companies join their sales, finance, and operations systems with NetSuite API integration.
NetSuite offers several API options. The REST API is useful for simple data operations. The SOAP API handles more complex tasks. SuiteScript lets you add custom code. Each option serves a specific purpose and improves operational efficiency.
There are several benefits of Netsuite API integration:
These benefits allow your team to focus on growth. They save time and reduce errors. You gain accuracy in reporting and smoother business operations with NetSuite integration.
Before you write code, you must prepare your environment. This section explains the prerequisites and steps to set up your NetSuite account for NetSuite API integration.
Before diving into API integration, ensure you have the following in place:
These prerequisites prepare you for a smooth setup. They ensure that your system is ready for the changes that NetSuite API integration brings.
A sandbox is a test environment that mirrors your production account. Use it to verify your integration steps safely.
These steps provide a reliable test space. You can verify your NetSuite API integration before moving to production.
Once your account is set up, enable API access. Follow these detailed steps:
Token-Based Authentication (TBA): A popular for many integrations, it uses tokens for authentication.
OAuth 2.0: More secure and adheres to modern standards
Basic Auth (SOAP): Uses a user name and password. Used for NetSuite SOAP API integrations.
Each step in enabling API access strengthens your overall NetSuite integration. It ensures that your system remains secure as data flows between platforms.
NetSuite offers three main API options. In this section, you will learn about each option to choose the one that best fits your needs. We provide clear comparisons and real examples to help you decide.
Every API option has its strengths. Compare them using the table below:
REST API (SuiteQL) -
Main Features: Main Features: SQL-like queries over REST
Primary Use Cases: Primary Use Cases: Read queries, reports, paginated data extraction
Data Format: JSON
SOAP API -
Main Features: Manages complex transactions
Primary Use Cases: Large data transfers; structured operations
Data Format: XML
SuiteScript
Main Features: Custom code on the server
Primary Use Cases: Tailored workflows; custom automation
Data Format: JavaScript
If you need quick queries and fast responses, choose the REST API. For large data transfers and detailed operations, the SOAP API works best. Use SuiteScript when you need to write custom scripts for unique processes.
Note: For new integrations, SuiteQL (POST a SQL SELECT to /services/rest/query/v1/suiteql) is the recommended query interface over the older record-based REST endpoints. It supports JOIN operations across record types and is what Knit uses internally for NetSuite data extraction.
The REST API is part of NetSuite’s SuiteTalk service. It offers a clear way to work with your data.
Example: Get a Record
GET /services/rest/record/v1/customrecord_api_rest/<id>

Shortened Body Response
{
    "autoName": true,
    "balance": 0,
    "billPay": false,
    "bulkmerge": {
        "links": [
            {
                "rel": "self",
                "href": "http://demo123.suitetalk.api.netsuite.com/services/rest/record/v1/customer/107/bulkmerge"

            }
        ]
    },
}
Developers appreciate the simplicity of the REST API. This API speeds up your NetSuite Integration tasks.
The SOAP API, or SuiteTalk SOAP, is designed for more complex tasks.
<changeEmail xmlns="urn:messages_2017_1.platform.webservices.netsuite.com">
 <changeEmail>
   <ns6:currentPassword xmlns:ns6="urn:core_2017_1.platform.webservices.netsuite.com">xxxxxxx</ns6:currentPassword>
   <ns7:newEmail xmlns:ns7="urn:core_2017_1.platform.webservices.netsuite.com">newEmail@tester.com</ns7:newEmail>
   <ns8:newEmail2 xmlns:ns8="urn:core_2017_1.platform.webservices.netsuite.com"> newEmail @tester.com</ns8:newEmail2>
   <ns9:justThisAccount xmlns:ns9="urn:core_2017_1.platform.webservices.netsuite.com">true</ns9:justThisAccount>
 </changeEmail>
</changeEmail>

SOAP Response:
<changeEmailResponse xmlns="urn:messages_2017_1.platform.webservices.netsuite.com">
   <sessionResponse>
   <platformCore:status isSuccess="true" xmlns:platformCore="urn:core_2017_1.platform.webservices.netsuite.com"/>
   </sessionResponse>
 </changeEmailResponse>
The SOAP API is a strong choice if your project needs detailed error messages and structured data. Check the official guide for more code examples and setup instructions.
SuiteScript lets you add custom code directly into your NetSuite account.
/**
* @NApiVersion 2.1
* @NScriptType ClientScript
*/
define(['N/ui/dialog'], (dialog) => {
    function pageInit() {
        let options = {
            title: 'I am an Alert',
            message: 'Click OK to continue.'
        };
        function success(result) {
            console.log('Success with value ' + result);
        }
        function failure(reason) {
            console.log('Failure: ' + reason);
        }
        dialog.alert(options).then(success).catch(failure);
    }
    return {
        pageInit: pageInit
    };
});
SuiteScript works best for unique workflows. Developers can write custom scripts that fit specific business needs. It offers a flexible option for NetSuite integration.
Now that you understand the API options, you can build your NetSuite API integration. This section outlines a clear process from testing to deployment. Follow these steps carefully.
Begin by making a simple test call. Use this checklist:
Test your API call in the sandbox thoroughly. Once you confirm that it works, prepare to move it to your production environment.
NetSuite API integration solves many business problems. Here are some real examples:
Each use case has its challenges. The official documentation offers deeper insights into these workflows. These examples show how NetSuite integration can drive better data flow and business performance.
Companies across various industries use NetSuite API integration to solve real challenges.
Here are a few examples:
40,000+ companies use NetSuite for their businesses. They lower the workload on their teams and reduce human errors. Successful integrations like these show how effective integration improves business processes.
Manually integrating NetSuite often involves complex coding, increased risk, and delays. Knit offers a simpler solution with its Unified Accounting API that allows you to build once and scale to many accounting integrations in one go.
Knit provides a Unified Accounting API which allows you to integrate with multiple Accounting tools in one go. You build an integration with Knit once, and Knit manages the underlying API complexities like
Knit’s guided setup follows NetSuite’s standards closely and supports both REST and SOAP API connections. The API directory provides a detailed overview of Netsuite's API endpoints for various categories.
Here are a few NetSuite integration best practices for a stable, long-term NetSuite API integration.
A fast integration improves user experience. Use these tips:
Following these steps keeps your integration fast and reliable.
Security is a must for any NetSuite API integration. Do these steps:
These steps keep your data safe and help you meet compliance standards.
Continuous monitoring helps you catch issues early. Here’s how:
Regular monitoring creates a more reliable NetSuite integration.
No integration project is free from challenges. Below are some common issues and their troubleshooting steps.
Understanding these challenges lets you plan and avoid major setbacks.
When issues occur, follow this checklist:
Following this checklist typically resolves most problems quickly.
A solid Netsuite Integration needs ongoing care. Maintenance ensures that your system stays reliable and efficient.
These steps keep your NetSuite integration robust and scalable over time.
Organizations that modernize their data workflows with NetSuite API integration see more than just reduced errors—they gain a competitive edge. By automating routine tasks and linking key systems, businesses can free up resources for growth. Solutions like Knit further cut complexity, ensuring that updates, security, and compliance are handled automatically. For companies serious about boosting efficiency and strategic agility, moving to an integrated NetSuite environment is a smart, forward-looking decision.
Book a demo with Knit today, and let a Knit expert assist in setting up a robust NetSuite API integration and address any questions.
References:
Yes. NetSuite provides three integration surfaces: the SuiteQL REST API (SQL-like queries over REST, recommended for new read integrations), SuiteTalk SOAP Web Services (the legacy interface covering the full data model, suitable for complex transactions), and SuiteScript (custom JavaScript that runs server-side, used for write automation and custom workflows). All three are included with a NetSuite subscription at no additional API cost. Knit's Unified ERP API normalises all three into a single REST interface consistent with Xero, QuickBooks, Sage Intacct, and other accounting platforms.
To use NetSuite's REST API: (1) Create an Integration Record in NetSuite (Setup → Integration → Manage Integrations) and enable Token-Based Authentication. (2) Create an Access Token using Setup → Users/Roles → Access Tokens. (3) Construct requests with an HMAC-SHA256 signed OAuth 1.0 Authorization header — required on every call. (4) For read operations, POST SQL queries to the SuiteQL endpoint: https://{accountId}.suitetalk.api.netsuite.com/services/rest/query/v1/suiteql. (5) Paginate results using the totalResults and links properties in the response. Note: Basic Auth was deprecated — Token-Based Authentication is the minimum requirement for all new integrations.
NetSuite authentication requires a manually constructed HMAC-SHA256 signed OAuth 1.0 Authorization header on every request — not just a Bearer token. NetSuite supports Token-Based Authentication (TBA) for server-to-server integrations and OAuth 2.0 (available from NetSuite 2022.2+) for user-facing flows. Basic authentication was fully deprecated. Each TBA request must include a signed header containing: realm, oauth_consumer_key, oauth_token, oauth_signature_method, oauth_timestamp, oauth_nonce, and oauth_signature. This is one of the more complex auth implementations in the ERP space — Knit handles TBA signature construction and token lifecycle management automatically.
NetSuite enforces concurrency limits rather than per-minute rate limits. Standard licences allow 10 concurrent web service requests; larger enterprise accounts can have higher limits. Exceeding the concurrency limit returns an EXCEEDED_CONCURRENCY_LIMIT_BY_INTEGRATION fault. SuiteQL REST API calls paginate at 1,000 rows per response — use the nextPageId parameter for larger datasets. Best practice for direct integrations is exponential backoff and request queuing rather than parallel firing. Knit manages concurrency and retry logic automatically.
NetSuite does not support traditional outbound webhooks natively. Real-time event notifications require either SuiteScript User Event scripts (server-side scripts that fire HTTP calls via the N/https module when records change) or Workflow Event Actions (triggered by business process events in NetSuite's workflow builder). For most integrations, the standard approach is scheduled polling via SuiteQL with a lastmodifieddate filter. Knit provides virtual webhooks for NetSuite — subscribe to normalised change events and Knit handles polling, deduplication, and delivery, making NetSuite behave like a webhook-native platform.
Yes. With an MCP server wrapping the NetSuite API, an AI agent can invoke ERP tools like query_invoices(), get_vendor_bills(), or create_journal_entry() as part of a multi-step workflow — without custom integration code per agent framework. Knit provides a pre-built NetSuite MCP server that exposes normalised ERP data (accounts, invoices, vendors, journal entries) as callable tools for Claude, GPT-4, and any MCP-compatible agent. The MCP server uses NetSuite's SuiteQL REST API internally, with Knit handling authentication, pagination, and data normalisation.
Yes — NetSuite API access (REST, SOAP, and SuiteScript) is included in a NetSuite subscription at no additional per-call cost. There is no usage-based API billing, unlike some cloud ERP platforms. The main cost considerations are the NetSuite licence itself, infrastructure for your integration middleware, and developer time for building and maintaining the integration. Knit offers a unified accounting API that adds NetSuite alongside QuickBooks, Xero, Sage Intacct, and other platforms, so teams build one integration rather than one per accounting system.
SuiteQL is NetSuite's SQL-like query language for the REST API. You POST a SQL SELECT statement to /services/rest/query/v1/suiteql referencing NetSuite record types — for example, SELECT id, entityid, email FROM customer WHERE isinactive = 'F'. Results are paginated at up to 1,000 rows per response in JSON format. SuiteQL supports JOIN operations across record types, making it significantly more powerful than the older SOAP SuiteTalk for read operations. Column names correspond to NetSuite's internal field names, visible in field help text when customisation mode is enabled. SuiteQL is the recommended interface for all new read integrations.
Let us consider a world, where setting appointments, contacting people, and organizing your time seems like a never-ending struggle. People find themselves often busy sending and reading their emails back and forth, missing deadlines or appointments and booking overlapping meetings. This surely demotivates one to be productive. Scheduling work is among the most difficult tasks in organizations.
Employees primarily depend on calendars for effective work organization and planning while manual changes most of the time result in getting overbooked, not receiving updates and wasting time on management. Installing Outlook Calendar API eliminates such problems by relieving the manual work of booking appointments and coordinating, instead of working constantly on the management of the calendar across multiple platforms.
However, API integration isn’t always straightforward. Developers encounter challenges such as complex authentication, navigating API endpoints, and ensuring permissions are set up correctly. This guide simplifies the process for you. If you're looking to integrate with Outlook and other Calendar apps as well you could consider Knit's Calendar API
The Outlook Calendar API is part of the Microsoft Graph suite. It allows developers to interact with calendar data programmatically, enabling operations like creating, updating, and retrieving events.
Key Features:
Microsoft Graph provides resource access to the Microsoft 365 platforms and ecosystems. It has the concept of integrated uniformity which provides the application programmers with direct application development of integration with Outlook, Teams, OneDrive and other Microsoft services.
Integrating the API enhances scheduling by:
Scheduling is often at the core of organizational productivity. Seamless integration ensures that meetings, events, and deadlines are easily accessible, fostering better communication and coordination among teams.
This section introduces the importance of setting up a Microsoft 365 Developer Account to access and manage API services.
Step-by-Step Guide:
Essential Configurations in the Azure Portal:
Proper authentication ensures secure communication between your app and the API. Understanding and managing Outlook Calendar API Permissions is crucial for ensuring secure access to calendars and events while avoiding common errors during integration.
Generating API Tokens and Configuring Permissions:
Understanding OAuth 2.0 and Microsoft Graph Authentication: OAuth 2.0 is a robust framework that allows applications to obtain limited access to user resources. Microsoft Graph builds on this by:
For example, a single-page app can use the implicit flow for quick access, while a backend app might prefer the client credentials flow.
Resolving Common Authentication Issues:
Challenges of Direct Integration: Direct integration with Outlook Calendar API often requires administrative approval, particularly for permissions that access sensitive data. The process involves:
Potential Hurdles with Manual Approval:
Avoid the Hustle with Knit: Knit simplifies this process by:
You can integrate Outlook Calendar functionalities into your workflow. The APIs enable the creation, management, and retrieval of Outlook Calendar API Events, providing a streamlined approach to event scheduling and updates.
Understanding the available endpoints is crucial for effective API usage. Here are a few key endpoints for the calendar, events, and users:
Well-structured API requests ensure smooth interaction with the calendar system. For reliable API requests:
Example1: Create an event in the specified time zone, and assign the event an optional
transactionId value.
Request Body:
POST https://graph.microsoft.com/v1.0/me/events
Prefer: outlook.timezone="Pacific Standard Time"
Content-type: application/JSON
{
"subject": "Let's go for lunch",
"body": {
"contentType": "HTML",
"content": "Does noon work for you?"
},
"start": {
"dateTime": "2017-04-15T12:00:00",
"timeZone": "Pacific Standard Time"
},
"end": {
"dateTime": "2017-04-15T14:00:00",
"timeZone": "Pacific Standard Time"
},
"location":{
"displayName": "Harry's Bar"
},
"attendees": [
{
"emailAddress": {
"address": "samanthab@contoso.com",
"name": "Samantha Booth"
},
"type": "required"
}
],
"allowNewTimeProposals": true,
"transactionId": "7E163156-7762-4BEB-A1C6-729EA81755A7"
}
Response Body: The response body shows the start and end properties.
The API data model organizes resources into logical structures for streamlined management.

To fetch events from the user’s calendar, follow these steps:
curl -X GET \ -H "Authorization: Bearer {access_token}" \
"https://graph.microsoft.com/v1.0/me/events"
{
"value": [
{
"id": "AAMkADk2",
"subject": "Team Meeting",
"start": {
"dateTime": "2025-01-20T10:00:00",
"timeZone": "Pacific Standard Time"
},
"end": {
"dateTime": "2025-01-20T11:00:00",
"timeZone": "Pacific Standard Time"
}
"locations": [
{
"displayName": "Conf Room Rainier",
"locationType": "default",
"uniqueId": "",
"uniqueIdType": "unknown"
}
],
"attendees": [
{
"type": "required",
"status": {
"response": "none",
"time": "0001-01-01T00:00:00Z"
},
"emailAddress": {
"name": "Engineering",
"address": "abc@contoso.com"
}
}
],
"organizer": {
"emailAddress": {
"name": "Engineering",
"address": "abc@contoso.com"
}
},
}
]
}
Recurring events are common in calendars. To create them:
Example JSON payload for a daily recurring event:
{
"recurrence": {
"pattern": {
"type": "daily",
"interval": 1
},
"range": {
"type": "endDate",
"startDate": "2025-01-01",
"endDate": "2025-01-31"
}
}
}
Time zones can cause discrepancies in event scheduling. The timeZone field ensures consistency:
{
"start": {
"dateTime": "2025-01-20T10:00:00",
"timeZone": "Pacific Standard Time"
},
"end": {
"dateTime": "2025-01-20T11:00:00",
"timeZone": "Pacific Standard Time"
} }
Errors can occur during API interactions. Implement logic to handle common errors:
Robust error handling ensures a seamless user experience and minimizes downtime.
Knit helps connect your apps to the Outlook Calendar API by abstracting the complexities involved in doing so. Now you don’t need to write heavy code to manage calendars either due to its simple design. With Knit, developers can:
Knit enables teams to focus on higher-priority tasks rather than troubleshooting integrations by handling API tokens, permissions, and calls in the background.
To get started with Knit, you’ll need:
Setup Steps:
This section bridges the gap between Microsoft Graph and Knit, making the integration process simpler.

Knit simplifies event management by:
For example, you can create workflows where Knit automatically schedules follow-up meetings after client calls, saving hours of manual effort.
Knit provides tools to test and validate your integration before it goes live. You can:
Case Study 1: Slack’s Calendar Integration Slack’s integration with the Outlook Calendar API transformed how teams manage their schedules within the platform. With this integration:
Impact: Due to Slack integration, users were able to streamline their day significantly through the reduction of app toggling, thus saving time and boosting team collaboration. A 25% rise in meeting attendance and a significant reduction in scheduling conflicts were both noted.
Case Study 2: HubSpot’s Event Scheduling: Everybody, especially the sales representatives and clients wanted a streamlined experience and that is exactly what their integration API did:
Impact: HubSpot’s scheduling solution increased customer satisfaction and saved sales teams hours of manual scheduling each week. Reports show that clients were more likely to attend scheduled meetings, leading to a 15% boost in closed deals.
These case studies emphasize the importance of:
Data security is paramount when dealing with sensitive information like calendar events. Follow these practices:
Example: Use tools like HashiCorp Vault to securely store credentials.
Optimize your integration to prevent performance bottlenecks:
Monitoring API interactions is essential for identifying and resolving issues promptly:
Integrating the Outlook Calendar API can present several hurdles, including:
Here are actionable steps to resolve common issues:
Microsoft continuously enhances its APIs to meet evolving user needs. Upcoming features include:
Stay ahead of changes by:
Integrating the Outlook Calendar API transforms how your organization schedules and manages events, saving time and improving productivity. From handling complex authentication to optimizing API usage, this guide equips you with the knowledge to implement a robust integration.
Knit takes this one step further by simplifying the entire process. With Knit, you can automate event management, streamline workflows, and focus on what truly matters for your business.
Yes. The Outlook Calendar API is part of Microsoft Graph, accessible at graph.microsoft.com. It allows developers to programmatically create, read, update, and delete calendar events, manage calendars and calendar groups, access free/busy availability, and subscribe to real-time change notifications via webhooks. All operations use standard REST with OAuth 2.0 Bearer token authentication via Microsoft Entra ID (formerly Azure AD). The API supports both delegated access (acting as a signed-in user) and application access (server-to-server without a signed-in user). Knit's Calendar API wraps Microsoft Graph and handles OAuth, token refresh, and webhook subscriptions so your team can integrate Outlook Calendar without managing Graph directly.
Yes — the Outlook Calendar API via Microsoft Graph has no per-call charges. Access requires a Microsoft 365 or Outlook.com account; for multi-user or enterprise access, a Microsoft 365 business subscription is needed. Azure AD app registration for OAuth is also free. The primary cost considerations are Microsoft 365 licensing for the users whose calendars you're accessing, and any Azure infrastructure costs for backend OAuth services. There are no Microsoft Graph API fees for calendar operations.
Authentication uses OAuth 2.0 via Microsoft Entra ID (Azure AD). Register an application in the Azure portal, add the Calendars.Read or Calendars.ReadWrite permission scope, and obtain an access token using the authorisation code flow (for user-delegated access) or the client credentials flow (for application-level access with admin consent). Tokens are short-lived — typically 1 hour — and must be refreshed using a refresh token or re-requested via the client credentials flow for app tokens. Knit handles the entire Entra ID OAuth flow; users authorise once and Knit manages token refresh and permission scopes automatically.
For delegated access: Calendars.Read to list and read events; Calendars.ReadWrite to create, update, and delete events; Calendars.Read.Shared to view shared calendars. For application access (no signed-in user, requires admin consent): Calendars.Read or Calendars.ReadWrite covering all users in the tenant. Always request the minimum permission scope needed — Microsoft scrutinises over-permissioned apps during the Entra ID admin consent process. For reading free/busy status without full event details, use the MailboxSettings.Read scope with the /calendarView endpoint and a schedule information filter.
Use Microsoft Graph change notifications (webhooks). POST to /v1.0/subscriptions with your notification URL, the resource path (/me/events or /users/{id}/events), and the change types to monitor (created, updated, deleted). Microsoft Graph sends a validation challenge to your endpoint — echo back the validationToken within 10 seconds or the subscription will not be created. Calendar subscriptions expire after a maximum of 4,230 minutes (~3 days) and must be renewed with PATCH /subscriptions/{id} before expiry. Knit manages subscription creation, validation, and renewal automatically.
They refer to the same underlying calendar service. Microsoft Calendar is the native Windows app that accesses Outlook/Microsoft 365 calendar data locally (offline-capable). Outlook Calendar is the calendar feature within the Outlook email client (desktop, web, or mobile) that syncs data via Microsoft's servers. Both read from and write to the same calendar data, accessible via Microsoft Graph. For API integration purposes there is no distinction — you always use the Microsoft Graph Calendar API regardless of which app your users prefer to view their calendar in.
A two-way sync requires connecting both Microsoft Graph (for Outlook) and the Google Calendar API, handling event creation, updates, and deletions in both directions, and managing conflicts when the same event is edited in both systems. Key technical challenges include mapping field schemas (Microsoft uses dateTime/timeZone objects; Google uses RFC 3339 strings), handling recurring event exceptions consistently, and preventing sync loops with source tracking. For application-level bidirectional calendar integration across multiple platforms, Knit provides a unified calendar API normalising both Outlook and Google into a consistent schema.
Microsoft Graph enforces per-app-per-tenant throttling on Calendar endpoints: approximately 10,000 requests per 10 minutes per application per tenant. When throttled, the API returns HTTP 429 with a Retry-After header — always honour this value exactly. Use $batch requests (up to 20 individual requests per batch call) to reduce total API call volume when syncing across many users. For high-volume calendar reads, use the /calendarView endpoint with $select to retrieve only the fields you need rather than full event objects. Knit handles Graph rate limit backoff, batching, and retry logic automatically.
Odoo is one of the most versatile and widely used ERP platforms, offering a complete suite of applications for CRM, accounting, inventory, HR, eCommerce, and more. Its modular design allows businesses of all sizes to streamline operations from a single platform. However, in reality, most organizations also rely on other specialized tools, such as Shopify for online sales, Salesforce for CRM, or ADP for payroll. The challenge lies in making these systems communicate seamlessly with each other.
That’s where the Odoo API becomes essential. With its strong set of integration capabilities, Odoo enables businesses to automate processes, reduce errors, and maintain real-time data consistency across platforms. Whether it’s syncing eCommerce orders, updating payroll data, or consolidating financial reports, Odoo APIs provide the flexibility to connect internal systems and scale operations effectively.
In this blog, we’ll cover core concepts, common use cases, authentication methods, step-by-step examples of the Odoo API, and how you can integrate Odoo using Knit.
Let's get started
Odoo is an open-source enterprise resource planning (ERP) platform that helps businesses manage a wide range of core functions in one place. Instead of using separate tools for accounting, sales, HR, inventory, and online stores, Odoo provides an integrated system where everything works together.
Yes, but with an important caveat.
Odoo 16+ introduced a native REST API for some modules, and Odoo 17+ expanded its coverage — but it is not yet comprehensive enough for most production integrations. Core modules like HR, payroll, and accounting are still most reliably accessed through JSON-RPC, not REST.
For teams that need a true REST interface today, the practical options are:1. Use a wrapper library like OdooRPC (Python) that translates JSON-RPC calls into a more REST-like interface2. Use a unified API layer like Knit that exposes Odoo data through a standard REST endpoint
The native REST API is improving with each Odoo version and is worth watching for future releases. For production integrations today, JSON-RPC remains the safe choice.
Before working with the Odoo API, it helps to understand some of the basic terms. These terms are often used in Odoo’s documentation and when writing integration code.
In newer Odoo versions (14+), you can also use an API key instead of a password for added security.
Odoo becomes more powerful when it is connected with the other platforms and tools a business already uses. Below are some of the most common situations where Odoo API integrations can save time, reduce errors, and make daily operations smoother.
For businesses that sell products online, it’s important to keep sales, stock, and accounting in sync. Manually transferring order information from your online store to Odoo can be slow and prone to mistakes. With an integration, this process happens automatically.
Managing employee data across multiple systems can lead to duplication and mistakes. Odoo’s HR module can be connected with payroll software to make things easier.
When a company sells products through multiple channels (e.g., online stores, marketplaces, and physical shops), keeping track of stock becomes a challenge. Odoo integrations help manage this more effectively.
Customer information often exists in different systems—some in a CRM, others in marketing tools, and others in sales systems. This can make it hard to get a complete view of each customer. Odoo APIs help by bringing all this data together.
Financial data is most valuable when it can be analyzed and used for decision-making. Odoo’s Accounting and Sales data can be integrated with external reporting and analytics platforms.
1. API Types: Odoo offers two main types of APIs, XML-RPC and JSON-RPC. XML-RPC is the traditional method and works in all Odoo versions, while JSON-RPC (often considered REST-like) is supported in newer versions and provides modern JSON responses. JSON-RPC is easier to work with for web and mobile integrations, while XML-RPC remains reliable and widely used.
2. Endpoint Structure: Each Odoo API endpoint serves a different purpose. For example:
3. API Documentation: Odoo’s API documentation provides details on both XML-RPC and JSON-RPC methods, including available endpoints, parameters, and request/response formats.
To use the Odoo API, every request must be authenticated. Odoo provides different methods depending on the API type and version. Understanding these methods will help you choose the right one for your integration.
XML-RPC is the traditional API method in Odoo, and it works in all versions. To log in, you provide the database name, a username (usually the login email), and a password. These credentials are sent to the /xmlrpc/2/common endpoint.
If the login is successful, Odoo returns a user ID (uid). This uid is then used in requests sent to the /xmlrpc/2/object endpoint, where you can perform actions such as creating records, updating invoices, or reading sales orders.
While XML-RPC is simple and reliable, it is considered less secure than newer options because it relies on passwords.
JSON-RPC is Odoo’s modern API, similar in style to REST, and is easier to use in web and mobile applications. Authentication happens through the /web/session/authenticate endpoint.
When you send the database name, username, and password, Odoo creates a session if the login is successful. This session acts like a cookie and can be reused for future API calls, which removes the need to repeatedly send login details.
This method is widely preferred for newer integrations since responses are returned in JSON format, which is easier to process and integrate into modern applications.
From version 14 onwards, Odoo introduced API key authentication. A user can generate an API key from their profile settings and use it in place of the password when making XML-RPC or JSON-RPC calls.
API keys are more secure because they can be revoked or regenerated at any time without changing the main user password. This makes them highly recommended for production environments. For long-term integrations, API keys provide the best balance of security and flexibility.
Regardless of which method you use, follow these security guidelines:
Integrating with Odoo can look complicated at first, but breaking it into clear steps makes the process manageable. This guide explains everything from preparing your Odoo environment to making live API calls in production.
Your Odoo instance is like your private ERP environment. Every integration connects to a specific database inside this instance.
✅ At this stage, you should be able to log in to Odoo at http://localhost:8069 (or your Odoo Online URL) and access your test database.
Using the admin account for integrations is insecure. Instead, create a dedicated API Integration User.
Steps:
1. Log in to your Odoo instance as the "userodoo" user.
2. Go to the "Settings" menu and click on the "Users" submenu.
3. Click on the "Create" button to create a new user.
4. Enter the details for the new user, including the login email and password.
5. Under the "Access Rights" tab, select the groups that you want the new user to belong to. To give the new user the same permissions as the "userodoo" user, you can select the same groups that the "userodoo" user belongs to.
6. Click on the "Save" button to save the new user.
When building an Odoo integration, one of the first choices you’ll need to make is:
Should I use XML-RPC or JSON-RPC?
Both are supported in Odoo, and both expose the same models and operations. However, they differ in how they handle requests, responses, and ease of use. Let’s break it down.
XML-RPC has been part of Odoo since the beginning and is still widely used today, especially in cases where backward compatibility is important.
Advantages of XML-RPC APIs
Limitations
How to Work with XML-RPC:
JSON-RPC is Odoo’s newer API style. It behaves much like a REST API, making it easier for developers who are familiar with modern web apps.
Advantages of JSON-RPC APIs
Limitations
How to Work with JSON-RPC:
import xmlrpc.client
url = "http://localhost:8069"
db = "test_db"
username = "api_user@company.com"
password = "your_password"  # or API key in v14+
common = xmlrpc.client.ServerProxy(f"{url}/xmlrpc/2/common")
uid = common.authenticate(db, username, password, {})
print("User ID:", uid)
If successful, Odoo returns a User ID (uid), which must be passed in future calls.
import requests

url = "http://localhost:8069/web/session/authenticate"
db = "test_db"
username = "api_user@company.com"
password = "your_password"

payload = {
    "jsonrpc": "2.0",
    "params": {
        "db": db,
        "login": username,
        "password": password
    }
}
response = requests.post(url, json=payload)
print(response.json())
If valid, Odoo returns a session ID, which works like a cookie for all future API requests.
Odoo is built on a modular structure where everything revolves around models.
A model in Odoo is like a table in a database, and each model contains fields that act as columns to store specific information. Models represent business objects such as customers, sales orders, invoices, employees, and more.
Understanding which model and fields you need is essential before making any API calls. This ensures that your integration is fetching or updating the right data.
Here are some frequently used models and what they represent:
To find the right model and its fields in your Odoo instance, follow these steps:
Enable Developer Mode
1. Go to Settings in your Odoo dashboard.
2. Scroll down and select Activate the Developer Mode (sometimes called “Debug Mode”).
3. This mode provides access to technical details of records.
Open a Record
1. Navigate to the module you want to work with (e.g., Customers, Sales, or Employees).
2. Open a specific record (for example, a single customer profile).
View Technical Details
1. In the record view, click on the bug/developer tools icon (visible once developer mode is active).
2. Select View Fields or View Metadata.
3. You will see details like:
This information tells you exactly what model and which fields you can use in your API request.
Suppose you want to fetch customer details through the API:
Request (Python - XML-RPC):
partners = models.execute_kw(
    db, uid, password,
    'res.partner', 'search_read',
    [[]], {'fields': ['name', 'email'], 'limit': 5}
)
print(partners)
Response (JSON):
[
  {"id": 5, "name": "Azure Interior", "email": "azure@example.com"},
  {"id": 7, "name": "John Doe", "email": "john@example.com"}
]Request (XML-RPC):
partners = models.execute_kw(
    db, uid, password,
    'res.partner', 'search_read',
    [[]], {'fields': ['id', 'name', 'email'], 'limit': 2}
)
Response:
[
  {"id": 5, "name": "Azure Interior", "email": "azure@example.com"},
  {"id": 7, "name": "John Doe", "email": "john@example.com"}
]
Elaboration:
limit=2 restricts the number of records returned.
Request (JSON-RPC):
payload = {
  "jsonrpc": "2.0",
  "method": "call",
  "params": {
    "model": "res.partner",
    "method": "create",
    "args": [{
      "name": "Jane Smith",
      "email": "jane@example.com"
    }]
  }
}
Response:
{"result": 12}Elaboration:
Request (XML-RPC):
result = models.execute_kw(
    db, uid, password,
    'res.partner', 'write',
    [[12], {'phone': '+123456789'}]
)
Response:
Updated: TrueElaboration:
Response True confirms the record was updated successfully.
Request (JSON-RPC):
payload = {
  "jsonrpc": "2.0",
  "method": "call",
  "params": {
    "model": "res.partner",
    "method": "unlink",
    "args": [[12]]
  }
}
Response:
{"result": true}Elaboration:
Request (XML-RPC):
order_id = models.execute_kw(
    db, uid, password,
    'sale.order', 'create',
    [{
        'partner_id': 5,
        'order_line': [(0, 0, {
            'product_id': 42,
            'product_uom_qty': 2
        })]
    }]
)
Response:
Created Order ID: 25Elaboration:
Response 25 is the ID of the new sales order.
Before you move your Odoo integration into production, it is strongly recommended to test everything in a sandbox (test) environment. A sandbox is a safe space where you can try out your API requests without affecting your real business data.
Inside your sandbox Odoo instance, create some sample records such as:
This allows you to run API calls on realistic data and verify results.
You can test your API calls in two main ways:
For example, test creating a new customer or reading existing sales orders.
After running an API request, log into your Odoo interface and check if the data was updated correctly. For example:
During testing, you may face errors. Some of the most common are:
Testing in a sandbox helps catch these issues early so that they don’t occur in production.
After testing in the sandbox, update your configuration to point to the production system. Replace the sandbox database name and server URL with production values, and use the production integration user. Instead of passwords, generate an API key for this user and store it in a secure secrets manager.
All communication should use HTTPS to keep data encrypted. Apply least-privilege access by giving the integration user only the permissions needed for its tasks, such as Sales or Accounting, rather than full administrative rights.
It is also important to enable logging and monitoring. Keep records of API requests and responses to make troubleshooting easier, and monitor response times and error rates to identify problems early.
If you’re using Knit, you can take advantage of its built-in observability dashboards, which provide real-time visibility into your integration. This makes debugging and monitoring much easier, ensuring a smooth transition from sandbox to production.
Integrating Odoo’s API requires more than just writing code. A successful integration depends on good planning, proper security, and ongoing maintenance. Below are some practical guidelines to follow.
Before you start, define the purpose of your integration. Be clear on whether you want to automate certain workflows, synchronize data between systems, or build a completely new process.
Take time to analyze your current workflows and identify where Odoo’s API can make improvements. Map out the data that needs to be exchanged, decide whether the flow will be one-way or two-way, and determine if updates should be real-time or in scheduled batches.
Finally, check compatibility. Make sure the external system can communicate with Odoo’s API (whether via XML-RPC or JSON-RPC/REST) and note if customizations or middleware are required.
API integrations deal with sensitive data, so security should be a priority.
When building the integration, choose the API type that best fits your needs. XML-RPC works across all Odoo versions, while JSON-RPC (REST-like) is better suited for modern applications that expect JSON responses.
Check if Odoo already has connectors or community modules for the integration you want. Using these can save time and ensure compatibility.
Make sure your code has proper error handling in place. API calls can fail for reasons like network issues, permission errors, or invalid data. Your integration should log these failures and handle them gracefully.
Always test thoroughly in a development or staging environment before going live. Validate that the data being exchanged is accurate and that all workflows behave as expected.
A good integration doesn’t end at deployment—it needs to be maintained.
Document your integration carefully. Include API endpoints, data mappings, and instructions for handling errors. This will make it easier to troubleshoot and update later.
Set up monitoring and alerts to keep track of API usage, response times, and failures. Catching issues early reduces downtime and prevents data mismatches.
Plan ahead for growth. Design your integration to handle larger data volumes and potential business changes so it remains reliable as your organization scales.
Take advantage of resources that make development and testing easier:
Odoo introduced webhook support in version 17, and it is available in both the Community and Enterprise editions. In Odoo 18, webhooks have become a practical way to connect Odoo with other systems using event-driven, push-based communication.
A webhook is essentially an automated message sent over HTTP. Instead of continuously polling Odoo for updates, webhooks allow you to send or receive data only when an event happens. This makes integrations more efficient and responsive.
Webhooks in Odoo are event-driven. They are not running constantly in the background but are triggered when a specific action takes place. For example, a webhook can be fired when a customer is created, when a product is updated, or when a sales order is confirmed. Instead of waiting for systems to poll Odoo for updates, these events trigger immediate communication. When an event occurs, Odoo can either push data to an external system or accept data from one.
In push mode, Odoo sends an HTTP request to a defined external URL whenever the event happens. For example, when a sales order is confirmed in Odoo, it can automatically send the order details to a logistics provider’s API.
In pull mode, the flow is reversed. An external system sends a POST request with its own data payload to an Odoo webhook URL. Odoo then processes that request and takes the appropriate action. A common example is when an e-commerce platform posts product details into Odoo to automatically create a matching product record.
Webhooks are configured through Odoo Studio, using automated actions. The process generally includes:
Odoo webhooks enable real-time data synchronization and automation across systems. Here are practical scenarios showcasing their application in business workflows.
1. Syncing Data with E-commerce Platforms: When a new product is added in WooCommerce, a webhook automatically creates the same product in Odoo, ensuring seamless inventory alignment.
2. Real-Time Inventory Updates: An external POS confirms a sales order, and Odoo receives a webhook request to instantly adjust inventory levels, maintaining accurate stock data.
3. Logistics Integration: Upon confirming a sales order in Odoo, the system pushes order details to a third-party logistics provider via a webhook for efficient fulfillment.
4. Accounting System Integration: Invoice data in Odoo is sent in real time to an external accounting tool through a webhook, streamlining reconciliation processes.
Setting up webhooks in Odoo requires installing modules, configuring automations, and testing the setup. Follow these steps to implement webhooks effectively.
Step 1: Navigate to the Apps menu, search for "Base Automation," and install it. This module is essential for creating automation rules and enabling webhooks.
Step 2: Go to Settings and activate Developer Mode to unlock advanced options and debugging tools necessary for webhook configuration.
Step 3: Access Odoo Studio from the Apps menu, create a new automated action, and select the event that triggers the webhook, such as record creation, update, or deletion.
Step 4: Choose the relevant model (e.g., Sales Order, Product, Customer), set the condition (e.g., “Sales Order confirmed”), and configure the action to “Send Webhook” with the external system’s URL.
Step 5: Use a tool like Postman to verify that the webhook fires correctly. Send test requests to confirm Odoo delivers data to the specified URL and check logs to ensure the payload aligns with the external system’s expectations.
Integrating directly with Odoo can be complex; you need to manage RPC protocols, access rights, users, API keys, and ongoing maintenance. Knit makes this much easier with a unified REST API, rated #1 for ease of use in 2025. It not only connects with Odoo but also with 40+ other systems, including ERP, CRM, HRIS, Payroll, ATS, and Accounting, all through a single interface.
Unified API: Instead of building separate integrations for every ERP, Knit gives you one REST API that works with multiple systems, including Odoo.
Developer-Friendly: Knit comes with clear documentation, intuitive endpoints, and fewer complexities, making it easier for developers to get started.
Scalable: Whether you’re handling a few records or millions, Knit is built to process large amounts of data without slowing down.
Reliable Support: Knit provides robust error handling and a responsive support team, so your integration stays smooth and reliable.
Here are answers to common questions about integrating Odoo's API using Knit, a unified platform that simplifies connections and adds features like virtual webhooks.
Q. What are the different API types in Odoo?
A: Odoo offers two main external API types: XML-RPC, the traditional method that works across all Odoo versions, and JSON-RPC, supported in newer versions and providing modern JSON responses. Both use a single endpoint model where operations - read, create, update, search - are method calls rather than REST-style resource endpoints. Odoo 16+ also introduced an experimental REST API for some modules, but JSON-RPC remains the stable choice for production integrations
Q. Does Odoo have a REST API?
A: Yes, but with an important caveat: Odoo's native REST API, introduced in Odoo 16+ and expanded in Odoo 17+, is not yet comprehensive enough for most production integrations — it covers only a subset of modules and is still considered experimental. The primary and most stable interface remains JSON-RPC, through which all core modules (HR, accounting, sales, inventory) are reliably accessible.
Q. What is Odoo API integration?
A: Odoo API integration is the process of connecting Odoo's ERP system with external applications — such as CRMs, HR tools, ecommerce platforms, or your own product — so data flows between them automatically using Odoo's external API. Developers typically use Odoo's JSON-RPC API to read and write records across installed modules, eliminating manual data entry and enabling cross-platform workflows.
Q. Why integrate Odoo with Knit instead of directly using APIs?
A: Direct Odoo API integration requires managing authentication, field mapping, and error retries, plus building custom connectors for each third-party system. Knit simplifies this with:
Q: Does Odoo support webhooks for real-time data sync?
Odoo does not support traditional outbound webhooks through its external API. Real-time event triggers in Odoo are handled through Automated Actions (Settings → Technical → Automation), which can fire outbound HTTP POST calls when records are created, updated, or deleted - though this requires configuration inside each individual Odoo instance. Odoo 18 added improved webhook support for some modules. For most direct integrations, scheduled polling via search_read with a write_date filter remains the standard approach. If you're integrating via Knit, you could leverage Knit's virtual webhooks even for models / objects where native webhook support isn't avilable.
Q: Is Odoo API free? What plan do I need?
A: The Odoo external API requires the Custom plan for Odoo Online (SaaS) - it is not available on the One App or Standard plans, which is the most common blocker developers hit mid-build. Rate limits on the Custom plan are approximately 1 call per second with no parallel calls. For Odoo.sh and on-premise installations, API access has no plan restriction.
Q. How do I authenticate Odoo’s API inside Knit?
A: To authenticate, provide your Odoo instance URL (e.g., https://mycompany.odoo.com), database name (for on-premise setups), username or email, and an API key from the user profile. Knit’s Odoo connector validates these to establish a secure connection.
Q. Which Odoo modules can I integrate with Knit?
A: Knit supports most Odoo modules, including:
Q. What if Odoo doesn’t support real-time webhooks?
A: Knit’s virtual webhooks poll Odoo’s APIs for changes and generate events like "New Invoice Created" or "Customer Updated," delivering near real-time notifications without custom polling logic.
Q. How does Knit handle Odoo’s API limits?
A: Odoo’s SaaS edition has rate limits around 60 requests per minute. Knit manages this through:
Q. Can I sync data both ways (Odoo ↔ Other Systems)?
A: Yes, Knit enables bi-directional syncing. Pull data from Odoo to your system via Knit, or push data into Odoo, like creating customers from a CRM, with field-level mapping for precision.
Q. How secure is the integration?
A: Knit ensures security by storing OAuth2 or API keys in its vault, using HTTPS/TLS encryption for all traffic, and supporting Odoo user role restrictions (e.g., read-only access). Logs are available for auditing.
Q. Do I need coding knowledge to integrate Odoo with Knit?
A: Basic setup, like connecting Odoo in Knit, requires no coding. For advanced customizations, such as unique models or workflows, a developer may be needed to extend Odoo’s API or adjust mappings.
Q. What are common use cases for Odoo + Knit integration?
A: Knit supports scenarios like syncing customer and order data to CRMs (e.g., HubSpot, Salesforce), pushing invoices to accounting tools (e.g., QuickBooks), updating employee records to payroll systems, centralizing inventory with e-commerce platforms, and streaming data to BI tools for reporting.
Q:How do I integrate Odoo with Salesforce, HubSpot, or other platforms?
A: Integrating Odoo with Salesforce typically involves syncing customers, contacts, and sales order data bidirectionally — calling Odoo's JSON-RPC API to read or write records, then mapping and pushing that data to Salesforce's REST API, with middleware handling field mapping, conflict resolution, and scheduling. HubSpot integrations commonly push CRM leads and deals from HubSpot into Odoo's CRM module. Both require custom connector code or an iPaaS tool like Zapier, Make, or Celigo for production deployments. If you need Odoo alongside other ERP platforms in a single product integration, Knit's Unified API normalises Odoo data into a consistent REST schema so your application calls one endpoint regardless of which ERP your customer uses.
Paycom is a leading cloud-based Human Capital Management (HCM) platform that combines payroll, HR, time tracking, and other key functions in one system. However, integrating directly with Paycom’s API can be challenging. Paycom doesn’t offer open public APIs and generally requires special access for integration.
Knit, on the other hand, is a unified API platform that provides pre-built integrations to systems like Paycom. With Knit, developers can connect to Paycom’s HR and payroll data through a standardized API, avoiding much of the custom development and maintenance overhead.
This guide will walk you through two approaches to integrating Paycom:
Let’s get started!
Integrating with Paycom unlocks powerful HR and payroll automation scenarios for your organization. Here are some common use cases:
Integrating Paycom with your applications eliminates duplicate data entry, reduces human errors, and ensures that critical HR data stays consistent across platforms.
Next, we’ll look at the challenges of doing this directly with Paycom’s API.
While Paycom offers an API for customers and partners, integrating directly comes with several challenges:
Mapping these fields into your application’s data model (or into a common schema if you integrate multiple HR systems) is a non-trivial task. Without a unified standard, developers must write extensive transformation logic for Paycom’s API.
Despite these challenges, you may still opt for a direct integration if you have very specialized needs or constraints. In the next section, we’ll outline how to integrate directly with Paycom’s API, covering authentication, key endpoints, and best practices for implementation.
Direct integration with Paycom involves using Paycom’s REST API endpoints to push or pull data. Below is a step-by-step breakdown of the process:
First, you’ll need to authenticate with Paycom to obtain an API token or otherwise authorize your API calls. As noted, Paycom’s auth can use either an OAuth 2.0 flow or a static API token mechanism:
Example, Obtaining an OAuth Token: The snippet below illustrates a generic OAuth token request to Paycom’s API (your actual domain/path may differ). This uses the Resource Owner Password Credentials grant type for simplicity, sending the username and password of an API user along with the client ID/secret in a form-encoded request:
curl -X POST "https://api.paycom.com/oauth/token" \
     -H "appkey: YOUR_APP_KEY" \
     -H "Content-Type: application/x-www-form-urlencoded" \
     -d 'username=YOUR_USERNAME&password=YOUR_PASSWORD&client_id=YOUR_CLIENT_ID&client_secret=YOUR_CLIENT_SECRET&grant_type=password'
Paycom will respond with a JSON containing an access_token if the credentials are valid.
Note: The exact URL and required parameters may vary; always refer to Paycom’s official documentation accessible through their UI for the correct auth procedure.
Once you have your token or API keys, you’re ready to call Paycom’s endpoints.
Paycom’s API is organized around various functional categories of its platform. Below are some key endpoints grouped by category:
Each endpoint has specific request and response schemas (often in JSON format). Always refer to the Paycom API documentation (available through your Paycom admin portal) for the exact parameters required for each call
Tip: Start by focusing on the endpoints required for your use case (e.g., if you only need to sync employees and payroll data, you might not need to use benefits or recruiting endpoints at all).
After authenticating, you can start making calls to Paycom’s API using standard HTTP methods (GET, POST, PUT, DELETE). Let’s walk through a simple example: retrieving employee data.
Example - Get Employee List: The following Python snippet demonstrates how you might fetch a list of employees from Paycom:
import requests

url = "https://api.paycom.com/v1/employees"  # endpoint to list employees
headers = {
    "Authorization": "Bearer YOUR_ACCESS_TOKEN",  # token obtained from auth
    "Content-Type": "application/json"
}
response = requests.get(url, headers=headers)
print(response.json())
In this example, we call the /employees endpoint with the required auth header. If successful (response.status_code == 200), the response will contain a JSON array of employees, with fields such as first name, last name, email, job title, department, etc.
You can modify query parameters or filters if Paycom’s API supports them to narrow the results (for instance, some APIs allow filtering by last update date, department, etc., though specifics depend on Paycom’s features).
You could also use curl to test this from the command line. For example, using the bearer token:
curl -X GET "https://api.paycom.com/v1/employees" \
     -H "Authorization: Bearer YOUR_ACCESS_TOKEN"
This should return a JSON payload of employees if your token and endpoint are correct.
Working with the Data: Paycom’s API responses are formatted in JSON. Generally, data objects will use Paycom’s field names (which might use camelCase or specific codes). For instance, an employee object might look like:
{
  "employeeId": "12345",
  "firstName": "John",
  "lastName": "Doe",
  "email": "john.doe@example.com",
  "jobTitle": "Software Engineer",
  "department": "Engineering",
  ... other fields ...
}
Make sure to parse the JSON (response.json() in Python, or your language’s equivalent) and handle the data according to your app’s logic. You may need to map Paycom’s fields to your own data model.
Other Calls: The process for other endpoints is similar:
Powerful error handling is crucial when working with any API, including Paycom’s. Paycom will return standard HTTP status codes to indicate success or various errors (400 for bad request, 401 for unauthorized, 403 for forbidden, 404 for not found, 500 for server error, etc.)
Your integration should check the response code for each API call and handle errors gracefully. For example:
if response.status_code == 200:
    data = response.json()
    # process the data
else:
    print(f"Error: {response.status_code} - {response.text}")
In case of an error, Paycom’s API might include a message in the response body (e.g., why the request was invalid). Logging these errors is important for troubleshooting.
Common things to watch for:
Handling responses and errors properly, you ensure your application can fail gracefully. For instance, if a call to Paycom fails, you might catch the exception, log the error, and surface a user-friendly message or alert in your application rather than crashing.
Knit is designed to address the challenges of custom integrations like the one we described. Instead of writing custom integration code for each API (and dealing with auth, data mapping, and maintenance yourself), Knit provides a unified integration layer. Here’s how using Knit can significantly improve the Paycom integration process:
Does Paycom have an open API?
Paycom does not offer open public APIs - access generally requires being an authorized customer or forming a commercial partnership, which can involve significant fees and a lengthy approval process. Developers cannot simply sign up and obtain API credentials. Knit provides a pre-built Paycom connector through its unified HRIS API, giving you normalised access to Paycom's HR and payroll data without navigating the direct access process.
What is the Paycom API?
The Paycom API is a REST-based interface that gives authorized developers programmatic access to Paycom's HCM platform - covering employee records, payroll processing, time and attendance, benefits administration, and compliance data. Unlike most HRIS platforms, Paycom does not offer a public API - access requires either being an existing Paycom customer with API access provisioned by your Paycom representative, or establishing a formal commercial partnership with Paycom. Authentication uses either a SID and API token (passed as custom HTTP headers APISID and APIToken) or OAuth 2.0, depending on the agreement type. Knit's pre-built Paycom connector handles authentication and data normalisation, making Paycom data available through the same unified API endpoint as 100+ other HR platforms.
How do I get access to the Paycom API?
To get direct Paycom API access, you must be an authorized customer or establish a formal commercial partnership - a process that typically involves fees running into thousands of dollars annually and justifying your use case to Paycom's team. Access credentials and documentation are provided through your Paycom account representative once approved. Knit's Paycom connector lets you connect to paycom via a unified API immediately
How do I authenticate with the Paycom API?
Paycom API authentication uses either a SID and API token — passed via custom HTTP headers (APISID and APIToken) or HTTP Basic Auth - or an OAuth 2.0 flow where you exchange client credentials for a Bearer access token. The exact method depends on your Paycom agreement and the API version you've been granted access to. For multi-tenant integrations, each customer requires separate credentials.
What are the Paycom API rate limits?
Paycom imposes strict API rate limits - limits are structured as: 100 calls per request bucket, a maximum of 10 calls per second, and an overall cap of 50,000 calls per day per API key. Exceeding the limit returns HTTP 429 Too Many Requests errors. Lifting rate limits may require upgrading to a higher-cost plan. For integrations syncing large volumes of employee or payroll data, implement request throttling and exponential backoff. Knit handles Paycom rate limit management automatically, queuing and retrying requests across all connected customer accounts.
What are common Paycom API integration use cases?
Common Paycom API integration use cases include: syncing new hires from an ATS into Paycom automatically at offer acceptance; syncing employee data when they are onboarded. Knit's Paycom connector supports all of these use cases through a single normalised API endpoint.
What are the main challenges of building a Paycom API integration?
The main challenges are restricted API access (no public API - requires paid partnership or customer status), high cost and slow approval timelines to obtain credentials, strict rate limits (~500 calls/minute), managing auth credentials across multiple customer accounts, and handling Paycom's evolving API documentation. Each customer also has a separate Paycom instance requiring individual credential setup. Knit removes these barriers by providing a pre-built Paycom connector with normalised data models and managed authentication.
How does Knit simplify Paycom API integration?
Knit provides a pre-built Paycom connector through its unified HRIS API, so you avoid the direct access approval process, per-customer credential management, and ongoing maintenance of Paycom-specific integration logic. You integrate with Knit once and get normalised access to Paycom employee, payroll, and HR data through the same API endpoints used for 65+ other HRIS platforms. Knit handles authentication, rate limiting, field mapping, and keeps integrations up to date as Paycom's API evolves.
How much does Paycom API access cost?
Paycom does not publish API pricing publicly. API access is not available as a self-serve purchase — it requires either being a Paycom customer with API access enabled through your account representative, or establishing a formal commercial partnership with Paycom
What endpoints does the Paycom API expose?
The Paycom API exposes endpoints across several functional areas: Employee Management (employee records, onboarding, terminations, job changes), Payroll Processing (payroll runs, pay history, deductions, tax data), Time and Attendance (timesheets, schedules, time-off requests), Benefits Administration (enrollment, plan data, life events), and Compliance and Reporting (audit logs, regulatory reports). The specific endpoints available depend on your Paycom agreement and which modules your organisation has enabled. Knit normalises Paycom's endpoint responses into a consistent schema alongside other HRIS platforms, so your application doesn't need Paycom-specific field mapping.
Does Paycom have a developer portal or API documentation?
Paycom does not offer a publicly accessible developer portal or API documentation - documentation is provided only after API access has been provisioned through a Paycom representative or commercial partnership agreement. This contrasts with platforms like Workday, ADP, and BambooHR, which publish API documentation publicly. For teams evaluating Paycom integration before committing, Knit's documentation covers the normalised data model and events that Knit's Paycom connector surfaces
Integrating Paycom into your application can open up powerful capabilities, from automated employee onboarding to streamlined payroll processing and compliance reporting. In this guide, we explored how to do it the hard way (direct API integration) and the smart way (using Knit’s unified API).
Direct integration requires navigating Paycom’s guarded API, dealing with custom auth, learning a complex schema, and writing a lot of code to handle errors and data sync. For organizations with ample resources and singular focus, this might be doable, but for most, it’s a heavy lift.
Using Knit, you can achieve the same (or greater) results with a fraction of the effort. Knit handles the messy parts, authentication, normalization, and ongoing maintenance, providing you with a clean, developer-friendly interface to work with Paycom’s data. As we saw, common tasks like syncing employees or payroll records become much simpler with Knit’s pre-built connectors and unified data models. You also future-proof your integrations strategy by having one framework to connect not just Paycom, but whichever systems your customers use.
Ready to streamline your Paycom integration? We encourage you to explore Knit’s platform and documentation. If you need help or want to see a demo, don’t hesitate to [connect with us]. We’re here to help you integrate faster and smarter.
Happy integrating! 🚀

This guide is part of our growing collection on HRIS integrations. We’re continuously exploring new apps and updating our HRIS Guides Directory with fresh insights.
BambooHR is a popular cloud-based human resource management software that helps businesses manage their HR operations, including employee data management, onboarding, performance tracking, and more. In addition to its user-friendly interface, BambooHR also provides an API that allows developers to programmatically access and update employee data.
Employee data is a critical component of HR operations, providing valuable insights into employee performance, engagement, and overall organizational health.
Looking to quickstart your BambooHR API Integration journey? Check our comprehensive BambooHR API Directory
In this article, we will provide a comprehensive guide to using the BambooHR API to retrieve and manage employee data in more than one way.
When working with the BambooHR API, it's essential to understand the rate limits and have access to comprehensive documentation to ensure smooth integration and usage. While specific details on the API rate limit for BambooHR were not explicitly found, we encourage you to refer to the official documentation for the most accurate and up-to-date information.
For detailed guidance and reference, you can access the BambooHR API documentation through the following URLs:
These resources provide extensive information on how to use the BambooHR API, including endpoints, request formats, and examples. Whether you are looking to integrate employee data, manage hours, or perform other HR-related tasks, the documentation will be invaluable.
For any specific queries or further assistance, it is always a good idea to reach out to BambooHR support or consult the community forums.
BambooHR uses a RESTful API, which is a web-based architectural style and approach to communications that is often used in web services development. The BambooHR API provides various endpoints for employee data, including:
When working with the BambooHR API, understanding the authorization mechanism is crucial for ensuring secure and efficient access to the data and functionalities provided by the API. This step-by-step guide will walk you through the process of authorizing your application to interact with the BambooHR API.
base64 library:requests library:
url = 'https://api.bamboohr.com/api/gateway.php/your_company_domain/v1/employees
'headers = {
	'Authorization': f
    'Basic {encoded_key}',
    'Accept': 'application/json'
    }
    response = requests.get (
    url,
    headers=headers
    )
    if response.status_code == 200:
    print('Request was successful')
    print(response.json())
    else:
    print('Failed to retrieve data')
    print(response.status_code
)401 Unauthorized: Indicates that the API key is missing or incorrect.403 Forbidden: Indicates that the API key does not have permission to access the requested resource.By following these steps, you can securely authorize your application to interact with the BambooHR API, ensuring that your data transactions are both secure and efficient.
To get started with using the BambooHR API, you'll first need to set up a BambooHR account and enable API access. Here's how:
To sign up for a BambooHR account, go to the BambooHR website and click on the "Try It Free" button.

Follow the step-by-step instructions to set up your account. You'll need to provide some basic information, such as your company name, email address, and password. You'll also need to select a pricing plan based on the number of employees in your organization and the features you need.
However, in this demo, we are “trying it for free” so we do not have to select the pricing plan. Once you have filled in the information click on “Get Free Trial”.

When you see this screen, click on “We’re Ready!” button.
From here, follow the subsequent instructions (provide a strong password, accept terms and conditions) to finish your sign up process using the email and password you supplied earlier.
When you see the following screen, click next.
Check all of these or at least what you need and click“Done” button.
If you have followed the necessary steps of signing up for your BambooHR account, you should land here:

Once you have a BambooHR account, you can create an API key to access the data associated with your BambooHR API. To create the API key, log in to your BambooHR account and navigate to the "API Keys" page in the "Account" section.

Click on the "Add a New Key" button.
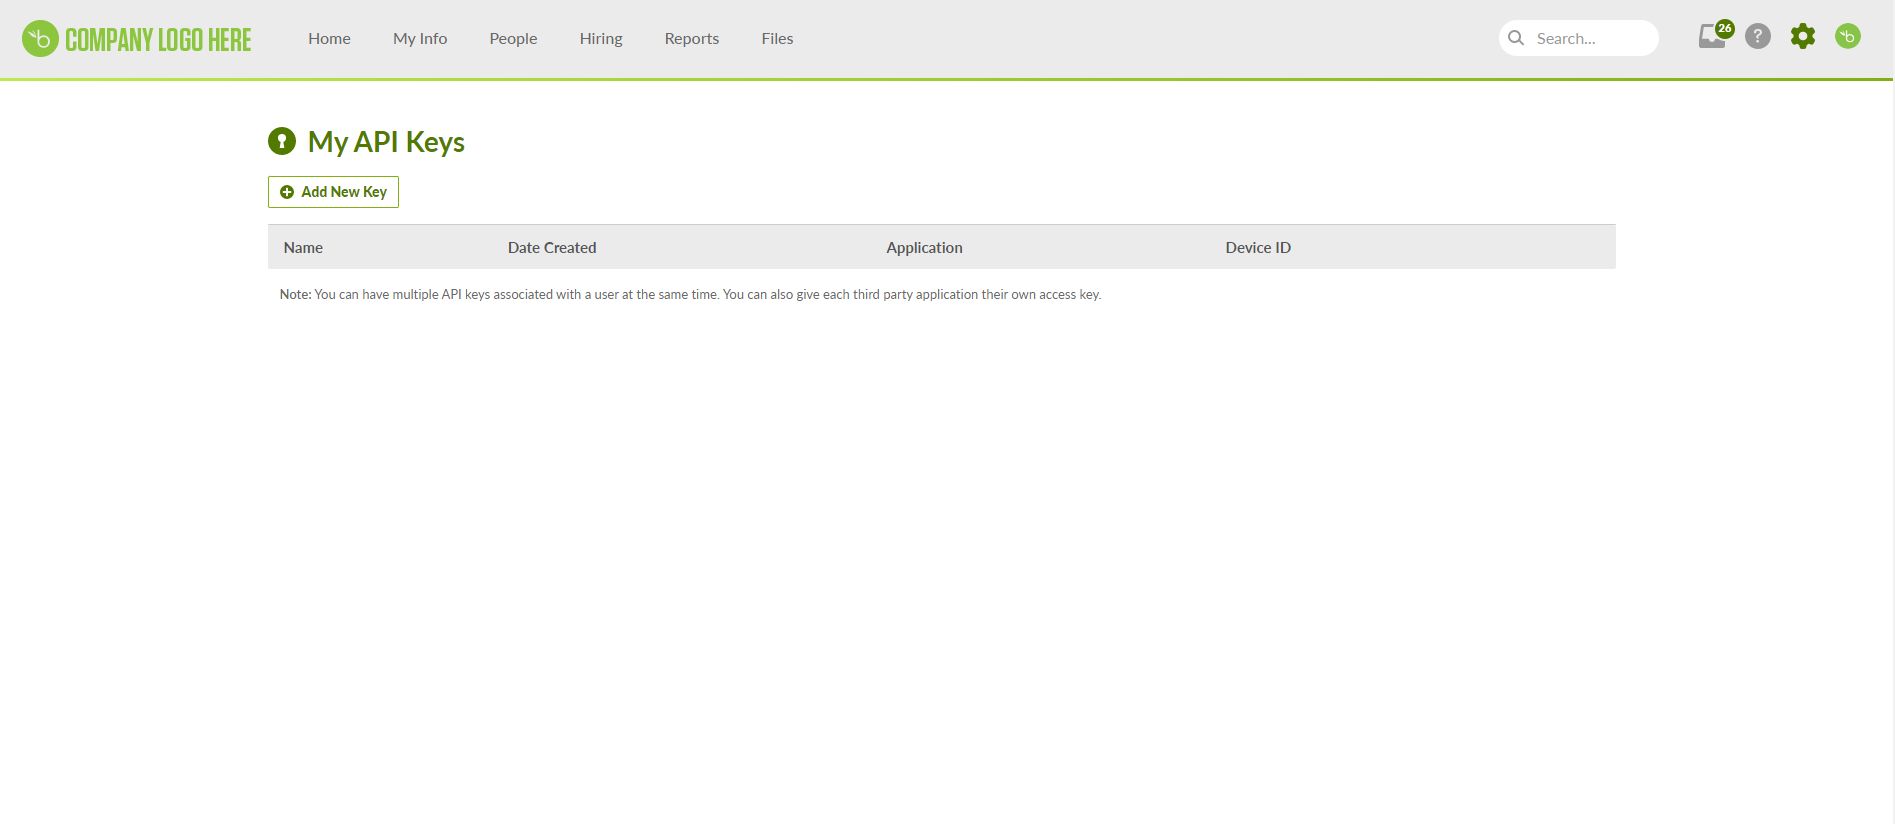
You will need to provide a name for your API key, which will help you identify it later and click “Generate Key”.

A key will be displayed. You can copy it and save it somewhere safe. After successfully saving your key, click “Done”.

After successfully saving your API key, your API key would be listed under My API Keys:
.jpg)
In the next section, we will discuss multiple use cases for the the BambooHR API.

BambooHR allows you to access and update employee data for individual employees as well as in bulk.
The code snippet above will retrieve records for all employees from the feature called directory.
One common pitfall to avoid here involves the use of the Company Directory feature. While this feature can be managed and disabled by individual companies in their account settings, it can lead to issues when calling the corresponding endpoint. This is because the feature may be disabled, or its behavior may vary across different companies.
Instead, the recommended approach is to use the "request a custom report" API to retrieve bulk employee data, which is a more reliable and consistent method.
To retrieve information about a specific employee, you can make a GET request to this endpoint:
where {id} is the ID of the employee you want to retrieve and {companyDomain} is the company subdomain.
This endpoint allows you to retrieve employee data by specifying a set of fields. It is ideal for retrieving basic employee information, including current values for fields that are part of a historical table such as job title or compensation information.
This retrieves the data for the employee with ID 0. Make sure to replace {subdomain} with your actual BambooHR credentials.
To create a new employee, you can make a POST request:
The endpoint allows for the addition of a new employee. It is mandatory to provide at least the first and last names of the new employee. Upon successful creation, the ID of the newly created employee can be found in the response's Location header.
This creates a new employee with the specified data. Make sure to replace `{subdomain}` with your actual BambooHR credentials.
To update an existing employee's data, you can make a PUT request to the `/employees/{id}` endpoint with a JSON payload containing the updated employee data.
Here's an example using Python requests library:
This updates the data for the employee with ID 134 with the specified data. Make sure to replace {subdomain} with your actual BambooHR credentials.
Pagination for BambooHR API is case-specific.
To navigate to the next page of results, you can use the next URL provided in the Link header of the response.
Yes. BambooHR offers an open REST API that allows developers to programmatically access and manage employee data, time-off records, company reports, and HR events. The API uses HTTP Basic Auth with an API key and supports JSON and XML response formats (JSON is the default when requested via the Accept header). The BambooHR API is available to all BambooHR customers at no additional cost. Knit's unified HRIS API includes BambooHR alongside 100+ other HR platforms, normalising BambooHR's data model into a consistent schema so SaaS products don't need to build against BambooHR's endpoints directly.
To generate a BambooHR API key: log in to your BambooHR account, click your profile icon in the top right, select "API Keys", then click "Add New Key" and give it a name. The key is displayed once - copy it immediately as it won't be shown again. Use the API key as the username in an HTTP Basic Auth header (the password field can be anything, conventionally "x"). API keys are scoped to the account that generates them, so each customer connection requires a separate key. For SaaS teams managing multiple customer connections, Knit handles API key provisioning and rotation across all BambooHR customer accounts automatically.
The BambooHR API uses HTTP Basic Auth with an API key instead of OAuth. Generate an API key in BambooHR under your profile icon → API Keys, then pass it as the username in a Basic Auth header with any string (e.g. 'x') as the password. Your base URL is https://api.bamboohr.com/api/gateway.php/{company_domain}/v1/. Every request must include the header Accept: application/json to receive JSON responses instead of XML.
Use the Employee Directory endpoint: GET /v1/employees/directory - this returns a list of all active employees with basic fields. For richer data including custom fields, use the Custom Report endpoint: POST /v1/reports/custom with a JSON body specifying the fields you want. BambooHR does not paginate employee lists - all employees are returned in a single response, so for large organisations the response can be substantial.
BambooHR uses a field-request model - you must specify which fields you want returned rather than receiving all fields by default. Standard fields include: id, firstName, lastName, workEmail, jobTitle, department, division, location, employmentHistoryStatus, hireDate, terminationDate, supervisor, mobilePhone, and payRate. The full list of available field IDs is returned by GET /v1/meta/fields.
Custom fields in BambooHR are referenced by their field ID, retrieved via GET /v1/meta/fields - this returns all available fields including custom ones, each with a unique numeric ID. Include these custom field IDs in the fields parameter of your employee or report request. Custom field availability varies per BambooHR account, so field IDs must be fetched per customer rather than hardcoded - a key challenge when building multi-tenant integrations against BambooHR.
BambooHR does not publish exact rate limit thresholds officially, but enforces them per API key. In practice, the limit is approximately 100 requests per minute per API key — requests exceeding this return a 503 Service Unavailable (not the standard 429). Always implement exponential backoff and treat 503 responses as a rate limit signal, not a server error. For teams consuming BambooHR data through Knit, rate limit handling is managed automatically - Knit monitors request pacing per customer connection and spaces calls to stay within BambooHR's thresholds.
BambooHR has limited native webhook support - it can send notifications for certain events (such as time-off requests and employee data changes) via its Webhooks feature, but coverage is narrower than most modern HRIS platforms and configuration is done within the BambooHR admin UI rather than programmatically via API. For SaaS products that need reliable, real-time event delivery across all BambooHR data types, Knit provides virtual webhooks - detecting BambooHR data changes and pushing normalised event payloads to your endpoint, covering employee creates, updates, and terminations that BambooHR's native webhooks may not surface.
Use the Changed Employees endpoint: GET /v1/employees/changed?since={ISO8601_timestamp} - this returns only employees whose records have changed since the given timestamp, avoiding the need to re-fetch all employees on every sync run. For table data (job history, compensation changes), use GET /v1/employees/changed/tables/{table_name}?since={timestamp}. This incremental approach is essential for production integrations where polling all employees repeatedly would be slow and risk rate limiting.
Use Python's requests library with HTTP Basic Auth. Set your company domain and API key, then call: requests.get('https://api.bamboohr.com/api/gateway.php/{company}/v1/employees/directory', auth=(api_key, 'x'), headers={'Accept': 'application/json'}). For specific employees with chosen fields: GET /v1/employees/{id}?fields=firstName,lastName,jobTitle,workEmail. Parse the JSON response with response.json() - the directory returns an employees array, individual lookups return a flat object.
Key challenges include: the field-request model requires knowing which field IDs to request upfront, and custom field IDs vary per customer account; rate limiting returns 503 instead of the standard 429, requiring custom error handling; BambooHR has no native webhooks, so real-time sync requires polling the Changed Employees endpoint; and the API returns XML by default - you must explicitly set Accept: application/json. For multi-tenant SaaS products, managing per-customer API keys and field mapping across accounts adds significant complexity. Knit normalises BambooHR data into a standard employee model, handling field mapping, auth, and incremental sync across customers.
In conclusion, the BambooHR API is a valuable tool for any organization looking to streamline their HR and employee data management processes. By leveraging the power of the API, organizations can improve their operations, reduce manual data entry, and gain deeper insights into their workforce.
If you need to quickly get access to BambooHR data, Knit unified API can make it easier for you. Knit is a unified API that connects 40+ HR and ATS APIs via a single, unified API. All you need to do is to integrate once with Knit, and all the authentication, authorization and integration maintenance will be done by Knit.
Talk to our sales team to learn more or get you free API key today
As HR and payroll complexities continue to grow in 2026, organizations are seeking ways to streamline their processes, reduce manual overhead, and stay compliant with ever-changing regulations. ADP (Automatic Data Processing), a leading human capital management (HCM) provider, answers these challenges with a robust suite of tools and services—everything from payroll to benefits, time tracking, and tax compliance. However, the true value emerges when you integrate these capabilities into your existing software ecosystems, using the ADP API suite.
Looking for a quick start with ADP Integrations? Check our ADP API Directory for common ADP API endpoints
In this comprehensive guide, we’ll dissect how adp integrations help automate HR tasks, reduce compliance headaches, and enhance business agility. Whether you’re looking at the adp api central platform, exploring adp workforce now api, or searching the adp developer portal for integration options, you’ll find essential tips, best practices, and real-world examples here. By the end, you’ll be equipped to confidently plan, build, test, and deploy an adp integration that aligns with your unique business goals.
At its core, ADP is a cloud-based platform offering HCM services to manage everything from recruitment and onboarding to payroll, taxes, benefits, and compliance. Despite this broad coverage, no two organizations run the exact same mix of software tools. It’s becoming standard practice for businesses to integrate ADP with CRMs, ERPs, eSignature tools, applicant tracking systems, and more—thereby driving efficiency and better data accuracy.
Founded nearly 70 years ago, ADP has grown into a global HCM powerhouse, trusted by over 900,000 clients. The platform covers core HR needs:
Regardless of which solution you use, adp workforce now api and other specialized endpoints let you sync employee data, run payroll seamlessly, and manage benefits or time tracking in near-real time.
Manual data transfers between HR tools, payroll software, and other systems open the door to errors. ADP API integration streamlines tasks like onboarding, offboarding, payroll runs, benefit changes, and more—leading to significant time savings for HR teams.
Synchronizing employee records, compensation changes, or new hires ensures everyone works with the same up-to-date information. Whether you’re updating a CRM to reflect new employees or connecting with a scheduling application, real-time updates prevent miscommunications.
ADP actively tracks labor law changes, ensuring your payroll and taxes remain compliant. With adp integration, you can feed these compliance updates into your other systems (like auditing or ERP software) to maintain consistent and accurate records.
Some organizations rely on essential HR functionalities, while others need advanced modules or external integrations—like adp and salesforce or specialized CRMs. Thanks to adp api documentation, it’s straightforward to integrate precisely the modules you need.
Certain integration platforms or iPaaS solutions provide pre-configured connectors for adp apis. This approach shortens development time and often includes a user-friendly interface. However, customization can be limited if your integration needs are highly specialized.
Enterprises with unique security or data transformation requirements may prefer building a custom solution. Directly interacting with the adp workforce api (or an alternative ADP endpoint) ensures that you control every detail of the process, from data mapping to exception handling.
Tools like Knit offer a unified approach, enabling you to manage multiple HRIS and payroll integrations (including ADP) in one place. On the other hand if you build bespoke business logic for each customer, an embedded iPaaS solution can be a strategic move.
ADP Workforce Now is one of ADP’s most popular solutions—particularly for mid-sized and large businesses looking for all-in-one HCM. Common integration scenarios include:
Other relevant modules exist in the ADP ecosystem:
Each module may expose different adp apis, so verifying compatibility and scoping each integration remains crucial.
Before you can tap into adp api documentation or sandbox environments, you’ll need to sign up on the adp developer portal. This registration process (explained later in the article) yields client credentials (Client ID, Client Secret), which you’ll use for authentication.
Most ADP workforce api endpoints rely on OAuth 2.0 for secure access. The flow typically involves:
Because tokens expire periodically, your integration must handle refresh logic. If you attempt to call an endpoint with an expired token, you’ll get a 401 error (Unauthorized).
For certain high-security requirements, ADP supports mTLS using certificate-based authentication. Generating a Certificate Signing Request (CSR) ensures traffic is encrypted end-to-end. This approach is more complex but offers stronger cryptographic guarantees.
Below, we revisit the crucial steps from the original doc—along with relevant code snippets—to illustrate how to implement adp integrations effectively.
Setting Up ADP Developer Account
Use of Sandbox & Postman
import requests
import json

CLIENT_ID = "your_client_id"
CLIENT_SECRET = "your_client_secret"
AUTH_URL = "https://accounts.adp.com/auth/oauth/v2/token"

def get_adp_access_token():
    auth = (CLIENT_ID, CLIENT_SECRET)
    headers = {
        "Content-Type": "application/x-www-form-urlencoded"
    }
    data = {
        "grant_type": "client_credentials"
    }

    response = requests.post(AUTH_URL, headers=headers, auth=auth, data=data)

    if response.status_code == 200:
        token_data = json.loads(response.text)
        return token_data["access_token"]
    else:
        print(f"Error fetching token: {response.status_code} - {response.text}")
        return None
This snippet outlines how you might obtain an ADP OAuth 2.0 access token in Python. Note that in a real production environment, you’ll want robust error handling, token caching, and refresh logic.
ADP Workforce Now API
Getting Started With ADP Payroll API
Obtain API Credentials & Set Up Authentication
Below is a representative JSON request based on the original doc, focusing on “Pay Data Input.”
{
  "events": [
    {
      "data": {
        "eventContext": {
          "worker": {
            "associateOID": "{{employeeAOID}}"
          },
          "payrollInstruction": {
            "payrollGroupCode": {
              "codeValue": "{{payrollGroupCode}}",
              "shortName": "94N"
            },
            "payrollFileNumber": "{{payrollFileNumber}}",
            "payrollAgreementID": "{{payrollAgreementID}}",
            "itemID": "169749147863_1",
            "generalDeductionInstruction": {
              "deductionCode": {
                "codeValue": "M"
              }
            }
          }
        },
        "transform": {
          "effectiveDateTime": "2020-05-08",
          "payrollInstruction": {
            "generalDeductionInstruction": {
              "inactiveIndicator": true,
              "deductionRate": {
                "rateValue": "20"
              }
            }
          }
        }
      }
    }
  ]
}
Key fields:
"associateOID": The unique employee identifier in ADP."deductionCode": Identifies which deduction to change or create."inactiveIndicator": Marks a deduction as inactive."deductionRate": The new deduction rate.Sample Response (HTTP 200 OK):
{
  "events": [
    {
      "data": {
        "eventContext": {
          "worker": {
            "associateOID": "G34YJ69EMRR7N4VJ"
          },
          "payrollInstruction": {
            "payrollGroupCode": {
              "codeValue": "94N",
              "shortName": "94N"
            },
            "payrollFileNumber": "4567",
            "payrollAgreementID": "CC1_169737547546",
            "itemID": "169749147863_1",
            "generalDeductionInstruction": {
              "deductionCode": {
                "codeValue": "M"
              }
            }
          }
        },
        "transform": {
          "effectiveDateTime": "2020-05-08",
          "payrollInstruction": {
            "generalDeductionInstruction": {
              "inactiveIndicator": true,
              "deductionRate": {
                "rateValue": "20"
              }
            }
          }
        }
      }
    }
  ]
}
ADP HR API integrates core employee data with workforce operations. Modules include:
{
  "events": [
    {
      "data": {
        "transform": {
          "worker": {
            "photo": {
              "nameCode": {
                "shortName": "photo",
                "longName": "photo"
              },
              "links": [
                {
                  "href": "/hr/v2/workers/G310YGK80NSS9D2N/worker-images/photo",
                  "mediaType": "image/jpg",
                  "method": "GET"
                }
              ]
            }
          },
          "effectiveDateTime": null
        }
      },
      "links": []
    }
  ]
}
Pro Tip: Always check ADP’s doc for the latest href or mediaType values, as these can change based on version updates.
ADP provides a controlled environment with sample data. By testing in a sandbox, you avoid messing with live employee records. Key checks include:
A user-friendly GUI for calling REST APIs:
Debugging Tips:
One of the most frequent queries is how to integrate adp and salesforce. For example:
Syncing time, attendance, or payroll results with financial modules ensures accurate costing and budgeting. You can track labor costs more efficiently across cost centers or business units.
If your CRM needs real-time updates on employees for marketing or internal comms, an adp integration ensures consistent contact info and job titles across systems like HubSpot or Zendesk.
As ADP handles sensitive HR, payroll, and tax data, ensuring a strong security posture is paramount.
The adp developer portal (often referred to as adp api central) is your go-to resource for technical details:
In an era defined by rapid HR and payroll transformations, organizations that leverage ADP’s robust capabilities gain a notable competitive edge—especially when these are woven seamlessly into broader enterprise tech stacks. From automating payroll runs to synchronizing new hire data in CRMs, the potential for time savings, error reduction, and compliance improvement is vast.
By following the best practices outlined here—prioritizing stable authentication, thorough data mapping, continuous testing, and robust security—you can confidently build or enhance your adp workforce api integration. Whether you’re just beginning your journey on the adp developer portal or looking to expand existing adp api connections, remember that thoughtful planning, collaboration, and vigilant monitoring are key to long-term success.
Ready to streamline your HR and payroll workflows? It’s time to embrace ADP integrations as a vital component of your digital transformation strategy.
Does ADP have an API?
Yes, ADP provides a REST API for accessing payroll, HR, and workforce data programmatically. API access is managed through ADP API Central, a separate product that must be purchased to obtain credentials and access ADP's developer resources. The API follows an event-based pattern for resource management and supports multiple ADP products, including Workforce Now and RUN. Knit's unified HRIS API includes ADP alongside 65+ other HR and payroll platforms through a single normalised endpoint.
What is ADP API Central?
ADP API Central is ADP's developer platform for accessing its REST APIs - it must be purchased separately from your ADP subscription to get API credentials and access the developer portal. Once purchased, it provides API keys, documentation, an API Explorer, and tools to build and manage integration projects. Unlike most HRIS platforms, where API access is included, ADP API Central is a paid add-on.
What is an ADP API?
ADP APIs are REST-based interfaces designed using an event-based pattern that separates retrieving resources from modifying them, and provides event notifications when resources change. They allow developers to programmatically access ADP payroll, HR, time, and benefits data across ADP's product suite. ADP supports the OData protocol for structured data querying. Knit normalises ADP's API responses into a consistent data model alongside 65+ other HRIS platforms, removing the need for ADP-specific integration logic.
How do I get access to the ADP API?
To access the ADP API, purchase API Central through your ADP account or the ADP Marketplace. Once provisioned, log in to the API Central portal, create a project, select the relevant use case (such as Employee Demographic Data), and generate OAuth 2.0 credentials. Each customer must go through this process for their own ADP account. Knit manages the ADP API Central credential setup and OAuth flow across all customer accounts, removing per-customer provisioning work from your team.
What data can I access through the ADP API?
The ADP API exposes employee demographic data, payroll information, time and attendance records, benefits enrollment, and HR events such as new hires, terminations, and job changes. Data availability depends on which ADP product your customer uses (Workforce Now, RUN, TotalSource) and which use cases are enabled in API Central. Knit normalises ADP's data model into a consistent schema alongside other HRIS and payroll platforms, so your application doesn't need ADP-specific field mapping.
How do I authenticate with the ADP API?
The ADP API uses OAuth 2.0 for authentication — credentials are obtained through the API Central portal, and an access token is generated using the client credentials flow. The token is passed as a Bearer token in API requests. For multi-tenant integrations, each customer must purchase API Central and go through a separate credential setup. Knit manages the full OAuth lifecycle for ADP across all customer accounts without requiring per-customer credential handling from your team.
How do I extract data from ADP?
Extracting data from ADP programmatically involves using the ADP REST API with credentials from API Central - call the relevant endpoints for employee, payroll, or time data, paginate through results, and handle event notifications for incremental updates. ADP also supports OData queries for structured data extraction. Knit's ADP connector handles authentication, pagination, and data normalisation, delivering ADP employee and payroll data in a consistent format alongside other connected HRIS platforms.
What are the main challenges of building an ADP API integration?
The main challenges are the requirement to purchase API Central separately (adding cost and setup friction for each customer), accessing the API documentation -as most of it is behind a paywall/login, managing OAuth credentials across multiple customer ADP accounts, handling differences between ADP product lines (Workforce Now vs RUN expose different endpoints), and mapping ADP's event-based data model to your application's schema. Per-customer API Central provisioning is the biggest onboarding bottleneck. Knit manages the full ADP integration lifecycle - credentials, auth, normalisation, and maintenance - across all customer accounts.
What is ADP integration?
ADP integration refers to connecting ADP's HR and payroll platform with other software systems - such as CRMs, ERPs, ATS platforms, benefits providers, or SaaS products - so that data flows automatically between them. For internal IT teams, this typically means connecting ADP Workforce Now, ADP Run or other ADP products with tools like Salesforce or ServiceNow. For SaaS vendors, it means building a customer-facing integration that reads or writes ADP data on behalf of their customers. Knit provides a unified ADP integration that SaaS products can activate in days, normalising ADP employee and payroll data into a consistent API schema alongside 100+ other HRIS platforms.
What is the ADP Workforce Now API?
The ADP Workforce Now API is the REST API surface for ADP's flagship HCM platform, used primarily by mid-market and enterprise companies. It provides access to employee records, payroll data, time and attendance, benefits, and HR events for organisations running ADP Workforce Now. Access requires API Central, which is purchased separately. The Workforce Now API is the most widely used of ADP's APIs due to Workforce Now's market dominance in the mid-market segment. Knit's ADP integration supports Workforce Now alongside ADP Vantage and RUN through the same normalised API endpoint, so SaaS teams don't need separate integrations per ADP platform.
How much does ADP API access cost?
ADP does not publish pricing for API Central publicly -costs are negotiated through your ADP account team and vary by organisation size and API usage volume. API Central is sold as an add-on to your existing ADP subscription.
This guide is part of our growing collection on HRIS integrations. We’re continuously exploring new apps and updating our HRIS Guides Directory with fresh insights.
Workday has become one of the most trusted platforms for enterprise HR, payroll, and financial management. It’s the system of record for employee data in thousands of organizations. But as powerful as Workday is, most businesses don’t run only on Workday. They also use performance management tools, applicant tracking systems, payroll software, CRMs, SaaS platforms, and more.
The challenge? Making all these systems talk to each other.
That’s where the Workday API comes in. By integrating with Workday’s APIs, companies can automate processes, reduce manual work, and ensure accurate, real-time data flows between systems.
In this blog, we’ll give you everything you need, whether you’re a beginner just learning about APIs or a developer looking to build an enterprise-grade integration.
We’ll cover terminology, use cases, step-by-step setup, code examples, and FAQs. By the end, you’ll know how Workday API integration works and how to do it the right way.
Looking to quickstart with the Workday API Integration? Check our Workday API Directory for common Workday API endpoints
Workday integrations can support both internal workflows for your HR and finance teams, as well as customer-facing use cases that make SaaS products more valuable. Let’s break down some of the most impactful examples.
Performance reviews are key to fair salary adjustments, promotions, and bonus payouts. Many organizations use tools like Lattice to manage reviews and feedback, but without accurate employee data, the process can become messy.
By integrating Lattice with Workday, job titles and salaries stay synced and up to date. HR teams can run performance cycles with confidence, and once reviews are done, compensation changes flow back into Workday automatically — keeping both systems aligned and reducing manual work.
Onboarding new employees is often a race against time , from getting payroll details set up to preparing IT access. With Workday, you can automate this process.
For example, by integrating an ATS like Greenhouse with Workday:
For SaaS companies, onboarding users efficiently is key to customer satisfaction. Workday integrations make this scalable.
Take BILL, a financial operations platform, as an example:
Offboarding is just as important as onboarding, especially for maintaining security. If a terminated employee retains access to systems, it creates serious risks.
Platforms like Ramp, a spend management solution, solve this through Workday integrations:
While this guide equips developers with the skills to build robust Workday integrations through clear explanations and practical examples, the benefits extend beyond the development team. You can also expand your HRIS integrations with the Workday API integration and automate tedious tasks like data entry, freeing up valuable time to focus on other important work. Business leaders gain access to real-time insights across their entire organization, empowering them to make data-driven decisions that drive growth and profitability. This guide empowers developers to build integrations that streamline HR workflows, unlock real-time data for leaders, and ultimately unlock Workday's full potential for your organization.
Understanding key terms is essential for effective integration with Workday. Let’s look upon few of them, that will be frequently used ahead -
1. API Types: Workday offers REST and SOAP APIs, which serve different purposes. REST APIs are commonly used for web-based integrations, while SOAP APIs are often utilized for complex transactions.
2. Endpoint Structure: You must familiarize yourself with the Workday API structure as each endpoint corresponds to a specific function. A common workday API example would be retrieving employee data or updating payroll information.
3. API Documentation: Workday API documentation provides a comprehensive overview of both REST and SOAP APIs.
Workday supports two primary ways to authenticate API calls. Which one you use depends on the API family you choose:
SOAP requests are authenticated with a special Workday user account (the ISU) using WS-Security headers. Access is controlled by the security group(s) and domain policies assigned to that ISU.
REST requests use OAuth 2.0. You register an API client in Workday, grant scopes (what the client is allowed to access), and obtain access tokens (and a refresh token) to call endpoints.
To ensure a secure and reliable connection with Workday's APIs, this section outlines the essential prerequisites. These steps will lay the groundwork for a successful integration, enabling seamless data exchange and unlocking the full potential of Workday within your existing technological infrastructure.
Now that you have a comprehensive overview of the steps required to build a Workday API Integration and an overview of the Workday API documentation, lets dive deep into each step so you can build your Workday integration confidently!
The Web Services Endpoint for the Workday tenant serves as the gateway for integrating external systems with Workday's APIs, enabling data exchange and communication between platforms. To access your specific Workday web services endpoint, follow these steps:
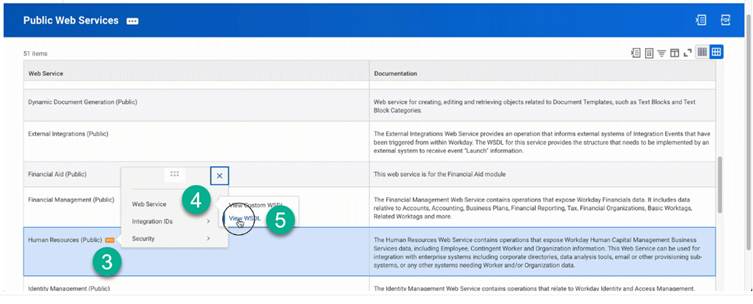
Next, you need to establish an Integration System User (ISU) in Workday, dedicated to managing API requests. This ensures enhanced security and enables better tracking of integration actions. Follow the below steps to set up an ISU in Workday:
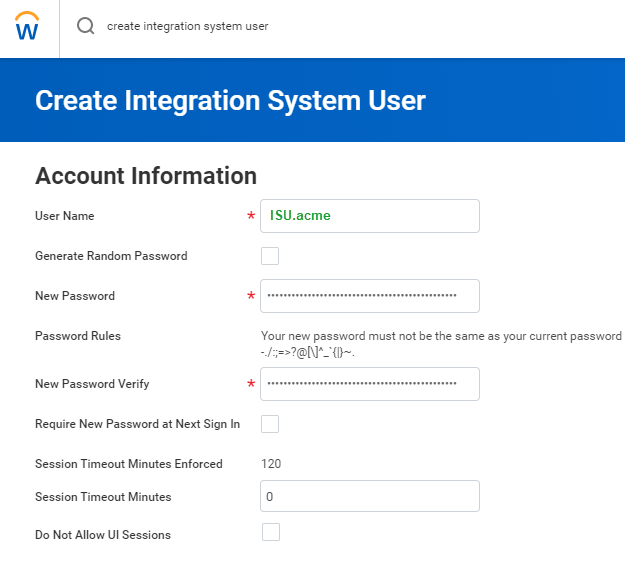
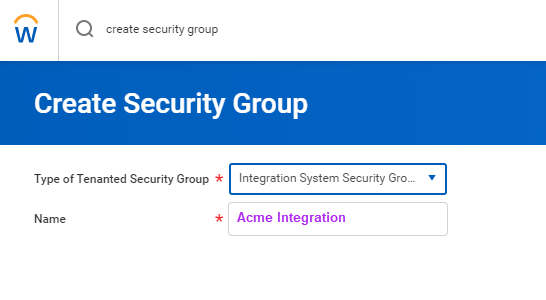

Note: The permissions listed below are necessary for the full HRIS API. These permissions may vary depending on the specific implementation
Parent Domains for HRIS
Parent Domains for HRIS
Workday offers different authentication methods. Here, we will focus on OAuth 2.0, a secure way for applications to gain access through an ISU (Integrated System User). An ISU acts like a dedicated user account for your integration, eliminating the need to share individual user credentials. Below steps highlight how to obtain OAuth 2.0 tokens in Workday:
When building a Workday integration, one of the first decisions you’ll face is: Should I use SOAP or REST?
Both are supported by Workday, but they serve slightly different purposes. Let’s break it down.
SOAP (Simple Object Access Protocol) has been around for years and is still widely used in Workday, especially for sensitive data and complex transactions.
How to work with SOAP:
REST (Representational State Transfer) is the newer, lighter, and easier option for Workday integrations. It’s widely used in SaaS products and web apps.
Advantages of REST APIs
How to work with REST:
Now that you have picked between SOAP and REST, let's proceed to utilize Workday HCM APIs effectively. We'll walk through creating a new employee and fetching a list of all employees – essential building blocks for your integration. Remember, if you are using SOAP, you will authenticate your requests with an ISU user name and password, while if your are using REST, you will authenticate your requests with access tokens generated by using the OAuth refresh tokens we generated in the above steps.
In this guide, we will focus on using SOAP to construct our API requests.
First let's learn about constructing a SOAP Request Body
SOAP requests follow a specific format and use XML to structure the data. Here's an example of a SOAP request body to fetch employees using the Get Workers endpoint:
<soapenv:Envelope
xmlns:soapenv="http://schemas.xmlsoap.org/soap/envelope/"
xmlns:bsvc="urn:com.workday/bsvc">
    <soapenv:Header>
        <wsse:Security>
            <wsse:UsernameToken>
                <wsse:Username>{ISU USERNAME}</wsse:Username>
                <wsse:Password>{ISU PASSWORD}</wsse:Password>
            </wsse:UsernameToken>
        </wsse:Security>
    </soapenv:Header>
    <soapenv:Body>
        <bsvc:Get_Workers_Request xmlns:bsvc="urn:com.workday/bsvc" bsvc:version="v40.1">
        </bsvc:Get_Workers_Request>
    </soapenv:Body>
</soapenv:Envelope>
👉 How it works:
Now that you know how to construct a SOAP request, let's look at a couple of real life Workday integration use cases:
Let's add a new team member. For this we will use the Hire Employee API! It lets you send employee details like name, job title, and salary to Workday. Here's a breakdown:
curl --location 'https://wd2-impl-services1.workday.com/ccx/service/{TENANT}/Staffing/v42.0' \
--header 'Content-Type: application/xml' \
--data-raw '<soapenv:Envelope xmlns:bsvc="urn:com.workday/bsvc" xmlns:soapenv="http://schemas.xmlsoap.org/soap/envelope/">
    <soapenv:Header>
        <wsse:Security>
            <wsse:UsernameToken>
                <wsse:Username>{ISU_USERNAME}</wsse:Username>
                <wsse:Password>{ISU_PASSWORD}</wsse:Password>
            </wsse:UsernameToken>
        </wsse:Security>
        <bsvc:Workday_Common_Header>
            <bsvc:Include_Reference_Descriptors_In_Response>true</bsvc:Include_Reference_Descriptors_In_Response>
        </bsvc:Workday_Common_Header>
    </soapenv:Header>
    <soapenv:Body>
        <bsvc:Hire_Employee_Request bsvc:version="v42.0">
            <bsvc:Business_Process_Parameters>
                <bsvc:Auto_Complete>true</bsvc:Auto_Complete>
                <bsvc:Run_Now>true</bsvc:Run_Now>
            </bsvc:Business_Process_Parameters>
            <bsvc:Hire_Employee_Data>
                <bsvc:Applicant_Data>
                    <bsvc:Personal_Data>
                        <bsvc:Name_Data>
                            <bsvc:Legal_Name_Data>
                                <bsvc:Name_Detail_Data>
                                    <bsvc:Country_Reference>
                                        <bsvc:ID bsvc:type="ISO_3166-1_Alpha-3_Code">USA</bsvc:ID>
                                    </bsvc:Country_Reference>
                                    <bsvc:First_Name>Employee</bsvc:First_Name>
                                    <bsvc:Last_Name>New</bsvc:Last_Name>
                                </bsvc:Name_Detail_Data>
                            </bsvc:Legal_Name_Data>
                        </bsvc:Name_Data>
                        <bsvc:Contact_Data>
                            <bsvc:Email_Address_Data bsvc:Delete="false" bsvc:Do_Not_Replace_All="true">
                                <bsvc:Email_Address>employee@work.com</bsvc:Email_Address>
                                <bsvc:Usage_Data bsvc:Public="true">
                                    <bsvc:Type_Data bsvc:Primary="true">
                                        <bsvc:Type_Reference>
                                            <bsvc:ID bsvc:type="Communication_Usage_Type_ID">WORK</bsvc:ID>
                                        </bsvc:Type_Reference>
                                    </bsvc:Type_Data>
                                </bsvc:Usage_Data>
                            </bsvc:Email_Address_Data>
                        </bsvc:Contact_Data>
                    </bsvc:Personal_Data>
                </bsvc:Applicant_Data>
                <bsvc:Position_Reference>
                    <bsvc:ID bsvc:type="Position_ID">P-SDE</bsvc:ID>
                </bsvc:Position_Reference>
                <bsvc:Hire_Date>2024-04-27Z</bsvc:Hire_Date>
            </bsvc:Hire_Employee_Data>
        </bsvc:Hire_Employee_Request>
    </soapenv:Body>
</soapenv:Envelope>'
Elaboration:
Response:
<bsvc:Hire_Employee_Event_Response
xmlns:bsvc="urn:com.workday/bsvc" bsvc:version="string">
<bsvc:Employee_Reference bsvc:Descriptor="string">
<bsvc:ID bsvc:type="ID">EMP123</bsvc:ID>
</bsvc:Employee_Reference>
</bsvc:Hire_Employee_Event_Response>
If everything goes well, you'll get a success message and the ID of the newly created employee!
Now, if you want to grab a list of all your existing employees. The Get Workers API is your friend!
Below is workday API get workers example:
curl --location 'https://wd2-impl-services1.workday.com/ccx/service/{TENANT}/Human_Resources/v40.1' \
--header 'Content-Type: application/xml' \
--data '<soapenv:Envelope
xmlns:soapenv="http://schemas.xmlsoap.org/soap/envelope/"
xmlns:bsvc="urn:com.workday/bsvc">
<soapenv:Header>
<wsse:Security>
<wsse:UsernameToken>
<wsse:Username>{ISU_USERNAME}</wsse:Username>
<wsse:Password>{ISU_USERNAME}</wsse:Password>
</wsse:UsernameToken>
</wsse:Security>
</soapenv:Header>
<soapenv:Body>
<bsvc:Get_Workers_Request xmlns:bsvc="urn:com.workday/bsvc" bsvc:version="v40.1">
<bsvc:Response_Filter>
<bsvc:Count>10</bsvc:Count>
<bsvc:Page>1</bsvc:Page>
</bsvc:Response_Filter>
<bsvc:Response_Group>
<bsvc:Include_Reference>true</bsvc:Include_Reference>
<bsvc:Include_Personal_Information>true</bsvc:Include_Personal_Information>
</bsvc:Response_Group>
</bsvc:Get_Workers_Request>
</soapenv:Body>
</soapenv:Envelope>'This is a simple GET request to the Get Workers endpoint.
Elaboration:
Response:
<?xml version='1.0' encoding='UTF-8'?>
<env:Envelope xmlns:env="http://schemas.xmlsoap.org/soap/envelope/">
<env:Body>
<wd:Get_Workers_Response xmlns:wd="urn:com.workday/bsvc" wd:version="v40.1">
<wd:Response_Filter>
<wd:Page>1</wd:Page>
<wd:Count>1</wd:Count>
</wd:Response_Filter>
<wd:Response_Data>
<wd:Worker>
<wd:Worker_Data>
<wd:Worker_ID>21001</wd:Worker_ID>
<wd:User_ID>lmcneil</wd:User_ID>
<wd:Personal_Data>
<wd:Name_Data>
<wd:Legal_Name_Data>
<wd:Name_Detail_Data wd:Formatted_Name="Logan McNeil" wd:Reporting_Name="McNeil, Logan">
<wd:Country_Reference>
<wd:ID wd:type="WID">bc33aa3152ec42d4995f4791a106ed09</wd:ID>
<wd:ID wd:type="ISO_3166-1_Alpha-2_Code">US</wd:ID>
<wd:ID wd:type="ISO_3166-1_Alpha-3_Code">USA</wd:ID>
<wd:ID wd:type="ISO_3166-1_Numeric-3_Code">840</wd:ID>
</wd:Country_Reference>
<wd:First_Name>Logan</wd:First_Name>
<wd:Last_Name>McNeil</wd:Last_Name>
</wd:Name_Detail_Data>
</wd:Legal_Name_Data>
</wd:Name_Data>
<wd:Contact_Data>
<wd:Address_Data wd:Effective_Date="2008-03-25" wd:Address_Format_Type="Basic" wd:Formatted_Address="42 Laurel Street&#xa;San Francisco, CA 94118&#xa;United States of America" wd:Defaulted_Business_Site_Address="0">
</wd:Address_Data>
<wd:Phone_Data wd:Area_Code="415" wd:Phone_Number_Without_Area_Code="441-7842" wd:E164_Formatted_Phone="+14154417842" wd:Workday_Traditional_Formatted_Phone="+1 (415) 441-7842" wd:National_Formatted_Phone="(415) 441-7842" wd:International_Formatted_Phone="+1 415-441-7842" wd:Tenant_Formatted_Phone="+1 (415) 441-7842">
</wd:Phone_Data>
</wd:Worker_Data>
</wd:Worker>
</wd:Response_Data>
</wd:Get_Workers_Response>
</env:Body>
</env:Envelope>This JSON array gives you details of all your employees including details like the name, email, phone number and more.
Use a tool like Postman or curl to POST this XML to your Workday endpoint.
If you used REST instead, the same “Get Workers” request would look much simpler:
curl --location 'https://{host}.workday.com/ccx/api/v1/{tenant}/workers' \
--header 'Authorization: Bearer {ACCESS_TOKEN}'Before moving your integration to production, it’s always safer to test everything in a sandbox environment. A sandbox is like a practice environment; it contains test data and behaves like production but without the risk of breaking live systems.
Here’s how to use a sandbox effectively:
Ask your Workday admin to provide you with a sandbox environment. Specify the type of sandbox you need (development, test, or preview). If you are a Knit customer on the Scale or Enterprise plan, Knit will provide you access to a Workday sandbox for integration testing.
Log in to your sandbox and configure it so it looks like your production environment. Add sample company data, roles, and permissions that match your real setup.
Just like in production, create a dedicated ISU account in the sandbox. Assign it the necessary permissions to access the required APIs.
Register your application inside the sandbox to get client credentials (Client ID & Secret). These credentials will be used for secure API calls in your test environment.
Use tools like Postman or cURL to send test requests to the sandbox. Test different scenarios (e.g., creating a worker, fetching employees, updating job info). Identify and fix errors before deploying to production.
Use Workday’s built-in logs to track API requests and responses. Look for failures, permission issues, or incorrect payloads. Fix issues in your code or configuration until everything runs smoothly.
Once your integration has been thoroughly tested in the sandbox and you’re confident that everything works smoothly, the next step is moving it to the production environment. To do this, you need to replace all sandbox details with production values. This means updating the URLs to point to your production Workday tenant and switching the ISU (Integration System User) credentials to the ones created for production use.
When your integration is live, it’s important to make sure you can track and troubleshoot it easily. Setting up detailed logging will help you capture every API request and response, making it much simpler to identify and fix issues when they occur. Alongside logging, monitoring plays a key role. By keeping track of performance metrics such as response times and error rates, you can ensure the integration continues to run smoothly and catch problems before they affect your workflows.
If you’re using Knit, you also get the advantage of built-in observability dashboards. These dashboards give you real-time visibility into your live integration, making debugging and ongoing maintenance far easier. With the right preparation and monitoring in place, moving from sandbox to production becomes a smooth and reliable process.
PECI (Payroll Effective Change Interface) lets you transmit employee data changes (like new hires, raises, or terminations) directly to your payroll provider, slashing manual work and errors. Below you will find a brief comparison of PECI and Web Services and also the steps required to setup PECI in Workday
Feature: PECI
Feature: Web Services
PECI set up steps :-
Workday does not natively support real-time webhooks. This means you can’t automatically get notified whenever an event happens in Workday (like a new employee being hired or someone’s role being updated). Instead, most integrations rely on polling, where your system repeatedly checks Workday for updates. While this works, it can be inefficient and slow compared to event-driven updates.
This is exactly where Knit Virtual Webhooks step in. Knit simulates webhook functionality for systems like Workday that don’t offer it out of the box.
Knit continuously monitors changes in Workday (such as employee updates, terminations, or payroll changes). When a change is detected, it instantly triggers a virtual webhook event to your application. This gives you real-time updates without having to build complex polling logic.
For example: If a new hire is added in Workday, Knit can send a webhook event to your product immediately, allowing you to provision access or update records in real time — just like native webhooks.
Getting stuck with errors can be frustrating and time-consuming. Although many times we face errors that someone else has already faced, and to avoid giving in hours to handle such errors, we have put some common errors below and solutions to how you can handle them.
Integrating with Workday can unlock huge value for your business, but it also comes with challenges. Here are some important best practices to keep in mind as you build and maintain your integration.
Workday supports two main authentication methods: ISU (Integration System User) and OAuth 2.0. The choice between them depends on your security needs and integration goals.
If your integration is customer-facing, don’t just focus on building it , think about how you’ll launch it. A Workday integration can be a major selling point, and many customers will expect it.
Before going live, align on:
This ensures your team is ready to deliver value from day one and can even help close deals faster.
Building and maintaining a Workday integration completely in-house can be very time-consuming. Your developers may spend months just scoping, coding, and testing the integration. And once it’s live, maintenance can become a headache.
For example, even a small change , like Workday returning a value in a different format (string instead of number) , could break your integration. Keeping up with these edge cases pulls your engineers away from core product work.
A third-party integration platform like Knit can solve this problem. These platforms handle the heavy lifting , scoping, development, testing, and maintenance , while also giving you features like observability dashboards, virtual webhooks, and broader HRIS coverage. This saves engineering time, speeds up your launch, and ensures your integration stays reliable over time.
We know you're here to conquer Workday integrations, and at Knit (rated #1 for ease of use as of 2025!), we're here to help! Knit offers a unified API platform which lets you connect your application to multiple HRIS, CRM, Accounting, Payroll, ATS, ERP, and more tools in one go.
Advantages of Knit for Workday Integrations
Getting Started with Knit
REST Unified API Approach with Knit
A Workday integration is a connection built between Workday and another system (like payroll, CRM, or ATS) that allows data to flow seamlessly between them. These integrations can be created using APIs, files (CSV/XML), databases, or scripts , depending on the use case and system design.
A Workday API integration is a type of integration where you use Workday’s APIs (SOAP or REST) to connect Workday with other applications. This lets you securely access, read, and update Workday data in real time.
It depends on your approach.
Workday offers:
Workday doesn’t publish all rate limits publicly. Most details are available only to customers or partners. However, some endpoints have documented limits , for example, the Strategic Sourcing Projects API allows up to 5 requests per second. Always design your integration with pagination, retry logic, and throttling to avoid issues. The safest approach is to implement exponential backoff on all retry logic, paginate all list operations regardless of expected result size, and avoid polling intervals shorter than 5 minutes for background sync jobs. If you're consuming Workday data through Knit, rate limit management is handled automatically — Knit spaces requests and retries within Workday's thresholds so your application never hits limits directly.
Workday provides sandbox environments to its customers for development and testing. If you’re a software vendor (not a Workday customer), you typically need a partnership agreement with Workday to get access. Some third-party platforms like Knit also provide sandbox access for integration testing.
Workday supports two main methods:
Yes. Workday provides both SOAP and REST APIs, covering a wide range of data domains, HR, recruiting, payroll, compensation, time tracking, and more. REST APIs are typically preferred because they are easier to implement, faster, and more developer-friendly.
Yes. If you are a Workday customer or have a formal partnership, you can build integrations with their APIs. Without access, you won’t be able to authenticate or use Workday’s endpoints.
No, Workday does not natively support outbound webhooks - there is no mechanism to push real-time change events to an external endpoint when an employee record is created, updated, or terminated. The standard alternative is polling: querying Workday's APIs on a schedule (typically every 15–60 minutes) to detect changes. Knit solves this with virtual webhooks — when you connect Workday through Knit, you receive real-time event notifications via webhook whenever data changes in Workday, without needing to build or maintain any polling infrastructure. This is particularly valuable for use cases that require fast response to Workday events, such as automated onboarding workflows triggered by new hires or access revocation triggered by terminations.
A custom Workday integration built directly against Workday Web Services typically takes 4–12 weeks for a single integration, factoring in ISU setup, OAuth configuration, SOAP/REST endpoint selection, data model mapping, error handling, and testing in sandbox before production. That timeline doesn't include ongoing maintenance as Workday releases new API versions. Using Knit's unified API, teams can go from zero to a production Workday integration in 1–3 days - Knit handles authentication, data normalization, rate limiting, and webhook delivery, so your engineering team only needs to integrate once against Knit's normalized API rather than Workday's raw endpoints directly. See https://developers.getknit.dev for implementation guides.
Workday API is a programmatic interface that allows external applications to read and write data in Workday - including employee records, payroll data, org structures, benefits, and time tracking. Workday offers two API types: SOAP-based Web Services (the older, more comprehensive set using XML) and REST APIs (modern, JSON-based, covering a growing set of domains). Both require formal authentication through an Integration System User (ISU) or OAuth 2.0 client. For SaaS products that need to access Workday data on behalf of their customers, Knit provides a unified API that normalizes Workday's data into a consistent schema alongside 100+ other HRIS platforms.
Workday's SOAP API (Web Services) is the older, more comprehensive set - it covers virtually every Workday domain including payroll, benefits, and complex HR transactions, uses XML, and requires constructing SOAP envelopes with WS-Security headers. Workday's REST API is newer, uses JSON, supports OAuth 2.0, and is simpler to implement - but it has narrower domain coverage than the full SOAP Web Services suite. For most new integrations, start with the REST API; fall back to SOAP for payroll, compliance-critical operations, or endpoints not yet exposed via REST. Knit abstracts both API types behind a single normalized endpoint, so you don't need to choose or maintain separate implementations.
Building a Workday integration directly has no per-call API cost from Workday itself - access to the API is included with Workday licenses. The real cost is engineering time: a custom integration typically takes 4–12 weeks of developer time to build and requires ongoing maintenance as Workday updates its API. Third-party tools vary: iPaaS platforms like Workato charge per task or connection; unified APIs like Knit charge per active connection per month, with pricing that covers authentication, data normalization, rate limiting, and webhook delivery. For SaaS teams building customer-facing Workday integrations at scale, unified API pricing is typically more predictable than task-based pricing as connection volume grows.

Accounting API integrations are one of the most common - and most painful - integration categories for B2B SaaS products. Every customer runs a different accounting platform: some on QuickBooks, others on Xero, Sage Intacct, NetSuite, or Microsoft Dynamics. Building and maintaining separate connectors for each is expensive, fragile, and never finished.
This guide covers everything developers need to know in 2026: the accounting data models you'll encounter, authentication patterns, common pitfalls, security requirements, and how to decide between building direct connectors versus using a unified accounting API like Knit to abstract the complexity.
If you're just looking to quick start with a specific Accounting APP integration, you can find APP specific guides and resources in our Accounting API Guides Directory
Whether you’re exploring bookkeeping APIs for internal workflows or embedding accounting software integrations into customer-facing products, leveraging an accounting integration API can yield major wins: real-time financial data, reduced manual errors, and faster revenue realization. This guide delves deeply into api integration for accounting and the range of accounting application APIs—from general ledger and payroll APIs to advanced reporting and analytics solutions - ensuring you have the insights to build or adopt an optimal api accounting framework in 2026 and beyond.
Every organization generating financial data - be it large enterprises or small businesses—seeks to maintain impeccable accuracy in its financial processes. Traditional, siloed accounting applications can only go so far in automating tasks like invoicing, billing, and expense management. But when you integrate these solutions with CRM, ERP, Marketing, or even e-commerce platforms using an accounting integration API, you unlock a more holistic, efficient system.
Ultimately, accounting software integrations transform discrete financial processes into a seamless ecosystem—allowing companies to glean real-time insights, adapt rapidly to market changes, and focus on strategic goals.
Regardless of size or industry, data accuracy underpins a company’s financial health. By connecting your accounting application API with other systems (e.g., CRM for deals or HRIS for payroll), you remove manual data entry points that can trigger errors. For example:
Time is money—especially in finance. With accounting API automation, billing and invoicing occur in near-real time. By eliminating delays in data exchange:
Customers today expect out-of-the-box accounting software integrations for tasks like expense reimbursement, payment processing, and more. By embedding robust connections to top bookkeeping APIs, you remove friction and deliver tangible value—closing deals faster and boosting renewal rates.
Offering multiple accounting application APIs paves the way for new market segments. Different industries use different accounting tools; delivering broad compatibility ensures you can address the needs of SMBs and enterprises across finance, healthcare, retail, and more.
Learn about more SaaS integration platforms
Understanding the core data structures is vital for any api integration for accounting. While each accounting software api (e.g., QuickBooks, Xero, NetSuite) may implement these fields slightly differently, most revolve around these key models:
By normalizing how your integration handles these concepts—e.g., ensuring consistent naming conventions and data formats—you drastically simplify the developer experience and reduce synchronization errors.
Modern accounting software integrations aren’t one-size-fits-all. Each subtype of accounting application api targets a unique function:
These broad solutions capture company-wide financial data: income, expenses, liabilities, and assets.
Focus on creating, sending, and tracking bills or invoices.
Automate salary disbursements and store payroll data for employees, contractors, and other payees.
Track, categorize, and approve corporate spend in real time.
Enable advanced financial analysis, custom reporting, and data visualization.
Allow secure online payment processing via credit cards, e-wallets, or net banking.
Automate tax rate lookups, compliance checks, and filing procedures.
Historical data from api accounting solutions can inform future spend, revealing inefficiencies or overspending and facilitating more accurate budgets.
Companies undergoing audits or adhering to strict regulatory requirements (e.g., nonprofits) use accounting software integrations to ensure consistent, verifiable records.
Automated invoice processing, payment scheduling, and expense reconciliation reduce overhead and minimize errors.
Despite their benefits, bookkeeping APIs and other accounting application APIs can come with significant pitfalls:
Some accounting platforms don’t offer public APIs; establishing a direct partnership can be cumbersome, requiring security checks and custom agreements. Adding multiple partners at scale can quickly become unmanageable.
Building and maintaining each integration can cost upwards of $10,000 and take weeks to complete. For large companies, the total cost and dev time balloon with each new accounting software api request.
If you’re connecting each app via direct, one-off connectors, you may quickly get stuck as new demands arise or the number of accounting tools surpasses developer bandwidth.
Ensuring near real-time sync under large loads can require sophisticated infrastructure. Frequent or high-volume data exchanges (invoices, transactions, logs) can strain both APIs and your own system.
Some accounting integration api documentation may be outdated, incomplete, or overly complex—leading to high developer frustration, mistakes in implementation, and delayed releases.
Accounting platforms often introduce new features or versions, potentially rendering existing integrations obsolete if not swiftly updated, further burdening engineering teams.
Learn about choosing a unified API vs. workflow automation
Different accounting application APIs use varied nomenclature and data structures (e.g., “line items” in one platform, “items” in another). Create an internal schema that normalizes naming conventions and data flows to unify your approach.
Because these APIs handle sensitive financial data, robust security is non-negotiable:
Dive deeper into API Security 101
Developers have two main paths: building direct connectors with each accounting software api or embracing a unified solution like Knit. Here’s a quick comparison:
Learn more about how Knit’s AI Agent streamlines accounting integration
Finance operations in 2026 and beyond rely heavily on integrated data flows that keep entire organizations aligned. Embracing api accounting solutions—whether you choose direct, one-off connections or a unified approach—allows you to automate critical financial workflows, ensure real-time visibility, and increase operational agility. By focusing on strategic integrations, robust security, and user-friendly experiences, your business can deliver the frictionless, automated ecosystem today’s customers demand.
Ready to supercharge your accounting workflows?
Book a Demo with Knit to explore how a unified accounting integration api can simplify your financial operations, reduce developer friction, and position you for scale.
An API (Application Programming Interface) in accounting is a set of protocols that allows software applications to programmatically read and write financial data - invoices, bills, journal entries, accounts, contacts, and transactions — from accounting platforms like QuickBooks, Xero, NetSuite, or Sage. Rather than manually exporting spreadsheets or re-entering data, an accounting API lets your product sync financial records directly with a customer's accounting system in real time. For B2B SaaS products, accounting APIs are the foundation for features like automated invoicing, expense syncing, payroll journal entries, and financial reporting.
What is an accounting API?
An accounting API is a programmatic interface that lets software applications read and write financial data - invoices, payments, journal entries, accounts, and contacts - from accounting platforms like QuickBooks, Xero, Sage Intacct, and NetSuite. Knit provides a unified accounting API that normalizes data from all major accounting platforms behind a single endpoint, so developers integrate once instead of building and maintaining separate connectors for each platform. This is particularly valuable for B2B SaaS products whose customers use a mix of accounting systems.
The most widely used accounting platforms with developer APIs are QuickBooks Online (the dominant SMB platform in the US), Xero (strong in the UK, Australia, and NZ), FreshBooks (freelancers and small businesses), Sage Intacct and Sage 50 (mid-market), Microsoft Dynamics 365 Business Central (enterprises), Oracle NetSuite (enterprises and scaling businesses), and Zoho Books. Each platform has its own REST API, authentication method (typically OAuth 2.0), and data model. Coverage requirements depend on your customer base - most B2B SaaS products start with QuickBooks and Xero, which together cover the majority of SMB accounting users. If you're looking to integrated with them you could consider Knit's unified accounting API that lets you integrate with all the accounting apps via a single integration
Accounting APIs typically expose: chart of accounts and account balances, invoices and bills (accounts receivable/payable), customers and vendor contacts, payments and receipts, journal entries, purchase orders, credit notes, tax rates, items/products, and bank transactions. The availability of specific objects varies by platform - for example, NetSuite has a far richer object model than FreshBooks. Most integrations focus on a subset: syncing invoices, pushing journal entries for payroll or expense data, or pulling account balances for financial reporting dashboards.
Each accounting platform has its own data model - the way it structures objects like invoices, accounts, and transactions. QuickBooks uses a line-item model for invoices with accounts linked by ID; Xero uses a similar structure but with different field names, account types, and currency handling; NetSuite has a far more complex object hierarchy suited to enterprise accounting. These differences matter because a field mapping that works for QuickBooks will not work unchanged for Xero or Sage. Building per-platform adapters for each data model is one of the primary maintenance costs of accounting integrations, which is why many teams eventually adopt a unified accounting API layer like Knit
Most modern accounting APIs use OAuth 2.0 with the Authorization Code flow - your customer connects their accounting account via a consent screen, and you receive access and refresh tokens scoped to their data. QuickBooks Online uses OAuth 2.0 with tokens that expire every hour (refresh tokens last 100 days). Xero also uses OAuth 2.0 with 30-minute access tokens and 60-day refresh tokens. Older or legacy platforms may use API key authentication. For multi-tenant SaaS products, you must securely store and refresh tokens per customer, and handle token revocation gracefully when a customer disconnects or changes their accounting credentials.
The main challenges are: divergent data models across platforms requiring per-platform field mapping; managing OAuth tokens at scale across many customer accounts; handling rate limits (QuickBooks enforces 500 requests per minute per company; Xero enforces 60 per minute); dealing with eventual consistency where changes made in the accounting UI don't appear in API responses instantly; error handling for partial failures (e.g. a journal entry rejected due to account configuration differences); and keeping integrations updated as platforms release breaking changes to their APIs. The cumulative engineering cost of maintaining multiple accounting integrations is why many SaaS teams look to a unified API to abstract platform differences.
A unified accounting API provides a single normalized data model and a single authentication flow that maps to multiple underlying accounting platforms. Instead of building separate integrations for QuickBooks, Xero, and NetSuite individually, you integrate once with the unified API and it handles the per-platform mapping, token management, and data normalization. This approach makes sense when your product needs to support more than two or three accounting platforms, when your team lacks dedicated integration engineering resources, or when time-to-market is a higher priority than owning the full integration layer. The tradeoff is less control over platform-specific features and dependency on a third-party abstraction layer. Knit provides a unified API for accounting and HR integrations, letting B2B SaaS products connect to all major accounting platforms through a single integration.
Key best practices: use webhooks or polling with incremental sync rather than full data refreshes to reduce API calls and stay within rate limits; store raw API responses alongside normalized data so you can re-process without re-fetching; handle rate limit responses (HTTP 429) with exponential backoff and a retry queue; validate account configurations at setup - a journal entry pushed to a non-existent account will fail silently on some platforms; scope OAuth tokens to the minimum permissions required; build idempotency into write operations so retries don't create duplicate invoices or entries; test against each platform's sandbox environment before going live, as platform behavior can differ meaningfully from documentation.
What is a unified accounting API and how does it differ from direct integration?
A unified accounting API like Knit provides a single normalized endpoint that maps to multiple accounting platforms - QuickBooks, Xero, Sage Intacct, NetSuite, FreshBooks, and more. Instead of building separate OAuth flows, data models, and sync logic for each platform, developers integrate once and the unified API handles per-platform differences. Direct integration gives more control over individual API surfaces but requires separate engineering effort and ongoing maintenance for each platform's API version changes. For most SaaS teams supporting 3+ accounting platforms, unified API ROI becomes clear within the first quarter of reduced maintenance overhead.
Is API better than EDI for accounting integrations?
For modern B2B SaaS products, APIs are almost always the better choice over EDI for accounting integrations. APIs support real-time data exchange, are significantly easier to implement and debug, and align with how all major accounting platforms (QuickBooks, Xero, NetSuite) expose their data today. EDI remains relevant for specific supply chain and large enterprise procurement workflows where trading partners mandate it, but for SaaS products building customer-facing accounting integrations, a REST API — or a unified accounting API like Knit — is the right architecture.
This article is part of a broader series covering the Paylocity API in depth. It focuses specifically on retrieving employee leave data using the Paylocity API.
If you're building HR integrations, leave data is not optional, it directly impacts payroll accuracy, workforce planning, and compliance. This guide walks through the exact flow required to access that data reliably.
For a complete breakdown of Paylocity APIs, including authentication, rate limits, and other use cases, refer to the full guide here.
The Paylocity API provides access to employee-related data through structured endpoints. However, leave data is not always exposed as a single consolidated resource.
In practice, you will need to retrieve employee records first and then map or extract leave-related attributes from the response. This multi-step approach is standard when working with Paylocity.
https://apisandbox.paylocity.com/api/v2/companies/{companyId}/employees/{employeeId}Ensure your API credentials are valid and included correctly in the request headers. Authentication failures are the most common integration blocker—resolve this upfront.
import requests

def get_employee_data(company_id, employee_id, api_key):
    url = f"https://apisandbox.paylocity.com/api/v2/companies/{company_id}/employees/{employee_id}"
    headers = {
        'accept': 'application/json',
        'Authorization': f'Bearer {api_key}'
    }
    response = requests.get(url, headers=headers)
    if response.status_code == 200:
        return response.json()
    else:
        return None

# Example usage
company_id = 'your_company_id'
employee_id = 'your_employee_id'
api_key = 'your_api_key'

employee_data = get_employee_data(company_id, employee_id, api_key)
print(employee_data)Direct integrations with Paylocity can become operationally heavy, authentication handling, schema inconsistencies, and ongoing maintenance add up quickly.
Knit simplifies this entire layer. With a single integration, you can standardize access to Paylocity data while offloading authentication, normalization, and maintenance overhead.
The result: faster deployment, lower engineering effort, and a more reliable integration stack.
This article is part of a broader series covering the Bullhorn API in depth. It focuses specifically on retrieving candidate education data using the Bullhorn API.
If you're building recruitment workflows, enriching candidate profiles, or standardizing talent data, accessing structured education records is a foundational requirement. This guide walks through how to do that efficiently, both for individual candidates and at scale.
For a complete overview of authentication, rate limits, and other Bullhorn API use cases, refer to the full guide here.
Before getting started, ensure the following are in place:
requests)GET /entity/CandidateEducation/{id}: Retrieve education data for a specific candidateGET /search/CandidateEducation: Retrieve education data across all candidatesimport requests
login_url = 'https://auth.bullhornstaffing.com/oauth/token'
params = {
'grant_type': 'password',
'client_id': 'YOUR_CLIENT_ID',
'client_secret': 'YOUR_CLIENT_SECRET',
'username': 'YOUR_USERNAME',
'password': 'YOUR_PASSWORD'
}
response = requests.post(login_url, data=params)
access_token = response.json()['access_token']candidate_id = 'CANDIDATE_ID'
education_url = f'https://rest.bullhorn.com/rest-services/{corpToken}/entity/CandidateEducation/{candidate_id}'
headers = {'BhRestToken': access_token}
response = requests.get(education_url, headers=headers)
education_data = response.json()search_url = f'https://rest.bullhorn.com/rest-services/{corpToken}/search/CandidateEducation'
params = {'query': '*', 'fields': 'id,candidate,degree,school,major'}
response = requests.get(search_url, headers=headers, params=params)
all_education_data = response.json()Execution typically fails not because of complexity, but due to operational gaps. Watch for these:
corpToken in the base URL leads to silent failures.start and count.PUT /entity/CandidateEducation/{id} endpoint.If your objective is speed and reliability, manual integration is a bottleneck.
Knit abstracts the entire Bullhorn API layer into a single integration. Authentication, authorization, and maintenance are handled out of the box.

This article is part of a broader series covering the Zoho People API in depth. It focuses on a high-frequency use case: retrieving employee leave data efficiently and reliably.
If you’re building HR integrations or automating workforce workflows, this is not optional plumbing, it’s core infrastructure.
For a complete breakdown of Zoho People API capabilities, including authentication and rate limits, refer to the full guide here.
https://people.zoho.com/people/api/leave/getLeaveTypeDetails?userId=<userId>https://people.zoho.com/people/api/leave/getHolidays?userId=<userId>https://people.zoho.com/people/api/forms/leave/getDataByID?recordId=<recordId>import requests
def get_leave_types(user_id, auth_token):
url = f"https://people.zoho.com/people/api/leave/getLeaveTypeDetails?userId={user_id}"
headers = {"Authorization": f"Zoho-oauthtoken {auth_token}"}
response = requests.get(url, headers=headers)
return response.json()
# Example usage
leave_types = get_leave_types("user@example.com", "your_auth_token")
print(leave_types)def get_holidays(user_id, auth_token):
url = f"https://people.zoho.com/people/api/leave/getHolidays?userId={user_id}"
headers = {"Authorization": f"Zoho-oauthtoken {auth_token}"}
response = requests.get(url, headers=headers)
return response.json()
# Example usage
holidays = get_holidays("user@example.com", "your_auth_token")
print(holidays)def fetch_single_record(record_id, auth_token):
url = f"https://people.zoho.com/people/api/forms/leave/getDataByID?recordId={record_id}"
headers = {"Authorization": f"Zoho-oauthtoken {auth_token}"}
response = requests.get(url, headers=headers)
return response.json()
# Example usage
record = fetch_single_record("413124000068132003", "your_auth_token")
print(record)Q: How do I obtain an OAuth token?
A: Generate it from the Zoho Developer Console.
Q: What is the rate limit for API calls?
A: 30 requests per minute with a 5-minute lock period.
Q: Can I use email ID instead of user ID?
A: Yes, both are supported.
Q: What data format is returned?
A: JSON format.
Q: How do I handle API errors?
A: Check the status code and error message in the response.
Q: Is there a sandbox environment?
A: Yes, Zoho provides a sandbox for testing.
Q: Can I fetch data for all employees?
A: Yes, but you need to iterate over each employee ID.
For quick and scalable access to the Zoho People API, Knit provides a cleaner path. One integration replaces multiple point solutions.
Authentication, authorization, and ongoing maintenance are handled upfront, reducing engineering overhead and operational risk. The result: faster deployment, fewer breakpoints, and a more reliable integration stack.
This article is part of a broader series covering the Workday API in depth. It focuses on a specific, high-value use case: retrieving employee leave data through Workday APIs.
If you're building HR workflows, analytics dashboards, or internal tools, leave data is not optional, it’s operational infrastructure. This guide walks through exactly how to extract that data reliably.
For a complete breakdown of Workday API fundamentals, including authentication, rate limits, and architecture, you can refer to the full guide here.
Before you start, ensure the basics are locked in:
requests)/v1/employees/{employee_id}/leave/v1/employees/leaveKeep endpoint hygiene tight—small mistakes here cascade into debugging headaches later.
Workday uses OAuth2. You need an access token before doing anything else.
import requests

def get_access_token(client_id, client_secret, tenant):
    url = f'https://{tenant}.workday.com/oauth2/token'
    headers = {'Content-Type': 'application/x-www-form-urlencoded'}
    data = {
        'grant_type': 'client_credentials',
        'client_id': client_id,
        'client_secret': client_secret
    }
    response = requests.post(url, headers=headers, data=data)
return response.json().get('access_token')Use a specific employee ID to pull targeted leave data.
def get_employee_leave_data(employee_id, access_token, tenant):
    url = f'https://{tenant}.workday.com/api/v1/employees/{employee_id}/leave'
    headers = {'Authorization': f'Bearer {access_token}'}
    response = requests.get(url, headers=headers)
    return response.json()
Use this when precision matters, dashboards, approvals, or workflows.
Fetch leave data across the organization.
def get_all_employees_leave_data(access_token, tenant):
    url = f'https://{tenant}.workday.com/api/v1/employees/leave'
    headers = {'Authorization': f'Bearer {access_token}'}
    response = requests.get(url, headers=headers)
    return response.json()
This is where scale challenges show up, plan accordingly.
Most teams don’t fail because of complexity, they fail because of poor execution discipline. Here’s where things typically break:
1. What is the rate limit for Workday API?
It varies by tenant and configuration. You need to design assuming limits exist, not discover them in production.
2. How do I handle pagination in API responses?
Use the pagination tokens or parameters returned in the response. Never assume single-call completeness.
3. Can I filter leave data by date range?
Yes, Workday APIs support query parameters for filtering. Use them aggressively to reduce payload size.
4. Is the API response format JSON?
Yes. Standard JSON responses, structured but can vary based on configuration.
5. How do I refresh the access token?
Use the OAuth2 flow again or implement refresh token logic if supported in your setup.
6. Can I access historical leave data?
Yes, provided your permissions and data retention policies allow it.
7. What happens if my access token expires?
Your requests will fail. Build automatic token refresh and retry mechanisms—non-negotiable for production.
If you’re building this from scratch, expect ongoing maintenance overhead, auth flows, schema changes, edge cases.
Knit abstracts that entire layer.
With a single integration, you get standardized access to Workday APIs without managing authentication, authorization, or long-term maintenance. It’s a faster path to production and significantly reduces engineering overhead.
If your goal is speed, reliability, and scale, this is the smarter route.
This article is part of our Lucca HR API deep-dive series, where we explore practical ways to use the API for HR data management. In this post, we’ll focus on how to retrieve employee data from the Lucca HR API, a core functionality for HR teams looking to automate employee records, reporting, and analytics.
If you’re looking for other use cases, such as authentication, rate limits, or advanced integrations, check out our full Lucca HR API Guide.
Before you start, make sure you have:
requests.GET /api/v3/users: Retrieve all active users.GET /api/v3/users?formerEmployees=true: Retrieve all users, including terminated ones.GET /api/v3/users/{id}: Retrieve data for a specific user by ID.import requests
url = "https://your-lucca-instance/api/v3/users"
headers = {"Authorization": "Bearer YOUR_ACCESS_TOKEN"}
response = requests.get(url, headers=headers)
all_users = response.json()
print(all_users)import requests
user_id = "123" # Replace with the actual user ID
url = f"https://your-lucca-instance/api/v3/users/{user_id}"
headers = {"Authorization": "Bearer YOUR_ACCESS_TOKEN"}
response = requests.get(url, headers=headers)
user_data = response.json()
print(user_data)Even seasoned developers can run into issues. Here are the most common mistakes when integrating with Lucca HR:
1. How do I authenticate with the Lucca HR API?
Use a Bearer token in the Authorization header, for example:Authorization: Bearer YOUR_ACCESS_TOKEN
2. Can I filter users by specific criteria?
Yes. Use query parameters such as firstName, lastName, or matricule to filter results.
3. How do I update user information?
Use the PUT /api/v3/users/{id} endpoint with the updated data payload.
4. What format are responses in?
All responses are in JSON format.
5. Is there a limit to how many users I can retrieve at once?
Yes. The API uses pagination, check the documentation for details on page and limit parameters.
6. How do I handle API errors?
Inspect the HTTP status code and response body for detailed error messages.
7. Can I retrieve only specific fields from the user data?
Yes. You can use the fields parameter to limit your response to specific attributes.
If you’re looking to skip the heavy lifting of building and maintaining direct integrations, Knit API offers a seamless alternative.
With a single integration to Knit, you can connect to the Lucca HR API and other HR systems without worrying about authentication, data synchronization, or ongoing maintenance. Knit ensures reliability, scalability, and faster deployment, letting your team focus on building great experiences instead of managing APIs. If you’re looking to integrate at scale, Knit API can drastically simplify your workflows, ensuring you stay focused on insights, not infrastructure.
Introduction
If you're building HR workflows, global payroll pipelines, or employee lifecycle automation, you’ll eventually need to pull clean, compliant employee data from Remote API. This guide walks you through exactly that.
As part of our broader deep-dive series on the Remote API, we unpack one of the most common real-world use cases, retrieving employee information with a single employment ID. If you want a more exhaustive understanding, check this out.
Before you hit the endpoint, make sure you have:
To retrieve employee details:GET /v1/employments/{employment_id}
Remote uses Bearer Token authentication. Follow the official docs to generate your token.
Below is a simple Python snippet using requests:
import requests

def get_employee_data(employment_id, access_token):
    url = f"https://api.remote.com/v1/employments/{employment_id}"
    headers = {
        "Authorization": f"Bearer {access_token}"
    }
    response = requests.get(url, headers=headers)

    if response.status_code == 200:
        return response.json()
    else:
        return response.json().get("message")

# Example usage
employment_id = "93t3j-employment-id-9suej43"
access_token = "your_access_token_here"
print(get_employee_data(employment_id, access_token))Here are some typical pitfalls teams face while using Remote API:
1. Why is the Bearer Token required?
It authenticates every request made to the Remote API. No token, no access.
2. How do I manage rate limits?
Use exponential backoff and batch requests where possible.
3. What does a 401 error usually indicate?
Almost always an expired or invalid Bearer Token.
4. How do I stay compliant with changing country rules?
Sync regularly with Remote’s JSON Schema forms and avoid hard-coding fields.
5. What if the employment ID is wrong?
Validate IDs from your source-of-truth system before hitting the endpoint.
6. How do I handle network issues?
Retries, timeouts, and fallback logic, treat it like any critical external dependency.
7. Can I fetch all employees in one go?
Remote doesn't offer a direct “list all employees” endpoint today; you need employment IDs individually or from underlying systems.
If you’d rather not navigate tokens, schema updates, compliance checks, and ongoing maintenance, Knit’s unified API automates all of it for Remote HRIS API. A single integration gets you standardized Remote data, token management, monitoring, and version-stable syncs, no heavy lifting on your end.
This article is part of a series on HRIS APIs. In this post, we focus on a common requirement, retrieving employee leave data—and explain how far the OneLogin API can support this use case.
Before you begin, make sure you have:
requests library available in your Python environmenthttps://api.onelogin.com/auth/oauth2/v2/token/api/1/usersUse the OAuth 2.0 client credentials flow to retrieve an access token.
import requests

client_id = 'YOUR_CLIENT_ID'
client_secret = 'YOUR_CLIENT_SECRET'

auth_url = 'https://api.onelogin.com/auth/oauth2/v2/token'
auth_headers = {
    'Content-Type': 'application/json'
}
auth_data = {
    'grant_type': 'client_credentials',
    'client_id': client_id,
    'client_secret': client_secret
}

response = requests.post(auth_url, headers=auth_headers, json=auth_data)
access_token = response.json().get('access_token')Once authenticated, use the access token to retrieve user records from OneLogin.
user_url = 'https://api.onelogin.com/api/1/users'
user_headers = {
    'Authorization': f'Bearer {access_token}'
}

user_response = requests.get(user_url, headers=user_headers)
users = user_response.json()
This endpoint returns identity-related information such as user IDs, names, email addresses, roles, and status.
At this stage, it’s important to set expectations clearly:
OneLogin does not provide employee leave or attendance data through its API.
If your use case requires leave information, you will need to:
Q: How do I get API credentials for OneLogin?
A: Log in to OneLogin and navigate to Settings → API to create a client and obtain your Client ID and Client Secret.
Q: What happens when the access token expires?
A: You must re-run the authentication flow to obtain a new access token.
Q: Can OneLogin provide employee leave or attendance data?
A: No. OneLogin does not manage or expose leave data via its API.
Q: How should I handle pagination when fetching users?
A: Use the pagination parameters returned in the API response to iterate through user records.
Q: Are there rate limits on the OneLogin API?
A: Yes. Rate limits apply and should be handled according to OneLogin’s API documentation.
Q: Is this API suitable for production use?
A: Yes, provided you follow security best practices and handle tokens, rate limits, and errors correctly.
Q: What response format does the OneLogin API use?
A: All responses are returned in JSON format.
If you’re looking to avoid managing OAuth flows, token refresh logic, pagination, and long-term maintenance, Knit provides a streamlined alternative.
By integrating with Knit once, you can access OneLogin data through a unified API layer. Knit handles authentication, authorization, and ongoing integration upkeep, allowing teams to focus on downstream workflows rather than infrastructure complexity.
This article is part of an ongoing series that explores the Zoho Recruit API in detail. It focuses specifically on retrieving job application and candidate data using the Zoho Recruit API.
If you are building integrations for recruitment analytics, internal dashboards, or downstream HR workflows, accessing candidate data reliably is a foundational requirement. This guide walks through the exact API endpoints, authentication steps, and common pitfalls involved in fetching candidate data from Zoho Recruit.
For a broader overview of the Zoho Recruit API, including authentication flows, rate limits, and other supported use cases—refer to the complete Zoho Recruit API guide here.
Before making any API calls, ensure the following are in place:
Without these, API requests will fail regardless of endpoint correctness.
GET https://recruit.zoho.in/recruit/v2/CandidatesGET https://recruit.zoho.in/recruit/v2/Candidates/{candidate_id}import requests
url = "https://accounts.zoho.in/oauth/v2/token"
payload = {
'grant_type': 'authorization_code',
'client_id': '{client_id}',
'client_secret': '{client_secret}',
'redirect_uri': '{redirect_uri}',
'code': '{grant_token}'
}
response = requests.post(url, data=payload)
access_token = response.json().get('access_token')This access token must be included in the Authorization header for all subsequent API calls.
url = "https://recruit.zoho.in/recruit/v2/Candidates"
headers = {
    'Authorization': f'Zoho-oauthtoken {access_token}'
}

response = requests.get(url, headers=headers)
candidates = response.json().get('data')
This endpoint returns a list of candidate records, subject to pagination and API limits.
candidate_id = "134154000000311105"
url = f"https://recruit.zoho.in/recruit/v2/Candidates/{candidate_id}"

response = requests.get(url, headers=headers)
candidate_data = response.json().get('data')
This is useful when you already have a candidate ID and need detailed information for a single record.
Q1. How do I refresh an expired access token?
Use the refresh token with Zoho’s OAuth token endpoint to generate a new access token.
Q2. What is the maximum number of candidates returned per API call?
You can retrieve up to 200 candidates per request.
Q3. Can candidate data be sorted in API responses?
Yes, sorting can be applied using the sort_by and sort_order parameters.
Q4. Is it possible to filter candidates by status?
Yes, filtering can be done using the Candidate_Status field in the request query.
Q5. How should API errors be handled?
Inspect the error code and message returned in the API response to identify the root cause.
Q6. Can I receive real-time updates when candidate data changes?
Yes, Zoho Recruit webhooks can be used to receive notifications for candidate updates.
Q7. Are candidate attachments accessible via the API?
Yes, but attachments require additional API calls beyond the candidate data endpoints.
For teams looking to simplify Zoho Recruit API integrations, Knit provides a streamlined alternative. By integrating with Knit once, you can avoid managing OAuth flows, token refresh logic, and long-term maintenance internally. Knit handles authentication, authorization, and integration upkeep, enabling faster and more reliable access to Zoho Recruit data with significantly reduced engineering overhead.
SAP SuccessFactors is very popular in enterprise HR stacks, but its APIs can feel unintuitive if you're pulling structured recruiting data at scale. This guide cuts through that friction. It’s part of our broader deep-dive series on ATS APIs, where we break down authentication, rate limits, payload structures, and common integration hurdles. If you want the full ATS API guide, you’ll find it here.
Here, we focus specifically on how to extract job application data, cleanly, consistently, from SAP SuccessFactors ATS API.
Before you get started, lock in the basics:
requests installed/oauth/token/odata/v2/JobApplicationimport requests
client_id = 'your_client_id'
client_secret = 'your_client_secret'
auth_url = 'https://api.successfactors.com/oauth/token'
auth_response = requests.post(
auth_url,
data={'grant_type': 'client_credentials'},
auth=(client_id, client_secret)
)
access_token = auth_response.json().get('access_token')candidate_id = 'specific_candidate_id'
job_application_url = f'https://api.successfactors.com/odata/v2/JobApplication?$filter=candidateId eq {candidate_id}'
headers = {'Authorization': f'Bearer {access_token}'}
response = requests.get(job_application_url, headers=headers)
job_application_data = response.json()job_application_url_all = 'https://api.successfactors.com/odata/v2/JobApplication'
response_all = requests.get(job_application_url_all, headers=headers)
all_job_applications = response_all.json()$filter) are unforgiving, typos cause empty payloads instead of errors.1. How do I get my Client ID and Secret?
Your SAP SuccessFactors admin must provision them from the OAuth client configuration panel.
2. Why am I getting a 401?
Your token is invalid or expired. Regenerate and ensure you're passing the Authorization header correctly.
3. Can I filter job applications by status or other fields?
Yes. SuccessFactors supports OData filters, e.g.,$filter=applicationStatus eq 'IN_PROGRESS'.
4. How long does the OAuth token stay valid?
Depends on your tenant configuration. Always check expires_in and refresh proactively.
5. Is there a limit on how many applications I can fetch?
Yes, pagination applies. Use $top, $skip, and nextLink.
6. What format should I expect in the response?
JSON (OData v2 format), often deeply nested.
7. How do I handle rate limits?
Implement exponential backoff and log all throttling events.
If you want the fast lane, Knit abstracts the heavy lifting. One integration gives you clean, normalized SuccessFactors data, without wrestling with auth flows, token refresh cycles, endpoint nuances, or ongoing maintenance. You plug in once with Knit's SAP SuccessFactors ATS API; and Knit handles the plumbing, monitoring, and updates across the entire lifecycle.
This guide is part of our comprehensive HRIS API series, designed to help developers and businesses make the most of the platform’s capabilities. In this article, we walk you through how to get employee data from the PrismHR API, step by step.
Before diving in, make sure you have:
requests installed.You must first authenticate using your API key and secret to obtain an access token.
import requests

api_url = "https://api.prismhr.com/authenticate"
credentials = {"apiKey": "your_api_key", "apiSecret": "your_api_secret"}

response = requests.post(api_url, json=credentials)
auth_token = response.json().get("authToken")
Retrieve data for a specific employee by passing their employee ID.
employee_id = "12345"
employee_url = f"https://api.prismhr.com/employees/{employee_id}"
headers = {"Authorization": f"Bearer {auth_token}"}

response = requests.get(employee_url, headers=headers)
employee_data = response.json()Fetch details of all employees in your PrismHR system.
all_employees_url = "https://api.prismhr.com/employees"
response = requests.get(all_employees_url, headers=headers)
all_employees_data = response.json()
Even experienced developers can run into issues while integrating with PrismHR. Watch out for these:
1. What is the base URL for the PrismHR API?
The standard base URL is https://api.prismhr.com.
2. How do I refresh my authentication token?
Simply re-authenticate through the /authenticate endpoint.
3. Can I filter employee data?
Yes, by appending query parameters to the /employees endpoint.
4. Is there a limit to how many employees I can retrieve at once?
Yes. Use pagination as detailed in PrismHR’s API documentation.
5. What’s the format of the returned data?
JSON is the default response format.
6. How do I handle API errors?
Check HTTP status codes and handle 4xx and 5xx errors with custom logic.
7. Is the PrismHR API secure?
Yes, provided you use HTTPS and follow best practices for credential management.
Integrating the PrismHR API allows businesses to centralize employee data, automate HR workflows, and unlock valuable insights. By following the authentication and data retrieval steps above, you can start building powerful integrations in minutes.
Manually managing authentication and endpoint connections can slow your development cycle. Knit API offers a seamless solution, integrate once and get instant access to the PrismHR API without worrying about token management, version updates, or maintenance.
Knit streamlines API integrations across HR, payroll, and accounting systems, saving engineering hours and ensuring reliability.
If you're building hiring workflows, analytics dashboards, or HR automations, pulling data directly from the ADP Workforce Now ATS API is a non-negotiable capability. This guide cuts past the fluff and gets straight to how you can fetch job application data reliably, securely, and at scale.
This article is part of a broader series on the ATS API, including deep dives on authentication, rate limits, pagination, and best practices. You can explore the complete guide here.
Before you start calling the API, make sure you have:
requests installed/staffing/v2/job-applications/staffing/v2/job-applications/{job-application-id}import requests
def get_oauth_token(client_id, client_secret):
url = 'https://auth.adp.com/oauth/v2/token'
headers = {'Content-Type': 'application/x-www-form-urlencoded'}
data = {'grant_type': 'client_credentials'}
response = requests.post(url, headers=headers, data=data, auth=(client_id, client_secret))
return response.json().get('access_token')def get_all_job_applications(token):
url = 'https://api.adp.com/staffing/v2/job-applications'
headers = {
'Authorization': f'Bearer {token}',
'Content-Type': 'application/json',
'roleCode': 'practitioner'
}
params = {'$select': 'itemID,jobRequisitionReference,applicationStatusCode'}
response = requests.get(url, headers=headers, params=params)
return response.json()def get_job_application(token, job_application_id):
url = f'https://api.adp.com/staffing/v2/job-applications/{job_application_id}'
headers = {
'Authorization': f'Bearer {token}',
'Content-Type': 'application/json',
'roleCode': 'practitioner'
}
response = requests.get(url, headers=headers)
return response.json()Developers integrating ADP Workforce Now often trip over the same issues. Keep these in check:
1. Token expiry sneaking up on you
ADP tokens expire quickly; build auto-refresh into your workflow.
2. Missing or incorrect roleCode
This header is mandatory and impacts what data you can see.
3. Pagination confusion
ADP won’t return everything in one shot, use $top and $skip.
4. Throttling during bulk fetches
ADP rate limits aggressively. Queue/batch your requests.
5. Complex nested JSON
Prepare to map multi-level objects; flattening the response helps.
6. Environment mismatches
ADP sandbox and production behave differently, test both.
7. Silent permission failures
Sometimes the API returns fewer fields simply because your role doesn’t have access.
1. Why do I need the roleCode header?
It determines your access level and controls which data fields ADP exposes.
2. Can I filter the job applications?
Yes. Use $filter, $select, $orderby, and other OData-style parameters.
3. What format does the API return?
All responses are JSON, often with deeply nested structures.
4. Is there a limit on how many applications I can fetch at once?
Yes. Use $top for batch size and $skip for pagination.
5. How do I handle ADP rate limits?
Implement retries with exponential backoff and stagger API calls.
6. Does ADP provide historical application data?
Only if your org's data retention settings allow it.
7. How do I debug API errors more effectively?
Check status codes, error objects, and verify your scopes + permissions.
Connecting directly to ADP Workforce Now ATS API often becomes a maintenance-heavy project, OAuth rotation, permission handling, schema changes, and rate limits add real engineering drag. Knit removes this overhead. A single integration gives you:
This article is part of an in-depth series on the QuickBooks API, focused on practical, real-world use cases. In this edition, the focus is straightforward: retrieving expense data from the QuickBooks API in a reliable and scalable way.
If you’re building financial integrations, expense analytics, or back-office automation, expense data is foundational. This guide walks through the exact flow, from authentication to data retrieval, without unnecessary abstraction.
For a broader overview of the QuickBooks API, including authentication models, rate limits, and other supported resources, refer to the comprehensive guide available here.
Before you begin, ensure the following are in place:
requests and jsonThe following endpoints are used in this workflow:
https://oauth.platform.intuit.com/oauth2/v1/tokens/bearerhttps://quickbooks.api.intuit.com/v3/company/{company_id}/reports/VendorExpensesUse the authorization code received during the OAuth flow to generate an access token.
import requests, json

def get_oauth_token(client_id, client_secret, redirect_uri, auth_code):
    url = "https://oauth.platform.intuit.com/oauth2/v1/tokens/bearer"
    headers = {
        "Content-Type": "application/x-www-form-urlencoded"
    }
    data = {
        "grant_type": "authorization_code",
        "code": auth_code,
        "redirect_uri": redirect_uri,
        "client_id": client_id,
        "client_secret": client_secret
    }
    response = requests.post(url, headers=headers, data=data)
return response.json().get("access_token")Once a valid access token is available, use it to call the Vendor Expenses report endpoint.
def get_expense_data(company_id, access_token):
    url = f"https://quickbooks.api.intuit.com/v3/company/{company_id}/reports/VendorExpenses"
    headers = {
        "Authorization": f"Bearer {access_token}",
        "Accept": "application/json"
    }
    response = requests.get(url, headers=headers)
return response.json()Most QuickBooks integrations fail for predictable reasons. Watch out for the following:
Addressing these early saves significant debugging time later.
What is the rate limit for the QuickBooks API?
Rate limits vary by endpoint and usage pattern. Refer to the official QuickBooks API documentation for exact thresholds.
How do I refresh an expired access token?
Use the refresh token flow provided by QuickBooks to obtain a new access token without re-authenticating the user.
Can I access data for multiple companies?
Yes. Each company requires its own authorization and access token.
What format does the API return data in?
All responses are returned in JSON format.
Is there a sandbox environment available?
Yes. QuickBooks provides a sandbox environment for development and testing.
How should API errors be handled?
Inspect the error payload in the API response and map it against QuickBooks error codes and documentation.
Can expense data retrieval be automated?
Yes. Data retrieval can be automated using scheduled scripts or cron jobs, subject to rate limits and token validity.
If you want to avoid managing OAuth flows, token refresh logic, and long-term integration maintenance, Knit offers a faster path.
With a single integration to Knit, you can access QuickBooks APIs without handling authentication, authorization, or ongoing changes yourself. Knit abstracts the operational overhead, allowing teams to focus on product logic rather than plumbing.
For teams scaling accounting integrations across customers, this approach materially reduces risk, effort, and maintenance cost.
The PeopleHR API offers a powerful way to access and manage employee data within your HR system. Whether you’re building custom HR dashboards, syncing employee information with other apps, or automating internal workflows, understanding how to interact with the API effectively is key.
This article is part of our HRIS API series, where we explore key use cases, best practices, and technical deep dives from authentication and rate limits to real-world integrations.
Before you begin, make sure you have:
requests and json libraries installed.https://api.peoplehr.net/Employeehttps://api.peoplehr.net/Employeeimport requests, json
url = 'https://api.peoplehr.net/Employee'
payload = json.dumps({
'APIKey': 'your_api_key',
'Action': 'GetAllEmployeeDetail',
'IncludeLeavers': 'false'
})
headers = {'Content-Type': 'application/json'}
response = requests.post(url, data=payload, headers=headers)
print(response.json())This call retrieves all active employee records. Set IncludeLeavers to "true" if you want to include terminated employees as well.
import requests, json

url = 'https://api.peoplehr.net/Employee'
payload = json.dumps({
    'APIKey': 'your_api_key',
    'Action': 'GetEmployeeDetail',
    'EmployeeId': 'specific_employee_id'
})
headers = {'Content-Type': 'application/json'}

response = requests.post(url, data=payload, headers=headers)
print(response.json())
Use this endpoint when you want to fetch detailed information about a single employee using their unique Employee ID.
IncludeLeavers as true if your use case involves ex-employees.1. How can I get an API key for PeopleHR?
Contact your PeopleHR system administrator to generate an API key for your application.
2. What is the API rate limit?
The limit is 30 API calls per minute per IP address.
3. Can I test the API before production?
Yes, PeopleHR provides a developer workbench and supports sandbox testing environments.
4. What data format does the API use?
The API uses JSON for both requests and responses.
5. How do I include leavers in the results?
Set "IncludeLeavers": "true" in your API payload.
6. What happens if I exceed the rate limit?
You’ll receive an exception message, and further requests may be temporarily blocked.
7. Is my API key secure?
Yes, as long as you store it securely and do not share or expose it in public codebases.
Integrating directly with PeopleHR can require ongoing maintenance, error handling, and authentication management. Knit simplifies this by offering a unified, secure integration platform that connects with PeopleHR (and dozens of other HRIS systems) via a single API.
By integrating with Knit once, you can:
This approach ensures faster deployment, consistent uptime, and smoother workflows for your HR and IT teams.
This article is part of an ongoing series that explores the Humi HR API in depth. In this post, we focus specifically on how to retrieve employee data using the Humi HR API, one of the most commonly used use cases when integrating HR systems.
If you’re looking for a broader overview of HR APIs, including authentication, rate limits, and other supported endpoints, you can find the complete guide here.
Before you can access employee data from the Humi HR API, ensure the following:
Authorization header for every requestWithout a valid token, requests to the employee endpoints will fail.
To fetch a list of all employees, send a GET request to the /v1/employees endpoint.
The API supports pagination, allowing you to control how many records are returned per request.
import requests

url = "https://partners.humi.ca/v1/employees"
headers = {
    "Authorization": "Bearer your-token-here"
}
params = {
    "page[size]": 5,
    "page[number]": 1
}

response = requests.get(url, headers=headers, params=params)
print(response.json())
Use pagination parameters to efficiently process large employee datasets and avoid oversized responses.
To retrieve details for a single employee, use the employee ID with the /v1/employees/:employeeId endpoint.
import requests

employee_id = "valid-employee-id-here"
url = f"https://partners.humi.ca/v1/employees/{employee_id}"
headers = {
    "Authorization": "Bearer your-token-here"
}

response = requests.get(url, headers=headers)
print(response.json())
This endpoint is useful when syncing or updating records for a specific employee rather than pulling the full directory.
Authorization: Bearer header, or it will be rejected.1. How do I get a Humi Partners API token?
You must request the token directly from Humi by contacting support@humi.ca.
2. What authentication method does the Humi HR API use?
The API uses Bearer token–based authentication via the Authorization header.
3. What is the maximum number of employees returned per request?
The maximum page size is 25 records per request.
4. Can I retrieve terminated or deleted employees?
No. Deleted employees are not included in API responses.
5. Does the API support pagination?
Yes. Pagination is supported using page[size] and page[number] parameters.
6. What happens if my token is invalid or expired?
The API will return an authorization error, and the request will fail.
7. Can I use this API for real-time employee syncs?
The API supports programmatic access, but sync frequency should respect pagination limits and API usage guidelines.
If you’re looking to reduce integration overhead, Knit provides a faster way to work with the Humi HR API. By integrating with Knit once, you can avoid managing authentication, token handling, and long-term maintenance yourself.
Knit handles authorization, API changes, and operational complexity, allowing you to focus on consuming employee data instead of maintaining the integration.
This article is part of a broader series covering the Salesforce API in depth. In this guide, we focus specifically on how to retrieve open tickets (Cases) using the Salesforce API.
If you’re building reporting workflows, customer support dashboards, or syncing ticket data into external systems, accessing open Cases programmatically is essential. This guide walks through prerequisites, authentication, querying open tickets for all customers, querying for a specific customer, common pitfalls, and key FAQs.
For a comprehensive deep dive into CRM API authentication, rate limits, and other use cases, refer to the complete Salesforce guide here.
Before making API calls, ensure the following:
https://login.salesforce.com/services/oauth2/tokenhttps://yourInstance.salesforce.com/services/data/vXX.X/query/Replace vXX.X with the API version you are using.
import requests

def authenticate(client_id, client_secret, username, password, security_token):
    url = 'https://login.salesforce.com/services/oauth2/token'
    payload = {
        'grant_type': 'password',
        'client_id': client_id,
        'client_secret': client_secret,
        'username': username,
        'password': password + security_token
    }

    response = requests.post(url, data=payload)

    if response.status_code == 200:
        return response.json()['access_token'], response.json()['instance_url']
    else:
        raise Exception('Authentication failed: ' + response.text)
This function returns:
access_token – required for authorized API callsinstance_url – your Salesforce instance-specific base URLdef get_open_tickets(access_token, instance_url):
query = "SELECT Id, Subject, Status FROM Case WHERE Status = 'Open'"
headers = {
'Authorization': 'Bearer ' + access_token
}
url = instance_url + '/services/data/vXX.X/query/'
params = {'q': query}
response = requests.get(url, headers=headers, params=params)
if response.status_code == 200:
return response.json()['records']
else:
raise Exception('Query failed: ' + response.text)This retrieves all Cases where the status is Open.
def get_open_tickets_for_customer(access_token, instance_url, customer_id):
    query = f"SELECT Id, Subject, Status FROM Case WHERE Status = 'Open' AND AccountId = '{customer_id}'"

    headers = {
        'Authorization': 'Bearer ' + access_token
    }

    url = instance_url + '/services/data/vXX.X/query/'
    params = {'q': query}

    response = requests.get(url, headers=headers, params=params)

    if response.status_code == 200:
        return response.json()['records']
    else:
        raise Exception('Query failed: ' + response.text)
This filters open Cases for a specific AccountId.
When integrating with the Salesforce API to retrieve open tickets, teams often run into avoidable issues. Watch out for the following:
Proactively validating credentials, permissions, and API versions significantly reduces integration failures.
Salesforce imposes limits based on the edition and license type of your organization.
It is returned in the authentication response after a successful login.
Yes, provided the user has appropriate permissions to update Case records.
You must update your application with the new security token.
Check the response status code and inspect the error message returned in the response body.
Yes. Tools such as Postman can be used to test authentication and query endpoints.
Yes. Modify the SOQL query to include closed statuses or remove the status filter.
For quick and seamless access to the Salesforce API, Knit API offers a convenient solution. By integrating with Knit once, you can streamline the entire process. Knit handles authentication, authorization, and ongoing integration maintenance.
This approach reduces engineering overhead, saves implementation time, and ensures a reliable connection to Salesforce without managing API complexity directly.
Keka’s ATS has quickly become a go-to system for fast-growing companies looking to professionalize recruitment operations without the bulk. But when teams start scaling hiring, the real unlock lies in pulling clean, structured application data directly into their internal dashboards, HRIS ecosystems, or analytics pipelines.
This guide walks through how to retrieve job application data from the Keka ATS API, step by step. It builds on our broader deep-dive series on ATS API integration, where we cover authentication, rate limits, data structures, and best practices. If you want the full technical exploration, you’ll find it in our extended guide here.
Before you begin, make sure you have the essentials in place:
requests installedKeka exposes a straightforward endpoint for fetching candidate data:
https://{company}.{environment}.com/api/v1/hire/preboarding/candidates
Keka uses OAuth for secure access. Ensure your OAuth tokens are generated and active.
import requests

url = "https://company.keka.com/api/v1/hire/preboarding/candidates"
headers = {
    "accept": "application/json",
    "Authorization": "Bearer YOUR_ACCESS_TOKEN"
}

response = requests.get(url, headers=headers)

if response.status_code == 200:
    candidates = response.json()
    print(candidates)
else:
print("Error:", response.status_code)candidate_id = "specific_candidate_id"
url = f"https://company.keka.com/api/v1/hire/preboarding/candidates?candidateIds={candidate_id}"
response = requests.get(url, headers=headers)
if response.status_code == 200:
candidate_data = response.json()
print(candidate_data)
else:
print("Error:", response.status_code)Developers typically hit the same roadblocks. Here’s what to expect and how to avoid inefficiencies:
Expired or incorrectly scoped tokens trigger 401s and slow your development cycle. Implement auto-refreshing.
Bulk pulls or aggressive sync loops can hit Keka’s limits faster than you think. Build backoff + retries.
Large hiring cycles mean large datasets. Missing pagination means missing candidates.
Keka’s payloads are nested; if you’re flattening data for a BI pipeline, map fields in advance.
Mixing up {company}.{environment} frequently causes 404 errors. Validate environment before every deployment.
Access tokens in logs or Git commits = catastrophic. Always vault secrets.
Keka returns meaningful error codes, use them. Don’t wrap everything in a generic 500 handler.
How do I authenticate with the Keka ATS API?
Using OAuth. Generate and pass a Bearer token in your headers.
What is the default page size for candidate data?
Keka typically defaults to 100 records per page, with a max of ~200.
Can I filter candidates by status?
Yes. Use the status query parameter.
How do I sort results?
Use sortBy and sortOrder parameters.
What does a 401 error usually mean?
Your OAuth token is invalid or expired.
Is there a rate limit?
Yes. Respect the limits defined in Keka’s documentation.
How do I handle API errors gracefully?
Use structured error-handling that reads response codes and messages instead of failing silently.
Building and maintaining a direct Keka ATS integration is expensive and operationally heavy, OAuth management, versioning, error resolution, retries, pagination, and ongoing upkeep all compound over time.
Knit eliminates this overhead with a single unified integration layer. Connect once, and Knit's Keka ATS API handles authentication, maintenance, scaling, and data normalization. Your engineering team stays focused on business logic, not maintaining integrations.
If you're building HR workflows, scaling recruiting ops, or stitching together multiple ATS systems, BambooHR’s ATS API is a solid lever to pull. This guide distills the exact process for fetching job application data, without wading through generic documentation.
It’s part of a broader deep-dive series on the comprehensive ATS API covering authentication flows, rate-limit behavior, and real-world integration patterns. If you want the full ecosystem view, the master guide is available on the Knit blog.
Before you start calling the API, make sure you’ve locked in the basics:
requests installedHere are the two BambooHR ATS endpoints you’ll use most frequently:
GET https://api.bamboohr.com/api/gateway.php/{companyDomain}/v1/applicant_tracking/applicationsGET https://api.bamboohr.com/api/gateway.php/{companyDomain}/v1/applicant_tracking/applications/{applicationId}import requests
def get_all_applications(company_domain, api_key):
url = f"https://api.bamboohr.com/api/gateway.php/{company_domain}/v1/applicant_tracking/applications"
headers = {
"accept": "application/json",
"authorization": f"Basic {api_key}"
}
response = requests.get(url, headers=headers)
return response.json()
# Example
applications = get_all_applications("mycompany", "your_api_key")
print(applications)import requests
def get_application_details(company_domain, application_id, api_key):
url = f"https://api.bamboohr.com/api/gateway.php/{company_domain}/v1/applicant_tracking/applications/{application_id}"
headers = {
"accept": "application/json",
"authorization": f"Basic {api_key}"
}
response = requests.get(url, headers=headers)
return response.json()
# Example
application_details = get_application_details("mycompany", 48, "your_api_key")
print(application_details)Most integration failures come from operational blind spots, not code. Watch these closely:
1. What is BambooHR ATS?
It’s BambooHR’s built-in applicant tracking system for managing candidates, roles, and application workflows.
2. How do I authenticate?
Using Basic Auth with your API key.
3. Can I filter by job ID?
Yes, pass a jobId query parameter when listing applications.
4. What format does the API return?
JSON.
5. Does BambooHR paginate application results?
Yes, depending on volume. Always check for pagination keys.
6. Can I access uploaded documents?
Yes, resumes, cover letters, and attachments appear as file IDs you can fetch separately.
7. How should I handle API errors?
Check HTTP status codes and include fallback logic for 400s, 401s, and 429s.
If you don’t want to maintain authentication flows, rate-limit handling, schema variations, and long-term BambooHR ATS API upkeep, Knit simplifies the entire stack. Integrating once with Knit gives you unified authentication, automatic schema normalization, zero-maintenance updates every time BambooHR changes something and easy access to application, employee, and hiring-related datasets
If you want to avoid the heavy lifting of maintaining these integrations long-term, Knit handles the full lifecycle so your engineering team can focus elsewhere.
The WorQ API allows you to retrieve both new and updated employee information through secure endpoints. In this guide, we’ll walk you through how to use the WorQ API to fetch employee details whether for a single employee or your entire workforce.
This article is part of our ongoing series on the WorQ API, where we cover authentication, rate limits, integration best practices, and more. You can explore the complete guide here.
Before you begin, make sure you have:
https://employee-mss.heptagon.tech/api/v1/get-employee-datahttps://employee-mss.worqhub.com/api/v1/get-employee-dataUse the WorQ Authenticate API to get a token, which is required for all subsequent requests.
import requests

auth_url = "https://employee-mss.heptagon.tech/api/v1/get-access-token"
auth_payload = {
    "partner_name": "your_partner_name",
    "partner_key": "your_partner_key"
}

response = requests.post(auth_url, json=auth_payload)
auth_token = response.json()['result']['token']
Once you have the token, use it to fetch employee details.
employee_url = "https://employee-mss.heptagon.tech/api/v1/get-employee-data"
employee_payload = {
    "token": auth_token,
    "customer_code": "your_customer_code",
    "start_date": "2023-11-01",
    "end_date": "2023-11-30",
    "page": 1
}

response = requests.post(employee_url, json=employee_payload)
employee_data = response.json()
Even simple API calls can fail if small details are missed. Watch out for these:
YYYY-MM-DD expected).1. What date format should I use in requests?
Use the format YYYY-MM-DD for all date fields.
2. How long is the authentication token valid?
Tokens are valid for 30 minutes. After expiration, generate a new one.
3. What does the “Invalid customer code” error mean?
It usually indicates a mismatch in the customer code provided, double-check your credentials.
4. Can I fetch data for a specific employee?
Yes, by including the employee ID in your request payload.
5. What happens if the token expires mid-request?
The API will return an authentication error, you’ll need to reauthenticate.
6. Is there a limit on how many employees I can fetch per request?
Yes, the API uses pagination. Use the page parameter to iterate through all results.
7. How can I handle error responses effectively?
Check the status and messages fields in the API response to understand the issue and handle it programmatically.
Instead of building and maintaining a one-off integration for WorQ API, you can connect via Knit’s unified HRIS API. With one integration, you can access WorQ API and dozens of other HR platforms, without worrying about authentication, token expiry, or version updates.
Knit handles all the heavy lifting, from syncing employee data to maintaining ongoing compatibility, allowing your team to focus on building products, not managing integrations.
This article is part of a deep-dive series on the Microsoft Dynamics Business Central API. The focus here is narrow and practical: pulling expense data from Business Central using its API.
If you’re looking for broader coverage, authentication models, rate limits, pagination patterns, or other supported use cases, refer to the complete Microsoft Dynamics Business Central API guide here.
Before you touch code, get the basics right. Most failures happen here.
All requests are routed through the Business Central OData v4 endpoint:
https://api.businesscentral.dynamics.com/v2.0/{tenant_id}/sandbox/ODataV4/
The {tenant_id} and environment (sandbox vs production) must match your setup exactly. One mismatch and you’ll get hard failures.
Business Central uses Basic Authentication with:
This is straightforward but unforgiving—invalid credentials return immediate 401 errors.
Expense data may not always live under a single logical entity, so you may need to query multiple endpoints depending on how expenses are modeled in your tenant.
import requests
from requests.auth import HTTPBasicAuth

# Define your credentials
username = 'your_username'
password = 'your_web_service_access_key'

# Define the endpoint
url = 'https://api.businesscentral.dynamics.com/v2.0/{tenant_id}/sandbox/ODataV4/Expenses'

# Make the request
response = requests.get(url, auth=HTTPBasicAuth(username, password))

# Check the response
if response.status_code == 200:
    expenses = response.json()
    print(expenses)
else:
print('Failed to retrieve data:', response.status_code)These issues come up repeatedly in real-world implementations:
Bottom line: most “API issues” are configuration or governance problems, not code problems.
How do I enable API access?
Use the Business Central Administration Shell to enable OData and API services.
What authentication method does Business Central use?
Basic Authentication with a username and web service access key.
Can I extend the API to include additional fields?
No. Extending standard APIs with custom fields is not currently supported.
What is the default port for OData services?
The default port is 7048.
How do I find my tenant ID?
Your tenant ID is embedded in your Business Central URL.
What causes a 401 Unauthorized error?
Almost always incorrect credentials or missing permissions.
How should I handle API rate limits?
Implement retry logic, backoff strategies, and actively monitor API usage.
If you don’t want to babysit authentication, versioning, and long-term maintenance, Knit offers a cleaner path. Integrate once with Knit, and it abstracts away authentication, authorization, and ongoing API changes for Microsoft Dynamics Business Central.
This isn’t about convenience, it’s about reducing operational drag and keeping your integration stable as APIs evolve.
This article is part of a broader series covering the Employment Hero API in depth. In this guide, we focus specifically on how to retrieve employee leave data using the Employment Hero API.
If you're building HR, payroll, or workforce management workflows, leave data is a core dataset. This walkthrough covers the complete process, from authentication to fetching leave data for a single employee or across the organization.
For a comprehensive deep dive into authentication, rate limits, and other use cases, refer to the complete HRIS API guide.
https://www.getknit.dev/blog/employmentHero-guide
Before you begin, make sure the following are in place:
Without proper OAuth configuration and scopes, your integration will fail—so get this foundation right.
You will work with the following endpoints:
https://oauth.employmenthero.com/oauth2/authorizehttps://oauth.employmenthero.com/oauth2/tokenhttps://api.employmenthero.com/api/v1/employees/{employee_id}/leavehttps://api.employmenthero.com/api/v1/employees/leaveRedirect the user to the authorization URL to grant access.
import requests

client_id = 'your_client_id'
redirect_uri = 'https://yourapp.com/callback'

auth_url = f'https://oauth.employmenthero.com/oauth2/authorize?client_id={client_id}&redirect_uri={redirect_uri}&response_type=code'

response = requests.get(auth_url)
print(response.url)  # Direct user to this URL for authorization
The user logs in and approves access. You will receive an authorization code via your configured redirect URI.
Use the authorization code to request an access token.
import requests

client_id = 'your_client_id'
client_secret = 'your_client_secret'
redirect_uri = 'https://yourapp.com/callback'
code = 'authorization_code_from_previous_step'

token_url = 'https://oauth.employmenthero.com/oauth2/token'

data = {
    'grant_type': 'authorization_code',
    'code': code,
    'redirect_uri': redirect_uri,
    'client_id': client_id,
    'client_secret': client_secret
}

response = requests.post(token_url, data=data)
access_token = response.json().get('access_token')
Store the access token securely. You’ll use it for all subsequent API calls.
To retrieve leave data for a specific employee:
import requests

headers = {'Authorization': f'Bearer {access_token}'}
employee_id = 'specific_employee_id'

leave_url = f'https://api.employmenthero.com/api/v1/employees/{employee_id}/leave'

response = requests.get(leave_url, headers=headers)
employee_leave_data = response.json()
This endpoint returns leave records for the specified employee.
To retrieve leave data for all employees:
import requests

headers = {'Authorization': f'Bearer {access_token}'}

leave_url = 'https://api.employmenthero.com/api/v1/employees/leave'

response = requests.get(leave_url, headers=headers)
all_employees_leave_data = response.json()
This is useful for reporting, dashboards, payroll sync, or compliance workflows.
Most integration failures aren’t technical, they’re configuration issues. Watch out for these:
If your calls fail, start by checking scopes and token validity before debugging code.
Use the refresh token to request a new access token from the token endpoint.
Ensure your application has the necessary scopes configured during registration.
Yes. Use the endpoint for all employees leave data.
Refer to the official API documentation for rate limits and ensure your application adheres to them.
The authorization process fails, and you will not receive an authorization code.
Yes, until it expires. After expiry, you must refresh it.
This guide focuses on reading leave data. Refer to the official API documentation for update capabilities.
If you want faster deployment and less integration overhead, Knit API provides a streamlined alternative.
With a single integration to Knit, you can abstract away authentication, authorization, token management, and ongoing API maintenance. This reduces engineering effort and accelerates time to production while ensuring a stable and reliable connection to the Employment Hero API.
Expense data is mission-critical for any finance, accounting, or spend-management workflow. If you’re integrating Zoho Books into your product or internal systems, pulling accurate and timely expense data is table stakes, not a nice-to-have.
This blog is part of our ongoing deep-dive series on the Zoho Books API. Here, we focus specifically on one high-impact use case: retrieving expense data from Zoho Books. If you’re looking for a broader overview of authentication, rate limits, and other core API concepts, you should start with the complete Zoho Books API guide available on Knit’s blog.
Before touching the API, make sure the basics are locked in:
If any of these are shaky, your integration will be brittle from day one.
Zoho Books exposes dedicated endpoints for expense data:
GET https://www.zohoapis.com/books/v3/expenses/{expense_id}?organization_id={organization_id}GET https://www.zohoapis.com/books/v3/expenses?organization_id={organization_id}Everything hinges on the organization_id. Get this wrong, and nothing else matters.
Zoho uses OAuth 2.0. You’ll first exchange your authorization code for an access token.
import requests

url = "https://accounts.zoho.com/oauth/v2/token"
payload = {
    'grant_type': 'authorization_code',
    'client_id': 'YOUR_CLIENT_ID',
    'client_secret': 'YOUR_CLIENT_SECRET',
    'redirect_uri': 'YOUR_REDIRECT_URI',
    'code': 'YOUR_AUTHORIZATION_CODE'
}

response = requests.post(url, data=payload)
access_token = response.json().get('access_token')In production, this step must be automated and paired with refresh-token logic. Manual token handling doesn’t scale.
import requests

headers = {
    'Authorization': f'Zoho-oauthtoken {access_token}'
}

url = "https://www.zohoapis.com/books/v3/expenses/982000000030049?organization_id=10234695"
response = requests.get(url, headers=headers)
expense_data = response.json()Use this when you already know the expense ID, for example, during reconciliation or drill-down workflows.
url = "https://www.zohoapis.com/books/v3/expenses?organization_id=10234695"
response = requests.get(url, headers=headers)
expenses_list = response.json()
This endpoint supports pagination, filtering, and sorting. If you’re syncing data, you should be using those aggressively to avoid unnecessary API calls.
Let’s be blunt, most Zoho Books integrations fail for predictable reasons:
ZohoBooks.expenses.READ will return empty or unauthorized responses.If you’re building a customer-facing product, each of these becomes a support ticket waiting to happen.
How do I refresh an expired access token?
Use the refresh token provided during OAuth authorization to request a new access token without user intervention.
What are the Zoho Books API rate limits?
Rate limits vary by plan and endpoint. Always consult Zoho’s official documentation and build throttling into your integration.
Can I filter expenses by date?
Yes. Use query parameters such as date_start and date_end to narrow results.
Can expenses be sorted?
Yes. The sort_column parameter allows sorting by supported fields.
How should API errors be handled?
Inspect HTTP status codes and error payloads. Don’t rely on generic exception handling.
Does Zoho Books API work globally?
Yes, but you must use the correct regional API domain (e.g., .com, .eu, .in).
What scopes are required for expense access?
At minimum, you need ZohoBooks.expenses.READ for read-only access.
If you’re evaluating whether to build and maintain this integration yourself, here’s the reality check: OAuth edge cases, token refreshes, regional domains, and ongoing API changes are operational drag.
Knit abstracts all of that.
Integrate with Knit once, and you get reliable, production-grade access to Zoho Books expense data without managing authentication, token lifecycles, or breaking API changes. For teams shipping fast or supporting multiple accounting platforms, this isn’t an optimization, it’s a strategic decision.
This article is part of our in-depth series on the HRIS API. In this guide, we’ll walk through how to retrieve employee data from IRIS Cascade, covering endpoints, prerequisites, sample code, and common troubleshooting tips.
If you’d like a deeper look at authentication, rate limits, and other use cases, check out our full list of HRIS API Guides.
The IRIS Cascade API provides endpoints that let you retrieve detailed employee information from basic personal details to department, position, and status. You can query data for a single employee or retrieve all employee records in bulk.
Before you begin, make sure you have:
requests library installed.GET /employeesGET /employees/{id}import requests
url = "https://yourdomain.com/api/employees"
headers = {"Authorization": "Bearer YOUR_ACCESS_TOKEN"}
response = requests.get(url, headers=headers)
if response.status_code == 200:
employees = response.json()
print(employees)
else:
print("Failed to retrieve employees")
import requests

employee_id = "12345"
url = f"https://yourdomain.com/api/employees/{employee_id}"
headers = {"Authorization": "Bearer YOUR_ACCESS_TOKEN"}

response = requests.get(url, headers=headers)
if response.status_code == 200:
    employee = response.json()
    print(employee)
else:
    print("Failed to retrieve employee")
$top and $skip parameters.4xx and 5xx responses to log and debug effectively.1. What is the maximum number of employees I can retrieve in one request?
You can fetch up to 250 employees per request using the $top query parameter.
2. How can I handle pagination for large datasets?
Use $skip and $top parameters to iterate through the employee list efficiently.
3. Can I filter the employee data?
Yes, apply the $filter parameter to retrieve employees based on specific attributes like department or job title.
4. What data formats does IRIS Cascade support?
The API supports JSON and XML response formats. JSON is recommended for most integrations.
5. How do I authenticate my API requests?
Include a Bearer token in the Authorization header of every request.
6. What if I receive a 401 Unauthorized error?
This usually means your token has expired or is invalid. Generate a new one and try again.
Instead of building and maintaining your own integration, Knit API lets you connect to IRIS Cascade in minutes. With a single integration, Knit manages:
For developers who want to avoid maintaining HR integrations and focus on product innovation, Knit provides a unified, reliable, and scalable way to connect to IRIS Cascade and other HRIS systems effortlessly.
Paycor is a leading HR and payroll platform that empowers businesses to manage their workforce efficiently. For developers and HR tech teams, accessing employee data via the Paycor API allows seamless integration of payroll, attendance, and HR information into internal dashboards or third-party applications.
This article, part of our in-depth HRIS API series, explains how to retrieve employee data using Paycor’s REST API. We’ll cover the endpoints, authentication steps, and practical Python examples to get you started quickly.
Before you begin, ensure you have:
Access-Token or Apim-Subscription-Key).To fetch data for a specific employee:
GET /v1/employees/{employeeId}
Path Parameter:
employeeId – Unique identifier for the employee (required).Query Parameters:
include – Add fields like EmploymentDates, Position, Status, or WorkLocation.emailType – Specify which email to return (Work or Home).To retrieve all employees in a legal entity:
GET /v1/legalentities/{legalEntityId}/employees
Path Parameter:
legalEntityId – The unique identifier of the legal entity (required).Retrieve Data for a Specific Employee:
import requests

def get_employee_by_id(employee_id, access_token):
    url = f'https://api.paycor.com/v1/employees/{employee_id}'
    headers = {'Authorization': f'Bearer {access_token}'}
    response = requests.get(url, headers=headers)
    return response.json()
Retrieve Data for All Employees in a Legal Entity:
import requests

def get_employees_by_legal_entity(legal_entity_id, access_token):
    url = f'https://api.paycor.com/v1/legalentities/{legal_entity_id}/employees'
    headers = {'Authorization': f'Bearer {access_token}'}
    response = requests.get(url, headers=headers)
return response.json()v1 or latest).1. What is the default email type returned?
The API returns the employee’s Work email by default.
2. Can I retrieve data for terminated employees?
Yes. Use the Status parameter to include terminated employees in your results.
3. How do I find an EmployeeID?
Use the Get Employees by Legal Entity ID endpoint to list all employees and their IDs.
4. What additional data can I include in the response?
You can include EmploymentDates, Position, Status, and WorkLocation for richer insights.
5. Is there a limit on the number of employees retrieved?
Yes, Paycor APIs often paginate results. Check for pagination tokens in the response.
6. How often is the data updated?
Employee data updates in real time as changes occur in the Paycor system.
7. What should I do if I receive a 500 error?
Check Paycor’s API status page for outages and review your request for formatting issues.
Integrating directly with multiple HR APIs can be complex and time-consuming. Knit simplifies this process.
With a single integration, you can connect to Paycor API and dozens of other HRIS systems seamlessly. Knit handles:
This eliminates the need to build and maintain individual API connections, saving engineering time and ensuring data reliability across your HR integrations.
If you work with Oracle Cloud HCM, you already know the ecosystem can feel heavy, fragmented, and operationally expensive to maintain. This guide focuses on one high-value use case: pulling job application data directly from the Oracle HCM API.
It’s part of our deeper Oracle-HCM API series where we break down authentication, rate limits, and real-world integration patterns in simple, actionable language. If you want the full deep dive, you’ll find the complete guide here.
requests installedhttps://your-instance.oraclecloud.com/oauth2/v1/tokenhttps://your-instance.oraclecloud.com/hcmRestApi/resources/latest/jobApplicationsimport requests
auth_url = 'https://your-instance.oraclecloud.com/oauth2/v1/token'
client_id = 'your_client_id'
client_secret = 'your_client_secret'
auth_response = requests.post(
auth_url,
data={'grant_type': 'client_credentials'},
auth=(client_id, client_secret)
)
access_token = auth_response.json().get('access_token')candidate_id = 'specific_candidate_id'
job_applications_url = (
f'https://your-instance.oraclecloud.com/'
f'hcmRestApi/resources/latest/jobApplications?q=CandidateId={candidate_id}'
)
headers = {'Authorization': f'Bearer {access_token}'}
response = requests.get(job_applications_url, headers=headers)
candidate_data = response.json()all_job_applications_url = (
'https://your-instance.oraclecloud.com/'
'hcmRestApi/resources/latest/jobApplications'
)
response = requests.get(all_job_applications_url, headers=headers)
all_candidates_data = response.json()You’ll avoid 90% of Oracle HCM integration failures by watching for these:
1. Does Oracle Cloud HCM have rate limits?
Yes. Limits differ by region and tenant setup, check your instance-specific documentation.
2. How do I refresh the token?
Regenerate via the same OAuth client_credentials flow. Oracle does not issue refresh tokens.
3. Can I filter job applications by status or date?
Yes. Use query parameters like q=Status='SUBMITTED'.
4. Is pagination supported?
Yes. Oracle returns links for next pages. Always iterate until exhausted.
5. Why do I get 401/403 errors?
Most often: missing roles. Ensure your client has access to recruitment objects.
6. Can I query historical or archived applications?
Only if your tenant stores them, config varies across organizations.
7. How secure is the API?
OAuth 2.0 with strict scoping. All calls happen over HTTPS.
Oracle Cloud HCM’s APIs are powerful, but the learning curve is steep and ops overhead adds up quickly. If you’re integrating once, the steps above get you there. If you’re integrating for scale across multiple systems, a unified API like Knit dramatically reduces engineering load and stabilizes your downstream workflows.
This article is part of an in-depth series on the FreshBooks API, designed for teams building reliable accounting integrations at scale. In this piece, we focus on a high-frequency use case: retrieving expense data from FreshBooks.
Expense data is foundational for downstream workflows, financial reporting, reimbursements, budgeting, and analytics. While FreshBooks provides a clean API, teams often underestimate the operational complexity around authentication, pagination, rate limits, and long-term maintenance.
If you’re looking for a broader overview of FreshBooks API authentication, limits, and core objects, refer to the complete FreshBooks API guide here.
Before you start, make sure the basics are in place:
requests library installedIf OAuth isn’t already set up, stop here and do that first. Nothing else works reliably without it.
FreshBooks exposes expenses through the Accounting API:
GET https://api.freshbooks.com/accounting/account/{accountid}/expenses/expenses
You’ll need the correct accountid, which is often a source of confusion for first-time integrators.
All FreshBooks API calls require a valid OAuth 2.0 access token. This token must be passed in the Authorization header as a Bearer token.
Key point: access tokens expire. Your integration must support token refresh from day one.
Below is a simple Python example to retrieve expense data for a given account.
import requests

def get_expenses(account_id, access_token):
    url = f"https://api.freshbooks.com/accounting/account/{account_id}/expenses/expenses"
    headers = {
        "Authorization": f"Bearer {access_token}",
        "Content-Type": "application/json"
    }

    response = requests.get(url, headers=headers)

    if response.status_code == 200:
        return response.json()
    else:
        raise Exception(
            f"Error fetching expenses: {response.status_code} - {response.text}"
        )

# Example usage
account_id = "your_account_id"
access_token = "your_access_token"

expenses = get_expenses(account_id, access_token)
print(expenses)
In production, this function should also handle pagination, retries, and token refresh logic. The example above is intentionally minimal.
This is where most integrations fail, not at the API call, but in the operational gaps around it.
Bottom line: most FreshBooks “API issues” are actually integration design issues.
How do I get an access token?
You must authenticate using OAuth 2.0 and complete the authorization flow to obtain an access token.
What happens when the access token expires?
Use the refresh token issued during authentication to generate a new access token automatically.
Can I filter expenses by date or other attributes?
Yes. FreshBooks supports query parameters for filtering. Refer to the official documentation for supported fields.
What are the API rate limits?
Rate limits vary by endpoint and usage pattern. Always design defensively and consult FreshBooks’ latest API docs.
How should API errors be handled?
Log them, categorize them (auth, rate limit, server), and retry only when appropriate. Silent failures are unacceptable.
Is there a limit to how many expenses I can fetch?
Large datasets are paginated. Your integration must iterate through pages until completion.
Can the same approach be used for other FreshBooks data?
Yes. Invoices, clients, payments, and other objects follow similar authentication and request patterns.
If you don’t want to spend engineering cycles on OAuth flows, token refresh, pagination, retries, and long-term API maintenance, this is where abstraction makes sense.
Knit provides a unified API layer for FreshBooks. You integrate once, and Knit handles:
For teams scaling accounting integrations across customers and geographies, this approach materially reduces risk, build time, and maintenance overhead.
This article is part of a broader series that breaks down the HubSpot API in a practical, use-case-driven way. The focus here is narrow and execution-oriented: retrieving open support tickets from HubSpot using the CRM v3 APIs.
If you’re building customer support dashboards, syncing ticket data into a data warehouse, or powering automation around unresolved issues, open tickets are a foundational dataset. This guide walks through exactly how to fetch them.
If you’re looking for a deeper dive into CRM guides across authentication, rate limits, or other CRM objects, refer to the comprehensive CRM API guide.
Before you start, make sure the basics are in place:
requests library installedWithout the right scopes or permissions, ticket data will simply not resolve—no partial credit here.
You’ll be working with two primary endpoints:
/crm/v3/objects/tickets/crm/v3/properties/ticketsThe first pulls ticket records; the second helps you identify which property represents ticket status or pipeline stage.
Start by fetching ticket properties. This allows you to confirm which field is used to represent ticket status (for example, hs_pipeline_stage).
import requests

url = "https://api.hubapi.com/crm/v3/properties/tickets"
headers = {
    "Authorization": "Bearer YOUR_ACCESS_TOKEN"
}

response = requests.get(url, headers=headers)
print(response.json())
This step is critical. Hard-coding assumptions about status fields is one of the fastest ways to ship a broken integration.
Once you’ve identified the correct status property, retrieve tickets and filter for open ones.
url = "https://api.hubapi.com/crm/v3/objects/tickets"
params = {
    "properties": "subject,hs_pipeline_stage",
    "limit": 100
}

response = requests.get(url, headers=headers, params=params)

open_tickets = [
    ticket for ticket in response.json()["results"]
    if ticket["properties"]["hs_pipeline_stage"] == "open"
]

print(open_tickets)
At scale, this pattern work —but only if you handle pagination and rate limits properly (more on that below).
To pull open tickets for a single customer, you first need to fetch ticket associations for a given contact ID.
contact_id = "CONTACT_ID"
url = f"https://api.hubapi.com/crm/v3/objects/contacts/{contact_id}/associations/tickets"

response = requests.get(url, headers=headers)
ticket_ids = [
    assoc["id"] for assoc in response.json()["results"]
    if assoc["type"] == "ticket"
]
Then retrieve each ticket and filter for open status:
open_tickets_for_contact = []

for ticket_id in ticket_ids:
    url = f"https://api.hubapi.com/crm/v3/objects/tickets/{ticket_id}"
    response = requests.get(url, headers=headers)
    ticket = response.json()

    if ticket["properties"]["hs_pipeline_stage"] == "open":
        open_tickets_for_contact.append(ticket)

print(open_tickets_for_contact)Most HubSpot ticket integrations fail for predictable reasons. Avoid these:
after parameter.Q: How do I authenticate with the HubSpot API?
A: Use either an API key or an OAuth access token with the required CRM scopes.
Q: What are the HubSpot API rate limits?
A: HubSpot allows 100 requests per 10 seconds per app by default.
Q: How do I paginate through large ticket datasets?
A: Use the after parameter returned in the response to fetch the next page of results.
Q: How do I identify the correct ticket status property?
A: Call the ticket properties endpoint and inspect the available fields and enums.
Q: Can I filter tickets using custom properties?
A: Yes. Custom properties can be requested and filtered like standard properties.
Q: What’s the best way to handle API errors?
A: Check HTTP status codes and log error payloads. Retry selectively, not blindly.
Q: Can I retrieve historical changes to ticket properties?
A: Yes. Use the propertiesWithHistory parameter when retrieving ticket objects.
If you want to skip the overhead of building and maintaining a direct HubSpot integration, Knit provides a faster path. With a single integration, Knit handles authentication, authorization, pagination, and long-term maintenance for the HubSpot API.
This article is part of an ongoing series that breaks down the Ceridian Dayforce API into practical, real-world use cases. The focus here is narrow and execution-oriented: retrieving employee leave data from the Ceridian Dayforce API in a way that is reliable, scalable, and production-ready.
If you’re building HR integrations, workforce analytics, payroll workflows, or compliance reporting, leave data is not optional, it is a core operational dependency. This guide walks through the exact steps required to authenticate, fetch leave data for individual employees or across the organization, and avoid the most common implementation mistakes.
For a broader overview of the Ceridian Dayforce API, refer to the comprehensive guide available here.
Before you start, ensure the following are in place:
requests).Ceridian Dayforce uses OAuth 2.0 with the client credentials grant. You must authenticate first to obtain an access token, which is then used for all subsequent API calls.
import requests
auth_url = "https://api.dayforce.com/Token"
auth_data = {
    'grant_type': 'client_credentials',
    'client_id': 'YOUR_CLIENT_ID',
    'client_secret': 'YOUR_CLIENT_SECRET'
}
response = requests.post(auth_url, data=auth_data)
access_token = response.json().get('access_token')
Once authenticated, the access token is passed in the Authorization header to fetch leave data.
employee_id = 'SPECIFIC_EMPLOYEE_ID'
leave_url = f"https://api.dayforce.com/leave/v1/employees/{employee_id}/leaves"
headers = {'Authorization': f'Bearer {access_token}'}
response = requests.get(leave_url, headers=headers)
employee_leave_data = response.json()
leave_url_all = "https://api.dayforce.com/leave/v1/employees/leaves"
response_all = requests.get(leave_url_all, headers=headers)
all_employees_leave_data = response_all.json()
If your goal is speed, reliability, and minimal maintenance overhead, building and managing a direct Ceridian Dayforce integration may not be the best use of engineering time.
Knit provides a unified API layer for Ceridian Dayforce. With a single integration, Knit handles authentication flows, permission management, schema normalization, and ongoing API changes. This allows teams to focus on business logic rather than vendor-specific edge cases.
For organizations scaling HR integrations across multiple systems, this approach materially reduces integration debt while improving data reliability.
If you’re building workflows on top of Sage HRIS API, the first real test of your integration maturity is how cleanly you can extract employee data. This guide breaks down the exact process, endpoints, scripts, parameters, and common challenges—so you don’t waste cycles debugging basics. It’s part of a broader series that deep-dives into Sage HRIS fundamentals such as authentication, rate limits, and real-world implementation patterns. Full Sage HRIS guide is available here.
requests installedGET https://subdomain.sage.hr/api/employeesGET https://subdomain.sage.hr/api/employees/{employee_id}import requests
url = "https://subdomain.sage.hr/api/employees"
headers = {
"X-Auth-Token": "your_auth_token"
}
params = {
"page": 1,
"team_history": "true",
"employment_status_history": "true",
"position_history": "true"
}
response = requests.get(url, headers=headers, params=params)
employees = response.json()
print(employees)import requests
employee_id = 19 # Replace with the actual employee ID
url = f"https://subdomain.sage.hr/api/employees/{employee_id}"
headers = {
"X-Auth-Token": "your_auth_token"
}
response = requests.get(url, headers=headers)
employee = response.json()
print(employee)1. How do I get an X-Auth-Token?
Your Sage HRIS admin generates it for your integration environment.
2. I’m getting a 401 Unauthorized, what should I check?
Your token is either wrong, expired, or tied to the wrong subdomain.
3. How do I handle pagination?
Use the page parameter and iterate until the response returns an empty list.
4. What format does Sage HRIS return data in?
JSON.
5. Can I pull team-level context?
Yes, set team_history=true.
6. Does Sage HRIS enforce rate limits?
Yes. You’ll get throttled if you don’t space requests.
7. Can I update employee records?
Yes, use PUT/PATCH endpoints documented in the Sage HRIS guide.
If you want a cleaner alternative to maintaining your own Sage HRIS API integrations, Knit abstracts the entire process, auth, refresh cycles, retries, pagination, schema normalization, and long-term maintenance. Integrate once, and gain plug-and-play access to Sage HRIS and dozens of other HRIS systems without rewriting connectors every quarter.
This article is part of an ongoing series that covers the Factorial HR API in depth. The focus here is a very specific operational use case: retrieving employee leave data using the Factorial HR API.
If you are building payroll systems, HR analytics pipelines, or internal reporting workflows, leave data is a non-negotiable input. This guide walks through the exact endpoints and steps required to extract that data reliably.
For a broader overview of the Factorial HR API, including authentication, rate limits, and general integration patterns—refer to the full guide available here.
Before you start, ensure the following are in place:
requests installedWithout these basics, the integration will fail early.
The following endpoints are used in this workflow:
https://api.factorialhr.com/api/2024-10-01/resources/employees/employeeshttps://api.factorialhr.com/api/2024-10-01/resources/timeoff/leavesThese endpoints form the backbone of employee-to-leave data mapping.
Start by pulling the complete employee list. This gives you the employee IDs required to associate leave records accurately.
import requests

url = 'https://api.factorialhr.com/api/2024-10-01/resources/employees/employees'
headers = {
    'accept': 'application/json',
    'Authorization': 'Bearer YOUR_API_KEY'
}

response = requests.get(url, headers=headers)
employees = response.json()
This step is foundational. Skipping it often leads to mismatched or incomplete leave data downstream.
Once employees are available, fetch leave records across the organization.
url = 'https://api.factorialhr.com/api/2024-10-01/resources/timeoff/leaves'
params = {
    'include_leave_type': 'true',
    'include_duration': 'true'
}

response = requests.get(url, headers=headers, params=params)
leaves = response.json()
Including leave types and durations upfront avoids additional enrichment calls later.
If your use case requires employee-level queries, filter leaves using the employee ID.
employee_id = 1  # Replace with the actual employee ID
params['employee_ids[]'] = employee_id

response = requests.get(url, headers=headers, params=params)
employee_leaves = response.json()
This is particularly useful for employee dashboards, manager approvals, or audit workflows.
Most integration failures are operational, not technical. Watch out for the following:
Addressing these early will save hours of debugging later.
1. What is the base URL for the Factorial HR API?
The base URL is https://api.factorialhr.com/api/2024-10-01.
2. How do I authenticate API requests?
Authentication is handled using an API key passed in the request headers as a Bearer token.
3. Can employees be filtered by location?
Yes. Use the location_ids[] query parameter when fetching employees.
4. How can I retrieve only active employees?
Set only_active=true in the query parameters for the employee endpoint.
5. Is it possible to retrieve leave types along with leave records?
Yes. Set include_leave_type=true when calling the leaves endpoint.
6. Can pending leave requests be included in the response?
Yes. Use include_pending=true in the query parameters.
7. How do I filter leave data by date range?
Use the from and to query parameters in YYYY-MM-DD format.
Directly integrating with the Factorial HR API works, but it comes with long-term maintenance overhead.
Knit simplifies this by acting as a single integration layer. You integrate once, and Knit handles authentication, authorization, version changes, and ongoing maintenance for the Factorial HR API. This reduces engineering effort, minimizes breakages, and accelerates time-to-value for HR data workflows.
If scale, reliability, and speed matter, this approach is materially more efficient.
This article is part of a broader series covering the Hibob API in depth. It focuses specifically on retrieving employee leave data using the Hibob API.
If you're building HR workflows, analytics pipelines, or integrations, leave data is not optional, it directly impacts payroll accuracy, workforce planning, and compliance. This guide walks through how to access that data efficiently and without breaking your system.
For a deeper understanding of the Hibob API, including authentication, rate limits, and other use cases, refer to the full guide here.
Before making any API calls, ensure the following is in place:
Authenticate all requests using your API key or token in the request headers:
headers = {
  'Authorization': 'Bearer YOUR_API_KEY',
  'Content-Type': 'application/json'
}Use the following code to fetch leave data for a specific employee:
import requests

employee_id = '12345'
url = f'https://api.hibob.com/v1/employees/{employee_id}/leave'

response = requests.get(url, headers=headers)
leave_data = response.json()

print(leave_data)Use the following code to fetch leave data across all employees:
url = 'https://api.hibob.com/v1/employees/leave'

response = requests.get(url, headers=headers)
all_leave_data = response.json()

print(all_leave_data)Most integrations fail not because of complexity, but because of poor handling of edge cases. Here’s where things typically break:
If you’re building this from scratch, expect ongoing maintenance, auth handling, schema changes, retries, and edge cases will keep surfacing.
Knit eliminates that overhead. With a single integration, you get standardized access to Hibob APIs without worrying about authentication, versioning, or maintenance. It’s a faster path to production and significantly reduces operational drag.
This article is part of our in-depth series on the Zendesk CRM API and focuses specifically on retrieving detailed customer information. Accessing accurate customer data is foundational for sales, support, and analytics workflows. In this guide, we walk through the exact API endpoints, authentication requirements, and Python implementation needed to fetch customer records efficiently.
For a broader deep dive into authentication, rate limits, and additional CRM API use cases, refer to the complete guide here.
Before you begin, ensure the following:
requests library installed in your Python environmentYou can install the requests library using:
pip install requests
Retrieve all contacts
GET /v2/contactsBase URL:
https://api.getbase.com/v2/contactsBelow is a Python function that retrieves all customer records:
import requests

def get_all_customers(access_token):
    url = "https://api.getbase.com/v2/contacts"
    headers = {
        "Accept": "application/json",
        "Authorization": f"Bearer {access_token}"
    }
    response = requests.get(url, headers=headers)
    if response.status_code == 200:
        return response.json()
    else:
        raise Exception(f"Error: {response.status_code}, {response.text}")

# Example usage
access_token = "your_access_token_here"
customers = get_all_customers(access_token)
print(customers)To fetch detailed information for a specific customer using their ID:
def get_customer_by_id(access_token, customer_id):
    url = f"https://api.getbase.com/v2/contacts/{customer_id}"
    headers = {
        "Accept": "application/json",
        "Authorization": f"Bearer {access_token}"
    }
    response = requests.get(url, headers=headers)
    if response.status_code == 200:
        return response.json()
    else:
        raise Exception(f"Error: {response.status_code}, {response.text}")

# Example usage
customer_id = 1
customer = get_customer_by_id(access_token, customer_id)
print(customer)
This method ensures you can drill down into individual customer records for detailed insights.
When working with the Zendesk CRM API, teams often run into avoidable issues. Here’s what to watch for:
Production-grade integrations must account for retries, error handling, and secure token management.
You can obtain an access token from your Zendesk CRM account settings.
Refer to the official Zendesk CRM documentation for current rate limit thresholds, as they may change.
Yes. You can use query parameters such as email or name to filter results.
Use the page and per_page query parameters to navigate through large result sets.
Responses are returned in JSON format.
Yes. Use the appropriate update endpoint provided in the Zendesk CRM API documentation.
Check with Zendesk CRM to confirm sandbox availability for testing purposes.
For quick and seamless access to the Zendesk CRM API, Knit API offers a streamlined solution. By integrating with Knit once, you can simplify authentication, authorization, and ongoing maintenance.
Knit manages integration complexity, allowing your team to focus on building workflows instead of handling API intricacies. This approach reduces engineering overhead while ensuring a reliable and scalable connection to the Zendesk CRM API.
This article is part of our in-depth series on the Alexis HR API, exploring specific use cases, authentication, rate limits, and integration best practices. In this guide, we’ll walk you through how to retrieve employee leave data from the Alexis HR API using simple Python examples.
If you’re looking for other use cases and detailed documentation on the Alexis HR API, check out our complete guide here.
Before you begin, make sure you have:
requests library installed.GET https://api.alexishr.com/v1/leaveGET https://api.alexishr.com/v1/leave/{id}Ensure you have a valid access token and include it in the Authorization header as a Bearer token.
import requests

url = "https://api.alexishr.com/v1/leave"
headers = {
    "Authorization": "Bearer YOUR_ACCESS_TOKEN"
}

response = requests.get(url, headers=headers)
if response.status_code == 200:
    leaves = response.json()
    print(leaves)
else:
    print("Error:", response.status_code, response.text)
import requests

leave_id = "507f1f77bcf86cd799439011"
url = f"https://api.alexishr.com/v1/leave/{leave_id}"
headers = {
    "Authorization": "Bearer YOUR_ACCESS_TOKEN"
}

response = requests.get(url, headers=headers)
if response.status_code == 200:
    leave_info = response.json()
    print(leave_info)
else:
    print("Error:", response.status_code, response.text)
1. What is the base URL for the Alexis HR API?
The base URL is https://api.alexishr.com/v1.
2. How do I authenticate API requests?
Use a Bearer token in the Authorization header.
3. Can I filter leave data by date or type?
Yes. Use query parameters to filter results as per your requirements.
4. What should I do if I receive a 401 Unauthorized error?
Check your access token, it might be expired or invalid.
5. Is there a sandbox environment for testing?
Yes. Use https://api.sandbox.alexishr.com/v1 for testing and development.
6. How can I sort leave data?
Use the sort query parameter (e.g., ?sort=startDate).
7. What date format does the API support?
Use the ISO 8601 date format (e.g., YYYY-MM-DD).
If you’re integrating Alexis HR with multiple HR systems or applications, Knit can simplify your workflow. With a single integration through Knit, you can access multiple HRIS APIs, including Alexis HR, without worrying about authentication, rate limits, or maintenance.
Knit manages the entire integration lifecycle, ensuring faster setup, reliable data sync, and reduced engineering overhead, helping your team focus on building insights rather than managing APIs.
This article is part of an in-depth series on the Lever API and focuses specifically on retrieving job application data from Lever ATS. The objective is straightforward: help you pull application-level data in a clean, reliable, and production-ready way.
If you’re looking for a broader overview of the Lever API, including authentication models, rate limits, and other supported use cases, refer to the comprehensive Lever API directory available on the Knit blog.
This post assumes you already know why you need application data. The focus here is how to get it right without breaking your integration later.
Before you begin, make sure the basics are locked in:
Skipping any of these will slow you down later. Treat this as table stakes.
To retrieve job application data, Lever exposes the following endpoint:
GET https://api.lever.co/v1/applications
This endpoint returns application-level records tied to candidates and job postings.
Authentication can be handled using OAuth or an API key. For OAuth-based access, the flow starts with user authorization.
import requests

# Step 1: Request User Authorization
auth_url = "https://auth.lever.co/authorize"
params = {
    "client_id": "your_client_id",
    "redirect_uri": "https://yourapplication.com/callback",
    "response_type": "code",
    "state": "random_state_string",
    "scope": "applications:read:admin",
    "audience": "https://api.lever.co/v1/"
}
response = requests.get(auth_url, params=params)
print(response.url)  # Direct user to this URL for authorization
The user must complete this step before you can proceed. This is a hard dependency.
Once authorization is complete, exchange the authorization code for an access token.
# After user authorization, exchange code for access token
token_url = "https://auth.lever.co/oauth/token"
data = {
    "grant_type": "authorization_code",
    "client_id": "your_client_id",
    "client_secret": "your_client_secret",
    "code": "authorization_code_received",
    "redirect_uri": "https://yourapplication.com/callback"
}
token_response = requests.post(token_url, data=data)
access_token = token_response.json().get("access_token")
This token is required for all subsequent API calls.
Use the access token to call the applications endpoint.
# Use access token to retrieve application data
headers = {"Authorization": f"Bearer {access_token}"}
applications_url = "https://api.lever.co/v1/applications"
applications_response = requests.get(applications_url, headers=headers)
applications_data = applications_response.json()
print(applications_data)
At this stage, you should have raw application data ready for processing or downstream workflows.
Most Lever API integrations fail for predictable reasons. Avoid these upfront:
state parameter in the OAuth flowcandidateIdnext parameter returned in the API response to fetch subsequent result pages.Direct integration with the Lever API works, but it comes with ongoing overhead. Authentication management, token refresh, API changes, and edge-case handling quickly add up.
Knit simplifies this by abstracting the entire integration layer. With a single integration to Knit, you get managed authentication, authorization, and long-term API maintenance handled for you. The result is faster implementation, lower maintenance cost, and fewer production surprises.
If your goal is reliability at scale, this approach is simply more efficient.
This article is part of an in-depth series on the Charlie HR API and focuses specifically on retrieving employee leave data. The objective is straightforward: help you programmatically access leave requests in a clean, reliable way without overengineering the integration.
If you are building HR analytics, syncing leave data to payroll systems, or centralizing workforce data, this endpoint is foundational. For a broader overview of the Charlie HR API, including authentication, rate limits, and other core concepts, refer to the complete Charlie HR API guide.
Before making requests to the Charlie HR API, ensure the following are in place:
client_id and client_secretrequestsWithout these basics, API calls will fail—there is no workaround.
Use this endpoint to retrieve details of a specific leave request.
Endpoint
GET https://charliehr.com/api/v1/leave_requests/:id
Replace :id with the relevant leave request ID.
Python Example
import requests

url = "https://charliehr.com/api/v1/leave_requests/{leave_request_id}"
headers = {
    "Authorization": "Token token=client_id:client_secret"
}

response = requests.get(url, headers=headers)
data = response.json()
print(data)
Use this endpoint to retrieve leave requests across the organization.
Endpoint
GET https://charliehr.com/api/v1/leave_requests
Python Example
import requests

url = "https://charliehr.com/api/v1/leave_requests"
headers = {
    "Authorization": "Token token=client_id:client_secret"
}

response = requests.get(url, headers=headers)
data = response.json()
print(data)
Authorization header with your API token.start_date and end_date query parameters.page and per_page parameters when working with large result sets.If you want to avoid managing authentication flows, token refresh logic, and ongoing maintenance, Knit provides a streamlined alternative. By integrating once with Knit, you get consistent access to the Charlie HR API without handling low-level API mechanics yourself.
This shifts effort away from plumbing and toward actual product logic, where engineering time delivers ROI.
This article is part of our in-depth CRM API series. This one focuses specifically on retrieving detailed customer information from Affinity. If you're looking for a broader breakdown of authentication methods, rate limits, and other supported use cases, you can explore the complete CRM API guide.
In this guide, we’ll walk through the exact steps required to authenticate, fetch a list of customers, and retrieve detailed information for a specific individual using the Affinity API.
Before making API calls, ensure you have the following in place:
requests library available.The following endpoints are required for retrieving customer information:
GET /people – Retrieve a list of all people.GET /people/{person_id} – Retrieve detailed information for a specific person.The Affinity API uses HTTP Basic Authentication. Your API key should be passed as the password in the Authorization header.
import requests

api_key = 'your_api_key'
headers = {'Authorization': f'Basic {api_key}'}To fetch all customers (people records), use the /people endpoint.
response = requests.get('https://api.affinity.co/people', headers=headers)
all_customers = response.json()
This returns a list of people along with their respective IDs. You will need the person_id from this response to fetch detailed information.
To fetch detailed information for a specific person, use their unique person_id.
person_id = 'specific_person_id'

response = requests.get(
    f'https://api.affinity.co/people/{person_id}',
    headers=headers
)

customer_details = response.json()
This returns comprehensive information about the selected individual.
When working with the Affinity API, integration issues usually stem from operational oversights. Here are the most common challenges and how to avoid them:
person_id exists before attempting to retrieve detailed data.Operational discipline is key. Most integration failures are preventable with structured request handling and monitoring.
1. How do I generate an API key?
Navigate to the Settings Panel in the Affinity web app and generate your API key from there.
2. What is the rate limit for API calls?
Affinity allows 900 API calls per user per minute.
3. How should I handle rate limit errors (429)?
Implement retry logic with exponential backoff to ensure stability.
4. Can I retrieve data for a specific field?
Yes. Use the relevant field ID within your requests.
5. How do I find a person’s ID?
Call the GET /people endpoint to retrieve all records along with their IDs.
6. What should I do if my API key is compromised?
Immediately revoke the compromised key and generate a new one.
7. How many API keys can a user have?
Currently, one API key per user is supported.
If you want to reduce integration complexity, Knit offers a streamlined way to connect with the Affinity API.
By integrating with Knit once, you eliminate the need to repeatedly manage authentication, authorization, and ongoing API maintenance. Knit handles the heavy lifting, allowing your team to focus on using the data rather than maintaining the integration.
This article is part of a broader series that explores HR APIs in detail. In this piece, the focus is on a specific and commonly used use case: retrieving employee leave data using the Lucca HR API.
If you’re building HR analytics, payroll workflows, or internal dashboards, access to accurate leave data is critical. Lucca’s API exposes this data through clearly defined resources, but understanding how these fit together is key to implementing it correctly.
Before getting started, make sure you have the following in place:
requests library installed/api/leaves?ownerId={employeeId}/api/leavesimport requestsbase_url = "https://api.lucca.fr/api/leaves"
headers = {
"Authorization": "Bearer YOUR_ACCESS_TOKEN",
"Content-Type": "application/json"
}def get_employee_leave(employee_id):
url = f"{base_url}?ownerId={employee_id}"
response = requests.get(url, headers=headers)
if response.status_code == 200:
return response.json()
else:
return {"error": "Failed to retrieve data"}def get_all_employees_leave():
response = requests.get(base_url, headers=headers)
if response.status_code == 200:
return response.json()
else:
return {"error": "Failed to retrieve data"}When working with the Lucca HR leave endpoints, these issues tend to surface most often:
Addressing these early will prevent data inconsistencies downstream.
Authorization header.If you want to avoid managing authentication, token refresh, and long-term maintenance yourself, Knit provides a simplified way to work with the Lucca HR API.
By integrating with Knit once, you get unified access to Lucca HR without worrying about credential handling or API changes. Knit manages authentication, authorization, and ongoing integration upkeep, allowing you to focus on consuming clean leave data rather than maintaining the integration.
Recruitee’s ATS API gives teams direct access to candidate and application data, but the actual lift, authentication, endpoint handling, pagination, and error management, often slows teams down. This guide cuts through the noise and walks you through the exact workflow to pull job application data reliably. It’s part of our broader deep-dive series on ATS API architecture, performance constraints, and integration patterns. You can find the same here.
requests installedGET /c/{company_id}/candidatesGET /c/{company_id}/candidates/{candidate_id}import requests
headers = {"Authorization": "Bearer YOUR_API_KEY"}company_id = "your_company_id"
url = f"https://api.recruitee.com/c/{company_id}/candidates"
response = requests.get(url, headers=headers)
all_candidates = response.json()company_id = "your_company_id"
url = f"https://api.recruitee.com/c/{company_id}/candidates"
response = requests.get(url, headers=headers)
all_candidates = response.json()These are the failure modes teams hit most often when productionizing Recruitee integrations:
company_id or candidate_id leads to silent failures; validate inputs early.requests versions break TLS or redirect chains.1. How do I get my Recruitee API key?
From your Recruitee admin console under API settings.
2. What are the rate limits?
Typically ~1000 requests/hour per account, but this changes, always cross-check the latest docs.
3. Can I filter candidates?
Yes. Use query parameters on the /candidates endpoint to filter by job, status, or tags.
4. Does Recruitee support pagination?
Yes. Use page and per_page parameters for large datasets.
5. What if I hit authentication errors?
Confirm the API key, token format, and permission scope tied to your Recruitee role.
6. Can I update a candidate?
Yes, via PUT/PATCH endpoints for candidate objects.
7. Is the API tied to any language?
No, it’s fully language-agnostic; examples here use Python for convenience.
If you don’t want to manage auth flows, rate limiting, retries, or version drift, Knit abstracts all of it. Recruitee ATS API integration with Knit gives you a stable, production-ready connection to Recruitee without rebuilding logic every quarter. Knit handles authentication, ongoing maintenance, schema normalization, and error resilience so your team ships integrations faster, with less operational drag.
If you're building a scalable talent workflow, access to reliable, structured applicant data is non-negotiable. JazzHR’s ATS API gives you exactly that, candidate records, job-linked applications, and metadata developers rely on for downstream automation.
This guide breaks down how to fetch job application data from the JazzHR ATS API in a clean, developer-first way. It’s part of our broader deep-dive series on JazzHR integrations, covering authentication, rate limits, sync patterns, and more.
For the full ATS API guide, visit here.
requests installedGET /candidates/{candidate_id}GET /candidatesimport requestsapi_key = "your_api_key_here"def get_single_candidate(candidate_id):
url = f"https://api.jazzhr.com/v1/candidates/{candidate_id}"
headers = {"Authorization": f"Bearer {api_key}"}
response = requests.get(url, headers=headers)
return response.json()def get_all_candidates():
url = "https://api.jazzhr.com/v1/candidates"
headers = {"Authorization": f"Bearer {api_key}"}
response = requests.get(url, headers=headers)
return response.json()Teams often underestimate the operational friction in production-grade ATS integrations. Keep an eye on:
How do I get my JazzHR API key?
From your JazzHR admin console or via JazzHR support.
Can I filter candidates by job or status?
Yes. Use query parameters such as job ID, stage, and date filters.
Does JazzHR support pagination?
Yes. Use the pagination parameters to iterate through large datasets.
Is there a sandbox environment?
JazzHR may provide controlled access, confirm with their support team.
What format does the API return?
JSON is the standard response format.
Can I update candidate records via API?
JazzHR exposes PUT/POST endpoints for updates when permitted by your plan.
What should I do if I hit rate limits?
Implement retry logic with backoff or shift to periodic syncs rather than real-time pulls.
If your engineering team is tired of managing JazzHR ATS API authentication, token handling, endpoint maintenance, and candidate sync logic, Knit takes the heavy lifting out of the equation. A single integration with Knit gives you streamlined, ready-to-consume JazzHR data pipelines, no ongoing maintenance, no breaking changes, and no integration debt piling up.
The Payfit API empowers businesses to programmatically access payroll and HR data, from employee records to accounting insights, allowing smoother integrations with your internal systems.
This article, part of our in-depth HRIS API series, focuses on how to fetch employee and accounting data using Payfit’s API.
Before making requests to Payfit’s API, ensure you have:
requests.The following Payfit endpoints are typically used for accessing company and employee-level data:
GET https://partner-api.payfit.com/companies/{companyId}GET https://partner-api.payfit.com/companies/{companyId}/accounting-v2import requests
def get_company_info(company_id, headers):
url = f"https://partner-api.payfit.com/companies/{company_id}"
response = requests.get(url, headers=headers)
return response.json()def get_employee_accounting_data(company_id, date, headers):
url = f"https://partner-api.payfit.com/companies/{company_id}/accounting-v2"
params = {"date": date}
response = requests.get(url, headers=headers, params=params)
return response.json()
Note: The date parameter should follow the format YYYYMM (e.g., 202212 for December 2022).
YYYYMM format.1. What authentication method does Payfit API use?
Typically OAuth or API key-based authentication, depending on your access level.
2. How can I handle API rate limits?
Use retry logic with exponential backoff and respect the Retry-After header.
3. What is the correct date format for accounting data?
Use YYYYMM, e.g., 202401 for January 2024.
4. Can I retrieve data for multiple months in one call?
No, each API request fetches data for a single month.
5. What if I get a 401 Unauthorized error?
Double-check your API token and ensure it hasn’t expired.
6. How should I handle response errors?
Implement robust error handling based on HTTP status codes (e.g., 400, 401, 429, 500).
Integrating directly with Payfit can be time-consuming, especially with complex authentication and version updates.
Knit simplifies this by offering a single, unified API to access Payfit and other HRIS systems with built-in:
By integrating with Knit once, your team can connect to Payfit and dozens of other systems effortlessly saving engineering hours and reducing maintenance overhead.
Rippling’s API gives teams a straightforward way to automate employee data retrieval across HR, IT, and payroll workflows. This guide walks through exactly how to pull employee records, for a single user or your entire workforce, using Rippling’s API.
It’s part of our deep-dive series on Rippling APi integrations, where we break down authentication, rate limits, and real-world implementation patterns. If you want the full ecosystem view, you can explore the complete guide on the Rippling API here.
requests installedhttps://api.rippling.com/platform/api/employees/{employeeId}https://api.rippling.com/platform/api/employeesimport requests
def get_single_employee(employee_id, token):
url = f"https://api.rippling.com/platform/api/employees/{employee_id}"
headers = {
"Authorization": f"Bearer {token}",
"Accept": "application/json"
}
response = requests.get(url, headers=headers)
return response.json()
# Example usage
employee_data = get_single_employee("employeeId", "your_access_token")
print(employee_data)import requests
def get_all_employees(token, limit=100, offset=0):
url = "https://api.rippling.com/platform/api/employees"
headers = {
"Authorization": f"Bearer {token}",
"Accept": "application/json"
}
params = {
"limit": limit,
"offset": offset
}
response = requests.get(url, headers=headers, params=params)
return response.json()
# Example usage
all_employees_data = get_all_employees("your_access_token")
print(all_employees_data)1. What’s the maximum pagination limit?
Up to 100 records per request.
2. How do I authenticate with the Rippling API?
Use a bearer token in the Authorization header.
3. Can I pull terminated employees?
Yes, use the include_terminated parameter when fetching employee lists.
4. Are all fields guaranteed?
Only core identifiers like id, personalEmail, and roleState are consistently present.
5. Can these endpoints update employee data?
No. They’re read-only.
6. Can I filter employees (e.g., by department)?
Filtering isn’t natively supported in the API; apply filters client-side after retrieval.
7. How should I handle API errors?
Always check status codes, log error bodies, and implement retries/backoff for transient failures.
If you’d rather not build and maintain your own Rippling API integration, Knit gives you a unified layer to pull employee data with a single connection. Knit handles authentication, token refresh, version changes, and schema reconciliation, removing the operational overhead of managing the integration yourself.
For teams that want to ship fast without babysitting APIs, this becomes the cleaner, more scalable option.
The Oracle Taleo ATS API guide walks you through the exact steps to fetch job application data from the Oracle Taleo ATS API, along with the typical integration pitfalls teams hit and how to avoid them. This article is part of our deeper ATS API series, where we unpack authentication, rate limits, and advanced use cases. You can explore the complete guide here.
requests library installed<<HOST_URL>>/object/candidateapplication?candidateId=XX<<HOST_URL>>/object/candidateapplication?requisitionId=XXimport requestshost_url = "https://your-taleo-instance.com"
api_username = "your_username"
api_password = "your_password"def get_candidate_applications(candidate_id):
url = f"{host_url}/object/candidateapplication?candidateId={candidate_id}"
response = requests.get(url, auth=(api_username, api_password))
if response.status_code == 200:
return response.json()
else:
return response.status_codedef get_all_applications(requisition_id):
url = f"{host_url}/object/candidateapplication?requisitionId={requisition_id}"
response = requests.get(url, auth=(api_username, api_password))
if response.status_code == 200:
return response.json()
else:
return response.status_codeTeams integrating Oracle Taleo API frequently stumble on the same issues. Here’s what typically breaks:
1. What format does Taleo return data in?
Primarily JSON. XML is available if explicitly requested.
2. Can I filter applications by status or date?
Yes. Use additional query parameters (e.g., status, createdDate).
3. Does Taleo paginate responses?
Yes. Some endpoints enforce hard limits, check for nextPage tokens.
4. What’s the best way to handle rate limits?
Use exponential backoff and sleep between bursts; Oracle Taleo APIis not optimized for rapid-fire calls.
5. Can I update an application record?
Yes, via PUT requests with the correct payload structure.
6. What happens if I supply an invalid candidate ID?
You’ll either get an empty list or an error object, behavior varies by instance.
7. Does the API enforce IP allowlisting?
Often, yes. Ensure your servers or VPN range is approved.
If you want to skip credential management, throttling issues, and Oracle Taleo ATS API's legacy API gaps altogether, Knit offers a unified way to connect once and instantly access applicant-tracking data from Taleo and other ATS platforms.
Knit handles authentication, retries, pagination, normalization, and long-term maintenance, so your engineering team doesn’t waste cycles stitching together brittle point-to-point integrations.
SmartRecruiters is widely adopted for modern talent acquisition, but pulling structured, reliable job application data from its API can still be a bottleneck for engineering and operations teams. This guide breaks down the exact workflow for retrieving candidate and application records from the SmartRecruiters ATS API, without the clutter.
It’s part of our broader ATS API deep-dive series, which unpacks authentication, rate limits, pagination models, and end-to-end integration strategies. If you want the full ecosystem-level overview, you can explore the main guide here.
requests library installedGET https://api.smartrecruiters.com/candidatesGET https://api.smartrecruiters.com/candidates/{id}/jobs/{jobId}import requests
headers = {'accept': 'application/json'}
params = {'limit': 10}
response = requests.get(
'https://api.smartrecruiters.com/candidates',
headers=headers,
params=params
)
if response.status_code == 200:
candidates = response.json()['content']
for c in candidates:
print(c['id'], c['firstName'], c['lastName'])candidate_id = 'candidate_id_here'
job_id = 'job_id_here'
response = requests.get(
f'https://api.smartrecruiters.com/candidates/{candidate_id}/jobs/{job_id}',
headers=headers
)
if response.status_code == 200:
application_details = response.json()
print(application_details)Teams often underestimate SmartRecruiters’ API nuances. These issues show up repeatedly:
1. What’s the maximum number of candidates per request?
Up to 100 records.
2. How do I paginate candidate results?
Use the nextPageId field from the API response to fetch subsequent pages.
3. What does a 403 error typically indicate?
Insufficient permissions or incorrect credentials.
4. Can I filter candidates by geo-location?
Yes, SmartRecruiters supports filtering via the location parameter.
5. Can I fetch candidates by status (e.g., NEW, IN_REVIEW)?
Yes, via the status query parameter.
6. How often should API credentials be rotated?
Follow your org’s security policy, typically every 60–90 days.
7. What date format does SmartRecruiters use?
ISO 8601 (e.g., 2024-01-01T12:45:00Z).
Instead of building and maintaining a custom SmartRecruiters ATS API integration stack, you can plug into Knit once and unlock a fully managed connector. Knit handles the authentication lifecycle, rate-limit management, schema normalization, monitoring, and ongoing API maintenance, freeing up engineering cycles and reducing integration risk.
This guide is part of our in-depth series on the HRIS API. In this edition, we will explore Kallidus API and its functionality, authentication mechanisms, and best practices. We’ll focus on one of the most common use cases, retrieving employee data using the Kallidus API.
Before you begin, ensure that:
https://{{subdomain}}.saplingapp.io/api/v1/beta/usershttps://{{subdomain}}.kallidus-suite.com/hr/api/v1/beta/usersimport requests
headers = {'Authorization': 'Bearer YOUR_API_KEY'}
subdomain = 'your_subdomain'
employee_id = 'specific_employee_id'

url = f'https://{subdomain}.saplingapp.io/api/v1/beta/users/{employee_id}'
response = requests.get(url, headers=headers)

if response.status_code == 200:
    employee_data = response.json()
    print(employee_data)
else:
    print('Error:', response.status_code)
url = f'https://{subdomain}.saplingapp.io/api/v1/beta/users'
response = requests.get(url, headers=headers)

if response.status_code == 200:
    all_employees_data = response.json()
    print(all_employees_data)
else:
    print('Error:', response.status_code)
{{subdomain}} with your actual company subdomain.?page= parameter) to avoid incomplete responses.1. How do I generate an API key for Kallidus?
You can create an API key in your Sapling Admin Settings under API Configuration.
2. What format does the API return data in?
Responses are returned in JSON format.
3. Is there a rate limit for requests?
Currently, there’s no fixed limit, but Kallidus may throttle requests if traffic spikes.
4. Can I access historical employee data?
The API provides current employee data. To track changes over time, set up webhooks.
5. What should I do if I receive a 401 Unauthorized error?
Check that your API key is valid, properly included in the header, and not expired.
6. How do I handle large employee datasets?
Use pagination to retrieve data page by page and ensure you don’t miss any records.
7. What happens if I exceed rate thresholds?
Your requests might be temporarily throttled. Implement retry logic with exponential backoff.
Manually handling API integrations can be time-consuming and error-prone. With Knit, you can integrate with the Kallidus API effortlessly through a single, unified connection.
Knit HRIS API takes care of authentication and token refresh, data syncing and normalization as well as ongoing integration maintenance. This not only accelerates your development process but ensures reliable, secure, and scalable API connections.
This article is part of an ongoing series that breaks down the Breezy ATS API in a practical, use-case–driven way. In this piece, the focus is narrow and execution-oriented: pulling job application (candidate) data from the Breezy ATS API.
If you’re building recruitment analytics, syncing candidate data into an internal HR system, or powering downstream workflows like onboarding or background checks, this is a foundational API flow you’ll rely on.
If you want a broader view of the Breezy API, including authentication, rate limits, and other core concepts, refer to the full Breezy API guide linked earlier.
Before you start, make sure the basics are in place:
requestsGET https://api.breezy.hr/v3/company/{company_id}/position/{position_id}/candidatesGET https://api.breezy.hr/v3/company/{company_id}/candidates/searchimport requests
def get_candidates_for_position(api_key, company_id, position_id):
url = f"https://api.breezy.hr/v3/company/{company_id}/position/{position_id}/candidates"
headers = {"Authorization": api_key}
response = requests.get(url, headers=headers)
if response.status_code == 200:
return response.json()
else:
raise Exception(f"Error: {response.status_code}, {response.json()}")
# Example usage
api_key = "your_api_key"
company_id = "your_company_id"
position_id = "your_position_id"
candidates = get_candidates_for_position(api_key, company_id, position_id)
print(candidates)import requests
def get_candidate_by_email(api_key, company_id, email):
url = f"https://api.breezy.hr/v3/company/{company_id}/candidates/search"
headers = {"Authorization": api_key}
params = {"email_address": email}
response = requests.get(url, headers=headers, params=params)
if response.status_code == 200:
return response.json()
else:
raise Exception(f"Error: {response.status_code}, {response.json()}")
# Example usage
api_key = "your_api_key"
company_id = "your_company_id"
email = "candidate_email@example.com"
candidate = get_candidate_by_email(api_key, company_id, email)
print(candidate)This approach is useful when you’re reconciling candidate records across systems or handling inbound workflows triggered by email-based identifiers.
sort query parameter with the value updated to order results accordingly.page_size and page query parameters to fetch results incrementally.If your goal is to move fast and avoid long-term maintenance overhead, Knit provides a cleaner path. Instead of managing Breezy authentication, pagination, and edge cases yourself, you integrate with Knit once and let it handle the complexity.
Knit abstracts away API quirks, manages authentication flows, and keeps integrations resilient as APIs evolve, allowing teams to focus on product logic.
This article is part of our in-depth HRIS API series, focused on one key use case, fetching employee data using the RazorpayX Payroll API. Whether you’re building internal payroll dashboards, automating HR workflows, or syncing payroll records, this step-by-step guide will help you do it right.
If you’d like a broader overview, including authentication, rate limits, and other use cases, check out our RazorpayX Payroll API Integration
Before you begin, ensure:
requests library.API Endpoint:https://payroll.razorpay.com/api/payroll
Python Example:
import requests

url = "https://payroll.razorpay.com/api/payroll"
headers = {
    "x-api-id": "your-api-id",
    "x-api-key": "your-api-key"
}
data = {
    "auth": {"id": "your-api-id", "key": "your-api-key"},
    "request": {"type": "payroll", "sub-type": "view-payroll"},
    "data": {"employee-id": 3, "payroll-month": "2020-12"}
}

response = requests.post(url, json=data, headers=headers)
print(response.json())There’s no bulk endpoint to fetch all employee data in one go. You’ll need to loop through employee IDs.
Python Example:
employee_ids = [1, 2, 3]  # Example employee IDs

for emp_id in employee_ids:
    data["data"]["employee-id"] = emp_id
    response = requests.post(url, json=data, headers=headers)
print(response.json())1. What authentication methods are supported?
RazorpayX supports API ID/Key and Partner/Client Key authentication.
2. Can I fetch data for multiple employees in one request?
No, you’ll need to iterate over employee IDs programmatically.
3. What is the base URL for API requests?https://payroll.razorpay.com (production).
4. Is there a sandbox environment?
Yes, use https://opfin.np.razorpay.in for testing.
5. How should I handle API errors?
Monitor the HTTP status code and log the error message from the response body.
6. What request format does RazorpayX Payroll API use?
All requests are in JSON format.
7. How do I update employee details?
Use the designated update endpoint (not covered in this article).
Integrating directly with RazorpayX Payroll can get complex, authentication, version changes, and maintenance add up fast. Knit simplifies this.
By connecting once with Knit’s unified API, you can:
Knit’s plug-and-play model makes payroll connectivity faster, cleaner, and more reliable, letting your team focus on building experiences, not integrations.
This article is part of a series covering the NetSuite API in depth. It focuses on a specific, high-frequency use case: retrieving expense data from NetSuite using its REST API.
If you’re building integrations around finance, reimbursements, or expense reporting, this is a core workflow you’ll need to get right. For a broader view of the NetSuite API, including authentication models, rate limits, and other supported use cases, you can refer to the complete NetSuite API guide here.
Before you begin, ensure the following are in place:
requests and oauthlib)Without these, API access will fail.
https://<ACCOUNT_ID>.suitetalk.api.netsuite.com
/services/rest/record/v1/expenseReport
This endpoint is used to retrieve expense report records from NetSuite.
NetSuite uses OAuth 1.0 for REST API authentication. Below is a basic Python example to configure OAuth credentials:
from requests_oauthlib import OAuth1

auth = OAuth1(
    'CONSUMER_KEY',
    'CONSUMER_SECRET',
    'TOKEN_ID',
    'TOKEN_SECRET'
)This authentication object is reused across all API requests.
Once authenticated, make a GET request to the Expense Report endpoint:
import requests

url = "https://<ACCOUNT_ID>.suitetalk.api.netsuite.com/services/rest/record/v1/expenseReport"
response = requests.get(url, auth=auth)

if response.status_code == 200:
    expense_data = response.json()
    print(expense_data)
else:
    print("Error:", response.status_code)
A successful response returns expense report data in JSON format.
When working with the NetSuite Expense Report API, teams commonly run into the following issues:
These are operational issues, not edge cases, and should be addressed early.
How do I find my NetSuite Account ID?
Log in to NetSuite and navigate to Setup → Company → Company Information.
What is the rate limit for the NetSuite API?
NetSuite enforces concurrency limits based on account type.
Can I use other programming languages?
Yes. Any language that supports OAuth 1.0 can be used.
How do I handle pagination?
Use the next link provided in the API response to retrieve additional pages.
Is there a sandbox environment available?
Yes. NetSuite provides a sandbox environment for testing.
What data formats are supported?
Both JSON and XML are supported.
How do I update an expense report?
Use the PUT method on the same endpoint with the updated expense data.
Fetching expense data from the NetSuite API is a straightforward process once authentication and permissions are correctly configured. By using the Expense Report endpoint and handling common pitfalls such as pagination and rate limits, you can reliably access the data required for expense tracking and reporting workflows. Use Knit to make the process faster and simpler with our unified API.
This article is part of a broader series covering the Pipedrive API in depth. It focuses specifically on retrieving open tickets from Pipedrive using its API.
If you're looking for a complete breakdown of authentication, rate limits, and other capabilities, refer to the full guide here.
At a practical level, this guide shows how to extract open tickets (deals) both at a customer level and across your entire account, using a structured, repeatable approach.
Before you start, ensure the following are in place:
requests)GET https://api.pipedrive.com/v1/dealsGET https://api.pipedrive.com/v1/deals/{id}import requests
api_token = 'your_api_token'
base_url = 'https://api.pipedrive.com/v1/'
headers = {'Authorization': f'Bearer {api_token}'}Use the deals endpoint and filter by status to fetch open tickets.
response = requests.get(f'{base_url}deals', headers=headers, params={'status': 'open'})
deals = response.json().get('data', [])If you need customer-level visibility, filter using the customer identifier.
customer_id = 'specific_customer_id'
customer_deals = [deal for deal in deals if deal['person_id'] == customer_id]Fetch granular details for each deal where deeper context is required.
for deal in customer_deals:
    deal_id = deal['id']
deal_details = requests.get(f'{base_url}deals/{deal_id}', headers=headers).json()person_id. Build for variability, not ideal cases.1. How do I get my API token?
You can find your API token in your Pipedrive account settings under the API section.
2. What is the rate limit for Pipedrive API?
Typically, 100 requests per 10 seconds. Design your integration to stay within limits.
3. Can I filter deals beyond status?
Yes. The API supports multiple query parameters for granular filtering.
4. What happens if the API token is invalid?
You will receive a 401 Unauthorized response.
5. How do I handle pagination effectively?
Use the start and limit parameters to iterate through all results systematically.
6. How should I test API requests before production use?
Use tools like Postman to validate endpoints and responses before coding.
7. Can deal data be updated via API?
Yes. Use the PUT /deals/{id} endpoint to update deal information.
If your goal is speed and reliability, building and maintaining direct integrations is not the best use of engineering bandwidth.
Knit API abstracts the complexity. A single integration gives you standardized access to Pipedrive while handling:
Net result: faster implementation, lower operational overhead, and fewer points of failure.
This article is part of an ongoing series that breaks down the Freshworks API in a practical, use-case–driven way. This piece focuses specifically on retrieving open tickets, one of the most common operational needs for support analytics, workflow automation, and reporting.
Before making any API calls, ensure the following are in place:
Freshworks exposes simple REST endpoints for querying tickets by status.
GET /api/tickets?filter=open&customer_id={customer_id}GET /api/tickets?filter=openBoth endpoints return JSON responses and support additional parameters such as pagination and embedded fields if needed.
Freshworks uses token-based authentication. Your API key must be passed in the request headers.
headers = {
    "Authorization": "Token token=your_api_key",
    "Content-Type": "application/json"
}Replace {customer_id} with the actual customer identifier from your Freshworks account.
import requests

url = "https://yourdomain.myfreshworks.com/api/tickets?filter=open&customer_id={customer_id}"
response = requests.get(url, headers=headers)

print(response.json())
Use this approach when you’re building customer-specific views or syncing ticket status into account-level workflows.
If you want a global view of unresolved tickets, use the endpoint without a customer filter.
import requests

url = "https://yourdomain.myfreshworks.com/api/tickets?filter=open"
response = requests.get(url, headers=headers)

print(response.json())
In production scenarios, this is almost always combined with pagination handling to avoid partial data pulls.
This is where most integrations break down. Avoid these mistakes upfront:
How do I find my API key?
Go to Profile Settings → API Settings in your Freshworks dashboard.
What exactly is a bundle alias?
It’s the unique identifier for your Freshworks account and forms part of the API base URL.
Can I filter tickets by other statuses?
Yes. The filter parameter supports values like open, closed, and others depending on your Freshworks configuration.
Is there a limit to how many tickets I can fetch?
Yes. Freshworks enforces pagination and rate limits. Always consult the official API documentation for current thresholds.
How should I handle API errors?
Check HTTP status codes, log error responses, and implement retry logic with exponential backoff.
Can I fetch additional ticket details in the same call?
Yes. Use the include parameter to embed related resources where supported.
What should I check if authentication fails?
Confirm the API key, ensure it’s active, and verify that it’s passed exactly as required in the headers.
If you don’t want to manage authentication quirks, pagination logic, rate limits, and long-term API maintenance yourself, Knit provides a cleaner abstraction.
Integrate with Knit once, and it handles authentication, authorization, version changes, and operational overhead for the Freshworks API behind the scenes. The result: faster implementation, fewer edge-case failures, and a more resilient integration layer that scales as your usage grows.
This article is part of a series covering Zoho CRM API in depth. In this guide, we focus specifically on retrieving detailed customer information using the Zoho CRM API.
If you’re building CRM integrations, analytics pipelines, or customer support automation, accessing accurate and structured customer data is foundational. This guide walks through the prerequisites, endpoints, and step-by-step implementation required to fetch customer data reliably.
You can find the complete Zoho CRM API guide here.
Before getting started, ensure you have:
requests)The following endpoints are relevant when retrieving customer information:
GET /crm/{version}/users/{user_id}GET /crm/{version}/{module_api_name}/searchFor customer data, the Contacts module is typically used.
Ensure you have a valid OAuth token for authentication. All requests must include this token in the Authorization header.
import requests

headers = {
    'Authorization': 'Zoho-oauthtoken YOUR_OAUTH_TOKEN'
}

response = requests.get(
    'https://www.zohoapis.com/crm/v6/Contacts',
    headers=headers
)

customers = response.json()
This request retrieves records from the Contacts module.
customer_id = 'SPECIFIC_CUSTOMER_ID'

response = requests.get(
    f'https://www.zohoapis.com/crm/v6/Contacts/{customer_id}',
    headers=headers
)

customer = response.json()
for customer in customers['data']:
    name = customer.get('Full_Name')
    email = customer.get('Email')
    phone = customer.get('Phone')
    location = f"{customer.get('City')}, {customer.get('Country')}"

    print(f"Name: {name}, Email: {email}, Phone: {phone}, Location: {location}")
Using the get() method ensures your code handles missing or null fields safely without throwing errors.
Even straightforward integrations can fail due to avoidable issues. Watch out for the following:
Most production issues stem from authentication gaps and improper handling of large data volumes. Build defensively.
1. How do I get an OAuth token?
You must use Zoho’s OAuth 2.0 authentication process to generate and refresh tokens.
2. What happens if I exceed API limits?
Implement rate limiting and retry logic in your application to prevent disruptions.
3. How should I handle missing fields in responses?
Use the get() method when accessing fields to avoid KeyError exceptions.
4. Can I filter customer results?
Yes. Use search criteria with the Search API endpoint.
5. How do I handle pagination?
Use the page and per_page parameters to navigate through large datasets.
6. What modules are supported?
Refer to the Zoho CRM API documentation for a complete list of supported modules.
7. How do I update customer information?
Use the appropriate update API endpoint for the relevant module.
For quick and seamless access to the Zoho CRM API, Knit API offers a streamlined solution. By integrating once with Knit, you simplify authentication, authorization, and ongoing integration maintenance.
This approach reduces engineering overhead and ensures a stable, reliable connection to your Zoho CRM data.
Accessing employee data efficiently is crucial for HR automation, analytics, and identity management. The OneLogin API provides developers with a secure and scalable way to fetch user information, synchronize employee records, and integrate authentication systems into their applications.
This article is part of our ongoing series on the HRIS APIs, focusing on how to get employee data from OneLogin using Python. If you’d like to explore other HRIS API use cases, including authentication, rate limits, and setup guides, you can find our complete overview here.
Before you start, ensure that you have:
requests library installed.https://api.onelogin.com/auth/oauth2/v2/token/api/1/usersUse your OneLogin API credentials to obtain an access token that allows you to make authorized requests.
import requests

client_id = 'YOUR_CLIENT_ID'
client_secret = 'YOUR_CLIENT_SECRET'
url = 'https://api.onelogin.com/auth/oauth2/v2/token'
headers = {'Content-Type': 'application/json'}
data = {
    'grant_type': 'client_credentials',
    'client_id': client_id,
    'client_secret': client_secret
}

response = requests.post(url, headers=headers, json=data)
access_token = response.json()['access_token']Once authenticated, you can fetch data for a specific employee using their user ID.
user_id = 'SPECIFIC_USER_ID'
url = f'https://api.onelogin.com/api/1/users/{user_id}'
headers = {'Authorization': f'Bearer {access_token}'}
response = requests.get(url, headers=headers)
employee_data = response.json()To retrieve data for all employees in your organization, send a request to the /api/1/users endpoint.
url = 'https://api.onelogin.com/api/1/users'
headers = {'Authorization': f'Bearer {access_token}'}
response = requests.get(url, headers=headers)
all_employees_data = response.json()1. How do I generate an API key in OneLogin?
Go to your OneLogin account, navigate to Settings → API, and create a new API key with appropriate permissions.
2. What’s the base URL for API requests?
Use https://api.onelogin.com for all your API calls.
3. How should I handle pagination?
Use the pagination parameters (limit, cursor, etc.) returned in the API response to retrieve large datasets in parts.
4. What happens when my token expires?
You’ll receive an authorization error. Simply re-authenticate using your client credentials to obtain a new token.
5. Can I use the API in a test environment?
Yes, OneLogin allows sandbox or test accounts for development and testing purposes.
6. Is there a limit to how many requests I can make?
Yes, OneLogin enforces API rate limits. Refer to their documentation for current thresholds and recommendations.
Managing API integrations, authentication, and maintenance across multiple HR systems can be complex. Knit API simplifies this by offering a single, unified API that connects with OneLogin and dozens of other HR and identity systems.
With Knit, you integrate once, and get seamless, secure, and scalable access without worrying about token management, version updates, or manual maintenance. This saves developer time and ensures reliable, ongoing connectivity.
This article is part of a broader series covering the CyberArk API in depth. In this guide, we focus specifically on how to retrieve employee leave data using the CyberArk API.
If you’re building HR workflows, compliance dashboards, or internal automation that depends on leave data, this walkthrough gives you a clear, implementation-ready approach, from authentication to data retrieval.
For a comprehensive deep dive into HRIS API concepts such as authentication flows, rate limits, and architectural considerations, refer to the complete guide here.
Before you begin, ensure the following are in place:
Without these, your integration will fail at the authentication stage.
You will primarily interact with the following endpoints:
Authentication
/Security/StartAuthentication/Security/AdvanceAuthenticationLeave Data
/LeaveManagement/GetEmployeeLeaveData (hypothetical endpoint)CyberArk authentication typically follows a two-step challenge-response flow.
import requests
tenant_url = "your_tenant_url"
username = "your_username"
password = "your_password"
# Start Authentication
start_auth_url = f"https://{tenant_url}/Security/StartAuthentication"
start_auth_payload = {
"username": username
}
start_auth_response = requests.post(start_auth_url, json=start_auth_payload)
challenges = start_auth_response.json().get("challenges")
# Advance Authentication
advance_auth_url = f"https://{tenant_url}/Security/AdvanceAuthentication"
advance_auth_payload = {
"username": username,
"password": password,
"challenges": challenges
}
advance_auth_response = requests.post(advance_auth_url, json=advance_auth_payload)
auth_token = advance_auth_response.json().get("auth_token")Once you successfully retrieve the auth_token, you can proceed with authorized API calls.
Use the bearer token in the Authorization header to fetch leave data.
# Hypothetical endpoint for getting leave data
leave_data_url = f"https://{tenant_url}/LeaveManagement/GetEmployeeLeaveData"
headers = {
"Authorization": f"Bearer {auth_token}"
}
# For a specific employee
employee_id = "specific_employee_id"
leave_data_response = requests.get(f"{leave_data_url}/{employee_id}", headers=headers)
leave_data = leave_data_response.json()
# For all employees
all_leave_data_response = requests.get(leave_data_url, headers=headers)
all_leave_data = all_leave_data_response.json()At this point, you’ll receive structured JSON data containing employee leave information.
If you’re debugging, start with authentication logs and HTTP response codes.
The API typically returns structured JSON containing employee identifiers, leave type, duration, status, and date fields.
You must repeat the authentication flow or implement token lifecycle management as defined by your tenant configuration.
Filtering capabilities depend on endpoint support. Check if query parameters are available for date-based filtering.
Bulk requests may be limited by API rate restrictions. Pagination or batching may be required.
Implement retry logic with exponential backoff and monitor HTTP status codes for throttling indicators.
A 403 typically indicates insufficient permissions. Review API scopes and tenant access policies.
Use tools like Postman or cURL to validate authentication and endpoint behavior before writing production code.
If you want to avoid managing authentication complexity, token refresh cycles, and long-term maintenance overhead, Knit API provides a streamlined alternative.
By integrating once with Knit, you eliminate repetitive API handling. Knit manages authentication, authorization, and ongoing integration upkeep, allowing your team to focus on building business logic rather than maintaining infrastructure plumbing.
For teams scaling integrations across multiple systems, this approach reduces engineering load and operational risk.
This article is part of our in-depth series on the Xero API and focuses specifically on retrieving expense data using the API.
If you're building integrations around finance automation, expense reconciliation, or reporting workflows, accessing expense claims programmatically is a core use case.
You can explore the complete Acconting API guide, including authentication, rate limits, and other use cases, here.
This guide walks through the prerequisites, authentication setup, API endpoint usage, and implementation steps required to fetch expense data securely and reliably.
Before calling the API, ensure the following:
requests, json, requests_oauthlib)Without proper OAuth configuration and permissions, the API call will fail. Set this up correctly before moving ahead.
Expense Claims Endpoint
GET https://api.xero.com/api.xro/2.0/ExpenseClaimsThis endpoint retrieves expense claims data from Xero.
import requests, json
from requests_oauthlib import OAuth2Session
# Define your client ID, client secret, and redirect URI
client_id = 'YOUR_CLIENT_ID'
client_secret = 'YOUR_CLIENT_SECRET'
redirect_uri = 'YOUR_REDIRECT_URI'
# Create an OAuth2 session
oauth = OAuth2Session(client_id, redirect_uri=redirect_uri)
# Get the authorization URL
authorization_url, state = oauth.authorization_url(
'https://login.xero.com/identity/connect/authorize'
)
print('Please go to %s and authorize access.' % authorization_url)This step generates the authorization URL where the user grants access to your application.
# After authorization, you'll get a response URL
response_url = 'RESPONSE_URL_FROM_AUTHORIZATION'
# Fetch the token
token = oauth.fetch_token(
'https://identity.xero.com/connect/token',
client_secret=client_secret,
authorization_response=response_url
)Once authorized, exchange the authorization code for an access token.
# Define the endpoint
url = 'https://api.xero.com/api.xro/2.0/ExpenseClaims'
# Make the request
response = requests.get(
url,
headers={'Authorization': 'Bearer ' + token['access_token']}
)
# Parse the response
expense_data = response.json()
print(json.dumps(expense_data, indent=2))This call retrieves expense claims data in JSON format.
Most integration failures happen due to preventable configuration mistakes. Watch out for:
Production-grade integrations must include token refresh logic, structured error handling, and rate limit management.
Use the refresh token provided during the initial token exchange to request a new access token.
Refer to Xero’s official API documentation for current rate limit details.
Yes. You can specify date ranges in your API requests to retrieve historical records.
Yes. Xero provides a demo company that can be used for testing API integrations.
Implement structured error handling to process HTTP status codes and response payloads gracefully.
Yes. Query parameters can be used to filter results.
The API uses JSON for both requests and responses.
For faster and more streamlined access to the Xero API, Knit provides a unified integration layer.
With a single integration, Knit manages authentication, authorization, and ongoing maintenance. This reduces engineering overhead and simplifies long-term API management, while ensuring a reliable connection to the Xero API.
If you're building finance automation workflows, expense reconciliation systems, or unified accounting integrations, this approach ensures secure, scalable access to Xero expense data.
This article is part of our ongoing series exploring the HRIS API in depth. In this edition, we’ll walk through how to retrieve employee data using the Folks HR API, including prerequisites, endpoints, and example code.
You can find details on other HRIS API here.
The Folks HR API provides endpoints to fetch data for individual employees or all employees within an organization. This guide outlines how to access this data step by step, from prerequisites and endpoint details to practical Python code snippets.
Before you begin, ensure you have:
employees:read scope.requests library installed. GET /api/v2/employees/{employee}
To fetch data for a specific employee, use the endpoint:
GET /api/v2/employees/{employee}
Replace {employee} with the employee’s ID.
import requests
def get_employee(employee_id, api_key):
url = f"https://api.folkshr.com/api/v2/employees/{employee_id}"
headers = {"Authorization": f"Bearer {api_key}"}
response = requests.get(url, headers=headers)
if response.status_code == 200:
return response.json()
else:
return {
"error": response.status_code,
"message": response.text
}
# Example usage
employee_data = get_employee(186415, "your_api_key_here")
print(employee_data)
employees:read scope).1. What is the base URL for the Folks HR API?https://api.folkshr.com
2. How do I authenticate API requests?
Use an API key or OAuth token in the Authorization header.
3. What format does the API return data in?
Responses are provided in JSON format.
4. What should I do if I receive a 404 error?
Confirm that the employee ID exists and is correct.
5. Can I include related models in the response?
Yes. Use the _embed[] query parameter to include related models such as country, province, or jobStatus.
If you’re looking for a faster, simpler, and more scalable way to connect with the Folks HR API, Knit makes it effortless.
With just one integration, Knit manages everything, from authentication and authorization to ongoing updates and maintenance, so your team can focus on building great products instead of managing integrations. t’s the easiest way to ensure your Folks HR API connection remains secure, reliable, and always up to date.
This article is part of an ongoing series that covers the Teamtailor API in depth. The focus here is narrow and practical: how to retrieve job application data using the Teamtailor ATS API.
If you are building integrations for recruiting analytics, internal dashboards, or downstream HR systems, job application data is the operational backbone. This guide walks through the exact endpoints and steps required to fetch candidate and application data reliably.
For a broader overview of the Teamtailor API, including authentication, rate limits, and overall API structure, refer to the full guide here.
Before making API calls, ensure the following are in place:
requests library installed in your Python environment.GET https://api.teamtailor.com/v1/candidatesGET https://api.teamtailor.com/v1/job-applicationsimport requests
headers = {
'Authorization': 'Token token=YOUR_API_KEY',
'X-Api-Version': '20240404'
}
response = requests.get(
'https://api.teamtailor.com/v1/candidates',
headers=headers
)
if response.status_code == 200:
candidates = response.json()['data']
else:
print('Failed to fetch candidates', response.status_code)response = requests.get(
'https://api.teamtailor.com/v1/job-applications',
headers=headers
)
if response.status_code == 200:
job_applications = response.json()['data']
else:
print('Failed to fetch job applications', response.status_code)candidate_id = 'SPECIFIC_CANDIDATE_ID'
url = f'https://api.teamtailor.com/v1/candidates/{candidate_id}/job-applications'
response = requests.get(url, headers=headers)
if response.status_code == 200:
specific_candidate_applications = response.json()['data']
else:
print('Failed to fetch job applications for candidate', response.status_code)Teams typically run into issues not because the API is complex, but because basics are overlooked. Watch out for the following:
X-Api-Version in request headers.YOUR_API_KEY with a valid API key.links object of the response. Use these links to fetch subsequent pages.filter[stage-type] when calling the job applications endpoint.created-at, updated-at, and relationships to candidates and jobs.PATCH endpoints.If you want to avoid managing authentication, versioning, and long-term maintenance yourself, Knit provides a streamlined alternative.
By integrating with Knit once, you gain consistent access to the Teamtailor API without handling token management or endpoint upkeep. Knit abstracts the operational complexity while ensuring stable and reliable data access across your integrations.
This article is part of an in-depth series on the Breathe HR API and focuses on a specific, high-utility use case: fetching employee leave data. Leave data is a core HR signal and is often required for payroll processing, workforce analytics, compliance reporting, and downstream integrations with finance or planning systems.
If you are looking for a broader understanding of the Breathe HR API, including authentication, rate limits, and other supported use cases, you can refer to the comprehensive guide linked earlier in this series. This post stays focused on leave data retrieval and how to do it correctly and reliably.
Before you begin, ensure the following are in place:
requests)Use the following endpoint to retrieve leave requests across all employees:
GET https://api.breathehr.com/v1/leave_requests
Optional query parameters:
start_date: Returns leave requests starting on or after the specified dateend_date: Returns leave requests starting on or before the specified dateexclude_cancelled_requests: Excludes cancelled leave requests from the responsepage: Specifies the page of results to fetchper_page: Controls the number of records returned per pageTo retrieve leave data for a single employee, use:
GET https://api.breathehr.com/v1/employees/{id}/leave_requests
Replace {id} with the employee’s unique identifier.
Optional query parameter:
exclude_cancelled_requests: Excludes cancelled leave requestsimport requests
api_key = 'YOUR_API_KEY'
headers = {'Authorization': f'Bearer {api_key}'}
response = requests.get(
'https://api.breathehr.com/v1/leave_requests',
headers=headers
)
leave_data = response.json()
print(leave_data)
import requests
employee_id = 'EMPLOYEE_ID'
api_key = 'YOUR_API_KEY'
headers = {'Authorization': f'Bearer {api_key}'}
response = requests.get(
f'https://api.breathehr.com/v1/employees/{employee_id}/leave_requests',
headers=headers
)
leave_data = response.json()
print(leave_data)
department_id query parameter where applicable.page and per_page parameters to iterate through large result sets in a controlled manner.exclude_cancelled_requests to avoid receiving cancelled records.If your goal is to minimize integration effort and long-term maintenance, Knit provides a streamlined alternative. By integrating with Knit once, you gain consistent access to the Breathe HR API without managing authentication flows, token refreshes, or ongoing API changes yourself.
This approach reduces engineering overhead, improves reliability, and allows teams to focus on using leave data rather than maintaining the integration layer.
More than 50,000 enterprises, including Tesla, Microsoft, Hitachi, and HSBC, use Adobe Acrobat eSign. It helps speed up transactions by 30% and has saved $8.7 million in sustainability costs. Users and reviewers consistently rank it as a top choice for secure and reliable electronic signatures.
Adobe Acrobat is a cloud-based solution that provides eSignature services. It helps you create,
track, and sign eSignatures. You can also accept digital payments and securely store
documents.
Integrating Adobe Acrobat Sign via API allows developers to automate document-related tasks, reducing manual intervention. It enables seamless document workflows, comprehensive document management, real-time tracking, and advanced features like bulk document processing and webhook integrations. This setup streamlines tasks and boosts efficiency by organizing documents effectively and allowing for quick monitoring and automated updates. With the added benefit of Acrobat AI Assistant, you can efficiently analyze multiple documents, summarize information, and outline key points to take smarter actions.
To get started with Adobe Acrobat Sign account:
To access the Adobe Acrobat Sign API, you need to generate API keys and tokens and create an OAuth 2.0 flow which enables secure communication with the Adobe Sign servers.
Acrobat Sign REST APIs can integrate signing functionalities into your application. Here are the most commonly used API Endpoints:
Also see: Adobe Acrobat Sign API Directory
Adobe Acrobat Sign API allows you to manage agreements, users, and workflows using common HTTP methods:
Example: Creating a User (POST Request)
To create a user using the Adobe Acrobat Sign API, provide the required parameters such as authorization and DetailedUserInfo. Structure your request in JSON format, specifying key-value pairs.
Sample JSON
{
"email": "newuser@example.com",
"firstName": "Augustus",
"lastName": "Green",
"company": "ExampleCorp"
}
Sample Python Code
import requests
# Replace with the correct URL for the Create User API
url = https://api.na1.adobesign.com/api/rest/v6/users
# API headers including your OAuth Bearer token
headers = {
"Authorization": "Bearer YOUR_ACCESS_TOKEN", # Replace with your valid access token
"Content-Type": "application/json"
}
# User details (Modify these details as needed)
data = {
"email": "newuser@example.com", # The email of the user you want to create
"firstName": "John", # First name of the user
"lastName": "Doe", # Last name of the user
"company": "ExampleCorp" # The company the user belongs to (optional)
}
# Sending the POST request to create the user
response = requests.post(url, json=data, headers=headers)
# Output the response from the API (response will be in JSON format)
print(response.json())Key Response Fields
To authenticate your application, you'll need an OAuth 2.0 access token. Section 2.2: API Access and Authentication explains how to generate API keys and tokens. Once you have your access token, you’re ready to make your first API call.
Retrieving the status of an agreement using the GET method. This is a common use case for checking the progress of a document sent for signature.
Set the endpoint and send the GET request:
GET /api/rest/v6/agreements/3AAABLblqZNOTREALAGREEMENTID5_BjiH HTTP/1.1
Host: api.na1.echosign.com
Authorization: Bearer 3AAANOTREALTOKENMS-4ATH
{
"id": "<an-adobe-sign-generated-id>",
"name": "MyTestAgreement",
"participantSetsInfo": [{
"memberInfos": [{
"email": "signer@somecompany.com",
"securityOption": {
"authenticationMethod": "NONE"
}
}],
"role": "SIGNER",
"order": 1
}],
"senderEmail": "sender@somecompany.com",
"createdDate": "2018-07-23T08:13:16Z",
"signatureType": "ESIGN",
"locale": "en_US",
"status": "OUT_FOR_SIGNATURE",
"documentVisibilityEnabled": false
}It is important to understand the data models of the API we are going to integrate. Data model are essential for understanding data structure useful in storing and retrieving data from database. It helps in data integrity and consistency.
The Adobe Acrobat Sign API provides advanced integration tools for integrating e-signature workflows into applications. Many enterprises such as Salesforce, Workday, Apttus, Ariba and more already collaborate and use Advanced API Integration Features that Adobe offers.
Webhooks enable service-to-service communication using a push model. They provide a more modern API solution by allowing real-time updates on agreement statuses. Set up webhooks to notify you when someone signs or cancels an agreement.
The Custom Workflow Designer lets you create tailored workflow templates for agreements. It helps you define the composition and signing processes to match your business needs. Workflow templates guide senders through the agreement creation process with custom instructions and fields. This makes the sending process easier.
The User API assigns roles and manages permissions directly. The API allows for managing users, creating groups, and setting role-based access. Business and enterprise-level accounts get access to the group feature. Go to Accounts> Group. Here you can create, delete, modify and change group-level settings.
It streamlines tasks such as contract approvals, cutting down manual effort. Adobe offers many features for automating processes. These include a built-in visual design tool for task automation, document routing, and creating reusable templates for teams.
Bulk data operations ensure consistency by applying uniform changes across all items. They also increase efficiency and reduce the number of API calls. For example, you can use the Mega Sign feature to send agreements to multiple people, while providing a personalized experience for each signer.
They are integral to the Acrobat Sign API, ensuring digital signatures meet legal standards. The API supports features like audit trails, encryption, and compliance with regulations such as eIDAS and ESIGN.
Knits Unified eSignature APIs offer many benefits for Acrobat Sign integrations. The Adobe Acrobat Sign API allows Knit users to automate workflows like onboarding, eliminating manual signatures and tracking. You just need to worry about integrating with one API Knit, and it takes care of rest. It eliminates complex download-print-sign-scan-email cycles by integrating directly with your existing systems.
To integrate Adobe Acrobat Sign with Knit, you need to have:
Salesforce is a leading customer relationship management (CRM) platform. Salesforce's integration with Adobe Acrobat Sign is a great example of successful contract management and e-signature solutions.
Key benefits of the integration:
Salesforce users can directly access Adobe Acrobat Sign's features from within their CRM platform. Businesses within Salesforce can streamline contract creation, negotiation, and execution. You can create documents using ‘Document Builder’, gather e-signatures and store them securely to close business in no time. Speed up sales cycles by 90% when you use Acrobat Sign to gather e-signatures and automate workflows right within Salesforce.
Integrating the Adobe Acrobat Sign API effectively and securely requires developers to follow key practices to ensure data protection and seamless operation. Below are the best practices for secure integration:
Effective error handling significantly improves your API integration. Here’s an overview of issues, error codes, and solutions:
With the increased demand for digital signatures, Adobe Acrobat Sign API is evolving to provide the best user experience. Here’s a look at future trends and what developers can expect.
In the August 13, 2024 production deployment, Adobe Acrobat improved functionality and enhanced the user experience.
The Manage page has new links to the Power Automate Template Gallery, with the "In Progress" filter linking to Notification templates and the "Completed" filter linking to Archival templates.
You can access links by clicking the ellipsis next to filter labels or in the list of actions for selected agreements.
Changes such as a new post-signing page for unregistered recipients, a Change to the Send Code announcement for Phone Authentication and many others have been deployed.
Stay updated on AdobeSign API by regularly checking its documentation and release notes. Join developer communities and subscribe to newsletters for important updates.
The Knit Unified API simplifies the complex integration process. It manages all complex API operations, ensuring that your Adobe Acrobat Sign API setup remains efficient. This allows developers to focus on core tasks while staying future-proof.
By staying aware of these trends and leveraging tools like Knit, businesses can ensure long-term success with their Acrobat Sign API integration. To integrate the Acrobat Sign API with ease, you can Book a call with Knit for personalized guidance and make your integration future-ready today! To sign up for free, click here. To check the pricing, see our pricing page.
In today’s fast-paced digital landscape, organizations across all industries are leveraging Calendar APIs to streamline scheduling, automate workflows, and optimize resource management. While standalone calendar applications have always been essential, Calendar Integration significantly amplifies their value—making it possible to synchronize events, reminders, and tasks across multiple platforms seamlessly. Whether you’re a SaaS provider integrating a customer’s calendar or an enterprise automating internal processes, a robust API Calendar strategy can drastically enhance efficiency and user satisfaction.
Explore more Calendar API integrations
In this comprehensive guide, we’ll discuss the benefits of Calendar API integration, best practices for developers, real-world use cases, and tips for managing common challenges like time zone discrepancies and data normalization. By the end, you’ll have a clear roadmap on how to build and maintain effective Calendar APIs for your organization or product offering in 2026.
In 2026, calendars have evolved beyond simple day-planners to become strategic tools that connect individuals, teams, and entire organizations. The real power comes from Calendar Integration, or the ability to synchronize these planning tools with other critical systems—CRM software, HRIS platforms, applicant tracking systems (ATS), eSignature solutions, and more.
Essentially, Calendar API integration becomes indispensable for any software looking to reduce operational overhead, improve user satisfaction, and scale globally.
One of the most notable advantages of Calendar Integration is automated scheduling. Instead of manually entering data into multiple calendars, an API can do it for you. For instance, an event management platform integrating with Google Calendar or Microsoft Outlook can immediately update participants’ schedules once an event is booked. This eliminates the need for separate email confirmations and reduces human error.
When a user can book or reschedule an appointment without back-and-forth emails, you’ve substantially upgraded their experience. For example, healthcare providers that leverage Calendar APIs can let patients pick available slots and sync these appointments directly to both the patient’s and the doctor’s calendars. Changes on either side trigger instant notifications, drastically simplifying patient-doctor communication.
By aligning calendars with HR systems, CRM tools, and project management platforms, businesses can ensure every resource—personnel, rooms, or equipment—is allocated efficiently. Calendar-based resource mapping can reduce double-bookings and idle times, increasing productivity while minimizing conflicts.
Notifications are integral to preventing missed meetings and last-minute confusion. Whether you run a field service company, a professional consulting firm, or a sales organization, instant schedule updates via Calendar APIs keep everyone on the same page—literally.
API Calendar solutions enable triggers and actions across diverse systems. For instance, when a sales lead in your CRM hits “hot” status, the system can automatically schedule a follow-up call, add it to the rep’s calendar, and send a reminder 15 minutes before the meeting. Such automation fosters a frictionless user experience and supports consistent follow-ups.
<a name="calendar-api-data-models-explained"></a>
To integrate calendar functionalities successfully, a solid grasp of the underlying data structures is crucial. While each calendar provider may have specific fields, the broad data model often consists of the following objects:
Properly mapping these objects during Calendar Integration ensures consistent data handling across multiple systems. Handling each element correctly—particularly with recurring events—lays the foundation for a smooth user experience.
Below are several well-known Calendar APIs that dominate the market. Each has unique features, so choose based on your users’ needs:
Applicant Tracking Systems (ATS) like Lever or Greenhouse can integrate with Google Calendar or Outlook to automate interview scheduling. Once a candidate is selected for an interview, the ATS checks availability for both the interviewer and candidate, auto-generates an event, and sends reminders. This reduces manual coordination, preventing double-bookings and ensuring a smooth interview process.
Learn more on How Interview Scheduling Companies Can Scale ATS Integrations Faster
ERPs like SAP or Oracle NetSuite handle complex scheduling needs for workforce or equipment management. By integrating with each user’s calendar, the ERP can dynamically allocate resources based on real-time availability and location, significantly reducing conflicts and idle times.
Salesforce and HubSpot CRMs can automatically book demos and follow-up calls. Once a customer selects a time slot, the CRM updates the rep’s calendar, triggers reminders, and logs the meeting details—keeping the sales cycle organized and on track.
Systems like Workday and BambooHR use Calendar APIs to automate onboarding schedules—adding orientation, training sessions, and check-ins to a new hire’s calendar. Managers can see progress in real-time, ensuring a structured, transparent onboarding experience.
Assessment tools like HackerRank or Codility integrate with Calendar APIs to plan coding tests. Once a test is scheduled, both candidates and recruiters receive real-time updates. After completion, debrief meetings are auto-booked based on availability.
DocuSign or Adobe Sign can create calendar reminders for upcoming document deadlines. If multiple signatures are required, it schedules follow-up reminders, ensuring legal or financial processes move along without hiccups.
QuickBooks or Xero integrations place invoice due dates and tax deadlines directly onto the user’s calendar, complete with reminders. Users avoid late penalties and maintain financial compliance with minimal manual effort.
While Calendar Integration can transform workflows, it’s not without its hurdles. Here are the most prevalent obstacles:
Businesses can integrate Calendar APIs either by building direct connectors for each calendar platform or opting for a Unified Calendar API provider that consolidates all integrations behind a single endpoint. Here’s how they compare:
Learn more about what should you look for in a Unified API Platform
The calendar landscape is only getting more complex as businesses and end users embrace an ever-growing range of tools and platforms. Implementing an effective Calendar API strategy—whether through direct connectors or a unified platform—can yield substantial operational efficiencies, improved user satisfaction, and a significant competitive edge. From Calendar APIs that power real-time notifications to AI-driven features predicting best meeting times, the potential for innovation is limitless.
If you’re looking to add API Calendar capabilities to your product or optimize an existing integration, now is the time to take action. Start by assessing your users’ needs, identifying top calendar providers they rely on, and determining whether a unified or direct connector strategy makes the most sense. Incorporate the best practices highlighted in this guide—like leveraging webhooks, managing data normalization, and handling rate limits—and you’ll be well on your way to delivering a next-level calendar experience.
Ready to transform your Calendar Integration journey?
Book a Demo with Knit to See How AI-Driven Unified APIs Simplify Integrations
Calendar API integration is the process of connecting your software application to a calendar platform - such as Google Calendar, Microsoft Outlook, or Apple Calendar - using that platform's API to read, create, update, and delete events programmatically. Instead of requiring users to manually copy meeting details between systems, a calendar API integration lets your product sync scheduling data directly with the user's existing calendar. For B2B SaaS products, calendar integrations are commonly used for interview scheduling in ATS tools, client meeting sync in CRM platforms, and onboarding milestone tracking in HRIS systems. Knit provides a unified Calendar API that connects your product to all major calendar platforms through a single integration.
To integrate a calendar API:
(1) Register your application with the calendar provider (Google Cloud Console for Google Calendar, Azure AD for Microsoft Graph);
(2) implement OAuth 2.0 to authenticate users and obtain access tokens scoped to calendar permissions;
(3) call the API endpoints to list, create, or update calendar events using the provider's REST API;
(4) handle webhooks or push notifications to receive real-time event changes;
(5) implement time zone normalization, since calendar APIs return timestamps in various formats. Each calendar platform has a different authentication model, event schema, and rate limit.
For products integrating multiple calendar providers, a unified calendar API layer handles per-provider differences automatically.
With a calendar API you can: read a user's upcoming events and availability windows; create new events with attendees, location, conferencing links, and reminders; update or cancel existing events; access free/busy information to find open slots for scheduling; subscribe to calendar change notifications via webhooks; and manage recurring event series including exceptions and cancellations. Calendar APIs expose the core scheduling primitives - events, attendees, reminders, recurrence rules - that power features like automated interview scheduling, appointment booking, resource allocation, and cross-platform event sync in B2B SaaS products.
Yes. Google Calendar API is free to use - there is no per-request charge and exceeding quota limits does not incur extra billing. The default quota is 1,000,000 queries per day per project, with a per-user rate limit of 60 requests per minute. For production applications with high request volumes, you can apply for a quota increase via Google Cloud Console. The Microsoft Graph Calendar API (Outlook/Microsoft 365) is similarly free to use for reading and writing calendar data, provided the end user has a valid Microsoft 365 licence. You pay for the underlying platform licences (if applicable), not for API calls themselves.
Prioritise based on your users' calendar providers. For most B2B SaaS products, start with Google Calendar API (dominant among SMB and tech-forward companies) and Microsoft Graph Calendar API (dominant in enterprise and regulated industries). Together these two cover the vast majority of business users. Apple Calendar (CalDAV-based) is worth adding if your users skew to Mac-heavy or mobile-first workflows. Zoho Calendar and Exchange on-premises matter for specific verticals. Most products build Google first, then Microsoft, then expand based on customer demand. If you want to go live with all of them at once consider a unified API like Knit that lets you integrate with all calendar apps via a single integration
Key challenges include: time zone handling - calendar events use IANA timezone identifiers and RFC 5545 recurrence rules (RRULE) that must be normalised across providers; recurring events - modifying a single instance vs. the entire series requires careful handling of exception logic; permission scopes - requesting overly broad calendar access triggers user friction during OAuth consent; rate limits - Google Calendar enforces per-user limits requiring exponential backoff; data sync inconsistencies - webhook delivery can be delayed or missed, requiring periodic polling as a fallback; and multi-provider divergence, where the event object structure differs significantly between Google, Microsoft, and Apple calendar APIs.
Key best practices: use webhooks (Google Calendar push notifications, Microsoft Graph change notifications) for real-time event updates rather than polling; request the minimum OAuth scopes needed - for read-only use cases, avoid requesting write permissions; normalise time zones using the IANA timezone database before storing or displaying event times; handle recurring event exceptions carefully - modifying a single occurrence requires sending the recurrence ID; implement exponential backoff for rate limit errors (HTTP 429); store event ETags or sync tokens to detect changes efficiently; and test edge cases like all-day events, multi-day events, and events with no attendees, which vary in structure across providers.
Use a unified calendar API when your product needs to support more than one or two calendar providers and you want to avoid maintaining separate integration codebases for each. A unified layer normalises the event schema, handles per-provider OAuth flows, and abstracts webhook differences - so you build once and gain coverage across Google Calendar, Microsoft Outlook, Apple Calendar, and others. Direct integrations make sense when you need provider-specific features not exposed by a unified layer, or when you're building deeply for a single platform. Knit's unified Calendar API lets B2B SaaS products connect to all major calendar platforms through a single integration without managing per-provider authentication or event schema differences.
By following the strategies in this comprehensive guide, you’ll not only harness the power of Calendar APIs but also future-proof your software or enterprise operations for the decade ahead. Whether you’re automating interviews, scheduling field services, or synchronizing resources across continents, Calendar Integration is the key to eliminating complexity and turning time management into a strategic asset.
Dropbox Sign (formerly HelloSign) is a cloud-based eSignature service known for its reliability and flexibility in document workflows. Many companies, including Samsung, Amenify, and Pima, rely on Dropbox Sign for managing and signing essential documents like sales contracts, MSAs, and change orders. With Dropbox Sign, documents are signed up to 80% faster, allowing companies to save their most valuable asset—time.
In customer reviews and rankings on G2, Dropbox Sign consistently ranks higher than comparable eSignature solutions. Its ease of use, workflow efficiency, performance, reliability, and enterprise scalability make it a standout competitor in the e-signature market.
Integrating the Dropbox Sign API into your platform enables you to embed secure, legally binding e-signature capabilities directly, supporting a seamless and efficient document-signing experience.
Dropbox Sign offers a smooth, secure way to manage documents from draft to signature. Integrating the Dropbox Sign API into your application can greatly improve efficiency and user satisfaction.
Here are some benefits:
Before diving into the integration, you need to set up a Dropbox dev account to access the API resources.
Proper authentication is crucial for secure and authorized API interactions. You can authenticate with the Dropbox Sign API in two ways: using an API key or an access token issued through an OAuth flow.
OAuth 2.0 is a common standard for authorization. It allows users to grant access to their resources without sharing passwords.
Dropbox provides a detailed understanding of API key management, such as generating new API keys, deleting API keys, renaming API keys, choosing a Primary Key, Rotating API keys, and more.
If you encounter an "Unauthorized with Access Token" error:
You can integrate Dropbox Sign signing functionalities into your workflow. Therefore, understanding the available API endpoints is essential for effective integration.
Key Endpoints for Sign Requests, Templates, and Users
Security: api_key or oauth2 (request_signature, signature_request_access)
POST /v3/signature_request/send
Content-Type: application/json
Request Payload:
{
"title": "NDA with Acme Co.",
"subject": "The NDA we talked about",
"message": "Please sign this NDA and then we can discuss more. Let me know if you\nhave any questions.",
"signers": [
{
"email_address": "jack@example.com",
"name": "Jack",
"order": 0
},
{
"email_address": "jill@example.com",
"name": "Jill",
"order": 1
}
],
"cc_email_addresses": [
"lawyer1@dropboxsign.com",
"lawyer2@dropboxsign.com"
],
"file_urls": [
"https://www.dropbox.com/s/ad9qnhbrjjn64tu/mutual-NDA-example.pdf?dl=1"
],
"metadata": {
"custom_id": 1234,
"custom_text": "NDA #9"
},
"signing_options": {
"draw": true,
"type": true,
"upload": true,
"phone": false,
"default_type": "draw"
},
"field_options": {
"date_format": "DD - MM - YYYY"
},
"test_mode": true
}
Dropbox Sign API allows you to manage signatures, teams, accounts, reports, teams and more using common HTTP methods:
All requests and responses use JSON format. Ensure your application can parse JSON and handle data serialization/deserialization.
Here's an overview of the main objects:

To start integrating with the Dropbox Sign API, you need to authenticate your application. This involves using an API key or obtaining an OAuth 2.0 access token, as explained in Section 2.2.
Sending a Signature Request
A common use case is sending a document for signature. The Dropbox Sign API provides an endpoint for this purpose.
Process Overview
Managing Signature Requests
You can manage existing signature requests using various endpoints.
Implementing Webhooks for Real-Time Notifications
With webhooks, your application instantly receives notifications about events like when someone views or signs a document.
Building Custom Workflows and Templates
Templates help streamline repetitive document workflows by predefining fields and signer roles.
Team Management
Administrators can manage team members and permissions via the API.
For tasks like sending documents to multiple recipients, you can use bulk send features.

Knit provides a unified API that connects with various HR and payroll systems. By integrating Dropbox Sign with Knit, you can streamline document management and automate HR workflows.
Advantages of Integrating Dropbox Sign with Knit
Authenticate with Knit API
Example Integration: Creating a Report
Step 1: Request a Report from Dropbox Sign
Step 2: Download the Report
Step 3: Process the Report with Knit
Mapping Objects and Fields to Knit's Standard API

Troubleshooting Common Issues
Flippa, a marketplace for buying and selling online businesses, wanted to improve its sales agreement process.
Challenge
Manual handling of sales agreements led to delays and inefficiencies.
Solution
Results
Greenhouse Enhances Onboarding
Greenhouse, a hiring software company, aimed to optimize its onboarding process.
Challenge
Sending HR documents manually was time-consuming and error-prone.
Solution
Results
Integrating the Dropbox Sign API effectively and securely requires developers to follow key practices to ensure data protection and seamless operation.
Integrating Dropbox Sign API into your app lets you provide smooth, secure e-signature capabilities, enhancing efficiency and user experience. Pair it with Knit's unified API to simplify HR and payroll tasks, like employee onboarding and document handling.
Take the Next Step
Setting up these integrations takes some planning: get familiar with the APIs, follow best practices, and handle setup carefully. Book a call today to learn more about how integrating Dropbox Sign with Knit's unified API can transform your operations.
POST /signature_request/send (send a document for signature), POST /signature_request/send_with_template (send using a pre-built template), POST /signature_request/create_embedded (create an embedded signing request), GET /signature_request/{id} (retrieve status and details), POST /template/create_embedded_draft (create a template), and GET /signature_request/list (list all requests). Webhooks notify your server of events like signature_request_signed and signature_request_declined in real time.

In a world where seamless employee onboarding, offboarding, and everything in between is essential, HRIS (Human Resources Information System) integration has become non-negotiable. Whether you need to automate hr workflows or enable customer-facing connections, robust HRIS integrations save time, reduce errors, and provide a better experience for everyone involved.
In this guide, we’ll show you what HRIS integration is, how it works, real-world use cases, the challenges you might face, and best practices to address them—all to help you master HRIS integration in your organization or product.
If you're just looking to quick start with a specific HRIS APP integration, you can find APP specific guides and resources in our HRIS API Guides Directory
HRIS integration is the process of connecting an HR system (sometimes also called HCM or Human Capital Management) with other applications—such as payroll, ATS, or onboarding tools—through APIs or other connectivity methods. These connections can be:
For an in-depth discussion on broader integration strategies, check out our in-depth guide SaaS Integration: Everything You Need to Know (Strategies, Platforms, and Best Practices)
Below are just a few reasons companies invest heavily in HRIS integrations:
Different HRIS tools vary in the data they store, but core objects usually include:
Understanding data models is essential for data normalization—ensuring your integration processes data consistently across multiple HRIS platforms.
If you’re building 1:1 connectors internally, each HRIS API can take weeks and ~$10k to implement. Start with the integrations your team or customers request most frequently.
Key aspects include:
HRIS vendors update their APIs frequently. Establish a process to track changes and switch to newer versions before older ones are deprecated.
Create a knowledge base for each HRIS integration—auth methods, endpoints, typical data flows, potential errors. Testing in a sandbox (if available) is crucial. Also consider Everything you need to know about auto-provisioning for advanced user onboarding/offboarding scenarios.
A unified API (like Knit’s) can drastically reduce dev time. Instead of building one connector per HRIS, a single integration can unlock dozens of platforms.
When a candidate is hired in Greenhouse or Lever, relevant data (name, email, role) automatically syncs into the HRIS—no manual re-entry.
Related: ATS Integration Guide
Ensures compensation details, time off, and new hires flow seamlessly. Tools like Gusto, ADP, Paylocity rely on HRIS data to run correct payroll.
Onboarding platforms (like Sapling) read data from the HRIS for user provisioning—email account setups, benefits enrollment, etc. Offboarding triggers automatically remove user access.
LMS tools (e.g., TalentLMS) read the employee’s department or skill set from the HRIS, then push training completion data back for performance records.
Apps like QuickBooks Time or When I Work update shift data automatically. The HRIS sees hours worked, schedules, or attendance logs in near-real time.
Since HR data is particularly sensitive, you must implement robust security measures to prevent unauthorized access.
Here’s a simplified roadmap for HRIS integration:
Q1: What are HRIS integrations?
An HRIS integration is a connection between a Human Resources Information System and another software application — such as a payroll tool, ATS, onboarding platform, or your own product — so employee data flows automatically between systems without manual entry. Integrations can be internal (connecting your company's own tools) or customer-facing (connecting your SaaS product to your customers' HR systems).
Q2: How does HRIS integration differ from payroll integration?
They overlap significantly, but payroll integration focuses primarily on pay data, taxes, and deductions. HRIS integration is broader—covering employee lifecycle, organizational structure, and more. (For a deep dive, check out our Guide to Payroll API Integration.)
Q3: Which HRIS solutions should I integrate with first?
Start with the ones your customers or internal teams use most, such as Workday, BambooHR, ADP, or Gusto. Focus on high-demand solutions that yield immediate ROI.
Q4: What data can I access through an HRIS API?
Most HRIS APIs expose: employee records (name, email, job title, department, employment status, start/end dates), organisational structure (teams, managers, reporting lines), compensation data (salary, pay frequency, currency), time and attendance, benefits enrolment, and payroll run summaries. The specific fields and data objects available vary significantly by platform - Workday's data model is far more extensive than BambooHR's, for example.
Q5: How do I handle versioning changes from HRIS vendors?
Monitor their documentation or developer portals. If they drop support for old endpoints, ensure your code updates quickly to avoid broken integrations.
Q6: Are unified APIs secure?
Yes. Platforms like Knit follow industry best practices (SOC2, GDPR, ISO27001) and never store a copy of your data. Always confirm the provider’s security compliance.
Q7: Can I integrate if an HRIS doesn’t offer a public API?
Some vendors have paywalled or partner-only APIs. You’ll need to set up a formal agreement or explore alternative integration approaches (like SFTP file syncs or iPaaS with custom connectors).
Q8: How long does it take to build a customer-facing HRIS integration?
A single direct HRIS integration typically takes 4–8 weeks: 1–2 weeks for API access setup and authentication, 2–4 weeks for data mapping and transformation logic, and 1–2 weeks for testing and edge case handling. The timeline multiplies for each additional HRIS platform you add, since each has a different data model, authentication method, and quirks. Knit's unified HRIS API reduces the initial integration to days for most teams, and each new HRIS platform in Knit's catalogue requires no additional engineering work.
Knit provides a unified HRIS API that streamlines the integration of HRIS solutions. Instead of connecting directly with multiple HRIS APIs, Knit allows you to connect with top providers like Workday, Successfactors, BambooHr, and many others through a single integration.
Learn more about the benefits of using a unified API.
Getting started with Knit is simple. In just 5 steps, you can embed multiple HRIS integrations into your APP.
Steps Overview:
For detailed integration steps with the unified HRIS API, visit: Getting started with Knit
HRIS integration automates employee data across diverse tools—ATS, payroll, onboarding, scheduling, and more. It cuts manual tasks, lowers errors, and boosts productivity and customer satisfaction.
eCommerce applications have seen a boom in the last few years. These applications have drastically transformed the way consumers shop, businesses sell and the entire shopping experience. However, these platforms no longer operate in isolation; they now interact extensively with systems like payment gateways, shipping and logistics, inventory management, loyalty programs, and more. This evolution has led to the rise of eCommerce API integrations, which enable seamless data exchange between applications, creating an interconnected and efficient ecosystem.
Read more: 14 Best SaaS Integration Platforms - 2024
API integrations empower businesses to unlock the full potential of their eCommerce platforms, ensuring smooth functionality for their specific products and operations. Through API integration, companies can link internal systems or connect with their customers' eCommerce platforms to access vital data and enhance operational efficiency. Here’s how:
Internal eCommerce API integration: Businesses integrating CRM with eCommerce API to consolidate customer data management
Businesses can integrate their eCommerce API with their CRM to consolidate customer data, including purchase history, preferences, and buying behavior. This unified system of record allows sales teams to tailor their pitches based on customer insights, improving conversion rates and customer satisfaction.
External eCommerce API integration: Shipping and logistics management providers can integrate can with eCommerce applications of their end customers
Shipping providers can integrate their systems with customers’ eCommerce platforms to access real-time order information. This automation ensures shipping providers are instantly notified when an order is placed, streamlining the process and enhancing transparency. Real-time updates via bi directional sync also ensure that customers have accurate information about shipping statuses, fostering trust and satisfaction.
eCommerce API integration is transforming business operations by enabling seamless management of eCommerce processes. This guide covers the essentials to help you successfully implement, scale, and optimize API integration. We'll explore data models, integration benefits, common challenges, best practices, and security considerations.
Let’s start with some of the top benefits that businesses can leverage with eCommerce API integration.
API integrations significantly speed up the eCommerce lifecycle by automating and streamlining various processes. From browsing products to order fulfillment and customer service, different systems such as inventory management, shipping, and payment gateways work together seamlessly.
By eliminating manual data entry, businesses can enable processes to run concurrently, rather than sequentially. For example, while one system processes payment, another can update the inventory and trigger an automated shipping notification. This simultaneous processing reduces the time it takes to complete each stage of the customer journey, resulting in faster delivery and a smoother experience for customers.
eCommerce API integration ensures that critical data, such as product availability, pricing, and shipping details, is constantly updated in real time across all systems. This creates a single source of truth, ensuring customers always see accurate information while browsing.
For example, imagine a customer placing an order for a product listed as in-stock, only to later find out it’s unavailable due to slow data synchronization. With real-time API integration, such discrepancies are avoided, and the customer experience is more seamless and trustworthy. Accurate, up-to-date information also helps businesses reduce cart abandonment and improve conversion rates. Internally, employees benefit from having full visibility into the customer lifecycle, empowering them to provide better support and service.
API integrations allow businesses to capture and analyze customer data across multiple touchpoints, providing a 360-degree view of customer behavior, preferences, and trends. This wealth of data helps businesses make data-driven decisions to refine their marketing strategies, product offerings, and customer engagement.
For example, an eCommerce API integration with an analytics platform can track user behavior on the website—what products they view, how often they make purchases, and their interaction with marketing campaigns. This data can then be leveraged to offer personalized product recommendations, targeted promotions, or loyalty programs tailored to each customer, driving engagement and increasing sales.
Integrating eCommerce APIs with accounting and payment systems provides businesses with a holistic view of their financial health. Businesses can track payment statuses, monitor pending invoices, and get real-time revenue projections, all of which are crucial for managing cash flow and financial planning.
For instance, connecting an eCommerce platform to an accounting system enables automatic reconciliation of transactions. Payment delays, refunds, and other financial activities are reflected in real time, providing clear insight into the business's cash flow and helping finance teams make informed decisions.
One of the most powerful benefits of eCommerce API integration is the ability to automate workflows and trigger actions based on specific events. This reduces manual intervention and allows businesses to scale their operations efficiently.
For example, when inventory levels drop below a predefined threshold, the eCommerce system can automatically trigger a restocking request to suppliers, ensuring that products are replenished in time to meet customer demand. Similarly, when an order is placed, API integration with a shipping provider can automatically generate a shipping label and notify the logistics team, accelerating the fulfillment process.
In essence, eCommerce API integration minimizes the chances of human error, reduces repetitive tasks, and frees up employees to focus on higher-value activities. Additionally, automated workflows ensure that the business can respond to dynamic changes—such as spikes in demand—without sacrificing operational efficiency.
With an understanding of the benefits, let’s move onto decoding the eCommerce API data model. These data models are foundational to understanding and running eCommerce API integrations successfully.
The product-related data is at the core of eCommerce operations. These fields ensure that every product listed on the platform is identifiable, categorized, and priced properly.
A unique identifier assigned to each product, ensuring it can be distinctly recognized across different systems.
The official name of the product, displayed on the platform for customer reference.
A detailed overview of the product, which may include features, specifications, usage instructions, and key dates (such as expiration or warranty).
Both the base price and any discounted prices, allowing flexibility in pricing and promotions.
Defines the broader category the product falls under, such as electronics, clothing, or household items, aiding in organization and search functionality.
Represents real-time inventory status, indicating whether the product is in stock, low in stock, or out of stock, along with available quantities.
Specific details about the product, such as color, size, material, etc., which can vary per product and be filtered by customers.
The currency in which the product's price is listed, critical for international eCommerce to ensure accurate pricing across regions., e.g. INR, USD, EUR, etc.
This data model captures everything related to customer purchases and the processing of orders. It tracks the lifecycle of an order, from the time it's placed until it's delivered or canceled.
A unique number or identifier that distinguishes each order, essential for tracking, customer service, and records.
A unique identifier for the customer, linking their purchase history and allowing personalized services.
The date and time when the order was placed, used for tracking shipment timelines and delivery estimates.
Reflects the current stage of the order in the processing chain, from initial placement to completion (shipped, delivered, etc.).
Includes both shipping and billing addresses, which can be different depending on the customer’s preference or payment method.
The customer’s choice of payment, such as credit card, UPI, or Cash on Delivery, which affects the backend processing and settlement.
The total amount due for the order, including item costs, taxes, and shipping fees, as well as the currency the transaction will be completed in.
Provides customers with real-time updates on their order's delivery status by linking to shipping services.
Captures all vital data and interactions related to customers who use the eCommerce platform and its integrated services. This data helps in improving personalization, customer support, and tracking the overall user experience.
A unique identifier (alphanumeric or numeric) assigned to each customer. It is essential for maintaining records such as purchase history, customer preferences, and profile information.
The name provided by the customer, typically used for communication and personalization purposes across emails, notifications, and marketing campaigns.
The email address of the customer, which is primarily used for transaction-related communication (order confirmations, invoices) and for marketing or promotional purposes (newsletters, product offers).
This includes both the shipping and billing addresses provided by the customer, facilitating accurate and timely delivery of orders. The billing address is used for invoicing purposes.
The customer’s contact number, which can be used to provide updates on order status, confirm delivery details, or for customer service inquiries.
A comprehensive list of orders placed by the customer, along with their current status (e.g., delivered, canceled, pending). This information aids in analyzing customer behavior and purchase trends.
The current status of the customer's account, which could be active, inactive, or on hold. This is particularly important in managing customer membership tiers or subscription services, if applicable.
The number of loyalty points accrued by the customer through previous purchases, including information on their validity, eligibility for redemption, and point expiration (if the platform supports loyalty programs).
Details related to all payments made through the eCommerce platform, ensuring transparency and accurate tracking of transactions.
A unique identifier assigned to each payment made on the platform. This is crucial for resolving payment-related issues and generating financial reports.
The unique identifier associated with the order for which the payment was made. It connects the payment to its respective order and helps in tracking the order's status.
The total amount paid by the customer for the order, including taxes, shipping fees, and discounts. This may also include the currency in which the payment was processed.
The method chosen by the customer for payment, such as credit card, net banking, UPI, or cash on delivery.
Indicates whether the payment was successfully completed, is pending, on hold, or declined. This is important for managing order fulfillment and refund processes.
The date and time when the payment transaction was completed, allowing for precise financial tracking and auditing.
Provides detailed information about the stock levels and availability of products listed on the platform, ensuring effective inventory control and replenishment.
A unique identifier assigned to each product, enabling accurate tracking of product details, stock levels, and associated logistics.
Identifies the specific warehouse or fulfillment center where the product is stored, facilitating efficient order processing and stock management.
The current status of the product's stock, such as whether it is in stock, running low, or out of stock. This helps the platform notify customers and manage product availability.
The exact number of units available for a particular product, assisting in order fulfillment and inventory forecasting.
The exact number of units available for a particular product, assisting in order fulfillment and inventory forecasting.
Encompasses all information related to the shipping and delivery of orders, helping in the smooth execution of logistics.
A unique identifier for each shipment, used to track the package's journey from the warehouse to the customer.
A unique identifier for each shipment, used to track the package's journey from the warehouse to the customer.
The logistics provider or shipping company responsible for delivering the order, such as FedEx, Delhivery, or a local courier.
A tracking number or reference code that allows the customer to monitor the shipment’s status in real time, ensuring transparency and predictability in the delivery process.
The current status of the shipment, such as whether it is in transit, delivered, delayed, or undelivered. This is crucial for customer communication and satisfaction.
The destination address to which the order is being delivered, as provided by the customer.
The expected date or time range when the order is anticipated to arrive at its destination, helping manage customer expectations.
Benefits: User friendly, allows complete customization
API documentation: https://shopify.dev/docs/api
Benefits: Robust features like subscriptions, can handle complex transactions
API documentation: https://docs.stripe.com/api
Benefits: Provides UTF–8 character encoding
API documentation: https://developer.bigcommerce.com/docs/api
Benefits: Backed by Adobe; built for scale
API documentation: https://developer.adobe.com/commerce/webapi/rest/
Benefits: Open source; designed for Wordpress
API documentation: https://woocommerce.com/document/woocommerce-rest-api/
Benefits: JSON format response actions
API documentation: https://developers.etsy.com/
Benefits: Powerful authentication mechanisms; high data security
API documentation: https://developer-docs.amazon.com/sp-api
Here’s a list of best practices that developers can adopt to accelerate their eCommerce API integration process.
The first step in successful eCommerce API integration is thoroughly understanding the API documentation. API documentation serves as the blueprint, detailing processes, endpoints, rate limits, error handling, and more. Developers should not rush this step—taking a deep dive into the documentation will help avoid common pitfalls during integration.
Additionally, many API providers offer sandbox environments, which allow developers to test their integration in simulated real-world conditions. Testing in sandbox environments helps identify potential issues early on and ensures the API behaves as expected across different scenarios. By using sandbox testing, developers can fine-tune their integrations, ensuring reliability and applicability at scale.
Data flowing between eCommerce applications must be validated and normalized for consistency. eCommerce platforms often use different formats, data types, so mismatched data can easily result in corruption or loss during transmission. By normalizing the data and validating it at every step, developers can avoid these issues and ensure smooth operation. This practice is essential for preventing errors that may arise from incompatible formatting or unvalidated inputs.
eCommerce API versions change as providers update their platforms. Newer versions may introduce features or improvements, but they can also render older integrations incompatible. Developers need to stay vigilant in monitoring updates and ensuring their code remains backward compatible. Support for multiple API versions is often necessary to maintain functionality across different systems. Equally important is keeping track of API deprecations. Deprecated endpoints should be phased out in favor of updated ones to avoid service disruptions and technical debt.
Webhooks provide a more efficient alternative to traditional polling mechanisms for synchronizing data. Polling involves repeatedly making API calls, which can strain both the client and server resources, especially if no new data has been generated. In contrast, webhooks allow the API to notify the system in real-time whenever a significant event occurs (e.g., an order is placed, a payment is confirmed, or inventory levels change).
By adopting a webhook-based architecture, developers can minimize the number of unnecessary API calls, reducing the load on the system and staying within rate limits. This approach ensures that important updates are reflected immediately, providing a faster, more responsive user experience and reducing the overhead associated with constant polling.
Documenting each and every step that goes into building and maintaining the eCommerce API integration is integral. A well-documented integration not only helps new developers get up to speed but also ensures that teams can quickly troubleshoot issues without needing to sift through large codebases.
Detailed documentation should cover the integration setup, including endpoint configurations, authentication methods, data flow, error-handling processes, and common troubleshooting tips. Additionally, it should outline best practices for maintaining the integration and updating it when new API versions are released. Documentation serves as a roadmap for developers and non-technical teams alike, empowering customer support teams to handle common errors and inquiries without involving the development team.
eCommerce transactions often involve sensitive customer data, including personal information, payment details, and order histories. Ensuring the security of these transactions is non-negotiable. Developers must implement strong authentication and authorization protocols to ensure that only trusted users can access the API.
Equally important is encryption—both in transit and at rest—to protect data from unauthorized access during transmission and while stored in databases. Developers should also focus on secure coding practices, such as validating inputs, sanitizing outputs, and consistently logging activity to detect suspicious behavior. Security should be integrated into every stage of the API lifecycle, from development through to deployment and monitoring.
Read more: API Monitoring and Logging
Scalability and reliability are crucial factors in eCommerce API integrations, especially for platforms dealing with heavy traffic or high transaction volumes. Developers need to perform rigorous load testing to simulate scenarios where the API may be handling an excessive number of requests, large amounts of data, or extended periods of high user activity. This ensures that the system remains responsive and performs well under heavy load.
In addition to load testing, monitoring API latency is essential to ensure that response times remain within acceptable limits. Slow API responses can lead to poor user experiences and degraded performance for the entire eCommerce system. Developers should set up alerts for when latency exceeds predefined thresholds, allowing them to address bottlenecks proactively.
Managing large datasets and adhering to rate limits is another key aspect of efficient eCommerce API integration. Developers must respect these limits by optimizing their API call patterns and implementing rate-limiting strategies to avoid overloading the server.
Pagination helps manage the retrieval of large datasets by breaking them down into smaller, manageable chunks. For instance, rather than retrieving thousands of orders in a single request, developers can use pagination to retrieve a subset of records at a time, improving both performance and reliability. Similarly, if the rate limit is exceeded, developers should implement a retry mechanism that waits before making another request, ensuring that no data is lost or duplicated during the process. Exponential backoff, where each retry attempt waits progressively longer, is a common technique that helps developers prevent repeated failures while ensuring system stability.
Read more: API Pagination 101: Best Practices for Efficient Data Retrieval
Below is a set of real world examples illustrating how different businesses can benefit from building and maintaining eCommerce API integrations.
When payment gateways integrate with eCommerce APIs, they gain immediate access to all relevant end-customer data, enabling swift and secure payment processing. This seamless connection allows for an enhanced customer experience, as payments are processed without manual intervention. In addition, payment providers can update their users in near real-time once a transaction is completed, facilitating faster order processing and minimizing delays. For example, an eCommerce platform can instantly notify a user that their payment has been successfully processed, while also triggering the order fulfillment process.
CRM systems and marketing automation platforms rely on eCommerce APIs to access real-time customer data such as purchase history, preferences, and behavior patterns. By integrating with these APIs, CRM systems can enrich customer profiles, enabling businesses to create highly personalized marketing campaigns. For instance, a CRM can automatically generate tailored email campaigns based on a customer's recent purchases, without requiring manual input from the marketing team. This integration fosters a more targeted, data-driven approach to customer engagement and boosts the effectiveness of sales pitches and promotions.
Shipping and logistics providers benefit significantly from eCommerce API integration. By accessing key order information like product dimensions, weight, and delivery location, these providers can calculate accurate shipping costs and offer users real-time shipping options. Moreover, a bi-directional API sync allows logistics providers to automatically feed tracking details back into the customer’s system, eliminating the need for manual data exchanges. This ensures that both the business and the customer are continuously updated on shipment status, leading to a more transparent and efficient delivery process.
Integrating eCommerce APIs with inventory management systems automates key processes such as restocking. For example, when a product reaches a minimum threshold or reorder level, an automated API call or webhook can trigger a restocking order, ensuring that the inventory remains up-to-date. With real-time data synchronization, businesses can reflect the updated stock levels on their eCommerce platforms without any manual intervention, reducing the risk of overselling and ensuring accurate stock availability.
Loyalty and rewards program providers can leverage eCommerce API integrations to monitor customer transactions in real time, automatically applying rewards and points as soon as a purchase is made. This integration not only enhances the customer experience by providing instant gratification but also allows businesses to customize loyalty programs based on individual customer behavior. By using eCommerce data, providers can refine their rewards structures, offering more personalized incentives that encourage customer retention and engagement.
Customer success platforms can use eCommerce APIs to pull comprehensive customer data, including order history, payment details, and shipping information, to support faster and more efficient issue resolution. In cases where customers face common challenges, such as delayed shipments or payment discrepancies, these platforms can automate the resolution process, significantly reducing customer wait times and improving overall satisfaction. This level of integration ensures that customer support teams have access to the information they need to resolve issues without requiring additional input from the customer, making for a seamless support experience.
While we have discussed the benefits, use cases and even the data models, it is important to acknowledge the common challenges that developers often face in the eCommerce API integration lifecycle.
One of the most prevalent challenges developers encounter is the inconsistency and inaccessibility of API documentation. In some cases, documentation is either incomplete or unavailable publicly, requiring developers to sign restrictive contracts or pay hefty fees just to access basic information. Even when documentation is accessible, it may not always be up to date with the latest API versions or may be poorly structured, making it difficult for developers to navigate. This forces developers to rely on guesswork during the integration process, increasing the likelihood of errors and bugs that can disrupt functionality later on.
Another significant hurdle is the mismatch in data formats and nomenclature across different eCommerce platforms. For example, what one platform refers to as a "product ID" might be labeled as "prodID" or "prod_ID" on another. This inconsistency in field naming conventions and data structures makes it difficult to map data correctly between systems. Consequently, developers are often required to invest time in normalizing and transforming data before it can be effectively transmitted. When integrating with multiple platforms, this issue becomes even more pronounced, leading to potential data loss or corrupted data exchanges.
eCommerce APIs are constantly evolving, with new versions and updates released regularly to improve performance, security, or features. However, these changes can introduce compatibility issues if they are not promptly reflected in existing integrations. Developers must continuously monitor for API version updates and incorporate necessary changes into their integration pathways to avoid performance disruptions. Failing to do so can result in outdated integrations that no longer function properly, jeopardizing the overall user experience.
As eCommerce platforms experience periods of high traffic, especially during peak seasons, the volume of data being transmitted through integrations can significantly increase. This can lead to performance issues such as slow data syncing, higher latency, and degraded quality of service. In extreme cases, latency issues may result in incomplete data transfers or the triggering of API rate limits, further complicating the integration process. For developers, ensuring consistent, high-quality performance under these conditions is a constant struggle, particularly when handling large-scale or high-frequency transactions.
Developing and maintaining eCommerce API integrations in-house presents significant scalability challenges. On average, building a single integration can take four weeks and cost approximately $10,000, making it a resource-intensive process. When developers need to integrate with multiple eCommerce platforms, these costs and timelines multiply, drawing focus away from the core product roadmap. Additionally, as businesses grow, scaling these integrations to support new features or increasing transaction volumes often requires additional resources, further straining development teams.
Finally, eCommerce API integration often involves significant reliance on third-party vendors for support, especially when encountering uncommon errors or issues. However, timely vendor support is not always guaranteed, and managing communications with multiple vendors for different APIs can become an operational headache. This vendor dependency adds another layer of complexity to the integration process, as developers must wait for external assistance to resolve critical issues, delaying project timelines and potentially disrupting business operations.
Knit provides a unified eCommerce API that streamlines the integration of eCommerce solutions. Instead of connecting directly with multiple eCommerce APIs, Knit allows you to connect with top providers like Magneto, Shopify, BigCommerce, eBay, Amazon API, WooCommerce and many others through a single integration.
Learn more about the benefits of using a unified API.
Getting started with Knit is simple. In just 5 steps, you can embed multiple eCommerce integrations into your App.
Steps Overview:
For detailed integration steps with the unified eCommerce API, visit:

Read more: Unified API: ROI Calculator
eCommerce platforms and their ecosystem partners manage vast amounts of sensitive customer and financial data, making them prime targets for cyberattacks. Ensuring the security of API integrations is not only essential for protecting customer information but also for safeguarding a business’s reputation and financial standing. Any security breaches or unauthorized access can result in severe legal, financial, and reputational damage. Below are the top security challenges in eCommerce API integrations, along with best practices for mitigating risks.
Improper or weak authentication and authorization mechanisms can expose customer data and sensitive business information to malicious actors. This is especially dangerous in eCommerce, where even a small security lapse can result in massive financial losses and damaged customer trust.
Implement robust authentication protocols such as OAuth 2.0, API Keys, Bearer Tokens, and JSON Web Tokens (JWT) to secure API access. Ensure that authorization is role-based, granting permissions according to user roles and responsibilities. This minimizes the risk of unauthorized access by limiting what actions different users can perform. Multi-factor authentication (MFA) can also be employed to add an extra layer of security, particularly for users accessing sensitive data or performing critical operations.
Read more: 5 Best API Authentication Methods to Dramatically Increase the Security of Your APIs
Data, whether in transit or at rest, is particularly vulnerable to interception and unauthorized access. Leaked customer information, such as payment details or personal data, can lead to identity theft, fraud, or loss of customer trust.
Use HTTPS with Transport Layer Security (TLS) or Secure Sockets Layer (SSL) to encrypt data during transmission, ensuring it remains confidential between the sender and the recipient. For data at rest, encryption should also be applied to protect sensitive information stored in databases or servers. Additionally, when outsourcing integrations to third-party vendors, it's crucial to verify that sensitive data isn’t unnecessarily stored by these providers. Businesses should ensure that vendors comply with industry security standards like SOC2, GDPR, and ISO27001.
One of the common attack vectors in eCommerce API integrations is injection attacks, where malicious code is inserted into the API through unvalidated input. These attacks can lead to data breaches, corruption of business operations, and disruption of eCommerce activities.
Enforce strict input validation protocols to cleanse incoming data, removing any potentially harmful scripts or queries. Use parameterized queries for database interactions to avoid SQL injection risks. By validating and sanitizing all inputs, businesses can significantly reduce the risk of malicious data entering their system and causing havoc.
Integrating third-party services and APIs can introduce additional risks. Vulnerabilities in third-party applications or poor security practices by vendors can compromise the entire eCommerce system. If a third-party application is exploited, attackers may gain access to the main eCommerce platform or its data.
Conduct regular security assessments of third-party vendors to ensure they maintain adequate security standards. Developers should stay updated on any known vulnerabilities in third-party integrations and patch them immediately. Performing vulnerability scans and penetration testing on integrated services will also help in identifying potential weaknesses that could be exploited by attackers.
eCommerce APIs are often targets for abuse, particularly through Distributed Denial of Service (DDoS) attacks where attackers flood the API with excessive requests, overloading the system and causing service outages. Such disruptions can lead to significant revenue loss, especially during peak shopping seasons.
Implement rate limiting and throttling strategies to manage the number of API requests per user within a defined timeframe. Rate limiting caps the number of requests a user can make, while throttling slows down excessive requests without blocking them outright. Together, these strategies ensure that APIs remain responsive while minimizing the impact of abusive usage and DDoS attacks. Additionally, businesses can set up automated monitoring to detect unusual traffic patterns and mitigate attacks in real-time.
Read more: 10 Best Practices for API Rate Limiting and Throttling
As eCommerce continues to grow as a crucial sales channel, the need for seamless eCommerce API integration with other ecosystem applications is becoming increasingly vital for businesses. These integrations enable different applications to communicate, streamlining workflows, accelerating the entire eCommerce lifecycle, and ultimately enhancing customer experiences by personalizing journeys based on rich, real-time insights.
However, for developers, building these integrations can be a complex and challenging endeavor, especially given the growing number of eCommerce applications. Issues like scalability, inconsistent API documentation, and slow turnaround times often hinder the integration process.
Despite these obstacles, businesses across the eCommerce landscape—from payment gateways to logistics providers, and inventory management systems—have discovered innovative ways to leverage eCommerce API integrations to drive efficiency and unlock business value. By tapping into near real-time data, these organizations optimize operations and improve profitability.
To address the challenges of developing and maintaining integrations in-house, many companies are turning to unified API solutions, like Knit. These solutions simplify the integration process by offering:
By leveraging solutions like Knit, businesses can not only streamline their API integration processes but also ensure they remain agile, secure, and ready to scale as the eCommerce ecosystem continues to evolve. Connect with Knit’s experts to understand the diverse use cases and accelerate your eCommerce API integration journey today.
An API (Application Programming Interface) in e-commerce is a set of protocols that allows different software systems - storefronts, ERPs, payment processors, shipping carriers, inventory tools, and marketing platforms - to communicate and share data programmatically. Instead of manually exporting CSVs or re-entering orders across systems, an ecommerce API lets your product read and write data like orders, products, customers, inventory, and fulfillment events directly to and from platforms like Shopify, WooCommerce, or BigCommerce in real time. For B2B SaaS products serving merchants, ecommerce APIs are the foundation for features like inventory sync, order automation, and multi-channel selling.
Yes, Shopify has an extensive REST Admin API and GraphQL Admin API that allow developers to read and write store data - products, orders, customers, inventory, fulfillment, discounts, and more. Shopify uses OAuth 2.0 for authentication; third-party apps request specific permission scopes during install and receive access tokens tied to each merchant store. The Shopify API enforces rate limits: REST API allows 2 requests per second (leaky bucket with a 40-request burst); GraphQL uses a cost-based rate limit system. Shopify also provides webhooks for real-time event notifications, a Partner Program for building public apps, and sandbox development stores for testing.
The major ecommerce platforms with developer APIs include: Shopify (REST and GraphQL Admin API, dominant for SMB merchants), WooCommerce (REST API, WordPress-based), BigCommerce (REST API, mid-market), Magento/Adobe Commerce (REST and GraphQL, enterprise), Wix eCommerce (Headless API), Squarespace Commerce (REST API), and Amazon Selling Partner API (marketplace). Each platform has different API capabilities, authentication methods, rate limits, and webhook support. Coverage decisions for B2B SaaS products typically start with Shopify and WooCommerce, which together cover the majority of independent merchants.
Ecommerce platform APIs typically expose: products and variants (titles, SKUs, prices, images, inventory levels), orders and line items (statuses, payment info, shipping details), customers and addresses, fulfillments and tracking numbers, refunds and returns, discounts and gift cards, and collections or categories. Availability varies by platform — Shopify's API coverage is very broad, while smaller platforms may have gaps in returns or discount objects. Most B2B SaaS integrations focus on a subset relevant to their use case: ERP tools sync orders and inventory; marketing tools sync customers and purchase history; analytics tools pull orders and revenue data.
Most ecommerce platform APIs use OAuth 2.0 for third-party app authentication. A merchant installs your app, grants specific permission scopes via a consent screen, and your application receives a permanent access token tied to that merchant's store. Unlike typical OAuth flows with expiring tokens, Shopify and BigCommerce access tokens do not expire - they remain valid until the merchant uninstalls the app or you explicitly revoke the token. WooCommerce uses OAuth 1.0a for server-side requests or API key pairs (consumer key + secret) for simpler setups. For multi-tenant SaaS products, you must store per-merchant tokens securely and handle token revocation gracefully.
Common ecommerce API integration use cases include: syncing orders from Shopify into an ERP or accounting system; pushing inventory updates from a warehouse management system back to the storefront; triggering email or SMS campaigns based on order events via webhooks; connecting product catalogs to comparison shopping engines or marketplaces; building custom analytics dashboards on top of order and customer data; automating fulfillment by sending orders to 3PL providers; and enabling multi-channel selling by syncing a single product catalog across multiple storefronts.
Key challenges include: rate limits that vary by platform and plan tier (Shopify's REST API allows 2 req/sec with a 40-request burst), requiring queuing and backoff logic; divergent data models across platforms - a Shopify order object differs structurally from a BigCommerce or WooCommerce order; webhook reliability, as platforms may retry failed deliveries, requiring idempotent handlers; managing per-merchant OAuth tokens at scale; handling eventual consistency where webhook events can arrive out of order; and keeping integrations updated as platforms make breaking API changes (Shopify deprecated its REST API in favour of GraphQL in 2024). Building and maintaining multiple platform-specific integrations multiplies this effort for each platform you support.
A unified ecommerce API provides a single normalized data model and authentication flow that abstracts multiple underlying ecommerce platforms. Instead of building separate integrations for Shopify, WooCommerce, and BigCommerce, you integrate once and the unified layer handles per-platform mapping, token management, and webhook normalization. This makes sense when your product needs to support more than two or three ecommerce platforms, when time-to-market is more important than owning the integration layer directly, or when your team lacks dedicated integration engineering resources. The tradeoff is reduced control over platform-specific features and a dependency on a third-party abstraction. Knit provides a unified API for ecommerce and ERP integrations, enabling B2B SaaS products to connect to all major ecommerce platforms through a single integration.
Wave Financials is a comprehensive, cloud-based accounting and financial management platform designed specifically for small businesses, freelancers, and entrepreneurs. As a completely free core accounting software (with paid add-ons for payments, payroll, and coaching), Wave has gained significant traction among businesses seeking strong financial tools without the high costs associated with traditional accounting software.
Wave's API ecosystem empowers developers to automate accounting workflows, synchronize financial data, and build custom integrations that extend Wave's capabilities.
In this guide, you will learn everything about integrating with Wave Financials API, from authentication and setup to real-world use cases and best practices for 2025.
Wave Financials is a complete suite of financial tools, including accounting, invoicing, receipt scanning, and payment processing, all accessible through a modern, intuitive interface. Unlike many accounting platforms that charge monthly fees, Wave offers its core accounting features completely free, making it particularly attractive for startups and small businesses.
Wave has revolutionized small business accounting by removing cost barriers while maintaining enterprise-level functionality. Here's why it matters:
1. Zero-Cost Accounting: Wave provides completely free accounting software with no limitations on users, transactions, or businesses. This democratizes professional accounting tools for businesses of all sizes.
2. All-in-One Financial Hub: By combining invoicing, payments, accounting, and payroll in one platform, Wave eliminates the need for multiple disparate systems, reducing complexity and improving data accuracy.
3. Mobile-First Approach: With powerful mobile apps for iOS and Android, Wave enables business owners to manage finances on the go, scanning receipts, sending invoices, and viewing reports from anywhere.
4. Automated Bank Reconciliation: Wave's bank connection technology automatically imports and categorizes transactions, saving hours of manual data entry each month.
5. Professional Invoicing: Even free users get access to professional, customizable invoice templates with automatic payment reminders and online payment options.
Before integrating with Wave Financials API, understanding these key terms is essential:
The Wave Financials API enables businesses to connect their accounting data with e-commerce platforms, CRM systems, custom applications, and financial analysis tools. These integrations automate workflows, reduce manual data entry, and provide real-time financial insights.
Online retailers using platforms like Shopify, Etsy, or WooCommerce can automatically create Wave invoices when orders are placed. This eliminates manual invoice creation and ensures accurate revenue tracking.
How It Works:
Businesses using expense management tools like Expensify, Rydoo, or mobile receipt scanning apps can sync expenses directly to Wave for categorization and reporting.
How It Works:
Companies needing specialized financial reporting beyond Wave's built-in reports can extract data to build custom dashboards in tools like Google Data Studio, Tableau, or Power BI.
How It Works:
Service businesses using time tracking tools like Toggl, Harvest, or Clockify can automatically convert billable hours into Wave invoices.
How It Works:
Businesses selling across multiple channels (in-person, online, marketplace) can consolidate all sales data into Wave for unified financial reporting.
How It Works:
Businesses receiving invoices from vendors via email or procurement systems can automate the accounts payable workflow in Wave.
How It Works:
RESTful API Design: Wave's API follows REST principles with resource-oriented endpoints using standard HTTP methods (GET, POST, PUT, DELETE).
GraphQL Alternative: Wave offers a GraphQL API alongside REST, allowing clients to request exactly the data they need in a single query.
JSON-Based Communication: All request and response bodies use JSON format, making integration straightforward across different programming languages.
Pagination Support: Lists of resources support cursor-based pagination to handle large datasets efficiently.
Rate Limiting: To ensure service stability, Wave implements rate limits on API calls, which vary based on your application's tier and user load.
Idempotency Key Support: For POST and PUT operations, you can include an idempotency key to prevent duplicate operations from network retries.
Error Handling: Comprehensive error responses include machine-readable codes and human-readable messages for debugging.
Versioning: API versioning ensures backward compatibility, with the current version indicated in endpoint URLs.
Explore the complete API architecture in the Wave API Documentation.
Wave uses industry-standard OAuth 2.0 for secure API authentication. Here's how it works:
Application Registration: Start by creating an application in the Wave Developer Portal to obtain your Client ID and Client Secret.
Authorization Flow:
Token Management:
Scope Definitions:
For implementation details, see the Wave OAuth 2.0 Guide.
The Wave Financials API provides programmatic access to all core accounting functions. Whether you're building an integration for invoicing, expense tracking, or financial reporting, Wave's API offers the endpoints you need.
Wave's REST API follows a consistent structure:
Base URL:
https://api.waveapps.com/{version}/
Current Version: Most endpoints use /v1/ as the current stable version.
Example Endpoints:
Get all businesses for a user:
GET https://api.waveapps.com/v1/businesses/
Create a new invoice:
POST https://api.waveapps.com/v1/businesses/{business_id}/invoices/
Retrieve customer list:
GET https://api.waveapps.com/v1/businesses/{business_id}/customers/
For more complex data requirements, Wave offers a GraphQL endpoint:
POST https://gql.waveapps.com/graphql
This allows you to request multiple resources in a single query and receive exactly the fields you need.
Wave exposes comprehensive endpoints for all accounting functions. Here are the most commonly used ones:
Here is the information formatted into a clean table:
Invoice Model Example:
{
"id": "abc123",
"created_at": "2024-01-15T10:30:00Z",
"modified_at": "2024-01-15T10:30:00Z",
"invoice_number": "INV-001",
"customer": {
"id": "cust_123",
"name": "Acme Corp"
},
"due_date": "2024-02-14",
"amount_due": {
"raw": 1000.00,
"value": "1000.00",
"currency": "USD"
},
"status": "SAVED",
"items": [
{
"product": {
"id": "prod_456",
"name": "Consulting Services"
},
"quantity": 10,
"price": 100.00
}
]
}Transaction Model Example:
{
"id": "txn_789",
"date": "2024-01-15",
"description": "Office supplies purchase",
"amount": -250.00,
"balance": 12500.00,
"account": {
"id": "acc_101",
"name": "Office Expenses"
}
}Follow these steps to authenticate your application with Wave's API:
Here's a Python example of the authorization code flow:
import requests
from flask import Flask, redirect, request
app = Flask(__name__)
# Configuration
CLIENT_ID = 'your_client_id'
CLIENT_SECRET = 'your_client_secret'
REDIRECT_URI = 'https://yourapp.com/callback'
WAVE_AUTH_URL = 'https://api.waveapps.com/oauth2/authorize/'
WAVE_TOKEN_URL = 'https://api.waveapps.com/oauth2/token/'
@app.route('/login')
def login():
# Redirect user to Wave for authorization
auth_url = (
f"{WAVE_AUTH_URL}?"
f"client_id={CLIENT_ID}&"
f"redirect_uri={REDIRECT_URI}&"
f"response_type=code&"
f"scope=accounting:read accounting:write"
)
return redirect(auth_url)
@app.route('/callback')
def callback():
# Exchange authorization code for tokens
code = request.args.get('code')
token_data = {
'client_id': CLIENT_ID,
'client_secret': CLIENT_SECRET,
'code': code,
'grant_type': 'authorization_code',
'redirect_uri': REDIRECT_URI
}
response = requests.post(WAVE_TOKEN_URL, data=token_data)
tokens = response.json()
# Store these securely
access_token = tokens['access_token']
refresh_token = tokens.get('refresh_token')
return "Authentication successful!"
Once you have an access token, include it in your API requests:
def get_businesses(access_token):
headers = {
'Authorization': f'Bearer {access_token}',
'Content-Type': 'application/json'
}
response = requests.get(
'https://api.waveapps.com/v1/businesses/',
headers=headers
)
if response.status_code == 200:
return response.json()
else:
raise Exception(f"API Error: {response.status_code}")Access tokens expire after 2 hours. Use refresh tokens to get new ones:
def refresh_access_token(refresh_token):
token_data = {
'client_id': CLIENT_ID,
'client_secret': CLIENT_SECRET,
'refresh_token': refresh_token,
'grant_type': 'refresh_token'
}
response = requests.post(WAVE_TOKEN_URL, data=token_data)
new_tokens = response.json()
return new_tokens['access_token'], new_tokens.get('refresh_token')Integrating with the Wave API involves working with its GraphQL-based architecture, which provides flexible data querying. This comprehensive, beginner-friendly guide (updated December 18, 2025) walks you through from setup to production, based on the official Wave Developer Portal at https://developer.waveapps.com/hc/en-us.
Important Note: As of May 26, 2025, third-party applications require connected businesses to have an active Wave Pro subscription (or Wave Advisors package) for OAuth access. Personal/development use with full access tokens does not require Pro.
Start with a Wave account for development and testing.
Steps:
✅ You now have a Wave account ready for API work.
Register to get credentials.
For Quick Personal Testing: Generate a Full Access Token in the portal (full permissions to your account; development/personal use only, see Authentication).
✅ You have credentials for authentication.
Use OAuth 2.0 Authorization Code Flow for multi-user apps (required for public/published integrations).
Steps (detailed in OAuth Guide):
1. Redirect to Authorization:
GET https://api.waveapps.com/oauth2/authorize?
client_id={YOUR_CLIENT_ID}&
redirect_uri={YOUR_REDIRECT_URI}&
response_type=code&
scope={SCOPES} // e.g., business:read invoice:write (see [OAuth Scopes](https://developer.waveapps.com/hc/en-us/articles/360032818132-OAuth-Scopes))
&approval_prompt=auto // or 'force' to reprompt2. User logs in, consents (only Pro businesses).
3. Redirect includes code: {YOUR_REDIRECT_URI}?code={AUTH_CODE}.
4. Exchange for Tokens:
POST https://api.waveapps.com/oauth2/token/
Content-Type: application/x-www-form-urlencoded
client_id={YOUR_CLIENT_ID}
&client_secret={YOUR_CLIENT_SECRET}
&code={AUTH_CODE}
&grant_type=authorization_code
&redirect_uri={YOUR_REDIRECT_URI}
5. Refresh Token: Similar POST with grant_type=refresh_token.
Tips: Use PKCE for public clients. See Permitted Use for public app requirements.
✅ Authenticated requests ready with Authorization: Bearer {ACCESS_TOKEN}.
Wave uses a single GraphQL endpoint: https://gql.waveapps.com/graphql/public (see Clients and Building on GraphQL).
Key Features:
Tools:
Requests:
POST https://gql.waveapps.com/graphql/public
Authorization: Bearer {ACCESS_TOKEN}
Content-Type: application/jsonUse Case 1: List Businesses
{
"query": "query { user { businesses(first: 10) { edges { node { id name currency { code } } } } } }"
}Use Case 2: Create Invoice (Mutation)
See examples in portal (e.g., Mutation: Create Invoice).
Use Case 3: List Customers
Nest under business:
query {
business(id: "Biz123") {
customers(first: 20) { edges { node { id name email } } }
}
}Tips: Use variables, handle pagination/errors.
Support: Submit tickets via portal or Support Resources.
Building and maintaining direct API integrations with Wave Financials requires significant development effort and ongoing maintenance. Knit provides a unified integration platform that simplifies connecting to Wave and dozens of other accounting systems through a single, standardized API.
Instead of writing separate integration code for each accounting platform (Wave, QuickBooks, Xero, FreshBooks), Knit offers one Unified Accounting API. Your application connects once to Knit and instantly works with multiple accounting systems without additional development.
Before Knit:
// Different code for each platform
if (platform === 'wave') {
await waveAPI.createInvoice(invoiceData);
} else if (platform === 'quickbooks') {
await quickbooksAPI.createInvoice(invoiceData);
} else if (platform === 'xero') {
await xeroAPI.createInvoice(invoiceData);
}With Knit:
javascript
// Same code works for all platforms
await knitAPI.createInvoice(invoiceData);Wave's OAuth 2.0 implementation requires handling authorization codes, token exchanges, refresh tokens, and secure storage. Knit manages all authentication complexity:
Every accounting system has different data structures. Wave's invoice format differs from QuickBooks', which differs from Xero's. Knit normalizes all data into a consistent schema:
// Knit's Unified Invoice Model
{
"id": "inv_123",
"customer": {
"id": "cust_456",
"name": "Acme Corp",
"email": "billing@acmecorp.com"
},
"amount": 1000.00,
"currency": "USD",
"status": "PAID",
"items": [
{
"description": "Consulting Services",
"quantity": 10,
"unit_price": 100.00
}
]
// Works with Wave, QuickBooks, Xero, etc.
}Polling Wave’s API is slow, inefficient, and can cause rate-limit issues, while Knit solves this by providing real-time webhooks that instantly notify your application whenever data changes in a connected Wave account.
This enables an event-driven architecture where new invoices, payments, or customer updates are received immediately, reducing the need for constant API calls and keeping your application data continuously up to date. You can also subscribe only to the specific events you need, making the integration more efficient and customizable.
Building a stable, production-ready Wave integration normally takes 2–3 months, but with Knit you can build, test, and deploy in just a few weeks. Knit offers pre-built, production-tested Wave connectors along with SDKs for JavaScript, Python, Ruby, PHP, and Java, plus a developer sandbox that lets you test using sample Wave data.
Its detailed documentation, complete with API references, tutorials, and best practices, combined with dedicated technical support, significantly speeds up development and reduces engineering effort.
As your platform grows and you manage hundreds or even thousands of Wave connections, maintaining performance and reliability becomes difficult. Knit handles this automatically by providing centralized connection management, built-in monitoring tools, and streamlined troubleshooting via a single dashboard.
It also ensures long-term stability by updating connectors whenever Wave changes its API and offering centralized error handling, alerting, and performance monitoring to track latency and success rates across all connections.
Consider the total cost of building and maintaining a direct Wave integration:
By using Knit, you reduce development costs, accelerate time-to-market, and ensure a reliable integration that scales with your business.
A. Yes, Wave's API is completely free to use. There are no API call fees or subscription costs for accessing the API. You only need a Wave account (which is free for core accounting features) and to register your application in the Wave Developer Portal.
A. Wave implements the following rate limits:
These limits help ensure service stability for all users. Implement exponential backoff and caching to stay within limits.
A. Yes, Wave Financial supports webhooks. They use webhooks to notify your application when specific events, such as a completed checkout or a received payment, occur in your Wave account. You can subscribe to events, including:
Webhooks require HTTPS endpoints and support signature verification for security.
A. Yes, Wave provides a sandbox environment for testing:
A. You can use any language with HTTP/JSON support. Popular choices include:
A. Several resources are available:
A. Yes, Wave offers both REST and GraphQL APIs. The GraphQL endpoint is at https://gql.waveapps.com/graphql and allows you to:
A. Wave provides detailed error responses:
{
"errors": [
{
"message": "Validation failed",
"locations": [{"line": 2, "column": 3}],
"path": ["createInvoice"],
"extensions": {
"code": "VALIDATION_ERROR",
"field": "customer_id",
"details": "Customer not found"
}
}
]
}Enable logging in your application and monitor HTTP status codes, error messages, and request/response bodies for debugging.
A. While Wave doesn't provide a dedicated mobile SDK, its REST API works perfectly with mobile applications. For mobile development:
Wave's API continues to evolve, so always check the official documentation for the latest features and best practices.
Microsoft Dynamics 365 Business Central is a complete, cloud-based Enterprise Resource Planning (ERP) solution designed for small to medium-sized businesses. It integrates core business functions like finance, sales, service, and operations into a single, connected system.
Its powerful, modern API ecosystem empowers developers to automate processes, build custom applications, and create seamless bridges between Business Central and other critical business systems.
The Business Central API offers a standardized, OData-compliant, and secure framework optimized for developers building integrations and extending the platform's capabilities.
In this blog, you’ll learn how to build, authenticate, and optimize integrations with the Microsoft Business Central API, including detailed setup steps, terminology, real-world use cases, and strategies for simplifying ERP connectivity through Knit.
Microsoft Dynamics 365 Business Central is an all-in-one business management solution that helps companies streamline their operations across financials, supply chain, project management, and sales. It serves as the digital hub for a business, replacing dozens of disparate spreadsheets and legacy systems with a unified, intelligent platform.
What Business Central Does
Business Central stands as a pivotal tool for contemporary business management by merging automation, real-time analytics, and effortless integration into a cohesive, AI-enhanced platform. It empowers organizations to eradicate manual tasks, enhance precision, and drive informed strategic choices effortlessly.
1. Automation: Business Central automates routine workflows across finance, sales, and operations, such as order fulfillment, invoice processing, and inventory adjustments. This frees up teams from tedious data entry, slashing processing times by up to 50% and minimizing human errors for more reliable daily operations. For instance, AI-driven features like predictive inventory forecasting proactively alert users to potential stockouts, ensuring uninterrupted supply chains.
2. Data Accuracy: By integrating with tools like Microsoft Power BI or external CRMs, Business Central ensures synchronized, consistent data across ecosystems. Real-time updates prevent silos, reducing discrepancies in financial records and boosting audit compliance. This accuracy is vital for SMEs scaling operations without proportional increases in administrative overhead.
3. Financial Visibility: Dynamic dashboards and embedded analytics provide instant views into cash flow, profitability, and key metrics. Leaders can drill down into variances or forecast trends using natural language queries via Copilot, the built-in AI assistant, enabling proactive decision-making that aligns with market dynamics.
4. Seamless Integration: With over 1,000 pre-built connectors in the Microsoft AppSource marketplace and a flexible API, Business Central bridges gaps between ERP, CRM (like Dynamics 365 Sales), and e-commerce platforms. This connectivity eliminates fragmented workflows, allowing unified data flows that enhance collaboration across departments.
5. Scalability and Flexibility: From startups to global enterprises, Business Central adapts via multi-tenant architectures, role-based access, and extensible APIs. It supports hybrid deployments and AI extensions without compromising speed or regulatory adherence, growing alongside business expansion while maintaining cost-effectiveness.
Before integrating with the Microsoft Dynamics 365 Business Central API, it’s essential to understand key terms that define how authentication, environments, and data operations work within the Microsoft ecosystem. The following glossary covers all critical concepts in a simplified and professional way.
A Tenant is a dedicated instance of Business Central allocated to a specific organization. Each tenant is isolated and contains its own set of data, configurations, and environments. All API calls are directed to a tenant-specific URL, ensuring that one company’s data remains separate from another’s.
An Environment is a logical container within a tenant that stores business data.
A tenant typically includes:
API requests must always target a specific environment to ensure data separation and control.
A Company represents a distinct business entity or legal organization within a Business Central environment.
Each company maintains its own ledgers, customers, vendors, items, and setup data.
API operations are scoped to a specific company, which is identified in the endpoint.
OData is an open protocol that defines how to build and consume RESTful APIs.
The Business Central API is built on OData v4, meaning it uses:
This makes the API interoperable and easy to integrate with other systems.
An API Page is a published Business Central page object that exposes a specific business entity (e.g., Customers, Vendors, or Items) through the API. API Pages support full CRUD operations, Create, Read, Update, and Delete, and are the primary interface for interacting with Business Central data.
An API Query is a read-only endpoint designed for retrieving complex datasets, aggregations, or filtered results. Unlike API Pages, API Queries cannot modify data but are optimized for reporting and analytics.
Authentication in Business Central is handled through Microsoft Entra ID (formerly Azure Active Directory). All API requests must be authorized using a valid access token obtained via Entra ID’s OAuth 2.0 protocol. This ensures secure, enterprise-grade identity and access control for integrations.
OAuth 2.0 is the authentication framework that allows secure, delegated access to Business Central APIs. It enables your app to access data without directly handling user credentials.
Common OAuth flows used:
If handling token refresh and environment routing yourself isn't the priority, Knit handles Business Central authentication entirely — including multi-environment tenant routing
A Service Principal is the security identity created when you register your application in Microsoft Entra ID. This registration provides:
This identity is used by your integration to authenticate and communicate with the Business Central API.
The Client ID is a globally unique identifier assigned to your application when it is registered in Entra ID. It identifies your app during the OAuth 2.0 token request process and must be included in authentication calls.
The Client Secret is a confidential key generated for your registered application in Entra ID.
It works in combination with the Client ID to verify your app’s identity during token acquisition.
Treat this value as a password, store it securely, and rotate it periodically.
An Access Token is a short-lived credential issued by Microsoft Entra ID after successful authentication. It is a JSON Web Token (JWT) that contains encoded claims such as permissions, user identity, and expiry time. This token must be included in every API request header:
Authorization: Bearer eyJ0eXAiOiJKV1QiLCJh...Tokens typically expire after one hour.
A Refresh Token is a long-lived credential used to silently obtain new access tokens without requiring user re-authentication. This ensures continuous access for long-running integrations or background services.
Permissions (or Scopes) define what data and operations your app is allowed to access via the API. They are requested during authentication and approved by an admin or user.
Examples:
A Scope specifies the exact level of access being requested for a given API. Scopes are part of the OAuth 2.0 token request and determine whether the app can read, write, or manage specific data. They ensure granular access control across multiple Microsoft services.
Rate Limits protect Business Central’s API infrastructure by restricting excessive request traffic.
Limits are typically enforced per:
Default limits include:
If these limits are exceeded, you’ll receive:
HTTP 429 Too Many Requests
Implement retry logic with exponential backoff and respect the Retry-After header to avoid disruption.
Webhooks are event-driven notifications that alert your application whenever specific data changes occur in Business Central. They’re implemented using the Change Notifications API, allowing external systems to stay synchronized in real-time.
The Business Central API enables businesses to connect their core ERP data with a vast array of other systems, from e-commerce and CRM to custom mobile apps and IoT platforms. These integrations automate workflows, provide real-time visibility, and create a truly connected digital enterprise.
Retailers and distributors running online stores (e.g., on Shopify, WooCommerce, or Magento) need real-time sync between their webstore and their ERP. A manual process is error-prone and doesn't scale.
How It Works:
Sales teams live in CRMs like Salesforce or Microsoft Dynamics 365 Sales, but the fulfillment and invoicing happen in Business Central. A disconnect here leads to inaccurate forecasting and customer service issues.
How It Works:
Field service technicians, sales reps on the go, and warehouse staff need mobile access to ERP data. Building a custom mobile app connected to Business Central empowers a mobile workforce.
How It Works:
While Business Central has built-in reporting, many organizations need to combine ERP data with information from other sources (e.g., marketing, web analytics) in a centralized data warehouse.
How It Works:
Companies can automate the entire procurement lifecycle, from initial request to payment, by connecting Business Central with vendor portals or internal request systems.
How It Works:
Business Central API uses the industry-standard OAuth 2.0 client credentials flow for server-to-server authentication, which is ideal for background integrations where no user is directly interacting.
Step-by-Step Authentication Flow (Client Credentials Grant):
Step 1: Visit the Azure Portal using an account with administrator or app registration privileges.
Step 2: In the left navigation menu, go to Microsoft Entra ID (Azure Active Directory).
Step 3: Select App registrations and then click + New registration.
Step 4: Provide Application Details
Step 5: Click Register. This will automatically create a Service Principal, a unique identity for your app in Microsoft Entra ID.
Step 6: After registration, make a note of the following values:
Step 7: Generate a Client Secret or Certificate
Note: These credentials (Client ID, Tenant ID, and Client Secret/Certificate) will be required later to request access tokens.
Step 1: In your registered application, open the API Permissions tab.
Step 2: Click + Add a permission → APIs my organization uses → Dynamics 365 Business Central.
Step 3: Select Application Permissions (since no user will be signing in).
Step 4: Add the required permissions (scopes) such as:
Step 5: Click Add permissions to confirm your selection.
Step 6: Choose Grant admin consent to approve these permissions for the entire tenant.
Once your application is registered and permissions are configured, you can request an Access Token from Microsoft Entra ID.
Token Endpoint
POST https://login.microsoftonline.com/{tenant_id}/oauth2/v2.0/token
Headers
Content-Type: application/x-www-form-urlencodedBody Parameters
client_id={your_client_id}
client_secret={your_client_secret}
scope=https://api.businesscentral.dynamics.com/.default
grant_type=client_credentialsWhen successful, Microsoft Entra ID responds with a JSON object containing your access_token.
Response Example
{
"token_type": "Bearer",
"expires_in": 3599,
"ext_expires_in": 3599,
"access_token": "eyJ0eXAiOiJKV1QiLCJh..."
}Once you receive the access token, use it to authenticate all API calls to Business Central.
Authorization Header
Authorization: Bearer {access_token}Example API Request
GET https://api.businesscentral.dynamics.com/v2.0/{tenant_id}/Production/api/v2.0/companies
Authorization: Bearer eyJ0eXAiOiJKV1QiLCJh...
Accept: application/jsonEach request made with a valid Bearer Token will be authorized based on the permissions (scopes) assigned to your registered app.
Access tokens are short-lived and usually valid for one hour. When a token expires, Business Central will return an HTTP 401 Unauthorized response.
To maintain uninterrupted access:
If your application requires interactive user sign-in, use the OAuth 2.0 Authorization Code Flow instead of Client Credentials.
In this flow:
For more information about the Authorization Code Flow, refer to the “Explore Authentication Flows”.
The Business Central API is a comprehensive set of OData endpoints that allow you to programmatically interact with almost every aspect of the ERP system. The API is versioned, and the current standard version is v2.0.
Base URL Structure:
https://api.businesscentral.dynamics.com/v2.0/{environmentName}/api/{publisher}/{apiGroup}/{apiVersion}/For the standard Microsoft API, this simplifies to:
https://api.businesscentral.dynamics.com/v2.0/{environmentName}/api/v2.0/1. Business Central API Categories and Key Endpoints
Let's walk through the practical steps of obtaining credentials and making your first authenticated API call.
You now have your Client ID (from the "Overview" blade) and your Client Secret.
Use a tool like Postman or write code to make a POST request to the Azure AD token endpoint.
Request Example:
http
POST https://login.microsoftonline.com/{tenant_id}/oauth2/v2.0/token
Content-Type: application/x-www-form-urlencoded
client_id={your_client_id}
&client_secret={your_client_secret}
&scope=https://api.businesscentral.dynamics.com/.default
&grant_type=client_credentialsResponse Example:
{
"token_type": "Bearer",
"expires_in": 3599,
"ext_expires_in": 3599,
"access_token": "eyJ0eXAiOiJKV1QiLCJhbGciOiJSUzI1NiIsIng1dCI6Ik5HVEZ2ZEstZnl0aEV1Q..."
}Use the extracted access_token to call any Business Central API endpoint.
Example: Get the list of companies
GET https://api.businesscentral.dynamics.com/v2.0/{environmentName}/api/v2.0/companies
Authorization: Bearer {your_access_token}A growing retailer uses Shopify for its online store but struggles with manual order entry and inventory updates. By integrating Shopify with Business Central via its API, they achieve full automation.
A middleware application (e.g., an Azure Logic App or custom service) listens for the orders/create webhook from Shopify. When triggered, it uses the Business Central Sales Orders API to create a new sales order. It also sets up a periodic job to call the Business Central Items API to update Shopify's inventory levels, ensuring the online store always reflects accurate stock counts.
A consulting firm needs a simple time-tracking application for its consultants. Building a custom Power App is the ideal solution, but the data must reside in Business Central for project accounting and billing.
The Power App is built with a custom UI for time entry. When a consultant submits their timesheet, the app uses a Power Automate flow to call the Business Central Journal API, posting the hours directly to the correct project in the general ledger. This eliminates double entry and provides real-time project profitability.
A distribution company's warehouse still relies on paper pick lists, leading to errors and slow fulfillment times.
A lightweight mobile web app is developed for warehouse scanners. When a worker scans a sales order number, the app calls the Business Central Sales Orders API to retrieve the line items. As items are picked and scanned, the app uses the Warehouse Shipment API to register the pick and post the shipment, updating inventory in real-time and dramatically improving accuracy and speed.
1. Handle Pagination Gracefully: Always assume datasets are large. After a GET request, check the response for an @odata.nextLink and be prepared to follow it until all data is retrieved.
2. Use Filtering to Reduce Payloads: Never call a top-level endpoint without filters if you only need a subset of data. Use $filter to get records modified after a certain time (lastModifiedDateTime gt 2024-01-01T00:00:00Z) and $select to retrieve only the necessary fields.
3. Respect Rate Limits: Implement retry logic with exponential backoff when you encounter a 429 Too Many Requests response. Do not simply retry immediately in a tight loop.
4. Prefer Batch Requests for Bulk Operations: When creating or updating multiple records (e.g., 100 new items), bundle them into a single batch request to significantly reduce HTTP overhead and improve performance.
5. Leverage Webhooks for Real-Time Sync: Instead of constantly polling the API for changes, use the change tracking and notification features to have Business Central push change events to your application. This is far more efficient and responsive.
6. Use Sandbox Environments for Development: Never develop and test your integration against a production environment. Use a dedicated Sandbox environment to avoid corrupting live business data.
7. Secure Your Credentials: Your Client Secret is a password. Never hardcode it in your application source code. Use secure secret management services like Azure Key Vault.
Building and maintaining a direct integration with the Business Central API is a significant undertaking. You must manage Azure AD authentication, handle pagination and rate limits, map data schemas, and maintain the integration through API updates.
Knit acts as a unified API platform that abstracts this complexity, allowing you to connect to Business Central and dozens of other ERP, HR, and CRM systems through a single, standardized interface.
Knit provides a single Unified API for accounting and ERP systems. Instead of learning the specific endpoints and data models for Business Central, QuickBooks, NetSuite, and others, you integrate once with Knit. Knit's API automatically normalizes the data, so your application works with all supported platforms without writing additional code.
Knit manages the entire OAuth 2.0 and Azure AD flow for Business Central. Your users authenticate through Knit's pre-built connector UI, and Knit securely handles the token acquisition, refresh, and storage. Your application only ever interacts with Knit's secure API, simplifying your security model and reducing your compliance burden.
Business Central represents a "Customer" differently than Sage Intacct or Xero. Knit's Unified Data Model translates the provider-specific schemas into a consistent, predictable format. Your application sends and receives data in one schema, and Knit handles the transformation to and from Business Central's specific format, saving countless hours of development and mapping logic.
Knit's robust webhook system notifies your application the moment data changes in Business Central. This event-driven architecture ensures your application's data is always fresh without the need for inefficient polling, helping you stay well within Business Central's API rate limits.
By using Knit, you can bypass weeks of development and maintenance work. With Knit's SDKs, detailed documentation, and sandbox environments, you can build, test, and launch a production-ready Business Central integration in days, not months, allowing you to focus on your core product features.
Rate limits in Microsoft Dynamics 365 Business Central are dynamic and based on a resource consumption model rather than a fixed request count. To ensure reliability, you should design your integration to be efficient and resilient.
If your requests exceed the defined limits, the API will respond with an HTTP 429 – Too Many Requests status code.
In such cases:
Yes. You can create custom API endpoints in Business Central using the AL language.
By defining the following attributes, APIPublisher, APIGroup, and APIVersion, developers can expose custom tables, pages, and codeunits as fully functional OData v4 endpoints.
This feature is essential for integrating external systems with bespoke functionality or extensions.
Learn more in Microsoft’s official guide: Developing Custom APIs in Business Central.
The Business Central API follows standard HTTP status codes to communicate success and error responses.
For example:
A 400 Bad Request response often includes a detailed JSON error body describing the issue, such as:
"error": { "message": "Customer Name cannot be blank" }Always implement structured error handling and logging within your integration to capture and act on these responses.
For more information, visit Business Central API Error Handling.
Yes. Each Business Central tenant can host one or more Sandbox environments, which are designed for testing, development, and training.
A sandbox is a fully functional copy of your production environment, or can be initialized empty, allowing developers to safely test integrations and extensions without affecting live data.
The v2.0 API is the stable, production-ready version of the Business Central API.
Microsoft occasionally releases a Beta API that introduces new or experimental features ahead of their official release.
While the beta version is useful for testing upcoming functionality, it is subject to change and should not be used in production environments.
You can view available versions and their differences here: Business Central API Versions (Standard & Beta).
The complete and up-to-date API documentation is available on Microsoft Learn, which provides:
You can explore it here: Microsoft Dynamics 365 Business Central API Reference.
This article is a part of a series of articles covering the GreytHR API in depth, and covers the specific use case of using the GreytHR API to get employee leave information.
You can find all the other use cases we have covered for the GreytHR API along with a comprehensive deep dive on its various aspects like authentication, rate limits etc here.
https://api.greythr.com/leave/v2/employee/{employee-id}/years/{{Year}}/balancehttps://api.greythr.com/leave/v2/employee/years/{{Year}}/balancehttps://api.greythr.com/leave/v2/employee/transactions?start={{StartDate}}&end={{EndDate}}headers = {
"ACCESS-TOKEN": "YourAccessToken",
"x-greythr-domain": "Yourcompany.greythr.com"
}
import requests
employee_id = "11"
year = "2020"
url = f"https://api.greythr.com/leave/v2/employee/{employee_id}/years/{year}/balance"
response = requests.get(url, headers=headers)
leave_balance = response.json()
print(leave_balance)
import requests
year = "2021"
url = f"https://api.greythr.com/leave/v2/employee/years/{year}/balance"
response = requests.get(url, headers=headers)
all_leave_balances = response.json()
print(all_leave_balances)
import requests
start_date = "2020-06-01"
end_date = "2020-06-30"
url = f"https://api.greythr.com/leave/v2/employee/transactions?start={start_date}&end={end_date}"
response = requests.get(url, headers=headers)
leave_transactions = response.json()
print(leave_transactions)
1. What does the access token look like?
The access token is a unique string provided by GreytHR during authentication. Always keep it secure and refresh it as required.
2. How should I handle pagination in large responses?
GreytHR includes pagination details in responses. Use these parameters to iterate through pages and fetch the complete dataset without missing records.
3. Can I filter leave transactions by leave type?
The API doesn’t currently allow filtering by leave type at the endpoint level. You’ll need to fetch all transactions and then filter them client-side.
4. What should I check if I get a 401 Unauthorized error?
This usually indicates an invalid or expired token. Recheck your token, regenerate if needed, and ensure your request headers are correctly set.
5. Are there limits on how many requests I can make?
Yes. GreytHR enforces rate limits on API usage. Refer to their documentation or contact support to confirm the exact limits for your plan.
For quick and seamless access to GreytHR API, Knit API offers a convenient solution. By integrating with Knit just once, you can streamline the entire process. Knit takes care of all the authentication, authorization, and ongoing integration maintenance. This approach not only saves time but also ensures a smooth and reliable connection to your GreytHR API.
This article is a part of a series of articles covering the Darwinbox API in depth, and covers the specific use case of using the Darwinbox API to Get employee data from Darwinbox API.
You can find all the other use cases we have covered for the Darwinbox API in this guide along with a comprehensive deep dive on its various aspects like authentication, rate limits etc
Access to Darwinbox APIs is restricted to privileged users. To get employee data from Darwinbox API:
To fetch employee data, use the following API endpoint:</p><pre>https://{{subdomain}}.darwinbox.in/masterapi/employee</pre>
import requests
url = "https://{{subdomain}}.darwinbox.in/masterapi/employee"
payload = {
"api_key": "your_api_key",
"datasetKey": "your_dataset_key",
"employee_ids": ["A123", "A124"]
}
headers = {
"Content-Type": "application/json"
}
response = requests.post(
url,
json=payload,
headers=headers,
auth=("username", "password")
)
print(response.json())
Set up the request with the required parameters: <code>api_key</code> and <code>datasetKey</code>.
Use the HTTP POST method to send the request.
Include basic authentication with your username and password.
Set the <code>Content-Type</code> header to <code>application/json</code>.
Send the request and handle the response.
import requests
url = "https://{{subdomain}}.darwinbox.in/masterapi/employee"
payload = {
"api_key": "your_api_key",
"datasetKey": "your_dataset_key"
}
headers = {
"Content-Type": "application/json"
}
response = requests.post(
url,
json=payload,
headers=headers,
auth=("username", "password")
)
print(response.json())
Pitfall 1: Incorrect API key or dataset key will result in authentication errors.
Mitigation: Ensure the subdomain is correctly specified for your Darwinbox instance.
Pitfall 2: Missing <code>Content-Type</code> header may lead to request failures.
Mitigation: Ensure employee IDs are correctly formatted as an array when fetching specific employees.
Pitfall 3: Network issues can cause request timeouts
Mitigation: Ensure stable internet connectivity.
1. What should I do if I receive an authentication error?
Verify your API key, dataset key, and credentials.
2. Can I fetch data for multiple employees in one request?
Yes, by providing an array of employee IDs.
3. Is there a limit to the number of employees I can fetch in one request?
Check with Darwinbox support for any limitations.
4. How often are the API specifications updated?
Darwinbox updates API specifications monthly.
For quick and seamless access to Darwinbox API, Knit API offers a convenient solution. By integrating with Knit just once, you can streamline the entire process. Knit takes care of all the authentication, authorization, and ongoing integration maintenance, this approach not only saves time but also ensures a smooth and reliable connection to your Darwinbox API.
This article is a part of a series of articles covering the Alexis HR API in depth, and covers the specific use case of using the Alexis HR API to get employee data.
To retrieve employee data using the Alexis HR API, you can utilize the available endpoints to access both individual employee details and a list of all employees. This guide provides a step-by-step approach to achieve this using Python, including handling pagination and extracting required details.
Ensure you have a valid access token for authentication.</li><li>Install the <code>requests</code> library in Python if not already installed.
To retrieve data for a specific employee, use the following endpoint:
</p><pre><code>GET https://api.alexishr.com/v1/employee/{id}</code></pre>
<p>Replace <code>{id}</code> with the employee's unique identifier.
Below is a Python code snippet to make this request:
</p><pre><code>import requests
def get_employee_data(employee_id, access_token):
url = f"https://api.alexishr.com/v1/employee/{employee_id}"
headers = {"Authorization": f"Bearer {access_token}"}
response = requests.get(url, headers=headers)
if response.status_code == 200:
return response.json()
else:
return {"error": response.json()}</code></pre>To retrieve data for all employees, use the following endpoint:
</p><pre><code>GET https://api.alexishr.com/v1/employment</code></pre>
<p>Handle pagination by using the <code>limit</code> and <code>offset</code> query parameters.
Below is a Python code snippet to make this request:
</p><pre><code>def get_all_employees(access_token, limit=50, offset=0):
url = "https://api.alexishr.com/v1/employment"
headers = {"Authorization": f"Bearer {access_token}"}
params = {"limit": limit, "offset": offset}
response = requests.get(url, headers=headers, params=params)
if response.status_code == 200:
return response.json()
else:
return {"error": response.json()}</code></pre></To handle pagination, iterate through the pages until all employee data is retrieved:
</p><pre><code>def fetch_all_employee_data(access_token):
all_data = []
offset = 0
while True:
data = get_all_employees(access_token, offset=offset)
if "error" in data:
break
all_data.extend(data.get("data", []))
if len(data.get("data", [])) < 50:
break
offset += 50
return all_data</code></pre></The response will contain employee data in JSON format. Handle the response by checking the status code and processing the data accordingly.
For more detailed queries, you can use filters and sorting options provided by the API. By following these steps, you can efficiently retrieve employee data from the Alexis HR API, whether for a single employee or all employees, while handling pagination and extracting necessary details.
For quick and seamless access to Alexis HR API API, Knit API offers a convenient solution. By integrating with Knit just once, you can streamline the entire process. Knit takes care of all the authentication, authorization, and ongoing integration maintenance, this approach not only saves time but also ensures a smooth and reliable connection to your Alexis HR API.
This article is a part of a series of articles covering the Ashby API in depth, and covers the specific use case of using the Ashby API to List all Candidates from Ashby API.
You can find all the other use cases we have covered for the Ashby API along with a comprehensive deep dive on its various aspects like authentication, rate limits etc in our in-depth Ashby API end point directory.
The Ashby API provides a robust method to list all candidates within an organization using the candidate.list endpoint. This endpoint supports pagination and incremental synchronization, allowing efficient data retrieval. Below is a step-by-step guide to using this API with Python code snippets.
Endpoint: https://api.ashbyhq.com/candidate.list
HTTP Method: POST
The request body should be a JSON object. You can specify parameters such as limit, cursor, and syncToken to control pagination and synchronization.
{
"limit": 25,
"cursor": "your-cursor-value",
"syncToken": "your-sync-token"
}Below is a Python code snippet demonstrating how to list all candidates using the Ashby API:
import requests
url = "https://api.ashbyhq.com/candidate.list"
headers = {
"Accept": "application/json",
"Content-Type": "application/json"
}
data = {
"limit": 25
}
response = requests.post(url, headers=headers, json=data)
if response.status_code == 200:
result = response.json()
print(result)
while result.get("moreDataAvailable"):
data["cursor"] = result.get("nextCursor")
response = requests.post(url, headers=headers, json=data)
result = response.json()
print(result)
else:
print("Error:", response.status_code, response.text)The response will include a list of candidates and pagination information. If moreDataAvailable is true, use nextCursor to fetch the next page.
{
"success": true,
"results": [
// Array of candidate objects
],
"moreDataAvailable": true,
"nextCursor": "next-cursor-value",
"syncToken": "new-sync-token-value"
}
If you are looking to learn how to get details on an individual candidate using Ashby API, read our developer guide here : Get candidate data using Ashby API (Python Example)
For quick and seamless access to Ashby API, Knit API offers a convenient Unified API solution. By integrating with Knit just once, you can integrate with multiple ATS systems in on go. Knit takes care of all the authentication, authorization, and ongoing integration maintenance, this approach not only saves time but also ensures a smooth and reliable connection to your Ashby API.
Introduction
This article is a part of a series of articles covering the GreytHR API in depth, and covers the specific use case of using the GreytHR API to get employee data from GreytHR.
You can find all the other use cases we have covered for the GreytHR API along with a comprehensive deep dive on its various aspects like authentication, rate limits etc here.
https://api.greythr.com/employee/v2/employees/personalhttps://api.greythr.com/employee/v2/employees/workhttps://api.greythr.com/employee/v2/employees/profile1. What are the rate limits for GreytHR API?
GreytHR does not publish its exact rate limits publicly. If you expect high request volumes, it’s best to contact their support team for detailed guidance and build your integration with retries/backoff in mind.
2. How do I refresh my API token?
Tokens eventually expire. To get a new one, you’ll need to re-run the authentication process as defined by GreytHR. It’s good practice to automate token refresh in your integration so it doesn’t break unexpectedly.
3. Can I directly filter data by employee ID?
Not at the API level. Current endpoints return full datasets. You’ll need to fetch the response and apply filtering client-side (e.g., by matching employeeId values in the JSON).
4. What format does the GreytHR API return data in?
All responses are provided in JSON, making them easy to parse and integrate into most systems.
5. How do I handle pagination in responses?
When there’s a large dataset, GreytHR includes pagination details in the response. Use these tokens/parameters to navigate page by page until you retrieve the full dataset.
For quick and seamless access to GreytHR API, Knit API offers a convenient solution. By integrating with Knit just once, you can streamline the entire process. Knit takes care of all the authentication, authorization, and ongoing integration maintenance. This approach not only saves time but also ensures a smooth and reliable connection to your GreytHR API.
This article is a part of a series of HRIS integration articles covering the ADP Run API in depth, and covers the specific use case of using the ADP Run API to get employee data.
requests library./hr/v2/workers/hr/v2/workers/{aoid}import requests
def get_all_employees(access_token):
url = "https://api.adp.com/hr/v2/workers"
headers = {
"Authorization": f"Bearer {access_token}",
"Content-Type": "application/json"
}
response = requests.get(url, headers=headers)
if response.status_code == 200:
return response.json()
else:
return response.status_codedef get_employee_by_aoid(access_token, aoid):
url = f"https://api.adp.com/hr/v2/workers/{aoid}"
headers = {
"Authorization": f"Bearer {access_token}",
"Content-Type": "application/json"
}
response = requests.get(url, headers=headers)
if response.status_code == 200:
return response.json()
else:
return response.status_code1. What format does the ADP Run API return data in?
All responses are in JSON format, making them straightforward to parse in most programming languages.
2. How do I handle pagination when fetching employees?
ADP uses OData parameters for pagination. Use $top to limit results per page and $skip to move through subsequent pages.
3. What should I do if I get a 401 Unauthorized error?
This usually means your access token is invalid or expired. Refresh your token using OAuth 2.0 and retry the request.
4. Can I filter the employee data I retrieve?
Yes. Use the OData $filter parameter to narrow results (e.g., filter by department or employment status).
5. How can I return only specific fields in the response?
Use the OData $select parameter to specify exactly which fields you want, instead of retrieving the entire object.
For quick and seamless access to ADP Run API, Knit API offers a convenient solution. By integrating with Knit just once, you can streamline the entire process. Knit takes care of all the authentication, authorization, and ongoing integration maintenance. This approach not only saves time but also ensures a smooth and reliable connection to your ADP Run API.
This article is a part of a series of articles covering the Deel API in depth, and covers the specific use case of using the Deel API to get employee data from Deel.
You can find all the other use cases we have covered for the Deel API along with a comprehensive deep dive on its various aspects like authentication, rate limits etc here.
https://api.letsdeel.com/rest/v1/employees/{employee_id}https://api.letsdeel.com/rest/v1/employees<pre><code>import requests</code></pre>
<pre><code>api_token = 'your_api_token_here'</code></pre>
<pre><code>def get_single_employee(employee_id): url = f'https://api.letsdeel.com/rest/v1/employees/{employee_id}' headers = {'Authorization': f'Bearer {api_token}'} response = requests.get(url, headers=headers) return response.json()</code></pre>
<pre><code>def get_all_employees(): url = 'https://api.letsdeel.com/rest/v1/employees' headers = {'Authorization': f'Bearer {api_token}'} response = requests.get(url, headers=headers) return response.json()</code></pre>
1. What are the rate limits for Deel API?
Deel enforces rate limits to ensure fair usage. Always check their official documentation for the most up-to-date thresholds, and design your integration to back off or retry gracefully when limits are hit.
2. How do I deal with pagination when fetching employees?
If your organization has many employees, Deel returns results in pages. Use the pagination parameters provided in the response (like page and per_page) to loop through all results.
3. Can I filter employees by department, role, or status?
Yes, Deel supports query parameters that let you filter results. This makes it easier to fetch just the employees you need rather than retrieving everyone.
4. What data fields are included for each employee?
The API typically returns identifiers, personal details, employment status, contracts, and department information. Refer to Deel’s documentation for the complete schema so you can map it cleanly into your system.
5. How do I update or change employee data?
Reading employee data uses GET requests, but updates require PUT or PATCH calls. Always use the correct endpoint for updates, and validate the required fields before sending data.
For quick and seamless access to Deel API, Knit API offers a convenient solution. By integrating with Knit just once, you can streamline the entire process. Knit takes care of all the authentication, authorization, and ongoing integration maintenance. This approach not only saves time but also ensures a smooth and reliable connection to your Deel API.
This article is a part of a series of articles covering the Ashby API in depth, and covers the specific use case of using the Ashby API to Get candidate data from Ashby API.
You can find all the other use cases we have covered for the Ashby API along with a comprehensive deep dive on its various aspects like authentication, rate limits etc in our in-depth Ashby API end point directory.
To retrieve candidate data using the Ashby API, you can utilize the candidate.info endpoint. This endpoint allows you to fetch detailed information about a candidate by their unique ID or an external mapping ID. Below is a step-by-step guide on how to use this API with Python code snippets.
Ensure you have Python installed along with the requests library. You can install the library using pip:
pip install requestsUse the following Python code to make a POST request to the candidate.info endpoint:
import requests
import json
# Define the API endpoint
url = 'https://api.ashbyhq.com/candidate.info'
# Set up the headers
headers = {
'accept': 'application/json',
'content-type': 'application/json'
}
# Define the request body with the candidate ID
data = {
'id': 'f9e52a51-a075-4116-a7b8-484deba69004' # Replace with the actual candidate ID
}
# Make the POST request
response = requests.post(url, headers=headers, data=json.dumps(data))
# Check if the request was successful
if response.status_code == 200:
candidate_data = response.json()
print('Candidate Data:', candidate_data)
else:
print('Failed to retrieve candidate data:', response.status_code, response.text)If the request is successful, the response will contain detailed information about the candidate, including their name, email addresses, phone numbers, social links, tags, and more. You can process this data as needed for your application.
For quick and seamless access to Ashby API, Knit API offers a convenient Unified API solution. By integrating with Knit just once, you can go live with multiple ATS integrations in one go. Knit takes care of all the authentication, authorization, and ongoing integration maintenance, this approach not only saves time but also ensures a smooth and reliable connection to your Ashby API.
.webp)
This article is a part of a series of articles covering the BambooHR API in depth, and covers the specific use case of using the BambooHR API to Get employee details.
If you are looking for a comprehensive directory of BambooHR API endpoints to discover what endpoints will fit best for your use case, check our BambooHR API Directory.
To retrieve detailed information about employees in BambooHR, you can utilize multiple APIs. This guide provides a step-by-step approach to get the first name and last name of all employees using the BambooHR API.
First, you need to fetch the employee directory, which contains basic information about all employees.
GET https://api.bamboohr.com/api/gateway.php/{companyDomain}/v1/employees/directoryimport requests
company_domain = 'your_company_domain'
url = f'https://api.bamboohr.com/api/gateway.php/{company_domain}/v1/employees/directory'
headers = {
'Accept': 'application/json',
'Authorization': 'Basic YOUR_API_KEY'
}
response = requests.get(url, headers=headers)
if response.status_code == 200:
employees = response.json().get('employees', [])
for employee in employees:
print(f"First Name: {employee.get('firstName')}, Last Name: {employee.get('lastName')}")
else:
print(f"Failed to retrieve employee directory: {response.status_code}")
If you need additional details such as employee dependents, you can use the following endpoint.
GET https://api.bamboohr.com/api/gateway.php/{companyDomain}/v1/employeedependentsemployee_id = 'specific_employee_id'
url = f'https://api.bamboohr.com/api/gateway.php/{company_domain}/v1/employeedependents?employeeid={employee_id}'
response = requests.get(url, headers=headers)
if response.status_code == 200:
dependents = response.json().get('Employee Dependents', [])
for dependent in dependents:
print(f"Dependent Name: {dependent.get('firstName')} {dependent.get('lastName')}")
else:
print(f"Failed to retrieve employee dependents: {response.status_code}")For quick and seamless access to BambooHR API, Knit API offers a convenient solution. By integrating with Knit just once, you can streamline the entire process. Knit takes care of all the authentication, authorization, and ongoing integration maintenance, this approach not only saves time but also ensures a smooth and reliable connection to your BambooHR API.
From wet ink on the Declaration of Independence to secure digital clicks, signatures have ensured binding contracts for centuries. A study found that businesses can spend an average of 5 days collecting physical signatures for a single contract. This time-consuming process not only hinders business agility but also creates geographical limitations. In this internet-centric world, signatures have also gone digital. Electronic signatures (eSignatures) or digital signatures offer a compelling solution. The traditional paper-based signing process can be frustrating and time-consuming for customers. But with just a few clicks, contracts and proposals can be signed from anywhere in the world with the help of eSignatures. eSignature API is user-friendly as it allows customers to sign documents conveniently from any device. With the rise of remote work, businesses need an efficient and secure document signing process regardless of location, and that's where eSignature serves its purpose.
An eSignature API is like a digital signing service. Your system/software interacts with the API as a client, sending a document and signing instructions (request) to the service (server). The service handles the signing process (with security) and returns the signed document to you (response). Just like any API, it's all about sending and receiving data. eSignature benefits businesses in several ways:
An eSignature API offers various functions that simplify the electronic signature process. Some of the key functionalities are:
There are two types of eSignature APIs:
Although SOAP APIs were commonly used in the past and are still employed to maintain legacy systems, most API providers now extensively use REST APIs for their modern applications.
Knits Unified eSignature APIs offer many benefits for eSignature integrations.
When choosing an eSignature API for your SaaS, consider these key features for a smooth and secure integration experience.
Effective data management within your eSignature SaaS application hinges on well-defined data models. These models act as blueprints, accurately organizing and structuring the information crucial for eSignature functionality. These models typically include:
Signers/Recipient: The person who will sign the contract.
Documents: This is the contract itself.
Signing Fields: These are the locations on the document where signatures, initials, or other data need to be captured.
Envelopes: They function as self-contained packages. They actively bundle all the documents requiring signatures, recipient details, completion status, and a unique identifier for easy tracking.
There are various eSignature API providers in the market today. You must choose which caters best to your needs, workflows, budget, and security considerations. This comparison provides features and API pricing for leading digital signature platforms, thus helping you choose the best eSignature API that fits your needs.
Strengths - Robust API, secure, compliant, workflow automation
Weaknesses - Complex setup, higher pricing
Ideal For - Enterprise, high-volume signing, complex workflows
DocuSign API Documentation Link: https://developers.docusign.com/
Strengths - User-friendly, branding, Adobe integration
Weaknesses - Limited features, potentially high pricing
Ideal For - User-friendly signing, Adobe ecosystem
Acrobat Sign API Documentation: https://developer.adobe.com/document-services/apis/sign-api/
Strengths - Simple API, Dropbox integration, budget-friendly
Weaknesses - Limited features, basic workflows
Ideal For - Existing Dropbox users, budget-conscious businesses
Dropbox Sign API Documentation: https://developers.hellosign.com/
Strengths - Interactive proposals, sales-oriented
Weaknesses - eSignature focus might be secondary, potentially higher pricing
Ideal For - Proposal creation, sales workflows
PandaDoc API Documentation: https://developers.pandadoc.com/reference/about
Strengths - Mobile-friendly, ease of use, competitive pricing
Weaknesses - Security concerns for some industries, limited automation
Ideal For - Easy mobile signing, cost-effective
SignNow API Documentation: https://www.signnow.com/developers
Knit provides a unified eSign API that streamlines the integration of eSignature solutions. Instead of connecting directly with multiple eSignature APIs, Knit allows you to connect with top providers like DocuSign and Adobe Acrobat Sign through a single integration. Choose Your eSignature Provider and API after evaluating which eSignature provider best meets your needs, such as DocuSign or Adobe Acrobat Sign, you can proceed with integration. Knit simplifies this process by supporting various providers, allowing you to connect with your chosen eSignature service through one API. By using Knit, integrating with popular eSignature providers becomes straightforward, making it a practical choice for your eSignature integration needs. Knit offers a unified API that simplifies integrating eSignature solutions. Instead of working directly with multiple eSignature APIs, you can use Knit to connect with top providers like DocuSign, Adobe Acrobat Sign, and many others through a single integration. Learn more about the benefits of using a unified API. Steps Overview:
For detailed integration steps with specific eSignature providers via Knit, visit:
You can learn about the body parameters, such as signers, documentName, content Type, senderEmailId, redirectURL, and other request body parameters, and responses for various eSignature actions on Knit. Here are a few eSignature reference documents to review.
Each of these links provides detailed information on the body parameters and responses. You can also test the request and response bodies in different programming languages, such as Node.js, Ruby, Python, Swift, Java, C++, C#, Go, and PHP. Knit simplifies the eSignature integration process, letting you focus on your core application development.

Below are a few points on how you can optimize your integration for better performance and increase scalability.
With the increasing demand for entrepreneurship, housing, and college applications, there has also been a rise in loan applications. The end-to-end loan application process involves hefty paperwork. To streamline this process, many financial institutions such as JPMorgan Chase, Citibank, and Wells Fargo have started using eSignature APIs for signing, creating an easy and secure loan application experience. Loan applicants now sign documents from their devices, anywhere.
Today, organizations of all sizes, from small to large, use Human Resources Information Systems (HRIS) to manage their human resources. The onboarding process requires signing an offer letter and several agreements. Due to fast-paced and advanced technology, companies are no longer spending their resources on manual work for tasks that can be automated. Many HRIS are integrating eSignature APIs into their systems. Companies like Salesforce use the DocuSign API Provider for eSignature, benefiting extensively from this integration. New hires electronically sign their offer letters and agreements, which are required during onboarding. This approach minimizes the risk of misplacing physical documents and accelerates the process.
This industry involves several documents, including Offer to Purchase Agreements, Sales Contracts, Disclosure Documents, Mortgage Documents, Deeds, and Closing Statements. Storing and retrieving all these documents is a significant concern due to the constant threat of theft, loss, or damage. The authenticity of these documents can also be questioned due to increasing fraud in the industry. With eSignature API integration, many of these issues are resolved, as documents can be signed digitally, eliminating the stress of physically storing and retrieving them. Mortgage lenders like Quicken Loans leverage eSignatures to revolutionize real estate transactions. Both homebuyers and sellers can sign all documents electronically, eliminating the need for physical documents and signatures.
IBM serves as a prime example of how eSignatures can supercharge contract management. Their Emptoris Contract Management system utilizes eSignatures for contract execution. When a contract is electronically signed, it is securely attached to a PDF document and includes a public key for verification alongside a private key held by the signer. This method ensures the legally binding nature of contracts while significantly reducing the reliance on paper-based processes. Additionally, it empowers IBM to efficiently track contract approvals, leading to a smoother and more efficient overall process.
Payroll and HR Service Provider ADP is a cloud-based software that provides services that cover all needs in human resource information systems (HRIS). The all-in-one native eSignature for ADP Workforce Now is used by ADP to manage its eSignature-related requirements such as HR documents, benefits enrollment, onboarding, and offboarding paperwork.
eBay sellers can now skip the printing and scanning! eSignatures allow them to electronically send and have buyers sign essential documents related to their sales, like invoices or return agreements. This streamlines the process for both sellers and buyers.
Integrating APIs in your system can be tricky but understanding common authentication errors and request/response issues can help ensure a smooth connection.
Some most common errors are:
Higher chances that your errors fall in this category. These can be caused by invalid data formats, missing required fields, or unsupported functionalities in your request. Some most common errors are:
Find other error codes of DocuSign
Ensuring a smooth integration requires thorough debugging. Here are two key strategies to pinpoint and resolve integration challenges:
Learn more about efficient logging practices here.
As eSignature technology continues to evolve, several trends are shaping the future of eSignature API integration, including:
AI-powered eSignatures offer numerous benefits, including:
This article is a part of a series of articles covering the Personio API in depth, and covers the specific use case of using the Personio API to Get employee details from Peronio API.
You can find all the other use cases we have covered for the Personio API along with a comprehensive deep dive on its various aspects like authentication, rate limits etc here.
To retrieve employee details such as first name, last name, and date of joining from the Personio API, you can utilize the listEmployees endpoint. Below is a step-by-step guide with Python code snippets to achieve this.
Ensure you have the necessary libraries installed:
pip install requestsSet your API credentials for authentication:
api_url = "https://api.personio.de/v1/company/employees"
headers = {
"X-Personio-Partner-ID": "your_partner_id",
"X-Personio-App-ID": "your_app_id",
"accept": "application/json"
}Send a GET request to the listEmployees endpoint to fetch the required details:
import requests
params = {
"attributes[]": ["first_name", "last_name", "hire_date"]
}
response = requests.get(api_url, headers=headers, params=params)
if response.status_code == 200:
employees = response.json().get("data", [])
for employee in employees:
first_name = employee["attributes"].get("first_name")
last_name = employee["attributes"].get("last_name")
hire_date = employee["attributes"].get("hire_date")
print(f"First Name: {first_name}, Last Name: {last_name}, Date of Joining: {hire_date}")
else:
print(f"Failed to retrieve data: {response.status_code}")Process the response to extract and display the employee details:
if response.status_code == 200:
employees = response.json().get("data", [])
for employee in employees:
first_name = employee["attributes"].get("first_name")
last_name = employee["attributes"].get("last_name")
hire_date = employee["attributes"].get("hire_date")
print(f"First Name: {first_name}, Last Name: {last_name}, Date of Joining: {hire_date}")
else:
print(f"Failed to retrieve data: {response.status_code}")For quick and seamless access to Personio API, Knit API offers a convenient solution. By integrating with Knit just once, you can streamline the entire process. Knit takes care of all the authentication, authorization, and ongoing integration maintenance, this approach not only saves time but also ensures a smooth and reliable connection to your Personio API.
This article is a part of a series of articles covering the Sage Recruitment API in depth, and covers the specific use case of using the Sage Recruitment API to Get job applications from Sage Recruitment API.
You can find all the other use cases we have covered for the Sage Recruitment API along with a comprehensive deep dive on its various aspects like authentication, rate limits etc here.
To retrieve job applications from the Sage Recruitment API, you can utilize the listApplicants and applicantDetails endpoints. This guide provides a step-by-step approach to fetch the first name, last name, and email of each candidate who has applied to a specific job.
First, use the listApplicants endpoint to get a list of applicants for a specific job position.
import requests
# Define the endpoint and parameters
position_id = 123 # Replace with your specific job position ID
url = f"https://subdomain.sage.hr/api/recruitment/positions/{position_id}/applicants"
headers = {
"X-Auth-Token": "your_auth_token" # Replace with your actual auth token
}
# Make the GET request
response = requests.get(url, headers=headers)
applicants = response.json().get('data', [])
# Extract applicant IDs
applicant_ids = [applicant['id'] for applicant in applicants]
Next, use the applicantDetails endpoint to fetch detailed information for each applicant.
applicant_details = []
for applicant_id in applicant_ids:
url = f"https://subdomain.sage.hr/api/recruitment/applicants/{applicant_id}"
response = requests.get(url, headers=headers)
data = response.json().get('data', {})
applicant_details.append({
"first_name": data.get("first_name"),
"last_name": data.get("last_name"),
"email": data.get("email")
})
# Print the applicant details
for detail in applicant_details:
print(detail)
The output will be a list of dictionaries containing the first name, last name, and email of each applicant.
[
{"first_name": "Jon", "last_name": "Vondrak", "email": "jon.vondrak@example.com"},
{"first_name": "Samantha", "last_name": "Cross", "email": "sam.cross@example.com"}
]
For quick and seamless access to Sage Recruitment API, Knit API offers a convenient solution. By integrating with Knit just once, you can streamline the entire process. Knit takes care of all the authentication, authorization, and ongoing integration maintenance, this approach not only saves time but also ensures a smooth and reliable connection to your Sage Recruitment API.
