

Developers
-
Jun 20, 2026
HubSpot API: Authentication, Endpoints & Rate Limits
Read more

Non sed sit aliquet iaculis turpis eget sed netus suspendisse ac vel dolor vitae et cursus nibh rhoncus et mauris nibh.

Note: This is a part of our API Security series where we solve common developer queries in detail with how-to guides, common examples, code snippets and a ready to use security checklist. Feel free to check other articles on topics such as authentication methods, rate limiting, API monitoring and more.
Using third-party APIs - unified API providers, workflow automation tools, and integration platforms - is standard practice for B2B SaaS products. But every third-party API you integrate becomes part of your security perimeter. A provider's breach can be your breach. Their compliance failures can be your audit findings.
This guide covers the specific security criteria to evaluate before integrating any third-party API provider, the questions to ask, and the risk mitigation practices to implement once you do.
Before walking through each criterion in detail, here is the full checklist for quick reference. Use this when evaluating any new API provider.
Before integrating a third-party API into your system; you should ensure they're trustworthy and won't compromise your security. Here’s what you need to ensure:
Start with publicly available information. Search for the provider's name alongside "security breach", "data incident", or "CVE". Review their security page, trust centre, or compliance documentation. Check whether they have disclosed past incidents and, if so, how they handled them — the quality of incident response matters as much as the absence of incidents.
Specific things to look for:
/security page with verifiable details (not just marketing language)Note: Knit is one of the only unified API in the market today that does not store a copy of your end user’s data thus ensuring the maximum security while fetching and syncing data. Learn more
A provider with serious security practices documents them thoroughly. Look for:
Red flags: vague claims like "we use industry-standard encryption" without specifics, or security documentation that has not been updated in over a year.
Do not wait until after integration to assess security. Before going live:
Compliance certifications are evidence of third-party audited security controls. The certifications that matter for B2B SaaS integrations:
Ask for the actual certificates, not just a checkbox on a webpage. Certificates include issuance dates and scope - both matter.
Weak authentication in a third-party API is a direct attack surface. Evaluate:
Verify both channels of encryption:
Rate limiting protects both you and the provider from abuse and denial-of-service conditions. Ask:
If a provider has no rate limiting at all, that is a reliability and security risk — it means a bug in your integration code could spike your spend and potentially affect other customers on shared infrastructure.
A security incident with your provider is a matter of when, not if. Before integrating:

Even after a thorough evaluation, implement these controls on your side:
API gateway as intermediary: Route all third-party API calls through an internal API gateway or proxy. This lets you add request logging, rate limiting, and authentication enforcement that supplements the provider's own controls.
Credential management: Store API keys in a secrets manager (HashiCorp Vault, AWS Secrets Manager, GCP Secret Manager) — never in code or environment variables in plaintext. Implement automated rotation wherever the provider supports it.
Data validation on ingress: Validate and sanitize all data received from third-party APIs before processing it. Do not assume that data from a trusted provider is free of injection payloads or malformed structures.
Continuous monitoring: Log all outbound API calls to third-party providers — endpoint, request size, response code, response time. Alert on anomalous patterns: unexpected data volumes, unusual error rates, calls to endpoints your integration does not normally use.
Dependency and supply chain monitoring: Use software composition analysis (SCA) tools to track the provider's client SDK if you use one. Known vulnerabilities in third-party SDKs (CVEs) can become your vulnerabilities if you do not update.
Fallback and graceful degradation: Plan for provider outages. Implement circuit breakers and fallback logic so that a third-party API failure degrades gracefully rather than propagating as an error through your product.
Regular access reviews: Audit which API keys are active quarterly. Revoke any key that is no longer in use.
If you are evaluating Knit as a unified API provider, here is the relevant security posture:
Pass-through architecture: Knit does not store or copy your end users' data. When your application calls Knit to fetch employee records, CRM contacts, or financial data, the request flows through Knit to the source system and the response flows directly back. No data is persisted in Knit's infrastructure between API calls.
Encryption: All data in transit is encrypted with TLS 1.3. Data at rest uses AES-256. PII fields receive additional app-level encryption.
Certifications: Knit is SOC2 Type II certified, GDPR compliant (with a Data Processing Agreement available), and ISO27001 certified.
Access scoping: Knit MCP Servers and API credentials can be scoped to specific apps and specific tools — your integration only accesses what you explicitly configure.
If you are looking for a unified API provider that takes API and data security seriously, you can try Knit. It doesn’t store any of your user data and uses the latest tools to stay on top of any potential issues while complying with security standards such as SOC2, GDPR, and ISO27001.
Get your API keys or talk to our experts to discuss your customization needs
What are the most important certifications to require from a third-party API provider?
Knit holds SOC2 Type II, GDPR (Article 28), and ISO27001 certifications — the three most commonly required by enterprise buyers for B2B SaaS integrations. For US customers, SOC2 Type II is the baseline. For EU data processing, a GDPR-compliant DPA is required. For international enterprise deals, ISO27001 is often expected. Always verify Type II for SOC2 — Type I only verifies controls exist at a point in time, not that they work continuously. Ask for the actual certificate with issuance date, not a checkbox.
What is the OWASP API Security Top 10 and why does it matter for evaluating providers?
The OWASP API Security Top 10 is the industry-standard framework for API security risks, maintained by the Open Web Application Security Project and updated in 2023. The top risks include Broken Object Level Authorization (BOLA), Broken Authentication, Broken Object Property Level Authorization, Unrestricted Resource Consumption, and Broken Function Level Authorization. When evaluating a provider, asking whether their security practices address the OWASP Top 10 is a fast way to assess maturity — providers with serious security programs will know the framework and can explain their controls.
How do I check if a third-party API is using strong encryption?
Check for HTTPS enforcement on all endpoints (HTTP should redirect to HTTPS, not just work alongside it). Ask explicitly which TLS version is used — TLS 1.3 is the current standard; TLS 1.0 and 1.1 have known vulnerabilities and should be disabled. For data at rest, AES-256 is the current standard. Ask what is stored and for how long — providers that log API request and response payloads indefinitely have a larger encryption surface area than those that do not store payload data.
What should I look for in a provider's incident response plan?
Key elements: a documented notification timeline (GDPR requires 72 hours for EU data breaches; many enterprise contracts require 24–48 hours), a named security contact or security@domain.com address, a responsible disclosure program for external researchers, and a record of how past incidents were handled. Ask whether the provider has experienced a breach — and if so, how they notified customers. The quality of disclosure often matters more than the incident itself.
Should I require penetration testing results from my API provider?
For any integration that handles personal data, financial data, or sensitive business records, yes. Ask when the last third-party penetration test was conducted and by which firm. Annual pen tests by an accredited third party are the minimum bar for enterprise-grade providers. Some providers publish pen test executive summaries or will share them under NDA. If a provider cannot confirm they have had a third-party pen test in the last 12 months, treat that as a significant risk signal.
What are the three pillars of API security?
The three pillars of API security are governance, testing, and continuous validation. Governance covers defining security policies, access controls, and compliance requirements. Testing covers penetration testing, vulnerability assessments, and running API calls against the OWASP Top 10 attack patterns. Continuous validation covers runtime monitoring, anomaly detection, and alerting on unexpected API behavior in production. When evaluating a third-party provider, you are assessing all three pillars — not just whether they have certifications, but whether they test continuously and have operational controls in place.
What is the difference between SOC2 Type I and SOC2 Type II?
SOC2 Type I is a point-in-time assessment: auditors verify that the right security controls exist on a specific date. SOC2 Type II is an audit over a period (typically 6–12 months): auditors verify that the controls are operating effectively over time. Type II is substantially stronger evidence. When a provider says "we're SOC2 compliant," always ask which type. Most enterprise procurement checklists and enterprise contracts require Type II. Ask for the certificate, which shows the audit period covered.
How does Knit's pass-through architecture reduce third-party API security risk?
Knit uses a pass-through architecture — your end users' data is not stored or copied within Knit's infrastructure. When your application calls Knit to fetch an employee record or CRM contact, the data flows from the source system through Knit directly to your application and is not persisted between calls. This significantly reduces the data breach exposure surface compared to providers that store normalized copies of your customers' data. Knit is SOC2 Type II certified, GDPR compliant with a Data Processing Agreement, and ISO27001 certified. All data in transit uses TLS 1.3; data at rest uses AES-256.

Note: This is a part of our series on API Pagination where we solve common developer queries in detail with common examples and code snippets. Please read the full guide here where we discuss page size, error handling, pagination stability, caching strategies and more.
Page size — the number of records returned per API request - is one of the most consequential configuration decisions in a paginated API. Too small, and consumers make hundreds of unnecessary requests to retrieve a full dataset. Too large, and you risk timeout errors, memory pressure on your server, and slow response times that break client-side rendering.
There is no universal right answer, but there are clear frameworks for finding the right answer for your specific case.
In a paginated API, page size (also called limit, per_page, or size depending on the API) controls how many records are returned per request. The consumer increments a page or cursor to retrieve subsequent batches.
GET /employees?page=1&per_page=50
GET /employees?page=2&per_page=50
Your job as the API designer is to pick a sensible default, enforce a safe maximum, and let consumers override the default within that ceiling.
The size and structure of individual records is the first variable to nail down.
Small, flat records (IDs, names, status fields — 1–5 KB each): you can safely return 100–200 per page without straining response payload sizes.
Typical business records (employee profiles, CRM contacts, support tickets — 5–20 KB each, with some nesting): 25–100 per page is the practical range for most APIs.
Complex or deeply nested records (job applications with embedded assessments, financial transactions with line items — 20–50+ KB each): keep page size at 10–25 to avoid response payloads exceeding 1–2 MB.
Media metadata or documents (large embedded blobs, rich-text fields): 5–20 per page, and consider whether the heavy fields should be excluded from list endpoints entirely and fetched only on individual record calls.
A fast check: multiply your average record size by your intended page size. If the math produces a payload above 2 MB, reduce the page size.
Network conditions vary significantly across your consumer base:
Larger pages put more load on your database and API server per request. Key considerations:
Database query cost: a LIMIT 500 query scans and returns 10x more rows than LIMIT 50. For indexed queries on normalized tables this is often acceptable; for complex joins or aggregations, the cost multiplies fast.
Memory allocation: each in-flight large-page request holds the full result set in memory until serialization completes. Under concurrent load, this can spike memory usage substantially.
Timeout risk: if a consumer requests a very large page on a slow query, the request may time out partway through. Set your max page size conservatively and enforce it server-side - do not trust the consumer to be reasonable.
Test at realistic data volumes, not dev-environment datasets with 500 rows. A query that runs in 50ms against 500 rows may take 4 seconds against 5 million.
Always allow consumers to specify page size. A fixed page size optimized for browser pagination is wrong for a batch sync job, and vice versa. Expose a parameter:
GET /contacts?page=2&per_page=100Enforce a ceiling. Even with consumer control, set a maximum the server will honor. A request for per_page=10000 should either be rejected with a 400 or silently capped at your maximum.
Return pagination metadata. Consumers should not have to guess whether there are more pages:
{
  "data": [ ... ],
  "pagination": {
    "page": 2,
    "per_page": 50,
    "total_records": 1247,
    "total_pages": 25,
    "next_page": 3,
    "next_cursor": "eyJpZCI6MTAwfQ"
  }
}
total_records and total_pages let consumers pre-allocate storage and report progress. next_cursor supports cursor-based consumers even alongside page-based navigation.
Based on common API design patterns and real-world benchmarks:
How major APIs set page size in practice:
The range across real-world APIs is wide. Your defaults should reflect your specific query patterns, not what another API does.
Don't pick a page size based on intuition alone. Before shipping:
A common finding: developers set a conservative default of 25 and discover their largest consumer is using ?per_page=25& in a loop making 400 requests to sync 10,000 records. A default of 200 with a max of 1000 would have served them better.
If you are integrating with third-party APIs — HRIS platforms, CRMs, ATS systems, accounting software — you are on the other side of the equation. You do not control the page size. You adapt to whatever the upstream API enforces.
The problem: every platform is different.
page, offset, cursor, pageToken, next)When you are building integrations across multiple platforms, you end up maintaining separate pagination logic for each - correctly handling each platform's parameters, response format, and edge cases (missing total counts, inconsistent last-page detection, cursor invalidation).
Knit's unified API abstracts this. When your application calls Knit to fetch employee data, Knit handles pagination internally against whatever HRIS platform the customer has connected — Workday, BambooHR, Darwinbox, ADP, HiBob, and 150+ others. Your code makes a single normalized request; Knit handles per-platform pagination and returns a complete, consistent dataset.
What is a good default page size for a REST API?
Knit's unified API uses 25–100 records per page as a default for most business data endpoints — a range that works well for typical employee, contact, or ticket records. For your own API, 25–50 is a safe starting default for business records: small enough to keep response times under 500ms in most configurations, large enough to be useful for consumers who need moderate data volumes. Adjust up or down based on your actual record sizes and database query performance at those sizes.
What is the difference between limit/offset and cursor-based pagination?
Limit/offset pagination uses numeric page and size parameters (?page=2&per_page=50) and is easy to implement and understand. Its weakness: if records are added or deleted between requests, the offset shifts and consumers may see duplicate or skipped records. Cursor-based pagination returns an opaque token pointing to the position after the last returned record; the next request passes the token instead of a page number. Cursors are stable under inserts and deletes and are the standard choice for real-time feeds or frequently updated datasets. Knit uses cursor-based pagination internally when connecting to platforms that support it, falling back to offset where cursors are unavailable.
Should I let API consumers set their own page size?
Yes — always allow consumers to specify a page size via a parameter. Different consumers have legitimately different needs: a batch sync job benefits from large pages (200–500), while a UI component loading records for display benefits from smaller pages (10–25). Enforcing a fixed page size that fits your average case will be wrong for your edge cases. Set a maximum ceiling the server enforces, and document both the default and the maximum clearly.
What happens if I set my API page size too large?
Large page sizes increase response payload size, server memory allocation per request, and database query execution time. Under concurrent load, multiple simultaneous large-page requests can spike memory usage and trigger timeout errors. Consumers who receive very large responses may hit client-side memory limits or parsing timeouts, especially in mobile environments. If your API has no max ceiling, a single malicious or misconfigured consumer can send ?per_page=100000 and effectively run a denial-of-service attack against your database. Always enforce a server-side maximum.
How do I paginate through all records in a REST API?
The standard pattern: start at page 1, request your target page size, and loop until the response contains fewer records than the page size (or a next cursor/link is absent). In Python:
all_records = []
page = 1
per_page = 100

while True:
    response = requests.get(
        "https://api.example.com/employees",
        params={"page": page, "per_page": per_page},
        headers={"Authorization": f"Bearer {token}"}
    )
    batch = response.json().get("data", [])
    all_records.extend(batch)

    if len(batch) < per_page:
        break  # Last page reached
    page += 1
When integrating with multiple third-party platforms, Knit handles this pagination loop for you — your application calls a single Knit endpoint and receives the full, normalized dataset without implementing per-platform pagination logic.
What is cursor-based pagination and when should I use it?
Cursor-based pagination replaces the page number with a pointer (cursor or token) to the position after the last returned record. Instead of ?page=3&per_page=50, the consumer sends ?cursor=eyJpZCI6MTUwfQ&per_page=50. The server returns the next batch starting after that position. Use cursor-based pagination when your dataset is updated frequently (new records inserted, existing records deleted) — offset-based pagination is unstable under these conditions and will produce duplicate or missed records between page requests. For static or infrequently updated datasets, offset is simpler and perfectly adequate.
How do major APIs like GitHub and Stripe set their page sizes?
GitHub's REST API defaults to 30 records per page with a maximum of 100. Stripe defaults to 10 with a maximum of 100. Zendesk fixes page size at 100 with no consumer override. Salesforce allows up to 2000 records per query — tuned for bulk data access rather than interactive pagination. HubSpot caps at 100 per endpoint. The wide variance reflects each platform's data model, typical use case, and database architecture. When you integrate with multiple of these APIs (as most B2B products do), you need pagination logic customized for each. Knit normalizes this across 150+ platforms so your integration code handles none of it directly.
How does Knit handle pagination when fetching data from third-party HRIS or CRM platforms?
Knit handles all pagination internally against the upstream SaaS platform — including per-platform page size limits, cursor management, offset handling, and last-page detection. When your application calls Knit's unified API to fetch employee records from Workday, BambooHR, or any of 150+ connected platforms, Knit iterates through all pages of the upstream API response and returns the complete, normalized dataset. Your integration code does not need to implement or maintain platform-specific pagination logic.
If your application integrates with HRIS, CRM, ATS, or accounting platforms, Knit handles pagination, authentication, rate limiting, and data normalization across 150+ business apps — so you do not manage any of it per-platform.
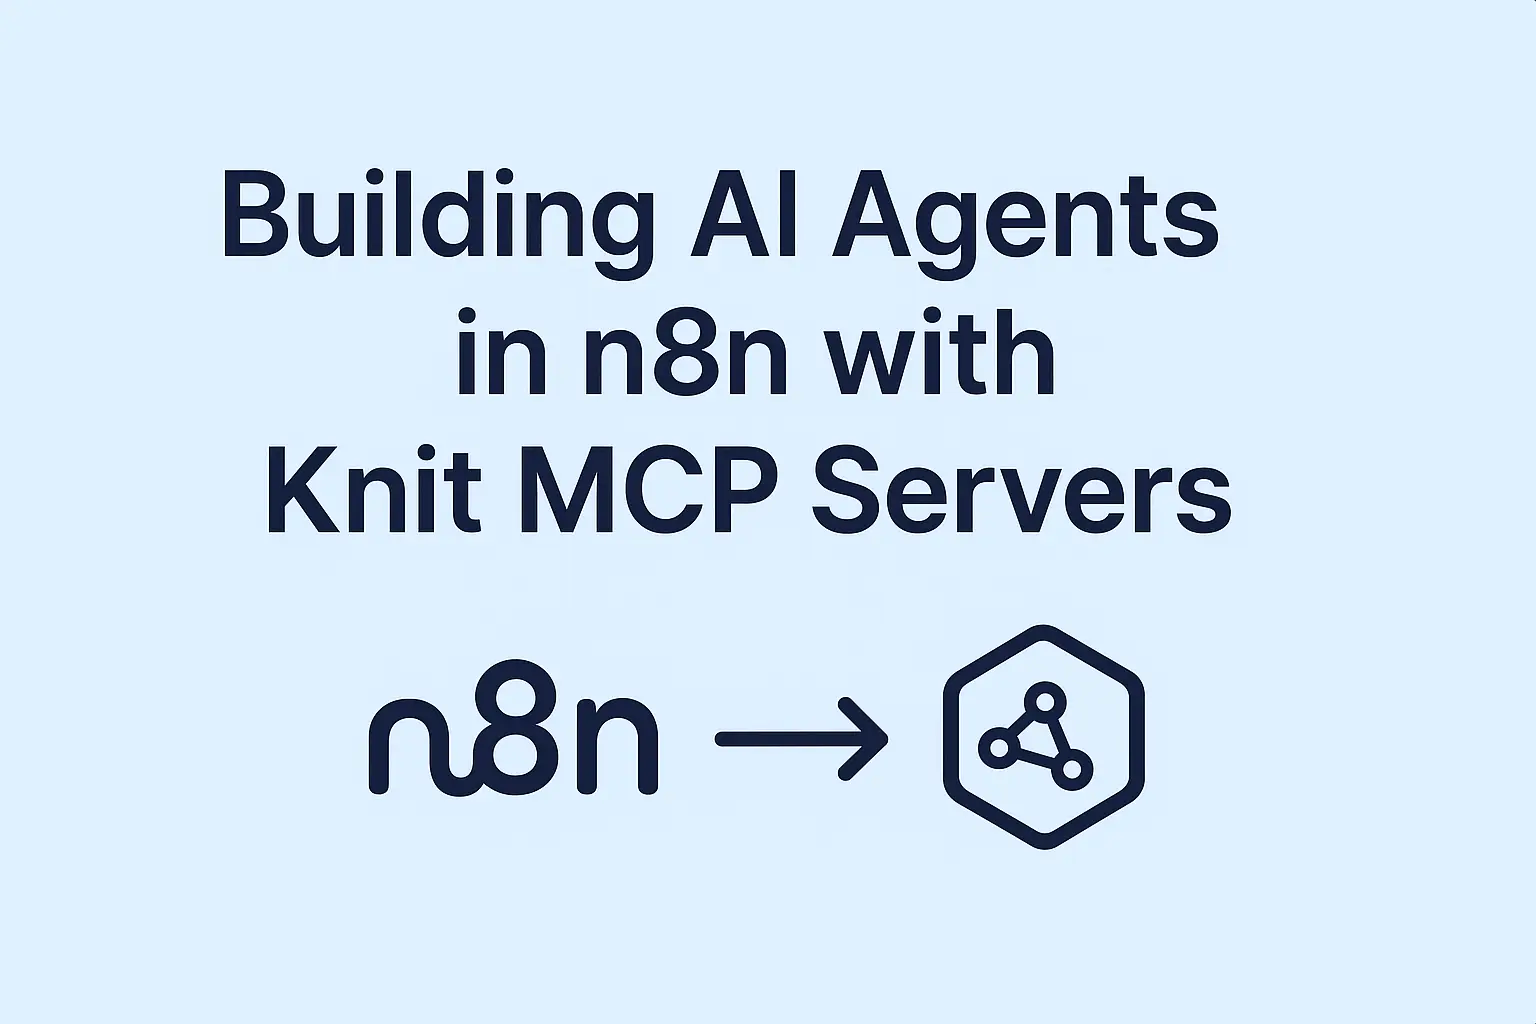
AI agents are only as useful as the business systems they can touch. An agent that can reason about your data but cannot update a CRM record, create a support ticket, or sync an employee record has limited real-world value.
Combining n8n's native MCP Client nodes with Knit MCP Servers solves this directly. Your agents get secure, pre-authenticated access to 150+ business apps — Salesforce, HubSpot, BambooHR, QuickBooks, Zendesk — ithout you managing OAuth flows, API versioning, or rate limit handling for each one.
This tutorial covers everything you need to build functional AI agents that integrate with your existing business stack:
By following this guide, you'll build an agent that can search your CRM, update contact records, and automatically post summaries to Slack.
The Model Context Protocol (MCP) creates a standardized way for AI models to interact with external tools and data sources. It's like having a universal adapter that connects any AI model to any business application.
n8n'sbuilt-in AI Agent node includes native MCP support through two node types, availablefrom the node panel without any additional packages:
MCP Client Tool Node: Connects your AI Agent to external MCP servers, enabling actions like "search contacts in Salesforce" or "create ticket in Zendesk"
MCP Server Trigger Node: Exposes your n8n workflows as MCP endpoints that other systems can call
This architecture means your AI agents can perform real business actions instead of just generating responses.
n8n also works in reverse: the MCP Server Trigger node lets you expose any n8n workflow asan MCP endpoint that other AI clients can call — turning your automations into callabletools for Claude Desktop, Cursor, or any other MCP-compatible host.
This guide covers the most common use case: using n8n as the MCP client, with Knit as the MCP server for your business app integrations.
Building your own MCP server sounds appealing until you face the reality:
Knit MCP Servers eliminate this complexity:
✅ Ready-to-use integrations for 150+ business applications
✅ Bidirectional operations – read data and write updates
✅ Enterprise security with compliance certifications
✅ Instant deployment using server URLs and API keys
✅ Automatic updates when SaaS providers change their APIs
Log into your Knit account and navigate to the MCP Hub. This centralizes all your MCP server configurations.
Click "Create New MCP Server" and select your apps :
Choose the exact capabilities your agent needs:
Click "Deploy" to activate your server. Copy the generated Server URL - – you'll need this for the n8n integration.
Create a new n8n workflow and add these essential nodes:
In your MCP Client Tool node:
Your system prompt determines how the agent behaves. Here's a production example:
You are a lead qualification assistant for our sales team.

When given a company domain:
1. Search our CRM for existing contacts at that company
2. If no contacts exist, create a new contact with available information
3. Create a follow-up task assigned to the appropriate sales rep
4. Post a summary to our #sales-leads Slack channel

Always search before creating to avoid duplicates. Include confidence scores in your Slack summaries.
Run the workflow with sample data to verify:
Trigger: New form submission or website visitActions:
Trigger: New support ticket createdActions:
Trigger: New employee added to HRISActions:
Trigger: Invoice status updates
Actions:
Start with 3-5 essential tools rather than overwhelming your agent with every possible action. You can always expand capabilities later.
Structure your prompts to accomplish tasks in fewer API calls:
Add fallback logic for common failure scenarios:
Store all API keys and tokens in n8n's secure credential system, never in workflow prompts or comments.
Limit MCP server tools to only what each agent actually needs:
Enable comprehensive logging to track:
Problem: Agent errors out even when MCP server tool call is succesful
Solutions:
Error: 401/403 responses from MCP server
Solutions:
Problem: The AI Agent connects but reports no tools available, or shows an error discovering tools from the MCP server.
Solutions
- Verify the server URL ends with the correct path - Knit server URLs follow the pattern: https://mcp.getknit.dev/server/{your-server-id}
- Confirm theAPI key is in the Authorization header as "Bearer {your-api-key}" -not as a query parameter or basic authcredential
- Check thatthe MCP server is deployed (green status) in your Knit MCP Hub
- If tools recently changed, refresh the MCP Client Tool node's tool list by re-saving the node configuration
Use n8n's MCP Server Trigger node to expose your own workflows as MCP tools. This works well for:
However, for standard SaaS integrations, Knit MCP Servers provide better reliability and maintenance.
Connect multiple MCP servers to single agents by adding multiple MCP Client Tool nodes. This enables complex workflows spanning different business systems.
A: Knit MCP Servers provide the simplest setup path for n8n. Deploy a server from mcphub.getknit.dev, copy the generated Server URL and API key. In your n8n workflow, add an MCP Client Tool node to your AI Agent, paste the Server URL as the endpoint, and add the API key as a Bearer token in the Authorization header. n8n automatically discovers all available tools from the Knit server — no manual toolconfiguration required. The full setup takes under five minutes.
A: Yes —n8n's MCP Server Trigger node lets you expose any n8n workflow as an MCP endpoint that AI clients like Claude Desktop or Cursor can call. Knit MCP Servers complement this: if your n8n-based MCP server needs to read or write data from Salesforce, BambooHR, QuickBooks, or 150+ other business apps, Knit handles those API connections so you do not need to build individual integrations into your n8n workflow .Use n8n for business logic orchestration, Knit for data access.
A: Add an MCP Client Tool node as a sub-node attached to your AI Agent node in n8n. Knit MCP Servers expose named tools such as "search_contacts", "create_ticket", or "get_employee_by_id" - the node discovers these automatically from the server URL. Once connected, the AI Agent decides which tool to call based on the task in its system prompt. You do not wire tools manually; the agent handles tool selection and sequencing based on the prompt instructions you write.
A: n8n supports MCP in two directions: as a client (using the MCP Client Tool node to connect to servers like Knit) and as a server (using the MCP Server Trigger node to expose n8n workflows as callable tools). Knit MCP Servers give n8n's client mode instant access to 150+ enterprise apps — HRIS, CRM, ATS, and accounting platforms — without building individual API integrations. For the reverse direction, n8n's own MCP Server capability is natively built into recent n8n versions.
A: Yes. The MCP Server Trigger node in n8n lets you define any workflow as a tool that MCP-compatible AI clients can discover and call. Knit is complementary: use n8n to expose your custom business logic as MCP tools, and pair it with Knit MCP Servers when those tools need to read or write data from third-party SaaS apps. This hybrid pattern — n8n as orchestrator, Knit as data access layer — is the most common production architecture for enterprise AI agents.
A: Yes —n8n's MCP Client Tool node connects to any remote MCP server via HTTP+SSE transport.Knit MCP Servers are fully remote, cloud-hosted endpoints. You connect by pastingthe server URL and adding your API key as a Bearer token in the node settings. No local server installation or ngrok tunneling required — Knit handles the hosting,scaling, and uptime of the server infrastructure.
A: No codingis required for standard MCP workflows in n8n. Knit MCP Servers provide pre-configured tool definitions that the MCP Client Tool node discovers automatically— you do not write tool schemas or API handlers. The entire setup uses n8n'svisual canvas: drag-and-drop nodes, paste the Knit server URL, and write plain-English system prompts for the AI Agent. Custom business logic can be added visuallyusing n8n's other node types without any JavaScript or Python.
A: Knit MCP Server pricing scales by the number of servers and integrations — see getknit.dev/pricing for current rates. n8n offers a free self-hosted tier for developmentuse, with cloud plans starting around $20-50/month depending on workflowvolume and team size. For most B2B automation use cases, the combined cost issubstantially lower than the engineering time required to build and maintain direct APIintegrations to each platform individually.
The combination of n8n and Knit MCP Servers transforms AI from a conversation tool into a business automation platform. Your agents can now:
Instead of spending months building custom API integrations, you can:
Ready to build agents that actually work? Start with Knit MCP Servers and see what's possible when AI meets your business applications.
The HubSpot API is the REST interface for reading and writing CRM data - contacts, companies, deals, tickets, and their associations - under /crm/v3/ (and /crm/v4/ for associations). It authenticates with a bearer token (a Service Key, a private app access token, or an OAuth access token), returns JSON, and is rate-limited per second and per day based on your HubSpot subscription.
This page covers how authentication works, the endpoints and objects you'll use most, rate limits and pagination, and where Knit's unified API and MCP server fit if you're connecting HubSpot alongside other CRMs.
HubSpot retired its legacy static API keys in 2022. Today, API calls are authenticated with a bearer token from one of three sources: a Service Key (account-level, data-only, in public beta since February 2026), a private app access token (supports webhooks and UI extensions), or an OAuth 2.0 access token from a project-based app (required for Marketplace or multi-account integrations). All three are sent the same way: Authorization: Bearer <token> (HubSpot Developers, Account Service Keys).
For the full walkthrough — creating a Service Key or private app, choosing between them, and a working curl example - see How to Get a HubSpot API Key.
The full, current set of endpoints and required scopes is in HubSpot's CRM API documentation - check each endpoint's page before assuming a token has access.
POST /crm/v3/objects/contacts with a properties object containing fields like email, firstname, lastname.PATCH /crm/v3/objects/deals/{dealId} with the properties to change, such as dealstage or amount.POST /crm/v3/objects/{objectType}/search with filterGroups, sorts, and properties to return — the shared 5 requests/second Search API limit applies regardless of object type.PUT /crm/v4/objects/{objectType}/{objectId}/associations/{toObjectType}/{toObjectId} to link, for example, a contact to a company or deal.GET /crm/v3/properties/{objectType} to see which standard and custom properties exist before reading or writing them.HubSpot enforces both per-second (burst) and daily rate limits, scoped to your account and subscription tier, documented at HubSpot's API usage guidelines and limits:
Every response includes X-HubSpot-RateLimit-Max and X-HubSpot-RateLimit-Remaining (the burst limit and remaining requests for the current window, with the window length given in X-HubSpot-RateLimit-Interval-Milliseconds), plus - for non-OAuth credentials - X-HubSpot-RateLimit-Daily / X-HubSpot-RateLimit-Daily-Remaining. The older X-HubSpot-RateLimit-Secondly / X-HubSpot-RateLimit-Secondly-Remaining headers are still sent but are deprecated and no longer enforced - don't build new logic against them. Search API responses don't include any of these rate-limit headers. Exceeding a limit returns 429 with a JSON body containing errorType: "RATE_LIMIT" and a policyName of SECONDLY or DAILY telling you which limit you hit.
For pagination, list and search endpoints under /crm/v3/ and /crm/v4/ use cursor pagination: each response includes a paging.next.after value, which you pass back as the after query parameter to fetch the next page. Keep paging until paging.next is absent from the response.
Calling the HubSpot API directly works well for a single account: pick the right credential (Service Key, private app, or OAuth), track per-second and daily limits, and handle cursor pagination on list and search endpoints. It gets more involved once you're connecting HubSpot alongside other CRMs - each with its own auth model, object schema, and rate-limit shape.
Knit's unified CRM API normalizes HubSpot contacts, companies, deals, and tickets alongside connectors like Salesforce behind one schema, handles the auth setup described in the HubSpot API key guide, and manages rate-limit backoff for you. See Knit's HubSpot connector for what's available, or book a demo to see it against your own account. You can also sign up free and connect a sandbox HubSpot account.
Knit also runs a HubSpot MCP Server, which gives AI agents read/write access to HubSpot CRM objects - contacts, companies, deals, custom objects and fields - through the same unified layer, so an agent built against Knit's MCP doesn't need separate HubSpot-specific auth or endpoint logic.
Is the HubSpot API a REST API?
Yes - the HubSpot CRM API follows REST conventions (GET, POST, PATCH, DELETE on resource URLs, JSON request and response bodies) under /crm/v3/ for most objects and /crm/v4/ for associations. HubSpot also offers webhook subscriptions for real-time events, available to private apps and project-based apps but not Service Keys.
How do I authenticate to the HubSpot API?
Send a bearer token in the Authorization header: Authorization: Bearer <token>. The token can come from a Service Key (data-only, no webhooks), a private app (supports webhooks), or an OAuth 2.0 flow for multi-account integrations. See the HubSpot API key guide for how to create each.
How do I paginate through HubSpot CRM records?
List and search endpoints return a paging.next.after value when more results exist. Pass that value as the after query parameter on your next request, and repeat until paging.next is no longer present in the response. This applies to /crm/v3/objects/{objectType} and the /search endpoints alike.
What happens if I exceed HubSpot's API rate limits?
HubSpot returns 429 with errorType: "RATE_LIMIT" and a policyName of SECONDLY (burst) or DAILY. Burst limits range from roughly 100 to 190+ requests per 10 seconds depending on your subscription tier, with the Search API capped separately at 5 requests/second across all object types. Knit handles this backoff automatically across the HubSpot connections it manages.
HubSpot retired its old static "API Keys" back in November 2022, so if you're looking for one today, you actually want one of two things: a Service Key (Settings → Integrations → Service Keys, in public beta since February 2026) for data-only, system-to-system access, or a private app access token (Settings → Integrations → Private Apps) if your integration needs webhooks. Both are sent the same way — as Authorization: Bearer <token>.
The rest of this page covers how to create each, where the credential goes, a working code sample, and the errors you'll hit if scopes or rate limits are off.
crm.objects.contacts.read, crm.objects.deals.write) — both credential types follow least-privilege: you can only grant scopes you already have.powerbi-contacts-read or nightly-deals-sync, not "my key."Authorization: Bearer <your-service-key> (HubSpot Developer Blog, HubSpot Service Keys).Service Keys don't support webhooks, UI extensions, or app pages. If your integration needs to react to HubSpot events in real time, create a private app: go to Settings → Integrations → Private Apps, click Create a private app, name it, select the scopes it needs under the Scopes tab, then open the Auth tab and click Show token to reveal the access token (HubSpot Developers, Private Apps overview). Private app tokens are also sent as Authorization: Bearer <token> and work the same way on API calls - the difference is in what each credential type can do, not how it authenticates.
Both Service Keys and private app access tokens go in the Authorization header as a bearer token:
Authorization: Bearer <your-token>against HubSpot's API base, e.g. https://api.hubapi.com/crm/v3/objects/contacts.
Connector-specific gotcha: Service Keys are account-level, data-only credentials - they explicitly do not support webhook subscriptions. If you build an integration on a Service Key and later need it to respond to HubSpot events (a deal stage change, a new contact, etc.), the key itself won't support that; you'll need to either add a private app / project-based app alongside it for the webhook piece, or rebuild the integration on a project-based app from the start (HubSpot Developer Changelog, Service Keys enter public beta).
A few other things to know:
Service Keys and private apps are both single-account credentials. If you're distributing an integration that connects to other people's HubSpot accounts - a Marketplace app or a multi-tenant product - you need OAuth 2.0 via a project-based app built with the HubSpot CLI, not a Service Key or private app token (HubSpot Developer Blog, HubSpot Service Keys).
This calls /crm/v3/objects/contacts with a limit of 1 — a good smoke test that confirms your token and scopes work.
curl:
curl "https://api.hubapi.com/crm/v3/objects/contacts?limit=1" \
  -H "Authorization: Bearer $HUBSPOT_ACCESS_TOKEN"
Node.js:
const res = await fetch(
  "https://api.hubapi.com/crm/v3/objects/contacts?limit=1",
  {
    headers: {
      Authorization: `Bearer ${process.env.HUBSPOT_ACCESS_TOKEN}`,
    },
  }
);

console.log(await res.json());
Store HUBSPOT_ACCESS_TOKEN as an environment variable - never hard-code a Service Key or private app token in source control.
Why am I getting 401 INVALID_AUTHENTICATION?
The token is missing, malformed, or has been deleted/rotated on HubSpot's side. Confirm the Authorization header is exactly Bearer <token> (with the space after "Bearer"), and that you're using the current key - if you recently rotated a Service Key, update every integration that referenced the old one before its grace period ends.
Why am I getting 403 with a scopes-related message?
Your Service Key or private app doesn't have the scope the endpoint requires (e.g., calling a deals endpoint without crm.objects.deals.read). Add the missing scope from Settings → Integrations → Service Keys (or the private app's Scopes tab), save, and re-copy the token if prompted.
Why am I getting 429 with errorType: "RATE_LIMIT"?
You've exceeded either a per-second or daily limit. The response body's policyName field says which (SECONDLY or DAILY), and response headers X-HubSpot-RateLimit-Remaining (burst, scoped to the window in X-HubSpot-RateLimit-Interval-Milliseconds) and X-HubSpot-RateLimit-Daily-Remaining show what's left. The older X-HubSpot-RateLimit-Secondly-Remaining header is still present but deprecated and no longer enforced (HubSpot Developers, API usage guidelines and limits).
Choosing between Service Keys, private apps, and OAuth, then mapping scopes and watching per-second and daily limits works fine for one HubSpot account. It gets more involved once you're connecting HubSpot alongside other CRMs — each with its own auth model and object schema. Knit's unified CRM API handles HubSpot's auth and rate-limit backoff for you, and normalizes contacts, companies, and deals alongside connectors like Salesforce behind one schema. See the HubSpot API overview for what's available, or book a demo to see it against your own account. You can also sign up free and connect a sandbox HubSpot account.
Does HubSpot still have "API keys"?
Not in the old sense - HubSpot retired its legacy static API keys (the ones passed as a hapikey query parameter) in November 2022. If you see a tutorial referencing ?hapikey=..., it no longer works. Today, "API key" searches usually mean a Service Key or a private app access token, both sent as Authorization: Bearer <token>.
What's the difference between a Service Key and a private app access token?
A Service Key is a newer (2026), account-level credential built specifically for data-only, system-to-system integrations - it's simple to create in Settings and supports clean rotation, but doesn't support webhooks. A private app access token is the older mechanism, also a Bearer token, but tied to a private app that can use webhooks and UI extensions. If you only need to read/write CRM data, HubSpot recommends Service Keys; if you need webhooks, use a private app or project-based app.
How do I authenticate to the HubSpot API?
Send your Service Key or private app access token as Authorization: Bearer <token> on every request to api.hubapi.com. There's no separate signing step or token exchange for either credential type - the token you copy from Settings is the token you use.
What scopes do I need for my HubSpot integration?
It depends on the objects you're working with - for example, crm.objects.contacts.read and .write for contacts, crm.objects.deals.read/.write for deals, and similar per-object scopes for companies and tickets. Both Service Keys and private apps let you select scopes individually at creation and add more later; grant only what your integration actually uses.
What happens if I exceed HubSpot's API rate limits?
HubSpot returns 429 with a JSON body containing errorType: "RATE_LIMIT" and a policyName of either SECONDLY (burst limit) or DAILY (daily cap). Response headers X-HubSpot-RateLimit-Remaining and X-HubSpot-RateLimit-Daily-Remaining let you check usage before hitting the limit (the older X-HubSpot-RateLimit-Secondly-Remaining header still appears but is deprecated). Knit handles this backoff automatically across the HubSpot connections it manages.
The Zendesk Ticketing API (part of Zendesk's Support API, under /api/v2/) is the REST interface for managing tickets, users, organizations, and views in a Zendesk account. It authenticates with an API token (Basic auth) or an OAuth access token (Bearer), returns JSON, and is rate-limited per minute based on your Zendesk plan.
This page covers how authentication works, the endpoints and objects you'll use most, rate limits and pagination, and where Knit's unified API fits if you're connecting Zendesk alongside other ticketing tools.
Zendesk supports two authentication methods: API tokens, sent as Basic auth using {email}/token:{api_token}, and OAuth access tokens, sent as Authorization: Bearer <access_token>. API token access must be explicitly enabled by an admin before tokens work, and OAuth is required if you're distributing an integration to multiple Zendesk accounts (Zendesk Developer Docs, Security and authentication).
For the full walkthrough - enabling token access, generating a token, and a working curl example - see How to Get a Zendesk API Token.
POST /api/v2/tickets.json with a ticket object containing subject, comment.body, and a requester (email or ID).PUT /api/v2/tickets/{id}.json with the fields to change, such as status or priority - note the 30-updates-per-10-minutes-per-agent limit on this endpoint.GET /api/v2/search.json?query=type:ticket status:open for filtered results, or GET /api/v2/tickets.json for all tickets with pagination.GET /api/v2/tickets/{id}/comments.json returns the public and internal comments on a ticket in order./api/v2/incremental/tickets/cursor.json, etc.) to pull everything changed since a given timestamp - the recommended approach for keeping an external system in sync.Zendesk's Support and Help Center API rate limits depend on your plan, documented at developer.zendesk.com/api-reference/introduction/rate-limits:
Every response includes X-Rate-Limit and X-Rate-Limit-Remaining headers (Ticketing endpoints also add ratelimit-limit, ratelimit-remaining, and ratelimit-reset). Exceeding the limit returns 429 Too Many Requests with a Retry-After header. Some endpoints carry their own tighter limits regardless of plan - for example, the Update Ticket endpoint allows only 30 updates to the same ticket by the same agent within 10 minutes, and incremental export endpoints are capped at 10 requests/minute (30 with the High Volume add-on).
For pagination, Zendesk recommends cursor pagination: pass page[size] (max 100) and follow links.next until meta.has_more is false. The older offset pagination (page=N&per_page=...) is capped at the first 100 pages / 10,000 records - requests beyond that return 400 Bad Request (Zendesk Developer Docs, Pagination).
Calling the Zendesk API directly works well for a single account: enable token access, handle the Basic-auth encoding, and watch the per-minute and per-endpoint rate limits. It gets more involved once you're connecting Zendesk alongside other ticketing systems - each with its own auth scheme, object model, and pagination style.
Knit's unified Ticketing API normalizes Zendesk tickets, users, and comments alongside connectors like Freshdesk, Intercom, and Jira behind one schema, handles the token/OAuth setup described in the Zendesk API token guide, and manages rate-limit backoff for you. See Knit's Zendesk Ticketing connector for what's available, or book a demo to see it against your own account. You can also sign up free and connect a sandbox Zendesk account.
Is the Zendesk Ticketing API a REST API?
Yes - it follows REST conventions under /api/v2/, using GET, POST, PUT, and DELETE on resource URLs with JSON bodies. It's part of Zendesk's broader Support API, which also includes the Help Center API (separate rate limit) and Side Conversations API.
How do I authenticate to the Zendesk Ticketing API?
Use either an API token with Basic auth ({email}/token:{api_token}, base64-encoded) or an OAuth access token sent as Authorization: Bearer <token>. API token access must be turned on by an admin in Admin Center before tokens work. See the Zendesk API token guide for setup steps.
How do I sync all my Zendesk tickets into another system?
Use the incremental export endpoints (/api/v2/incremental/tickets/cursor.json and equivalents for users and organizations), which return everything changed since a given timestamp using cursor-based pagination — designed for bulk sync rather than one-off queries. These endpoints have their own tighter rate limit (10/minute, or 30/minute with the High Volume add-on). Knit's unified API exposes equivalent sync primitives across ticketing connectors without needing endpoint-specific incremental-export logic.
What happens if I exceed Zendesk's API rate limits?
Zendesk returns 429 Too Many Requests with a Retry-After header specifying how many seconds to wait. The X-Rate-Limit and X-Rate-Limit-Remaining headers on every response let you monitor usage before hitting the limit. Limits range from 200 to 2,500 requests/minute depending on your plan, and some endpoints (like ticket updates) have their own separate caps. Knit handles this backoff automatically across the Zendesk connections it manages.
To get a Zendesk API token, an admin first enables API access in Admin Center → Apps and integrations → APIs → API configuration (accept the terms, then turn on Allow API token access), then generates a token under APIs → API tokens → Add API token. Use the token with Basic auth: base64-encode {email_address}/token:{api_token} and send it in the Authorization header.
The rest of this page covers where the credential goes, a working code sample, and the errors you'll hit if token access isn't enabled or the format is wrong.
Administrator access to your Zendesk account's Admin Center - only admins can turn on API token access and generate tokens (source: Zendesk Help, Managing API token access to the Zendesk API).
A verified user (email address) on the account - API tokens are used alongside a verified user's email, not on their own.
A decision on whether an API token (simple, account-wide Basic auth) or an OAuth access token (scoped to an OAuth client, supports CORS) fits your integration (source: Zendesk Developer Docs, Security and authentication)
Zendesk API tokens use Basic authentication, combined with a verified user's email address. Build the credential string as:
{email_address}/token:{api_token}Base64-encode that string and send it in the Authorization header:
Authorization: Basic <base64-encoded {email}/token:{api_token}>With curl, you can skip the manual encoding by passing -u:
curl https://yoursubdomain.zendesk.com/api/v2/users/me.json \
-u jdoe@example.com/token:6wiIBWbGkBMo1mRDMuVwkw1EPsNkeUj95PIz2akv(Zendesk Developer Docs, Security and authentication)
Connector-specific gotcha: API token access is off by default at the account level. If you generate a token under APIs → API tokens before enabling Allow API token access in API configuration, every request authenticated with that token returns 401 Unauthorized - The token itself is valid, but the account isn't accepting token-based auth yet. If your brand-new token doesn't work, check the API configuration toggle first, not the token.
A few other things to know:
If you're distributing an integration to multiple Zendesk accounts, or want CORS-friendly browser requests and tokens scoped to a specific OAuth client, use an OAuth access token instead. Create an OAuth client in Admin Center, run the authorization flow, and send the resulting token as:
Authorization: Bearer <access_token>OAuth access tokens can be up to 184 characters and are scoped to the Zendesk instance whose OAuth client issued them (Zendesk Developer Docs, Security and authentication).
This calls /api/v2/users/me.json, which returns the authenticated user's profile — a good smoke test for a new token.
curl:
curl "https://$ZENDESK_SUBDOMAIN.zendesk.com/api/v2/users/me.json" \
  -u "$ZENDESK_EMAIL/token:$ZENDESK_API_TOKEN"
Node.js:
const credentials = Buffer.from(
  `${process.env.ZENDESK_EMAIL}/token:${process.env.ZENDESK_API_TOKEN}`
).toString("base64");

const res = await fetch(
  `https://${process.env.ZENDESK_SUBDOMAIN}.zendesk.com/api/v2/users/me.json`,
  {
    headers: {
      Authorization: `Basic ${credentials}`,
    },
  }
);

console.log(await res.json());
Store ZENDESK_SUBDOMAIN, ZENDESK_EMAIL, and ZENDESK_API_TOKEN as environment variables — never hard-code the token or commit it to source control.
Why am I getting 401 Unauthorized with a valid token?
The most common cause is that Allow API token access isn't enabled in Admin Center → Apps and integrations → APIs → API configuration. Enable it, save, and retry. Also double-check the credential format — it's {email}/token:{api_token}, including the literal /token, not just the email and token separated by a colon (Zendesk Help, Turning on and off API access).
Why am I getting 403 Forbidden?
The token is valid and account-wide, but the user whose email you paired it with doesn't have permission for that endpoint — for example, a non-admin agent calling an admin-only endpoint. Pair the token with a user (or admin) that has the right role for the resource you're calling.
Why am I getting 429 Too Many Requests?
You've exceeded your plan's API rate limit (200–2,500 requests per minute depending on plan, or lower for specific endpoints). The response includes a Retry-After header telling you how many seconds to wait, and X-Rate-Limit / X-Rate-Limit-Remaining headers show your limit and remaining quota for the current minute (Zendesk Developer Docs, Rate limits).
Enabling token access, generating a token, and getting the Basic auth encoding right works fine for one Zendesk account. It gets more involved once you're connecting Zendesk alongside other ticketing tools — each with its own auth scheme, object model, and rate-limit shape. Knit's unified Ticketing API normalizes Zendesk alongside connectors like Freshdesk and Intercom behind one schema, handles token storage, and manages rate-limit backoff for you. See the Zendesk Ticketing API overview for what's available, or book a demo to see it against your own account. You can also sign up free and connect a sandbox Zendesk account.
Where do I generate a Zendesk API token?
In Admin Center, go to Apps and integrations → APIs → API tokens and click Add API token. Before this works, an admin must first enable Allow API token access under APIs → API configuration. Copy the token immediately after creating it - Zendesk only shows the full value once.
Why does my Zendesk API request return 401 even though my token is correct?
Almost always because Allow API token access hasn't been turned on in API configuration, or because the Authorization header isn't formatted as {email}/token:{api_token} (base64-encoded for the header, or passed via -u in curl). Both the toggle and the format need to be correct.
Is a Zendesk API token tied to one user?
No. An API token is account-wide - it's an auto-generated password that can be combined with any verified user's email address. The permissions on a given request come from whichever user's email you paired with the token, not from the token itself. Because of this, Zendesk recommends treating tokens like shared admin passwords and deleting any you're not using.
Should I use an API token or OAuth for my Zendesk integration?
API tokens are simplest for a single account and internal tools. Use OAuth access tokens if you're building something distributed to multiple Zendesk accounts (Zendesk's developer terms require global OAuth tokens for that case), or if you need CORS-friendly browser requests and per-client scoping. Knit's Zendesk connector handles the OAuth flow for you if you connect via Knit.
What are Zendesk's API rate limits?
They depend on your plan: roughly 200 requests/minute on Team, 400 on Growth/Professional, 700 on Enterprise, and up to 2,500 on Enterprise Plus or with the High Volume API add-on. Some endpoints have their own tighter limits - for example, updating the same ticket is capped at 30 times per 10 minutes per agent. Knit manages this backoff automatically across the Zendesk connections it handles.
Salesforce doesn't issue a single "API key" - instead you create a Connected App in Setup, enable OAuth settings, and get a Consumer Key (client ID) and Consumer Secret (client secret). You exchange those for an OAuth 2.0 access token - using the Client Credentials flow for server-to-server integrations, or the Web Server (Authorization Code) flow for per-user access - and send that token as Authorization: Bearer <token> on REST API calls.
The rest of this page covers the setup steps, where the credential goes, a working code sample, and the errors you'll hit if something's misconfigured.
api)". If your integration needs long-lived access without re-prompting a user, also add "Perform requests at any time (refresh_token, offline_access)" (Salesforce Help, Enable OAuth Settings for API Integration).The Consumer Key and Consumer Secret aren't sent directly on API calls - they're exchanged for an OAuth access token at your org's token endpoint:
POST https://login.salesforce.com/services/oauth2/tokenFor the Client Credentials flow, send grant_type=client_credentials with your client_id (Consumer Key) and client_secret (Consumer Secret). The response includes an access_token and an instance_url. Use the token on subsequent calls:
Authorization: Bearer <access_token>against <instance_url>/services/data/v66.0/... (Salesforce Developers, Authorization Through Connected Apps and OAuth 2.0).
Connector-specific gotcha: the instance_url returned in the token response is specific to your org (e.g., https://yourcompany.my.salesforce.com) and can change — for example, after a sandbox refresh or org migration. Always use the instance_url from the most recent token response for your API calls rather than hardcoding a domain; a cached or assumed domain is a common source of IP_RESTRICTED or connection errors after a sandbox refresh.
A few other things to know:
INVALID_SESSION_ID.refresh_token and offline_access scopes, exchange the refresh token at the same /services/oauth2/token endpoint with grant_type=refresh_token to get a new access token without re-prompting the user.api covers REST, SOAP, Bulk, and Metadata API access for the Run As user's permission set — grant the Run As user only the object and field permissions the integration needs, since the scope itself doesn't restrict data access beyond that user's profile.If your integration needs to act on behalf of different Salesforce users (not a single Run As user), use the Web Server (Authorization Code) flow: direct the user to https://login.salesforce.com/services/oauth2/authorize?response_type=code&client_id=...&redirect_uri=..., then exchange the returned code at /services/oauth2/token with grant_type=authorization_code for an access token and refresh token (Salesforce Developers, Authorization Through Connected Apps and OAuth 2.0).
This uses the Client Credentials flow to get a token, then calls the REST API's limits endpoint — a good smoke test that doesn't depend on any specific object data.
curl:
# 1. Get an access token
curl -X POST https://login.salesforce.com/services/oauth2/token \
  -d "grant_type=client_credentials" \
  -d "client_id=$SF_CONSUMER_KEY" \
  -d "client_secret=$SF_CONSUMER_SECRET"

# Response includes "access_token" and "instance_url" — use both below

# 2. Call the REST API
curl "$SF_INSTANCE_URL/services/data/v66.0/limits" \
  -H "Authorization: Bearer $SF_ACCESS_TOKEN"
Node.js:
const tokenRes = await fetch("https://login.salesforce.com/services/oauth2/token", {
  method: "POST",
  headers: { "Content-Type": "application/x-www-form-urlencoded" },
  body: new URLSearchParams({
    grant_type: "client_credentials",
    client_id: process.env.SF_CONSUMER_KEY,
    client_secret: process.env.SF_CONSUMER_SECRET,
  }),
});
const { access_token, instance_url } = await tokenRes.json();

const res = await fetch(`${instance_url}/services/data/v66.0/limits`, {
  headers: { Authorization: `Bearer ${access_token}` },
});
console.log(await res.json());
Store SF_CONSUMER_KEY and SF_CONSUMER_SECRET as environment variables, and treat the resulting access token as a short-lived secret too.
Why am I getting invalid_client_id or invalid_client?
Either the Consumer Key/Secret is wrong, or the Connected App hasn't finished propagating yet - Salesforce can take up to 10 minutes after creation or after enabling Client Credentials Flow. Double-check you copied the Consumer Key and Secret from Manage Consumer Details, and retry after a few minutes (Salesforce Help, Configure a Connected App for the OAuth 2.0 Client Credentials Flow).
Why am I getting a 401 with INVALID_SESSION_ID?
Your access token expired or was revoked - session-based tokens expire per your org's session timeout policy (2 hours by default). Request a new access token via the same OAuth flow; if you're using the Authorization Code flow with offline_access, use the refresh token instead of restarting the full flow (Salesforce Developers, Authorization Through Connected Apps and OAuth 2.0).
Why am I getting a 403 with REQUEST_LIMIT_EXCEEDED?
Your org has exceeded its Daily API Request Limit (100,000 requests per rolling 24 hours for Enterprise Edition, plus 1,000 per additional user license, scaling with org size). This is a soft limit that allows temporary bursts, but a hard cap blocks further calls until usage drops back under the limit. Check current usage via the Sforce-Limit-Info response header or the /services/data/vXX.0/limits endpoint (Salesforce Developers Blog, API Limits and Monitoring Your API Usage).
Setting up a Connected App, choosing the right OAuth flow, and tracking the instance_url and daily limits works fine for one Salesforce org. It gets harder once you're connecting Salesforce alongside other CRMs — each with different auth flows, object models, and rate-limit shapes. Knit's unified CRM API handles Salesforce's OAuth and instance_url routing, normalizes object data across connectors, and manages rate-limit backoff for you. See the Salesforce API overview for what's available, or book a demo to see it against your own org. You can also sign up free and connect a sandbox Salesforce org in a few minutes.
Where do I find my Salesforce Consumer Key and Consumer Secret?
After creating a Connected App in Setup → App Manager, open it and click "Manage Consumer Details." Salesforce sends a verification code to your registered email to confirm your identity before showing the Consumer Key (client ID) and Consumer Secret (client secret). You can return to this page later to view them again.
Does Salesforce have a simple API key like some other platforms?
No — Salesforce doesn't issue a static "API key" you paste into a header. Access is always through OAuth 2.0: a Connected App's Consumer Key and Secret are exchanged for a short-lived access token, which is what you actually send with API requests. This adds setup steps but means credentials can be rotated and scoped without changing a hardcoded key.
What's the difference between the Client Credentials flow and the Authorization Code flow?
The Client Credentials flow is server-to-server: your app exchanges its Consumer Key and Secret directly for a token tied to a configured "Run As" user, with no end-user login. The Authorization Code (Web Server) flow involves a Salesforce user logging in and granting consent, after which your app gets an access token and refresh token tied to that specific user. Use Client Credentials for backend integrations and Authorization Code when the integration needs to act as different individual users.
How long does a Salesforce access token last?
It depends on your org's session timeout setting in Setup, which defaults to 2 hours but can be configured higher or lower. There's no fixed "token expiry" separate from session timeout. If you're using the Authorization Code flow with the refresh_token and offline_access scopes, your app can silently get a new access token via the refresh token instead of expiring the user's session.
What are Salesforce's API rate limits?
Most paid editions (e.g., Enterprise Edition) get a Daily API Request Limit starting at 100,000 calls per rolling 24-hour period, increasing with the number of user licenses your org has. It's a soft limit - short bursts above it are allowed - but a hard system-protection limit eventually returns 403 REQUEST_LIMIT_EXCEEDED until usage drops back down. Knit manages this backoff automatically across the Salesforce connections it handles.
To get a Jira API token, log in to id.atlassian.com/manage-profile/security/api-tokens, select Create API token (or Create API token with scopes), name it, set an expiration of up to 365 days, and copy the value immediately — it's shown only once. Use that token as the password in HTTP Basic Auth, paired with your Atlassian account email, to call the Jira Cloud REST API.
The rest of this page covers scoped vs. unscoped tokens, where the credential goes on a request, a working code sample, and the errors you'll hit if something's misconfigured.
https://your-domain.atlassian.net).read:jira-work for read-only access or write:jira-work to also create and update issues (Atlassian Support, Manage API tokens).Jira Cloud's REST API uses HTTP Basic Authentication, with your Atlassian account email as the username and the API token as the password (Atlassian Developer, Basic auth for REST APIs):
Authorization: Basic base64(email:api_token)
Most HTTP clients build this for you — with curl, pass -u email@example.com:api_token.
Connector-specific gotcha: if you created an API token with scopes, requests must go to api.atlassian.com/ex/jira/{cloudId}/..., not your normal https://your-domain.atlassian.net/... base URL. Unscoped (legacy) tokens still work against your-domain.atlassian.net, but scoped tokens are routed through Atlassian's gateway using your site's cloudId (Atlassian Support, Manage API tokens).
A few other things to know:
read:jira-work if you're only reading issues). Unscoped tokens inherit the full permission set of the account that created them.If your integration needs to act on behalf of multiple Jira users (not just your own account), use OAuth 2.0 (3LO): register an app in the Atlassian developer console, enable OAuth 2.0 (3LO) under Authorization, then direct users through https://auth.atlassian.com/authorize to get an authorization code, and exchange it at https://auth.atlassian.com/oauth/token for an access token and (with the offline_access scope) a rotating refresh token (Atlassian Developer, OAuth 2.0 (3LO) apps). Refresh tokens expire after 90 days of inactivity, and each use issues a new refresh token that replaces the old one.
This calls GET /rest/api/3/myself, which returns the profile of the authenticated user — a good smoke test for a new token.
curl:
curl -X GET \
  -u "$JIRA_EMAIL:$JIRA_API_TOKEN" \
  -H "Accept: application/json" \
  "https://$JIRA_DOMAIN.atlassian.net/rest/api/3/myself"
Node.js:
const auth = Buffer.from(
  `${process.env.JIRA_EMAIL}:${process.env.JIRA_API_TOKEN}`
).toString("base64");

const res = await fetch(
  `https://${process.env.JIRA_DOMAIN}.atlassian.net/rest/api/3/myself`,
  {
    headers: {
      Authorization: `Basic ${auth}`,
      Accept: "application/json",
    },
  }
);

const data = await res.json();
console.log(data.displayName);
Store JIRA_EMAIL, JIRA_API_TOKEN, and JIRA_DOMAIN as environment variables — never hard-code the token.
Why am I getting a 401 Unauthorized?
Either the email/token pair is wrong, the token has expired, or it was revoked. Regenerate a token from id.atlassian.com/manage-profile/security/api-tokens and confirm you're using the Atlassian account email, not a username, as the Basic Auth username (Atlassian Developer, Basic auth for REST APIs).
Why does my request fail with an X-Seraph-LoginReason: AUTHENTICATION_DENIED header?
Jira triggers a CAPTCHA after several consecutive failed logins, and the REST API can't complete a CAPTCHA challenge. This header means the login was rejected before the password was even checked. Log in to the Jira web UI once to clear the CAPTCHA, then retry the API call (Atlassian Developer, Basic auth for REST APIs).
Why does refreshing my OAuth token return 403 invalid_grant?
This means the refresh token is unknown or invalid — usually because the user changed their Atlassian password, the refresh token expired after 90 days of inactivity, or your app didn't store the new rotating refresh token from the previous exchange. If it's expired, the user needs to redo the full authorization flow (Atlassian Developer, OAuth 2.0 (3LO) apps).
Generating and rotating a Jira API token works fine for one integration. It gets harder once you're connecting Jira alongside other ticketing tools — each with its own token formats, scoped-vs-unscoped routing quirks, and refresh schedules. Knit's unified ticketing API handles Jira's auth (including the scoped-token cloudId routing above), normalizes issue and project data across connectors, and refreshes credentials automatically. See the Jira API overview for what's available, or book a demo to see it against your own Jira site. You can also sign up free and connect a sandbox Jira instance in a few minutes.
Where do I find my Jira API token after creating it?
Atlassian shows the token value only once, immediately after you click "Create." Copy it then — if you lose it, revoke the old token and create a new one. Existing tokens (without their values) are listed at id.atlassian.com/manage-profile/security/api-tokens, where you can see names, expiration dates, and scopes.
What's the difference between a Jira API token and OAuth 2.0 (3LO)?
An API token authenticates as you via Basic Auth — simple, but tied to one Atlassian account. OAuth 2.0 (3LO) lets an app act on behalf of other users after they grant consent through an authorization screen, and issues short-lived access tokens plus rotating refresh tokens. Use a token for personal scripts and internal automation; use OAuth 2.0 (3LO) for an app that multiple Jira users will install.
Do Jira API tokens expire?
Yes. New tokens expire 1–365 days after creation, whichever date you set (1-year default). Tokens created before December 15, 2024 were transitioned under Atlassian's policy change and have already expired as of May 2026 — if you're still relying on one of those, generate a replacement now. There's no auto-renewal otherwise — generate a new token before the current one expires and update it wherever it's stored.
Why do I need my site's cloudId for some Jira API calls?
Scoped API tokens and OAuth 2.0 (3LO) apps both call the Jira API through api.atlassian.com/ex/jira/{cloudId}/... rather than your-domain.atlassian.net. Get the cloudId by calling GET https://api.atlassian.com/oauth/token/accessible-resources (for OAuth) — for scoped API tokens, the same gateway pattern applies using your site's cloud ID.
Is the Jira API free to use with an API token?
Yes — creating a token and calling the Jira Cloud REST API costs nothing beyond your existing Atlassian subscription. Usage is governed by Jira's rate limits: a 65,000-points-per-hour global quota shared across apps, plus per-endpoint burst limits (typically 100 GET requests/second). API token-based traffic continues to be governed by the existing burst limits rather than the newer points-based quota.
Last verified: 2026-06-13 against the sources listed below.
Sources:
Slack has four API surfaces — Web API, Events API, Incoming Webhooks, and Socket Mode — and picking the wrong one is the most common reason Slack integrations need to be rebuilt. This guide explains what each surface does, which one your integration actually needs, and how to work with the key Web API endpoints (chat.postMessage, chat.update, conversations.list, users.lookupByEmail) with real code examples.
Quick answer: For most product integrations — sending notifications, DMs, interactive messages, slash commands — use the Web API with a bot token. Use the Events API when you need Slack to push events to your server in real time. Use Incoming Webhooks only for simple, one-way alerts to a fixed channel.
If you've ever searched "how to integrate with Slack," you've probably landed on a page that explains how to post a message using an Incoming Webhook — and wondered why there are three other APIs that seem to do something similar.
That confusion is real, and it costs engineering teams time. Slack has four distinct API surfaces: the Web API, the Events API, Incoming Webhooks, and Socket Mode. Each one exists for a different reason. Picking the wrong one means either building something that breaks when Slack's terms change, or over-engineering a simple notification system.
This guide cuts through that. By the end, you'll know exactly which Slack API surface your integration needs, how OAuth works, how the key endpoints behave, and how to handle slash commands and interactive messages. There's also a section on building via Knit, if you'd rather skip managing Slack auth and token lifecycle yourself and if you plan to add a ms teams integration later as it solves for both in one go.
The Slack Web API is a standard HTTPS REST API. You make requests to https://slack.com/api/{method}, pass a bot token in the Authorization header, and get JSON back. It is the foundation of most serious Slack integrations — over 100 methods are available covering messaging, user management, channels, files, and more.
Use it when you need to initiate actions from your server: send messages, look up users, list channels, update a message after it's been sent, or respond to interactions.
The Events API flips the direction. Instead of your server calling Slack, Slack calls your server via HTTP POST whenever something happens — a message is posted, a user joins a channel, a reaction is added, and so on. You register a public URL, Slack sends events to it, and you process them.
Use it when your integration needs to react to things happening in Slack: syncing messages to an external system, triggering workflows when users mention a keyword, or logging activity.
Incoming Webhooks are the simplest option. During app installation, Slack gives you a URL. You POST JSON to that URL and a message appears in a pre-configured channel. There's no OAuth flow to manage at runtime, no tokens to refresh — just one URL.
Use them when you want to push simple notifications from an external system into a single channel: CI/CD build alerts, server monitoring notifications, daily digest messages.
The constraint: each webhook is tied to one channel at install time. You can't dynamically choose where to send the message, and you can't read data or respond to events.
Socket Mode lets your app receive events over a persistent WebSocket connection rather than an HTTP endpoint. This means Slack doesn't need to reach a public URL — useful during development, or when your app runs behind a firewall or in an environment where exposing a port isn't possible.
Use it for local development or for apps that live in environments without a public-facing URL. In production, the Events API is generally preferred.
Start at api.slack.com/apps. Create a new app, either from scratch or from an app manifest. An app manifest is a YAML or JSON file that declares your app's permissions, event subscriptions, and slash commands — useful for version-controlling your app configuration.
When your app is installed to a workspace, Slack issues two types of tokens:
xoxb-...): Acts on behalf of your app's bot user. This is what most integrations use. The bot can only access channels it's been added to.xoxp-...): Acts on behalf of the user who installed the app. Has access to that user's data. Generally only needed if your integration requires user-level permissions (e.g., reading someone's private messages on their behalf).For the full step-by-step on generating a bot token — including where to find it after install and the most common missing_scope fix — see How to Get a Slack Bot Token.For most integration use cases — sending notifications, managing channels, looking up users — a bot token is sufficient and the safer choice.
Scopes define what your app can do. You declare required scopes when creating the app, and users see them listed when installing. Request only what you need — over-permissioned apps create friction at install time.
Common scopes for a messaging integration:
client_id, requested scopes, and a redirect_uri.redirect_uri with a temporary code.code for an access token via https://slack.com/api/oauth.v2.access.access_token (and team_id) securely. This token doesn't expire — but users can revoke it, and you should handle token_revoked events.All Web API calls follow the same pattern:
POST https://slack.com/api/{method}
Authorization: Bearer xoxb-your-bot-token
Content-Type: application/json
Every response includes an "ok" boolean. If "ok": false, the "error" field tells you why.
{ "ok": false, "error": "channel_not_found" }Always check ok before using the response body.
chat.postMessageThe workhorse of most Slack integrations. Sends a message to a channel — or a DM when you pass a user ID as the channel.
POST https://slack.com/api/chat.postMessage
Authorization: Bearer xoxb-your-bot-token
Content-Type: application/json
{
"channel": "C0123456789",
"blocks": [
{
"type": "section",
"text": {
"type": "mrkdwn",
"text": "*New order received* 🎉\nOrder #1042 from Acme Corp — $4,200"
}
}
]
}Response:
{
  "ok": true,
  "ts": "1715000000.000100",
  "channel": "C0123456789"
}
Save the ts (timestamp) and channel from the response. Together, these uniquely identify the message and are required to update it later.
The blocks array uses Slack's Block Kit — a structured layout system that lets you build rich messages with sections, buttons, images, and dropdowns. Plain text is also accepted but blocks give you far more control.
chat.updateWhen a status changes — a build completes, an order ships, an approval is actioned — update the original message rather than posting a new one. This keeps channels clean.
{
  "channel": "C0123456789",
  "ts": "1715000000.000100",
  "blocks": [
    {
      "type": "section",
      "text": {
        "type": "mrkdwn",
        "text": "*Order #1042 — Shipped* ✅\nTracking: UPS 1Z999AA10123456784"
      }
    }
  ]
}
Pass "as_user": true if you want the update to appear as coming from the user rather than the bot.
conversations.listRetrieves public and private channels. Useful for letting users select a channel in your app's UI without hardcoding channel IDs.
GET https://slack.com/api/conversations.list?types=public_channel,private_channel&limit=200
Authorization: Bearer xoxb-your-bot-token
{
"channels": [
{ "id": "C0123456789", "name": "engineering-alerts", "is_private": false },
{ "id": "C0987654321", "name": "finance-approvals", "is_private": true }
],
"response_metadata": {
"next_cursor": "dGVhbTpDMDYxRkE3OTM="
}
}Paginate using the cursor query parameter: pass the next_cursor value from response_metadata as the cursor in your next request. Continue until next_cursor is empty.
users.list and users.lookupByEmailTwo options depending on what you have:
users.list — returns all workspace members with pagination. Useful for building a local user cache or populating a dropdown.
GET https://slack.com/api/users.list?limit=200{
"members": [
{
"id": "U0123456789",
"is_bot": false,
"deleted": false,
"profile": { "email": "sarah@acme.com" }
}
],
"response_metadata": { "next_cursor": "..." }
}Filter out bots (is_bot: true) and deactivated users (deleted: true) before storing.
users.lookupByEmail — the faster option when you already know the email. One call, one user.
GET https://slack.com/api/users.lookupByEmail?email=sarah@acme.com{
"ok": true,
"user": { "id": "U0123456789" }
}Use the returned id directly as the channel in chat.postMessage to send a direct message to that user.
Slash commands let users trigger actions in your external system by typing /command in any Slack channel. When a user fires one, Slack sends a POST request to your registered endpoint within 3 seconds — if your response takes longer, Slack will show an error.
{
  "eventId": "evt_01abc",
  "eventType": "slash_command",
  "eventData": {
    "command": "/report",
    "text": "Q1 2026",
    "keyCommand": "report",
    "argumentCommand": "Q1 2026",
    "userId": "U0123456789",
    "teamId": "T0123456789",
    "channelId": "C0123456789",
    "responseUrl": "https://hooks.slack.com/commands/..."
  }
}
Key fields:
command — the slash command itself (e.g., /report)text — everything the user typed after the commandkeyCommand — the command name without the slashargumentCommand — the arguments portion (everything after the command name)userId — who triggered itresponseUrl — a URL you can POST a delayed response to (valid for 30 minutes)If your command triggers a long-running operation, acknowledge immediately with a simple response, then POST the actual result to responseUrl when ready:
// Immediate acknowledgment (within 3s)
{
  "commandResponse": {
    "text": "Generating your Q1 report, hang tight..."
  }
}
// Delayed response via responseUrl (up to 30 min later)
{
"commandResponse": {
"blocks": [
{
"type": "section",
"text": { "type": "mrkdwn", "text": "*Q1 2026 Report*\nRevenue: $2.4M | Growth: +18%" }
}
]
}
}Slack rate-limits the Web API by method, using a tier system:
When you hit a limit, Slack responds with HTTP 429 and a Retry-After header indicating how many seconds to wait. Always implement retry logic with exponential backoff. For high-volume messaging (bulk notifications, digest sends), queue messages and pace them against the per-channel limit.
One gotcha worth flagging: as of a dated change effective May 29, 2025,conversations.historyandconversations.repliesmoved from Tier 3 to Tier 1 (about 1 request/minute, capped at 15 objects per request, down from 1,000) for non-Marketplace, commercially distributed apps created or installed after that date. Marketplace apps and internal apps built for a single workspace are unaffected and keep the higher limits. If your integration suddenly can't paginate channel history at a usable rate, check which category your app falls into.
A common need: your backend event has a user's email and you need to reach them directly in Slack.
import requests

SLACK_TOKEN = "xoxb-your-bot-token"
HEADERS = {"Authorization": f"Bearer {SLACK_TOKEN}", "Content-Type": "application/json"}

def send_dm_by_email(email: str, message: str):
    # Step 1: Resolve email → user ID
    lookup = requests.get(
        "https://slack.com/api/users.lookupByEmail",
        params={"email": email},
        headers=HEADERS
    ).json()

    if not lookup.get("ok"):
        raise Exception(f"User not found: {lookup.get('error')}")

    user_id = lookup["user"]["id"]

    # Step 2: Send DM (user ID is used as the channel)
    response = requests.post(
        "https://slack.com/api/chat.postMessage",
        headers=HEADERS,
        json={
            "channel": user_id,
            "blocks": [
                {"type": "section", "text": {"type": "mrkdwn", "text": message}}
            ]
        }
    ).json()

    if not response.get("ok"):
        raise Exception(f"Message failed: {response.get('error')}")

return response["ts"] # Save for later updatesPost a message with Approve/Decline buttons, then update it once the manager acts.
def post_approval_request(channel: str, request_details: str):
    response = requests.post(
        "https://slack.com/api/chat.postMessage",
        headers=HEADERS,
        json={
            "channel": channel,
            "blocks": [
                {
                    "type": "section",
                    "text": {"type": "mrkdwn", "text": f"*Approval Request*\n{request_details}"}
                },
                {
                    "type": "actions",
                    "elements": [
                        {"type": "button", "text": {"type": "plain_text", "text": "✅ Approve"},
                         "action_id": "approve", "style": "primary"},
                        {"type": "button", "text": {"type": "plain_text", "text": "❌ Decline"},
                         "action_id": "decline", "style": "danger"}
                    ]
                }
            ]
        }
    ).json()
    return {"ts": response["ts"], "channel": response["channel"]}


def resolve_approval(ts: str, channel: str, approved: bool, actioned_by: str):
    status = "✅ Approved" if approved else "❌ Declined"
    requests.post(
        "https://slack.com/api/chat.update",
        headers=HEADERS,
        json={
            "channel": channel,
            "ts": ts,
            "blocks": [
                {
                    "type": "section",
                    "text": {"type": "mrkdwn", "text": f"*Approval Request* — {status}\nActioned by: {actioned_by}"}
                }
            ]
        }
)Route different /commands to the right handler in your backend.
from flask import Flask, request, jsonify

app = Flask(__name__)

HANDLERS = {
    "report":  handle_report_command,
    "ticket":  handle_ticket_command,
    "status":  handle_status_command,
}

@app.route("/slack/commands", methods=["POST"])
def slack_command():
    payload = request.get_json()
    key_command = payload["eventData"]["keyCommand"]
    args = payload["eventData"]["argumentCommand"]
    user_id = payload["eventData"]["userId"]
    response_url = payload["eventData"]["responseUrl"]

    handler = HANDLERS.get(key_command)
    if not handler:
        return jsonify({"commandResponse": {"text": f"Unknown command: `/{key_command}`"}})

    # Acknowledge immediately, process async
    handler(args, user_id, response_url)
return jsonify({"commandResponse": {"text": "On it — give me a moment..."}})Managing OAuth installs, token storage, token refresh, and multi-workspace support adds significant overhead before you've written a line of business logic. Knit handles the Slack integration infrastructure — auth, token lifecycle, and a normalised API layer — so you can focus on what your integration actually does.
Here's what Knit exposes for Slack:
POST to chat.postMessage behind a single Knit endpoint. Pass a channel ID and a blocks array. The response returns ts and channel — both stored by Knit for downstream operations.
Use cases: Order notifications, incident alerts, digest messages, CRM event triggers, approval requests.
Updates an existing message using its ts + channel pair. Pass as_user: true to update as the installing user rather than the bot.
Use cases: Live build status boards, approval resolution, updating order/ticket status without channel noise.
Wraps conversations.list with cursor-based pagination handled automatically. Returns id, name, and is_private for each channel. Supports filtering by types.
Use cases: Channel pickers in your UI, compliance audits, onboarding automation (add new users to default channels).
Retrieves the DM channel IDs for users the bot has existing conversations with. Useful for mapping your internal user records to Slack DM channels without repeatedly calling users.lookupByEmail.
Single call to resolve an email address to a Slack user ID — the equivalent of users.lookupByEmail. Use the returned id as the channel in a Send Message call to DM that user directly.
Use cases: HR onboarding flows, IT support ticket updates, sales/support follow-up DMs.
Register a slash command and a destination URL. When a user fires the command, Knit forwards the full event payload — including command, text, keyCommand, argumentCommand, userId, channelId, and responseUrl — to your endpoint, signed with an X-Knit-Signature header for verification.
Your endpoint returns a commandResponse object with blocks and/or text, and Knit delivers it back to Slack. For async operations, use the responseUrl from the forwarded payload.
Use cases: /report, /ticket, /status, /approve — any command that needs to query or trigger something in your backend.
If you're starting a Slack integration from scratch, here's a sensible sequence:
chat.postMessage — get a working notification flowing before adding complexity.chat.update once you have messages being sent — live-updating messages is one of the highest-value Slack UX patterns.If you're integrating Slack as one of several tools in a larger product and don't want to manage per-workspace OAuth and token storage for each one, Knit's Slack integration gives you all six of the above capabilities behind a single authenticated API — and adds every other integration you support through the same interface.
The most common mistake in Slack integrations is starting with Incoming Webhooks because they're simple, then realising six months later that you need to post to different channels dynamically, update messages, or handle slash commands — and having to rebuild. Start with the Web API unless your use case genuinely only needs fixed-channel notifications.
What is the difference between the Slack Web API and the Events API?
The Web API is request-driven: your server calls Slack to send messages, retrieve data, or update content. The Events API is event-driven: Slack calls your server when something happens in a workspace. Most integrations use both — the Web API to act, the Events API to react.
Which Slack API should I use to send a message?
Use chat.postMessage via the Slack Web API. Authenticate with a bot token (xoxb-), POST to https://slack.com/api/chat.postMessage with a channel ID and a blocks or text body. For direct messages, use the recipient's Slack user ID as the channel value.
How do I send a direct message to a Slack user from my application?
First look up the user's Slack ID by calling users.lookupByEmail with their email address. Then call chat.postMessage using that user ID as the channel parameter. The user will receive the message in their DMs from your app's bot.
What are Slack OAuth scopes and which ones do I need?
Scopes are permissions your app requests when a user installs it. For a basic messaging integration you need: chat:write (post messages), users:read.email (look up users by email), channels:read (list channels), and commands (if you're adding slash commands). Only request scopes you actually use.
What is Slack Socket Mode and when should I use it?
Socket Mode lets your app receive Slack events over a WebSocket connection instead of a public HTTP endpoint. Use it during local development when you don't have a public URL, or in production environments behind a firewall. For public-facing production apps, the Events API over HTTP is the standard approach.
Does the Slack Web API have rate limits?
Yes. Slack uses a tier system: chat.postMessage is Tier 3 (~50 requests per minute per channel), conversations.list is Tier 2 (~20 req/min), and users.lookupByEmail is Tier 4 (~100 req/min). Exceeding limits returns HTTP 429 with a Retry-After header. Always implement exponential backoff retry logic.
How do I handle Slack slash commands in my backend?
Register your slash command in your Slack app settings with an endpoint URL. Slack will POST a payload to that URL whenever the command is used. You must respond within 3 seconds — for longer operations, return an immediate acknowledgment and use the responseUrl from the payload to send the actual response asynchronously.
To get a Slack bot token, create an app at api.slack.com/apps ("Create New App" → "From scratch"), open OAuth & Permissions, add the Bot Token Scopes your integration needs (such as chat:write), click Install to Workspace, approve the permissions, and copy the Bot User OAuth Token — it starts with xoxb-. Use that token in the Authorization: Bearer header to call Slack's Web API.
The rest of this page covers token types, where the credential goes, a working code sample, and the errors you'll hit if a scope is missing.
A Slack workspace where you can install apps, or an admin who can approve the install.
A rough idea of which Bot Token Scopes your integration needs up front - adding scopes after install requires reinstalling the app, which generates a new token (Slack Developer Docs, App management quickstart).
If your integration needs to act as a specific person rather than a bot, you want a user token (xoxp-) instead - see the note near the bottom of this page.
Step-by-step: creating a Slack bot token
Slack's Web API accepts the token as a bearer token in the Authorization header (Slack Developer Docs, Tokens):
Authorization: Bearer xoxb-...
The word Bearer is case-sensitive. For some POST endpoints, you can alternatively send the token as a token= form field with Content-Type: application/x-www-form-urlencoded.
Connector-specific gotcha: a bot token's permissions are frozen at install time. If you add a new Bot Token Scope later, your existing xoxb- token does not gain that permission — you have to reinstall the app to the workspace (generating a new token) before the scope takes effect. A large share of missing_scope errors are really "I added the scope in the dashboard, but never reinstalled."
A few other things to know:
Lifetime: bot tokens (xoxb-) don't expire on their own and remain valid until revoked or the app is uninstalled. Apps that opt into Slack's token rotation get short-lived access tokens (around 12 hours) plus a refresh token instead (Slack Developer Docs, Tokens).
Revocation: call auth. revoke, or uninstall the app from the workspace's app management settings — either invalidates the token immediately.
Scopes: request the minimum Bot Token Scopes your integration needs, and add more only when required (then reinstall).
If you need a user token or a multi-workspace OAuth flow
For apps installed by many different workspaces, use the OAuth v2 install flow: send users to https://slack.com/oauth/v2/authorize?client_id=...&scope=<bot_scopes>&user_scope=<user_scopes>&redirect_uri=.... Slack redirects back with a temporary code (valid 10 minutes), which you exchange at oauth.v2.access for an access_token (bot, xoxb-) and, if you requested user_scope, an authed_user.access_token (user, xoxp-) (Slack Developer Docs, Installing with OAuth):
curl -F code=1234
-F client_id="$SLACK_CLIENT_ID"
-F client_secret="$SLACK_CLIENT_SECRET"
https://slack.com/api/oauth.v2.access
Minimal working example
This calls auth.test, which confirms the token is valid and returns basic identity info - a good smoke test for a new token.
curl:
curl -X POST https://slack.com/api/auth.test

-H "Authorization: Bearer $SLACK_BOT_TOKEN"
Node.js:
const res = await fetch("https://slack.com/api/auth.test", {

method: "POST",

headers: {

Authorization: Bearer ${process.env.SLACK_BOT_TOKEN},

},

});
const data = await res.json();

console.log(data.team, data.user, data.bot_id);
Store SLACK_BOT_TOKEN as an environment variable — never hard-code it, and never commit it to source control.
The token is missing, malformed, or has been revoked (often via app uninstall). Check that the header reads Authorization: Bearer xoxb-... with no extra quotes, and confirm the app is still installed to the workspace under OAuth & Permissions (Slack Developer Docs, Tokens).
The response body includes needed and provided fields showing exactly which scope is required and which scopes your token actually has. Add the missing Bot Token Scope under OAuth & Permissions in your app's settings, then reinstall the app to the workspace — adding the scope alone doesn't update existing tokens (Slack Developer Docs, App management quickstart).
You've exceeded the per-method rate limit for your app in this workspace. Slack returns a 429 with a Retry-After header telling you how many seconds to wait before retrying (Slack Developer Docs, Rate limits).
Creating and reinstalling a Slack app to fix scope issues is manageable for one workspace. It gets harder once your integration needs to support many workspaces, each with its own installed scopes, token lifecycles, and rate-limit tiers - on top of whatever other communication tools you're connecting. Knit's unified API handles Slack's OAuth installs and token storage, normalizes messaging and channel data across connectors, and manages rate-limit backoff for you. See the Slack API overview for what's available, or book a demo to see it against your own workspace. You can also sign up for free and connect a sandbox Slack workspace in a few minutes.
After you click "Install to Workspace" and approve the permissions, Slack shows the Bot User OAuth Token (starting with xoxb-) on the OAuth & Permissions page of your app. You can return to this page any time to copy it again - unlike some platforms, Slack doesn't hide it after the first view, but you should still store it as a secret.
A bot token belongs to the app's bot user and is shared across the workspace install — it's the recommended default for most integrations. A user token acts on behalf of the specific person who authorized the app, with that person's own permissions. Use a bot token unless your integration specifically needs to act as a particular human user, such as posting messages that appear to come from them.
No, not by default - xoxb- tokens remain valid until revoked via auth.revoke or until the app is uninstalled from the workspace. Apps that enable Slack's token rotation feature instead get short-lived access tokens (about 12 hours) and a refresh token, which Knit handles automatically for connected workspaces.
Adding a Bot Token Scope in your app's settings doesn't change tokens that were already issued. You need to reinstall the app to the workspace (or have the user reauthorize), which generates a new token that includes the added scope. This is the most common cause of missing_scope errors after a configuration change.
Yes - creating an app, installing it, and calling the Web API is free. Usage is governed by per-method rate limit tiers (roughly 1 to 100+ requests per minute, depending on the method), and some methods have additional limits for newer apps. Knit doesn't charge extra for Slack access either, and manages the rate-limit handling across connectors for you.
Sources:Tokens — Slack Developer Docs (https://docs.slack.dev/authentication/tokens)App management quickstart — Slack Developer Docs (https://docs.slack.dev/app-management/quickstart-app-settings)Installing with OAuth — Slack Developer Docs (https://docs.slack.dev/authentication/installing-with-oauth)Rate limits — Slack Developer Docs (https://docs.slack.dev/apis/web-api/rate-limits/)Slack setup — Knit Docs (https://developers.getknit.dev/docs/slack)
To get a GitHub personal access token, sign in to GitHub, go to Settings → Developer settings → Personal access tokens, choose Fine-grained tokens (or Tokens (classic)), click Generate new token, set an expiration and the permissions or scopes you need, then click Generate token. Copy the token immediately — GitHub shows it only once — and use it in the Authorization: Bearer header of your API requests.
That's the short version. The rest of this page covers which token type to pick, exactly which scopes to grant, a working code sample, and the errors you'll hit if a permission is missing.
GitHub recommends fine-grained tokens over classic tokens for new integrations, because you can scope them to specific repos and specific permissions instead of broad account-wide scopes (GitHub Docs, Managing your personal access tokens).
pending state — and read-only on public data — until an admin approves it.Some endpoints (Packages, the Checks API, public repos you don't own) still don't support fine-grained tokens (limitations). For those, use Tokens (classic) instead: Developer settings → Personal access tokens → Tokens (classic) → Generate new token (classic), name it, set an expiration, check the scopes you need (repo covers most repository read/write cases), and generate. Knit's own GitHub setup guide uses this classic flow with repo, read:org, read:user, and user:email (Knit Docs — GitHub).
GitHub's REST API expects the token in a standard bearer header:
Authorization: Bearer YOUR-TOKENGitHub also still accepts the older Authorization: token YOUR-TOKEN form, but Bearer is what current docs and examples use (GitHub Docs, Authenticating to the REST API).
A few things to keep in mind:
contents: read can't accidentally delete a repo; a classic token with repo can do almost anything to every repo you can access. Store the token in an environment variable or secrets manager — never commit it.This calls GET /user, which returns the profile of the token's owner — a good smoke test for any new token.
curl:
curl -H "Authorization: Bearer $GITHUB_TOKEN" \
     -H "Accept: application/vnd.github+json" \
     -H "X-GitHub-Api-Version: 2026-03-10" \
     https://api.github.com/user
Node.js:
	const res = await fetch("https://api.github.com/user", {
  headers: {
    Authorization: `Bearer ${process.env.GITHUB_TOKEN}`,
    Accept: "application/vnd.github+json",
    "X-GitHub-Api-Version": "2026-03-10",
  },
});

const data = await res.json();
console.log(data.login);
Both send the X-GitHub-Api-Version header, which GitHub recommends pinning so a future API version change doesn't silently alter your response shape (GitHub Docs, Authenticating to the REST API).
Why am I getting "Bad credentials" with a 401?
The token is missing, malformed, expired, or was revoked. Double-check the header reads Authorization: Bearer <token> with no extra quotes or whitespace, and confirm the token still exists under Settings → Developer settings — GitHub auto-deletes personal access tokens that sit unused for a year (GitHub Docs, Managing your personal access tokens).
Why do I get "Resource not accessible by personal access token"?
Your token doesn't have the scope or permission that endpoint needs. For fine-grained tokens, check the response's X-Accepted-GitHub-Permissions header — it lists exactly what's required — then add that permission to the token. For classic tokens, you likely need a broader scope like repo instead of public_repo (GitHub Docs, Troubleshooting the REST API).
Why am I hitting a 403/429 rate limit so quickly?
Unauthenticated requests are capped at 60/hour; authenticated requests get 5,000/hour. If x-ratelimit-remaining is 0, wait until the time in x-ratelimit-reset (UTC epoch seconds) before retrying — retrying immediately just burns more of your secondary rate limit (GitHub Docs, Rate limits for the REST API).
Generating and rotating PATs is fine for a single script. It gets messier once you're supporting GitHub alongside Jira, Zendesk, or a dozen other ticketing tools — each with its own auth quirks, scopes, and expiry rules. Knit's unified ticketing API handles GitHub's OAuth and PAT flows, normalizes the endpoints across connectors, and refreshes credentials so you don't have to build that machinery yourself. See the GitHub API overview for what's available, or book a demo to see it against your own GitHub org. You can also sign up free and connect a sandbox GitHub account in a few minutes.
GitHub shows the token value exactly once, right after you click "Generate token" — copy it then, because it's never displayed again. Lost it? Generate a new one. Existing tokens (without values) live under Settings → Developer settings → Personal access tokens, where you can check scopes, expiration, and delete unused ones.
Fine-grained tokens scope to specific repos and specific permissions; classic tokens use broad scopes like repo that apply everywhere you have access. Knit's GitHub setup currently uses classic scopes (repo, read:org, read:user, user:email) because a few endpoints — Packages, the Checks API, public repos you don't own — still aren't supported by fine-grained tokens.
Yes, if the org allows it and you already have access to those repos — a token can't grant access you don't have. Org admins can restrict or require approval for both token types, so a 403 against org repos usually means a policy setting, not a bad token.
Fine-grained tokens expire on whatever date you set, up to 366 days out, or never if your org's policy allows it. Classic tokens can be set to never expire, but GitHub auto-deletes any token — classic or fine-grained — that sits unused for a year.
Yes — token creation and REST API calls are free, subject to GitHub's rate limits (5,000 authenticated requests/hour for most accounts). If you're hitting that limit across multiple orgs, a GitHub App is worth a look — installation tokens get up to 15,000/hour on Enterprise Cloud.
Last verified and updated: 2026-06-13
Sources:
The GitHub REST API gives you programmatic access to repositories, issues, pull requests, users, and webhooks — but before you write a single API call, you need to make the right authentication decision. Choose the wrong one and you'll either hit per-user rate limits at scale or spend weeks rebuilding your auth layer.
Quick answer: For production product integrations, use GitHub Apps — they authenticate at the installation level (not per-user), receive 15,000 API requests/hour per installation, and support fine-grained permissions. Use OAuth Apps when you need to act as the user. Use Personal Access Tokens for scripts and one-off automation only.
This guide covers everything you need to build a complete GitHub API integration: authentication setup for all three methods, REST API endpoints for issues, repos, users, and labels, webhook configuration with signature verification, rate limits, and three real-world integration patterns with working Python code.
If your product needs to support GitHub alongside other issue trackers like Jira, Linear, or Asana, there's a unified approach worth knowing about — covered in the Building with Knit section.
GitHub exposes three API surfaces. Understanding which to use before you start building saves significant refactoring later.
REST API is the right choice for the vast majority of product integrations. The GraphQL API is useful when you need to fetch nested relationships (issues with their labels, assignees, and comments) in a single query and want to avoid over-fetching. Webhooks are event-driven and complement REST — they notify your server when something happens, then you call REST to get full details.
The GitHub REST API base URL is https://api.github.com. All endpoints accept and return JSON. The API version is specified via the X-GitHub-Api-Version header — always pin this to avoid breaking changes:
GET /repos/{owner}/{repo}/issues
Authorization: Bearer {token}
Accept: application/vnd.github+json
X-GitHub-Api-Version: 2022-11-28
This is the most consequential decision in any GitHub integration. Here's what each approach actually means for a production system:
GitHub Apps is the most powerful option and the right default for any B2B product integration. A GitHub App is installed on an organization or repository, not tied to a user account, and generates short-lived installation tokens.
Step 1: Register a GitHub App
Go to Settings → Developer settings → GitHub Apps → New GitHub App. Key fields:
GitHub generates a private key (.pem file) and an App ID. Store both securely.
Step 2: Generate a JWT
import jwt
import time
from pathlib import Path

def generate_github_jwt(app_id: str, private_key_path: str) -> str:
    private_key = Path(private_key_path).read_text()
    payload = {
        "iat": int(time.time()) - 60,       # Issued at (60s buffer for clock skew)
        "exp": int(time.time()) + (10 * 60), # Expires in 10 minutes (max)
        "iss": app_id
    }
    return jwt.encode(payload, private_key, algorithm="RS256")
Step 3: Exchange the JWT for an Installation Token
import requests

def get_installation_token(jwt_token: str, installation_id: str) -> str:
    """
    Installation tokens expire after 1 hour.
    Cache and refresh them before expiry in production.
    """
    response = requests.post(
        f"https://api.github.com/app/installations/{installation_id}/access_tokens",
        headers={
            "Authorization": f"Bearer {jwt_token}",
            "Accept": "application/vnd.github+json",
            "X-GitHub-Api-Version": "2022-11-28"
        }
    )
    data = response.json()
    return data["token"]  # This is your installation access token
The installation token is used exactly like any other Bearer token for subsequent API calls. Because it expires in 1 hour, build a caching layer that refreshes tokens 5 minutes before expiry.
Step 4: Redirect users to install your GitHub App
https://github.com/apps/{app-name}/installations/newAfter installation, GitHub redirects to your callback URL with an installation_id. Store this per-customer in your database.
If you're building a product that needs to support GitHub alongside other issue trackers — Jira, Linear, Asana — managing GitHub Apps installation tokens per customer, while also handling different auth flows for every other tool, quickly becomes a significant engineering overhead. Knit handles GitHub auth (OAuth and PAT) and normalises the API surface across all your supported ticketing tools, so you write the integration once. See getknit.dev/integration/github.
Use OAuth Apps when your integration needs to act as the user — for example, creating issues on behalf of the authenticated user, or reading private repos the user has access to.
OAuth Flow:
# Step 1: Redirect user to GitHub
auth_url = (
    "https://github.com/login/oauth/authorize"
    f"?client_id={CLIENT_ID}"
    f"&redirect_uri={REDIRECT_URI}"
    f"&scope=repo,read:user"
    f"&state={generate_csrf_token()}"  # Always validate state to prevent CSRF
)

# Step 2: Exchange code for token (after redirect back)
def exchange_code_for_token(code: str) -> str:
    response = requests.post(
        "https://github.com/login/oauth/access_token",
        data={
            "client_id": CLIENT_ID,
            "client_secret": CLIENT_SECRET,
            "code": code
        },
        headers={"Accept": "application/json"}
    )
    return response.json()["access_token"]
OAuth App tokens do not expire automatically, but users can revoke them at any time. Build webhook listeners for the github_app_authorization event to detect revocations and clean up stored tokens accordingly.
PATs are the simplest option — generate one in Settings → Developer settings → Personal access tokens — but they're fundamentally single-user. All API calls are attributed to the token owner, which creates audit and attribution problems in multi-tenant products. Use PATs for CI/CD pipelines, internal automation, and developer tooling only.
Fine-grained PATs (currently in beta) allow scoping to specific repositories and actions, making them a reasonable choice for tightly controlled automation scenarios.
For step-by-step instructions, see How to Get a GitHub Personal Access Token
Issues are the core resource for most GitHub integrations. GitHub's Issues API also returns pull requests — always check for the pull_request field if you want to exclude PRs.
List issues in a repository:
def list_issues(owner: str, repo: str, token: str, state: str = "open") -> list:
    """
    Returns up to 100 issues per page.
    Iterate Link headers for full pagination.
    pull_request field is present on PRs — filter if needed.
    """
    issues = []
    url = f"https://api.github.com/repos/{owner}/{repo}/issues"
    params = {"state": state, "per_page": 100}
    headers = {
        "Authorization": f"Bearer {token}",
        "Accept": "application/vnd.github+json",
        "X-GitHub-Api-Version": "2022-11-28"
    }

    while url:
        response = requests.get(url, params=params, headers=headers)
        response.raise_for_status()
        issues.extend([i for i in response.json() if "pull_request" not in i])

        # GitHub returns pagination via Link header
        link_header = response.headers.get("Link", "")
        url = extract_next_url(link_header)  # Parse rel="next" from header
        params = {}  # Next URL already includes params

    return issues
Create an issue:
def create_issue(owner: str, repo: str, token: str,
                 title: str, body: str, labels: list = None,
                 assignees: list = None) -> dict:
    response = requests.post(
        f"https://api.github.com/repos/{owner}/{repo}/issues",
        headers={
            "Authorization": f"Bearer {token}",
            "Accept": "application/vnd.github+json",
            "X-GitHub-Api-Version": "2022-11-28"
        },
        json={
            "title": title,
            "body": body,
            "labels": labels or [],
            "assignees": assignees or []
        }
    )
    response.raise_for_status()
    return response.json()  # Returns full issue object including issue number and URL
Update an issue (assign, label, close):
def update_issue(owner: str, repo: str, issue_number: int, token: str, **fields) -> dict:
    """
    Supports: title, body, state (open/closed), labels, assignees, milestone.
    """
    response = requests.patch(
        f"https://api.github.com/repos/{owner}/{repo}/issues/{issue_number}",
        headers={
            "Authorization": f"Bearer {token}",
            "Accept": "application/vnd.github+json",
            "X-GitHub-Api-Version": "2022-11-28"
        },
        json=fields
    )
    response.raise_for_status()
return response.json()# List repositories for an organization
GET /orgs/{org}/repos?type=all&per_page=100
# Get a specific repository
GET /repos/{owner}/{repo}
# List repository collaborators
GET /repos/{owner}/{repo}/collaborators# Get the authenticated user
GET /user
# Get a user by username
GET /users/{username}
# List organization members
GET /orgs/{org}/members# List all labels in a repository
GET /repos/{owner}/{repo}/labels
# Create a label
POST /repos/{owner}/{repo}/labels
Body: {"name": "bug", "color": "d73a4a", "description": "Something isn't working"}
# List milestones
GET /repos/{owner}/{repo}/milestones?state=openWebhooks let GitHub push events to your server rather than requiring you to poll the API. Configure them in repository or organization settings, or programmatically via the API.
Create a webhook via the API:
def create_webhook(owner: str, repo: str, token: str,
                   payload_url: str, secret: str, events: list) -> dict:
    response = requests.post(
        f"https://api.github.com/repos/{owner}/{repo}/hooks",
        headers={
            "Authorization": f"Bearer {token}",
            "Accept": "application/vnd.github+json",
            "X-GitHub-Api-Version": "2022-11-28"
        },
        json={
            "name": "web",
            "active": True,
            "events": events,  # e.g. ["issues", "pull_request", "push"]
            "config": {
                "url": payload_url,
                "content_type": "json",
                "secret": secret,
                "insecure_ssl": "0"
            }
        }
    )
    response.raise_for_status()
return response.json()Every GitHub webhook payload includes an X-Hub-Signature-256 header. You must verify this on every incoming request — skip this step and your endpoint can be spoofed by anyone who discovers its URL.
import hmac
import hashlib
from flask import Flask, request, abort

app = Flask(__name__)
WEBHOOK_SECRET = b"your-webhook-secret"

@app.route("/webhook/github", methods=["POST"])
def handle_github_webhook():
    # Verify signature before processing anything
    signature_header = request.headers.get("X-Hub-Signature-256", "")
    if not signature_header.startswith("sha256="):
        abort(400, "Missing or malformed signature")

    expected_sig = hmac.new(
        WEBHOOK_SECRET,
        request.data,           # Raw bytes — don't use parsed JSON here
        hashlib.sha256
    ).hexdigest()

    received_sig = signature_header[7:]  # Strip "sha256=" prefix

    # Constant-time comparison prevents timing attacks
    if not hmac.compare_digest(expected_sig, received_sig):
        abort(401, "Invalid signature")

    # Safe to process the payload now
    payload = request.json
    event_type = request.headers.get("X-GitHub-Event")

    if event_type == "issues":
        handle_issue_event(payload)
    elif event_type == "pull_request":
        handle_pr_event(payload)

    return "", 200

def handle_issue_event(payload: dict):
    action = payload["action"]  # opened, closed, labeled, assigned, etc.
    issue = payload["issue"]
    repo = payload["repository"]

    if action == "opened":
        print(f"New issue #{issue['number']} in {repo['full_name']}: {issue['title']}")
Supported webhook events for issue integrations: issues, issue_comment, label, milestone, pull_request, push, repository.
GitHub retries failed webhook deliveries with exponential backoff for up to 72 hours. Return a 200 response immediately on receipt and process the payload asynchronously to avoid delivery timeouts (GitHub expects a response within 10 seconds).
Rate limit status is returned in every response:
X-RateLimit-Limit: 5000
X-RateLimit-Remaining: 4823
X-RateLimit-Reset: 1747353600   # Unix timestamp when the limit resets
X-RateLimit-Used: 177
When X-RateLimit-Remaining reaches 0, GitHub returns 403 Forbidden with a Retry-After header. Build rate limit handling into your HTTP client from the start:
def github_request(url: str, token: str, **kwargs) -> requests.Response:
    response = requests.get(url, headers={
        "Authorization": f"Bearer {token}",
        "Accept": "application/vnd.github+json",
        "X-GitHub-Api-Version": "2022-11-28"
    }, **kwargs)

    if response.status_code == 403 and "X-RateLimit-Remaining" in response.headers:
        if response.headers["X-RateLimit-Remaining"] == "0":
            reset_time = int(response.headers["X-RateLimit-Reset"])
            wait = max(0, reset_time - int(time.time())) + 5  # 5s buffer
            time.sleep(wait)
            return github_request(url, token, **kwargs)  # Retry

    response.raise_for_status()
    return response
For secondary rate limits (triggered by too many concurrent requests), watch for Retry-After in the response headers and honor it exactly.
The most common integration pattern: pull issues from one or more GitHub repos and display or sync them inside your product.
import requests
import time

def sync_all_issues(installations: list, token_manager) -> list:
    """
    Full issue sync across multiple repositories.
    Returns a normalised list of issues for storage.
    """
    all_issues = []

    for installation in installations:
        token = token_manager.get_token(installation["id"])  # Cached + auto-refreshed

        for repo in installation["repos"]:
            owner, name = repo["owner"], repo["name"]
            page_url = f"https://api.github.com/repos/{owner}/{name}/issues"
            params = {"state": "all", "per_page": 100}

            while page_url:
                resp = requests.get(page_url, params=params, headers={
                    "Authorization": f"Bearer {token}",
                    "Accept": "application/vnd.github+json",
                    "X-GitHub-Api-Version": "2022-11-28"
                })
                resp.raise_for_status()

                for issue in resp.json():
                    if "pull_request" in issue:
                        continue  # Skip PRs

                    all_issues.append({
                        "id": issue["number"],
                        "title": issue["title"],
                        "state": issue["state"],
                        "assignees": [a["login"] for a in issue["assignees"]],
                        "labels": [l["name"] for l in issue["labels"]],
                        "url": issue["html_url"],
                        "created_at": issue["created_at"],
                        "updated_at": issue["updated_at"],
                        "repo": f"{owner}/{name}"
                    })

                # Parse next page from Link header
                link = resp.headers.get("Link", "")
                next_url = next(
                    (p.split(";")[0].strip("<>") for p in link.split(",")
                     if 'rel="next"' in p), None
                )
                page_url = next_url
                params = {}

return all_issuesWhen a user creates a task in your product and wants it to appear in GitHub:
def create_github_issue_from_task(task: dict, repo_config: dict, token: str) -> dict:
    """
    Maps your product's task model to a GitHub issue.
    Returns the created issue with GitHub's issue number for cross-referencing.
    """
    # Map your assignees to GitHub usernames
    github_assignees = [
        repo_config["user_mapping"].get(uid)
        for uid in task.get("assignee_ids", [])
        if repo_config["user_mapping"].get(uid)
    ]

    # Map your labels/tags to GitHub label names
    github_labels = [
        repo_config["label_mapping"].get(tag)
        for tag in task.get("tags", [])
        if repo_config["label_mapping"].get(tag)
    ]

    response = requests.post(
        f"https://api.github.com/repos/{repo_config['owner']}/{repo_config['repo']}/issues",
        headers={
            "Authorization": f"Bearer {token}",
            "Accept": "application/vnd.github+json",
            "X-GitHub-Api-Version": "2022-11-28"
        },
        json={
            "title": task["title"],
            "body": f"{task['description']}\n\n---\n*Created via {task['source']}*",
            "assignees": github_assignees,
            "labels": github_labels,
            "milestone": repo_config.get("milestone_id")
        }
    )
    response.raise_for_status()
    github_issue = response.json()

    # Store the GitHub issue number in your database for future updates
    return {
        "github_issue_number": github_issue["number"],
        "github_issue_url": github_issue["html_url"],
        "github_issue_id": github_issue["id"]
}Keep issue state in sync in real time — when a GitHub issue is closed, close the linked item in your product; and vice versa.
# Webhook handler (GitHub → your product)
def handle_issue_state_change(payload: dict):
    action = payload["action"]

    if action not in ("closed", "reopened"):
        return  # Only care about state changes

    github_issue_id = payload["issue"]["id"]
    new_state = "closed" if action == "closed" else "open"

    # Look up the linked task in your DB
    task_id = db.get_task_by_github_id(github_issue_id)
    if task_id:
        db.update_task_state(task_id, new_state)
        print(f"Synced GitHub issue {github_issue_id} → Task {task_id}: {new_state}")


# REST handler (your product → GitHub)
def close_github_issue_for_task(task_id: str, token: str):
    github_info = db.get_github_info_for_task(task_id)
    if not github_info:
        return

    update_issue(
        owner=github_info["owner"],
        repo=github_info["repo"],
        issue_number=github_info["issue_number"],
        token=token,
        state="closed"
)GitHub Apps auth — JWTs, per-installation tokens that expire hourly, managing token refresh across multiple customer installations — is the part of a GitHub integration that adds the most engineering overhead for the least user-visible value.
Knit provides a unified ticketing API that handles GitHub authentication (OAuth and Personal Access Token flows) for your customers. Instead of building and maintaining the OAuth consent flow, token storage, and refresh logic, your customers connect their GitHub account once through Knit's auth layer. You call Knit's normalised endpoints using a single set of headers:
Authorization: Bearer {your-knit-api-token}
X-Knit-Integration-Id: {customer-integration-id}
This is particularly valuable if your product supports GitHub alongside other issue trackers — Jira, Linear, Asana, Zendesk, and more are all available through the same Knit interface, so you build the integration pattern once and it works across all of them.
The Knit APIs available for GitHub:
Example: fetch all teams in a GitHub org via Knit
import requests

def get_github_teams_via_knit(knit_token: str, integration_id: str,
                               account_id: str) -> list:
    """
    Returns GitHub teams for the given org (account_id).
    No JWT generation, no installation tokens, no token refresh logic.
    """
    response = requests.get(
        "https://api.getknit.dev/v1.0/ticketing/groups",
        headers={
            "Authorization": f"Bearer {knit_token}",
            "X-Knit-Integration-Id": integration_id
        },
        params={"accountId": account_id}
    )
    response.raise_for_status()
    data = response.json()

    # Cursor-based pagination built in
    groups = data["data"]["groups"]
    next_cursor = data["data"]["pagination"].get("next")

    while next_cursor:
        response = requests.get(
            "https://api.getknit.dev/v1.0/ticketing/groups",
            headers={
                "Authorization": f"Bearer {knit_token}",
                "X-Knit-Integration-Id": integration_id
            },
            params={"accountId": account_id, "cursor": next_cursor}
        )
        page = response.json()
        groups.extend(page["data"]["groups"])
        next_cursor = page["data"]["pagination"].get("next")

    return groups
→ See the full GitHub integration on Knit: getknit.dev/integration/github
→ Knit's ticketing API docs: developers.getknit.dev
If you're building a GitHub integration from scratch, this is the order that minimises rework:
installation_id on callback, and store it per customer.
What is the difference between GitHub Apps, OAuth Apps, and Personal Access Tokens?
GitHub Apps are the recommended approach for building integrations — they authenticate as the app itself, support fine-grained permissions, and receive 15,000 API requests/hour per installation. OAuth Apps authenticate as a user and are limited to the user's rate limit of 5,000 requests/hour. Personal Access Tokens are best for scripts and automation where a single user account controls access, but they do not scale across multiple users.
How do I authenticate with the GitHub REST API?
Pass your token in the Authorization header: Authorization: Bearer {token}. For GitHub Apps, generate a JWT signed with your app's private key, then exchange it for an installation access token via POST /app/installations/{installation_id}/access_tokens. For OAuth Apps and PATs, pass the token directly. Unauthenticated requests are limited to 60 requests per hour; authenticated requests get 5,000 per hour.
What are the GitHub REST API rate limits?
Unauthenticated requests: 60 per hour. Authenticated OAuth Apps and PATs: 5,000 requests per hour. GitHub Apps using installation tokens: 15,000 requests per hour per installation. Search API requests: 30 per minute for authenticated users, 10 per minute for unauthenticated. Rate limit status is returned on every response via X-RateLimit-Remaining and X-RateLimit-Reset headers.
How do GitHub webhooks work?
GitHub webhooks send HTTP POST payloads to a URL you configure whenever a subscribed event occurs. Every payload includes an X-Hub-Signature-256 header — an HMAC-SHA256 signature of the raw request body using your webhook secret. You must verify this signature on every incoming request. GitHub delivers at most one webhook per event and retries for up to 72 hours on delivery failure.
How do I list all issues from a GitHub repository via the API?
Use GET /repos/{owner}/{repo}/issues. By default this returns open issues and pull requests. Filter with state=open, state=closed, or state=all. Use labels, assignee, and milestone query params to narrow results. Results are paginated at 30 items per page by default — use per_page (max 100) and the Link response header to navigate pages. Pull requests are included in the issues endpoint; filter them out by checking for the pull_request field.
What is the difference between the GitHub REST API and GraphQL API?
The GitHub REST API has separate endpoints per resource and is the standard choice for most integrations. The GitHub GraphQL API (v4) lets you request exactly the fields you need in a single query, reducing over-fetching. Use REST when building straightforward CRUD integrations. Use GraphQL when you need to fetch deeply nested relationships — issues with their comments, labels, and assignees — in a single request.
How do I verify a GitHub webhook signature?
Compute HMAC-SHA256 of the raw request body using your webhook secret as the key. Compare this digest to the value in the X-Hub-Signature-256 header (prefixed with sha256=). Use a constant-time comparison function (like hmac.compare_digest in Python) to prevent timing attacks. Never process webhook payloads before verifying the signature.
Is there a simpler way to integrate GitHub without managing OAuth or GitHub Apps authentication myself?
Yes. Knit provides a unified ticketing API that handles GitHub authentication (OAuth and PAT) for you. Instead of implementing the OAuth flow, managing token storage, or dealing with per-user credentials, your customers connect their GitHub account once through Knit's auth layer. You then call Knit's normalised endpoints — for organisations, users, teams, and labels — without writing auth infrastructure. This is especially useful if you also need to support Jira, Linear, or Asana alongside GitHub, as Knit's same API surface covers all of them. → getknit.dev/integration/github

Last updated: June 2026
Note: This is a part of our API Security series where we solve common developer queries in detail with how-to guides, common examples, code snippets and a ready to use security checklist. Feel free to check other articles on topics such as authentication methods, rate limiting, API monitoring and more.
Below are some common API security FAQs that serve as a valuable resource for understanding, implementing, and maintaining the robust security measures necessary to protect your APIs and the valuable data they handle.
When an authentication token used with your API expires, the best practice is to generate a new token and update it in your application's authentication system.
This process often involves sending a request to the authentication server, such as an OAuth 2.0 token endpoint, with necessary credentials to obtain a fresh token.
The new token should then be securely stored and used for subsequent API requests. Make sure to handle token expiration gracefully in your application code by checking the token's expiration time and obtaining a new one before it expires to avoid disruptions in API access.
If you're integrating with several third-party APIs, this refresh logic has to be built and maintained separately for each provider's OAuth implementation. Knit handles OAuth 2.0 authentication and token refresh automatically across its supported integrations, so your application doesn't need to implement or monitor this logic per platform.
Regular security audits and testing are crucial for maintaining API security. The right cadence depends on your organization's risk tolerance, regulatory requirements, and how quickly your API ecosystem changes — but in practice, it works best as two layers: continuous, automated checks that run with every API change or release, and periodic formal audits that go deeper into architecture, access controls, and threat modeling.
As a general guideline:
Most established incident-response frameworks — including those published by AWS and IBM — describe a similar lifecycle: prepare, detect and analyze, contain, eradicate and recover, and apply lessons learned. In the unfortunate event of a security breach involving your API, that lifecycle translates into the following steps:
Remember, having a well-documented incident response plan in place beforehand can greatly streamline your actions in case of a security breach involving your API.
Monitoring and logging API activity is essential for security. To achieve this, consider implementing the following:
For example – Knit has a dedicated Logs and Issues page where the status of each API call and webhook for all your integrated accounts is available for a quick review on a single page. Knit continuously monitors all integrations and sends you automated alerts whenever a security threshold is reached.
[image: existing screenshot of Knit's Logs and Issues page — unchanged]
There's no single lifetime that applies to every API, but Google's Apigee team publishes a widely-cited starting point: configure access tokens to expire after around 30 minutes and refresh tokens after around 24 hours, then adjust both based on your application's security and usability needs. In practice, lifetimes vary a lot by provider — some issue access tokens valid for hours, others for days, and refresh tokens can range from a day to several months — so always check the specific API's documentation rather than assuming a default. Shorter access-token lifetimes limit how long a leaked token stays useful, while longer refresh-token lifetimes reduce how often users have to re-authenticate. If you're managing this across several integrations, Knit issues and refreshes OAuth tokens automatically for its supported platforms, so each provider's specific token lifetime is handled for you rather than tracked manually.
An expired API token should return a 401 Unauthorized response, not 403 Forbidden. The distinction matters for how your application handles the error: 401 means the credentials provided — including an expired or invalid token — aren't sufficient to authenticate the request at all, while 403 means the credentials are valid but the authenticated user or application doesn't have permission for that specific action. On a 401, the correct response is typically to refresh the token and retry the request; a 403 usually signals a permissions or scope issue that refreshing a token won't fix. Not every API follows this convention strictly, so it's worth checking a given provider's documentation, but 401 is the technically correct code for an expired token.
A practical API security checklist covers both how requests are authenticated and how the API behaves once a request is inside the system. At minimum, it should include: using OAuth 2.0 or another modern authentication standard with appropriately short-lived tokens, enforcing rate limiting and throttling to prevent abuse, validating and sanitizing all input, encrypting data in transit and at rest, logging and monitoring API activity with alerts for anomalies, and maintaining a documented incident response plan. For a more detailed, ready-to-use checklist with examples, see our API Security 101 guide.
Knit reduces API security risk by acting as a single, consistently-secured layer between your application and the HRIS, ATS, CRM, and other platforms it supports. Instead of your team building and maintaining separate authentication, token-refresh, and data-handling logic for each connected platform — each with its own security model — Knit handles OAuth flows, token refresh, and credential storage centrally, and normalizes data from every integration into a consistent format. Knit also provides a dedicated Logs and Issues dashboard so you can review the status of every API call and webhook across your integrated accounts from one place, with automated alerts when a security threshold is reached. For teams integrating with many third-party APIs, this consolidates what would otherwise be dozens of separate security surfaces into one that Knit maintains and monitors.

Note: This is a part of our API Security 101 series where we solve common developer queries in detail with how-to guides, common examples and code snippets. Feel free to visit the smaller guides linked later in this article on topics such as authentication methods, rate limiting, API monitoring and more.
APIs are the connective tissueof modern software - every integration, mobile app, and automated workflowdepends on them. But every API endpoint is also a potential entry point forattackers, which makes understanding API security risks essential for any teamthat builds or relies on APIs.
The most common API securityrisks and threats include unauthorized access from weak or brokenauthentication, injection attacks, excessive data exposure, lack of ratelimiting, vulnerabilities introduced by third-party dependencies, human errorsuch as leaked credentials, and shadow APIs - undocumented endpoints thatbypass security review entirely. Many of these map directly to the OWASP API Security Top 10, the industry-standard framework for API vulnerabilities, whichthis guide's companion post on API Security 101 best practices covers in full.
In this post, we break down eachof these risks - what it looks like in practice, how it's typically exploited,and how to mitigate it - so you can assess where your own APIs (and thethird-party APIs you depend on) might be exposed.
1. Unauthorized access
2. Broken authentication tokens
3. Injection attacks
4. Data exposure
5. Rate limiting and Denial of Service (DoS) attacks
6. Third-party dependencies
7. Human error
8. Shadow and undocumented APIs
9. Consequences of API security breaches
10. FAQs
Unauthorized access happens whensomeone — a malicious actor, a former employee, or even another customer'sapplication — gains access to API endpoints or data they shouldn't be able toreach. This is typically the result of weak or missing authentication, overlypermissive access controls, or endpoints that don't verify a user's identityand permissions on every request.
For example, an endpoint like/api/users/12345/invoices might only check that a request includes a validtoken — not that the token actually belongs to user 12345. An attacker whosimply changes the ID in the URL could retrieve another customer's invoices.This is a textbook case of Broken Object Level Authorization, the #1 risk inthe OWASP API Security Top 10.
Mitigation: every request needsto be authenticated and authorized — not just at login, but on every call, witha check that the authenticated user actually has permission to access thespecific object being requested. Knit's API Security 101 guide coversauthentication and authorization methods in depth, including how to enforcethese per-object access checks.
Broken authentication tokensoccur when the tokens used to verify a user's identity — session tokens, APIkeys, or JWTs — are predictable, long-lived, improperly stored, or not properlyi nvalidated. If an attacker obtains a valid token, they can impersonate thatuser for as long as the token remains valid.
A common real-world example issession hijacking: if a token doesn't expire, isn't tied to a specific deviceor IP address, or is exposed in a URL or log file, an attacker who captures itcan use it to access the account indefinitely — often without triggering anyalerts, since the requests look like normal traffic from an authenticated user.
Mitigation: issue short-livedaccess tokens with refresh tokens rather than long-lived credentials, storetokens securely, and invalidate tokens on logout or password change. Knit'sauthentication best practices section covers token lifecycle management forboth the APIs you build and the third-party APIs you integrate with.
Injection attacks happen whenuntrusted input — from a URL parameter, form field, or API request body — is passed directly into a database query, command, or interpreter without beingvalidated or sanitized. The most common form is SQL injection, where anattacker manipulates input to run unintended database commands.
For example, if an API endpointbuilds a query like SELECT * FROM users WHERE id = '<input>' withoutsanitizing the input, an attacker could pass a value like ' OR '1'='1 toretrieve every row in the table instead of just one user's record.
Mitigation: always useparameterized queries or prepared statements instead of string concatenation,validate and sanitize every input against an expected format, and apply theprinciple of least privilege to database accounts used by APIs. Knit's sectionon input validation and parameter sanitization covers this pattern in moredepth.
Data exposure — sometimes calledexcessive data exposure — happens when an API returns more information than theclient actually needs, relying on the front end to filter out sensitive fieldsrather than restricting them at the API level. Because API responses can beinspected directly, in browser dev tools, intercepted traffic, or by callingthe endpoint outside the intended app, any sensitive field included in aresponse is effectively exposed.
A common example: an endpointmeant to show a user's name and avatar in a directory actually returns the fulluser object, including email address, phone number, internal role, or otherfields the front end simply chooses not to display.
Mitigation: define explicitresponse schemas that include only the fields a given endpoint needs, neverrely on the client to filter sensitive data, and encrypt sensitive fields atrest and in transit. Knit's section on secure data transmission, encryption,and HTTPS covers the encryption side of this in detail.
Without rate limiting, an APIhas no way to distinguish between normal usage and abuse — whether that's aclient accidentally retrying a failed request in a tight loop, a scraperpulling data far faster than intended, or a deliberate Denial of Service (DoS)attack designed to overwhelm the API with traffic until it becomes slow orunavailable for everyone.
The impact isn't limited todowntime: APIs without limits are also more vulnerable to brute-force attacksagainst login or token endpoints, since an attacker can attempt unlimitedpassword or token guesses without being throttled.
Mitigation: set per-client ratelimits based on an API key, token, or IP address, return an HTTP 429 (Too ManyRequests) response with a Retry-After header when limits are exceeded, andcombine hard limits with throttling so the API degrades gracefully under loadrather than failing outright. Knit's guide to API rate limiting and throttlingcovers these patterns — including how to handle 429 responses from third-partyAPIs — in more detail.
Most modern applications don'toperate in isolation — they call out to third-party APIs for payments,authentication, data enrichment, communications, and more. Each of thosedependencies extends your application's attack surface: a vulnerability, outage,or data breach at a third-party provider can compromise your application evenif your own code has no flaws at all.
This risk is easy tounderestimate because it's invisible until something goes wrong — a third-partyAPI that suddenly changes its authentication requirements, gets compromised, orquietly starts storing more of your users' data than you realized can allbecome your problem with little warning.
Mitigation: vet third-party APIsbefore integrating with them — review their security certifications, datahandling policies, and incident history — grant them the minimum access anddata they need, and prefer providers that are explicit about not retaining acopy of your data. Knit's section on third-party API security considerationscovers what to look for when evaluating an integration partner.
Many of the most damaging APIsecurity incidents don't involve a sophisticated exploit at all — they comedown to a misconfiguration or a mistake. Common examples include API keys orcredentials accidentally committed to a public code repository, overly permissivedatabase or IAM permissions left in place after testing, debug or stagingendpoints left accessible in production, and documentation or API collectionsshared externally that contain live credentials.
Because these mistakes are ofteninvisible until they're exploited — a leaked key can sit in a public repositoryfor months before anyone notices — they're frequently the root cause behindincidents that initially look like sophisticated attacks.
Mitigation: use secret-scanningtools on your repositories, rotate any credentials that may have been exposed,apply least-privilege access by default, and review permissions and exposedendpoints on a regular cadence rather than only at launch. The API securitychecklist in Knit's API Security 101 guide is designed to catch exactly thesekinds of configuration gaps.
Shadow APIs are endpoints thatexist and are reachable in production but aren't tracked in your API inventory,documentation, or security review process. They're typically created duringrapid development — a developer spins up an endpoint for testing, an old APIversion is left running after a new one ships, or a feature is deprecated butits underlying endpoint is never decommissioned.
Because shadow APIs fall outsidenormal monitoring and review, they often lack the authentication, ratelimiting, and logging applied to documented endpoints — making them an attractive target. Attackers actively scan for these endpoints, since they're frequentlyless protected than an organization's primary, well-documented APIs.
Mitigation: maintain a complete, current inventory of every API endpointin production — including internal and deprecated ones — and decommissionunused endpoints rather than leaving them reachable. Knit's section on APIlifecycle management and decommissioning covers how to build this inventory andretirement process into your API lifecycle
The consequences of an APIsecurity breach extend well beyond the immediate incident. Depending on whatdata and systems are exposed, organizations can face direct financial losses,regulatory fines under frameworks like GDPR, costly incident response andremediation work, and reputational damage that affects customer trust longafter the breach itself is resolved.
For B2B platforms, a breach in one customer's data can also expose every other customer connected through thesame API — which is why addressing these risks isn't optional once an API ishandling real user data. The API security checklist in Knit's API Security 101guide is a practical starting point for working through these riskssystematically.
If you are dealing with a large number of API integration and looking for smarter solutions, check out unified API solutions like Knit. Knit ensures that you have access to high quality data faster in the safest way possible.
There are 3 ways Knit ensures maximum security.
If you want to learn more about Knit Security Practices, please talk to one of our experts. We would love to talk to you
The most common API securityrisks include unauthorized access from weak or broken authentication, injectionattacks such as SQL injection, excessive data exposure through endpoints thatreturn more data than needed, lack of rate limiting that leaves APIs open todenial-of-service attacks, vulnerabilities introduced through third-partydependencies, human error such as leaked API keys or misconfigured permissions,and shadow APIs — undocumented endpoints that bypass security review. Thisguide covers each of these in depth, including concrete examples of how they'reexploited and how to mitigate them. For teams managing many third-partyintegrations, several of these risks — particularly third-party dependency andauthentication risk — are reduced by default through Knit's unified API, whichhandles authentication and doesn't retain a copy of integrated platforms' data.
An API vulnerability is aweakness in an API's design, code, or configuration — such as a missingauthorization check, an unvalidated input field, or an API key exposed in apublic repository — that could potentially be exploited. An API attack is theact of exploiting that vulnerability, such as an attacker manipulating arequest to access another user's data, injecting malicious input into a query,or flooding an endpoint with traffic to cause a denial of service. In practice,most vulnerabilities exist for some time before they're attacked, which is whyproactive steps like input validation, rate limiting, and regular securityaudits matter — they close the gap between a vulnerability existing and itbeing exploited, often before an attacker ever finds it.
Shadow APIs are API endpointsthat are live and reachable in production but aren't tracked in anorganization's API inventory, documentation, or security review process — oftenleft over from testing, old API versions, or deprecated features that were neverdecommissioned. They're a significant security risk because they typically lackthe authentication, rate limiting, and monitoring applied to documentedendpoints, making them an easier target for attackers who actively scan forexactly this kind of unmonitored access point. Shadow APIs are also harder topatch quickly, since a vulnerability can't be fixed in an endpoint the securityteam doesn't know exists. Maintaining a complete, current inventory of everyAPI endpoint — and decommissioning unused ones — is the most effective way toclose this gap, an approach covered in Knit's API lifecycle managementguidance.
Broken authentication occurswhen the tokens, API keys, or session credentials used to verify a user'sidentity are predictable, long-lived, improperly stored, or not properlyinvalidated after logout or a password change. Knit removes a common source ofthis risk for the 100+ platforms it connects by handling OAuth flows, tokenrefresh, and credential storage automatically, so integrating teams don't haveto manage long-lived third-party credentials themselves. If an attacker obtainsa valid token through any of these weaknesses in your own API, they canimpersonate that user and access their data for as long as the token remainsvalid — often without triggering alerts, since the request looks like normaltraffic. Best practices include issuing short-lived access tokens with refreshtokens, storing tokens securely, and invalidating them on logout or passwordchange.
Excessive data exposure happenswhen an API response includes more information than the requesting clientactually needs — relying on the front end to filter out sensitive fields ratherthan restricting them at the API level itself. Because API responses can beinspected directly through browser developer tools, intercepted traffic, or bycalling the endpoint outside the intended application, any sensitive fieldincluded in a response — such as an email address, internal ID, or role — iseffectively exposed regardless of whether the interface displays it. Knitaddresses this for the data it processes by encrypting sensitive fields,including PII and credentials, with an additional layer of application-levelencryption beyond standard transport security. The fix at the API level is todefine explicit response schemas that return only the fields each endpointgenuinely needs.
Every third-party API yourapplication integrates with — for payments, authentication, data enrichment, orcommunications — extends your attack surface, because a vulnerability, outage,or data breach at that provider can compromise your application even if yourown code is secure. Knit addresses this directly: as a pass-through integrationlayer, Knit does not store a copy of your end users' data on its servers orshare it with any third party, syncing data via event-based webhooks instead ofretaining it in a database. This removes an entire category of third-party risk— a vendor's data retention practices can't expose your users' data if thatvendor never holds a copy of it. When evaluating any third-party API, reviewits security certifications, data retention policy, and incident history, andgrant it the minimum access it needs.
Knit reduces third-party APIsecurity risk in two ways: first, it handles authentication, token refresh, andcredential storage for every one of the 100+ HRIS, ATS, CRM, and otherplatforms it connects, removing a common source of broken-authentication riskfrom your integration layer. Second, Knit is built as a pass-through proxy — itdoes not store a copy of your end users' data on its servers or share it withany third party, and all syncs happen via event-based webhooks rather thanretained databases. Knit is also SOC2, GDPR, and ISO27001 certified, withcontinuously monitored infrastructure, intrusion detection, and 24/7 support,documented in full at getknit.dev/security. For teams managing dozens ofintegrations, this consolidates third-party API risk review into a single,audited layer instead of one per integration.
Knit's own API securitypractices align with the OWASP API Security Top 10 — the industry-standardframework covering risks like broken object-level authorization, brokenauthentication, and excessive data exposure, the same risks covered in thisguide. Knit's API Security 101 guide includes a full mapping of its securitybest practices to each of the ten OWASP categories, showing how each risk isaddressed in Knit's architecture and in the practices recommended for the APIsKnit connects to. While OWASP's list is aimed at anyone building or securingAPIs, it's a useful checklist for evaluating any third-party API — includingKnit — as part of a vendor security review.

Note: This is our master guide on API Security where we solve common developer queries in detail with how-to guides, common examples and code snippets. Feel free to visit the smaller guides linked later in this article on topics such as authentication methods, rate limiting, API monitoring and more.
Today, an average SaaS company relies on 350 integrations to share data and functionality, both internally andwith the tools their customers already use. That reliance makes API security afoundational requirement, not an afterthought — a single overlookedvulnerability can expose sensitive data, compromise user privacy, and disruptoperations for every customer connected through that API.
This guide is Knit's masterreference on API security. In it, you'll find:
• The most common API security risks and how they happen
• Eight best practices for securing your APIs, withpractical, step-by-step guidance
• How these practices map to the OWASP API Security Top 10, the industry-standard framework for API vulnerabilities
• An on-page API security checklist you can work throughdirectly (plus a downloadable version)
• Answers to the API security questions developers askmost
Whether you're securing the APIsyou build or evaluating the third-party APIs you integrate with, thesepractices apply either way. Let's get started.
• API Security Risks
• API security best practices
1. API Authentication and Authorization methods
2. Secure data transmission: Encryption and HTTPS
3. Input validation and parameter sanitization
4. Rate limiting and Throttling
5. API monitoring and logging
6. Regular security audits and Penetration Testing
7. API lifecycle management and decommissioning
8. Third-Party API Security Considerations
• OWASP API Security Top 10: How These Practices Map
• API security checklist
• Common API security FAQs by developers
• Enable maximum security for your API integrations withKnit
Before diving deeper into the API security best practices, it's crucial to have a solid grasp of the risks and threats that APIs can face. These risks can stem from various sources, both external and internal, and being aware of them is the first step towards effective protection.
Here are some of the key API security risks to consider:
Read: Common Risks to API Security and their consequences where we discussed all these threats in detail
The old adage "prevention is better than cure" couldn't be more apt in the realm of API security, where a proactive approach is the key to averting devastating consequences for all parties involved.
Keeping this in mind, let’s dive deeper into our API security best practices.
Ensuring API security means providing a safe way for authentication, authorization, data transfer and more.
API authentication and authorization methods are the most essential components of modern web and software development. These methods play a crucial role in ensuring the security and integrity of the data exchanged between systems and applications.
Authentication verifies the identity of users or systems accessing an API, while authorization determines what actions or resources they are allowed to access.
With a variety of techniques and protocols available, such as API keys, OAuth, and token-based systems, developers have the flexibility to choose the most suitable approach to protect their APIs and the data they manage.
Read our article on API Authentication Best Practices where we discuss top 5 authentication protocols such as OAuth, Bearer tokens, Basic auth, JWT and API keys in detail.
While choosing the right protocol depends on your specific use case and security requirements, here's a quick comparison of the 5 API authentication methods:

Now, let’s explore how data can be transferred securely between API calls.
When it comes to API security, ensuring that data is transmitted securely is an absolute must.
Imagine your data is like a confidential letter traveling from sender to receiver through the postal service. Just as you'd want that letter to be sealed in an envelope to prevent prying eyes from seeing its contents, data encryption in transit ensures that the information exchanged between clients and servers is kept safe and confidential during its journey across the internet.
The go-to method for achieving this security is HTTPS, which is like the secure postal service for your data.
HTTPS uses Transport Layer Security (TLS) or its predecessor, Secure Sockets Layer (SSL), to encrypt data before it leaves the sender's location and decrypt it only when it reaches the intended recipient.
Think of TLS/SSL certificates as the unique stamps on your sealed letter; they ensure that the data's journey is tamper-proof and that it's delivered only to the right address.
So, whenever you see that little padlock icon in your browser's address bar, rest assured that your data is traveling securely, just like that confidential letter in its sealed envelope.
In a world where data breaches are a constant threat, secure data transmission is like the lock and key that keeps your digital communication safe from potential eavesdroppers.
Note: As an API aggregator, Knit, prioritizes user privacy and commit to keeping your data safe in the best way possible. All data at Knit is doubly encrypted at rest with AES 256 bit encryption and in transit with TLS 1.3. Plus, all PII and user credentials are encrypted with an additional layer of application security. Learn more about Knit's security practices here
In the world of API security, one area that often flies under the radar but is absolutely critical is input validation and parameter sanitization. It's like inspecting every ingredient that goes into a recipe; if you miss something harmful, the entire dish could turn out toxic.
First, let's talk about the risks.
Input validation failures can open the door to a variety of malicious attacks, with one of the most notorious being injection attacks.
These crafty attacks involve malicious code or data being injected into an API's input fields, exploiting vulnerabilities and wreaking havoc. Two common types are SQL injection and Cross-Site Scripting (XSS), both of which can lead to data breaches and system compromise.
To learn more about injection vulnerabilities, read Common API Security Threats Developers Must Know About
Well, think of sanitizing user inputs as thoroughly washing your hands before handling food – it's a fundamental hygiene practice.
By rigorously examining and cleaning incoming data, we can block malicious code from getting through. For instance, when dealing with user-generated content, we should sanitize inputs to remove potentially harmful scripts or queries.
Additionally, for database queries, you should use parameterized statements instead of injecting user inputs directly into SQL queries. This way, even if an attacker tries a SQL injection, their input gets treated as data rather than executable code.
In the above example, we use a parameterized statement (? as a placeholder) to safely handle user input, preventing SQL injection by treating the input as data rather than executable SQL code.
In essence, input validation and parameter sanitization are like the gatekeepers of your API, filtering out the bad actors and ensuring the safety of your system. It's not just good practice; it's a crucial line of defense in the world of API security.
Both rate limiting and throttling are critical components of API security, as they help maintain the availability and performance of API services, protect them against abusive usage, and ensure a fair distribution of resources among clients.
Rate limiting restricts the number of API requests a client can make within a specific timeframe (e.g. requests per second or minute) while throttling is a more flexible approach that slows down or delays the processing of requests from clients who exceeded their allotted rate limit instead of denying requests outright.
Throttling is useful for ensuring a more graceful degradation of service and a smoother user experience when rate limits are exceeded. The exhaustion of rate limits are often denoted by HTTP error code 429.
These techniques are often implemented in combination with each other to create a comprehensive defense strategy for APIs.
Read: 10 API rate limiting best practices to deal with HTTP error code 429
API monitoring and logging are vital for proactive security measures, threat detection, and incident response.
API monitoring involves the continuous observation of API traffic and activities in real-time. It allows for immediate detection of unusual or suspicious behavior, such as spikes in traffic or unexpected access patterns. Beyond security, it also aids in optimizing performance by identifying bottlenecks, latency issues, or errors in API responses, ensuring smooth and efficient operation.
API logging involves the recording of all API interactions and events over time. This creates a detailed historical record that can be invaluable for forensic analysis, compliance, and auditing. They are invaluable for debugging and troubleshooting, as they contain detailed information about API requests, responses, errors, and performance metrics.
Monitoring and logging systems can also trigger alerts or notifications when predefined security thresholds are breached, enabling rapid incident response.
This is exactly what Knit does.Alongside giving you access to 100+ HRIS, ATS, CRM, and other SaaS platformsthrough a single unified API, Knit also takes care of API logging andmonitoring for every connected integration.
Knit's Logs and Issues pagegives you a one-page historical overview of all your webhooks and integratedaccounts, including a count of API calls and filters to narrow down by platform, account, or time range. This helps you stay on top of integration healthwithout building separate logging for each platform you support.
For a deeper look at what tolog, where logs are stored, and the tools teams commonly use, see Knit's guideto API Monitoring and Logging.
.webp)
Regular security audits and penetration testing are critical components of a comprehensive API security strategy. They help identify vulnerabilities, assess the effectiveness of existing security measures, and ensure that an API remains resilient to evolving threats.
The results of penetration testing provide insights into the API's security posture, allowing organizations to prioritize and remediate high-risk vulnerabilities. Penetration tests should be conducted regularly, especially when changes or updates are made to the API, to ensure that security measures remain effective over time.
These practices are essential for safeguarding sensitive data and ensuring the trustworthiness of API-based services.
A comprehensive approach to API security involves not only establishing APIs securely but also systematically retiring and decommissioning them when they are no longer needed or viable.
This process involves clearly documenting the API's purpose, usage, and dependencies from the outset to facilitate informed decisions during the decommissioning phase. Also, you should implement version control and deprecation policies, enabling a gradual transition for API consumers and regularly audit and monitor API usage and access controls to detect potential security risks.
When decommissioning an API, the sunset plan should be communicated with stakeholders while providing ample notice, and assistance to the users in migrating to alternative APIs or solutions.
Finally, a thorough security assessment and testing should be conducted before decommissioning to identify and resolve any vulnerabilities, to ensure that the process is executed securely and without compromising data or system integrity.
Read: Developer's guide to API lifecycle management
When integrating third-party APIs into your application, it's crucial to consider several important security factors.
These five checks — providerreputation, minimum necessary permissions, ongoing patch monitoring, encrypteddata in transit, and a contingency plan — are also the basis for the‘Third-party API review’ items in the checklist below.
The OWASP API Security Top 10(2023) is the industry-standard framework for the most critical APIvulnerability categories, maintained by the Open Web Application SecurityProject. It's worth keeping on hand alongside the best practices above — here'show each category maps to the sections in this guide:
• API1: Broken Object Level Authorization — occurs whenan API lets a user access or modify another user's data by changing an ID in arequest. Addressed by Section 1 (Authentication and Authorization methods),which covers verifying not just who a user is but what specific resourcesthey're allowed to touch.
• API2: Broken Authentication — weak or missing checks ontokens, passwords, and API keys that let attackers compromise accounts.Addressed by Section 1.
• API3: Broken Object Property Level Authorization — anAPI exposes or allows changes to data fields a client shouldn't see or edit,even if overall access is authorized. Addressed by Sections 1 and 3 (Inputvalidation and parameter sanitization), which limit what fields a request canread or write.
• API4: Unrestricted Resource Consumption — an API withno limits on request frequency, payload size, or processing cost, opening thedoor to denial-of-service issues and runaway costs. Addressed directly bySection 4 (Rate limiting and Throttling).
• API5: Broken Function Level Authorization —access-control gaps that let regular users reach administrative or privilegedendpoints. Addressed by Section 1.
• API6: Unrestricted Access to Sensitive Business Flows —an API exposes a multi-step business process (like checkout or accountcreation) without checks on whether a request is following the intended flow.Addressed by Section 6 (Regular security audits and Penetration Testing), wherethis kind of abuse is most reliably caught.
• API7: Server-Side Request Forgery (SSRF) — an APIaccepts a user-supplied URL and fetches it without validating the destination,letting an attacker reach internal systems. Addressed by Sections 2 and 3,which cover validating and sanitizing everything an API sends or receives.
• API8: Security Misconfiguration — open storage, verboseerror messages, missing security headers, or overly permissive CORS settings.Addressed by Section 2 (Encryption and HTTPS) and Section 6 (audits).
• API9: Improper Inventory Management — undocumented,deprecated, or debug API versions left exposed. Addressed directly by Section 7(API lifecycle management and decommissioning).
• API10: Unsafe Consumption of APIs — trusting data froma third-party API without validating it, so a compromised upstream APIcompromises you too. Addressed directly by Section 8 (Third-Party API SecurityConsiderations).
For the full detail behind eachcategory, including real-world examples, the OWASP API Security Projectmaintains the authoritative reference at owasp.org. Use the list above as aquick cross-check against the best practices in this guide — if a section abovefeels thin for your use case, the corresponding OWASP category is a good placeto dig deeper.
Use this checklist as a workingreference when building, reviewing, or integrating with APIs. It follows thesame structure as the best practices above — and maps to the OWASP API SecurityTop 10 categories covered in the previous section.
• Use a standard protocol (OAuth 2.0, API keys, or JWTs)appropriate to your use case
• Issue short-lived access tokens with refresh tokensrather than long-lived credentials
• Scope tokens and API keys to the minimum permissionsneeded
• Check authorization on every request, not just at login
• Enforce HTTPS (TLS 1.2+) on every endpoint — noplaintext HTTP
• Encrypt sensitive data at rest, in addition to intransit
• Set security headers and restrict CORS to known origins
• Validate and sanitize every input field, includingheaders and query parameters
• Use parameterized queries for all database access —never concatenate user input into SQL
• Restrict which object fields a request can read orwrite (avoid mass-assignment issues)
• Set per-client rate limits based on API key, token, orIP
• Return HTTP 429 with a Retry-After header when limitsare exceeded
• Tier limits by endpoint cost and client type
• Log every request and response, including timestamps,status codes, and caller identity
• Set alerts for unusual traffic patterns or spikes inerrors
• Retain logs long enough to support debugging, audits,and incident response
• Document each API version's purpose, usage, anddependencies
• Apply version control and deprecation policies withadvance notice to consumers
• Conduct a security review before decommissioning anyAPI
• Vet the security track record and reputation of anythird-party API provider
• Grant only the minimum access scopes the integrationneeds
• Monitor third-party APIs for security updates andbreaking changes
• Have a contingency plan for third-party API downtime ora security incident upstream
To download checklist, click here
The OWASP API Security Top 10 is the industry-standard list of the most critical security risks specific to APIs, maintained by the Open Web Application Security Project and most recently updated in 2023. It covers risks such as Broken Object Level Authorization, Broken Authentication, Unrestricted Resource Consumption, Server-Side RequestForgery, and Unsafe Consumption of APIs, among others. Unlike the general OWASP Top 10, which focuses on web application vulnerabilities broadly, this list addresses issues unique to how APIs expose data and business logic throughendpoints. The best practices in this guide map directly to each of these tencategories — see the OWASP API Security Top 10 section above for the full mapping. Reviewing your APIs against this list is one of the most efficientways to prioritize security work.
The most common API security risks include unauthorized access from weak or broken authentication, injection attacks such as SQL injection and cross-site scripting, excessive data exposure through endpoints that return more information than needed, lack of rate limiting that leaves APIs open to abuse, and security misconfigurations such as missing headers or overly verbose error messages. Third-party dependencies and human error round out the list — a vulnerability in an API you integrate with, or a single misconfigured permission, can compromise your application even if your own code is otherwise secure. This guide's section on API security risks covers each of these in more depth. Addressing them systematically, using the OWASP API Security Top 10 as a checklist, is the most reliable way to reduce your API's attack surface.
A solid API security checklistcovers six areas: authentication and authorization (strong protocols,short-lived tokens, least-privilege scopes), encryption (HTTPS/TLS for alltraffic and encryption at rest), input validation (sanitizing every parameter andusing parameterized queries), rate limiting (per-client limits with HTTP 429responses), monitoring and logging (recording every request, response, anderror), and third-party API review (vetting providers and limiting the accessyou grant them). The full checklist earlier in this guide breaks each area intospecific, actionable items. Knit handles several of these — encryption,logging, and monitoring — automatically for every one of the 100+ platforms itconnects, which is useful if your checklist spans many integrations rather thana single API.
The OWASP Top 10 is a broad listof the most critical risks to web applications generally, covering issues like injection, broken access control, and security misconfiguration across any type of application. The OWASP API Security Top 10 is a separate, API-specific listthat focuses on risks unique to how APIs expose data and functionality through endpoints — such as Broken Object Level Authorization, where an API lets a user access another user's data by changing an ID in a request, or Unrestricted ResourceConsumption, where an API has no limits on request volume or payload size. If you're building or securing APIs specifically, the API Security Top 10 is the more directly applicable framework, though both lists are maintained by OWASP and complement each other.
Strong API authentication startswith choosing the right protocol for the job — OAuth 2.0 for delegated access,API keys for simple server-to-server calls, or JWTs for stateless sessionvalidation — and applying it consistently. From there, best practices includeissuing short-lived access tokens with refresh tokens rather than long-livedcredentials, scoping tokens to the minimum permissions needed, and rotating APIkeys regularly. Authorization should be checked on every request, not just atlogin, to avoid the broken object- and function-level access issues covered inthe OWASP mapping above. For teams managing authentication across manythird-party APIs rather than just their own, Knit handles OAuth flows, tokenrefresh, and credential storage for every connected platform, removing a commonsource of authentication-related security gaps.
Effective rate limiting startswith setting per-client limits based on an API key, token, or IP address, andreturning an HTTP 429 (Too Many Requests) response with a Retry-After headerwhen a client exceeds them. Many APIs combine hard limits with throttling —slowing requests down rather than rejecting them outright — so the servicedegrades gracefully under load instead of failing. Limits should be tiered byendpoint cost and client type, and logging rate-limit events helps identifyclients that need higher limits or are misbehaving. Knit's guide to API ratelimiting and throttling covers these patterns in more detail, including how tohandle 429 responses when integrating with third-party APIs that enforce theirown limits.
Knit secures every integrationwith AES-256 encryption at rest and TLS 1.3 in transit, with an additionallayer of encryption for PII and user credentials. Beyond encryption, Knit isSOC2, GDPR, and ISO27001 certified, and its infrastructure is continuouslymonitored with intrusion detection systems backed by a 24/7 support team. Forteams evaluating third-party APIs as part of their own security review — arecurring theme in the checklist above — Knit's security practices aredocumented in full at getknit.dev/security, making it straightforward toinclude in a vendor security assessment.
No. Knit is built as apass-through proxy and does not store a copy of your end users' data on itsservers or share it with any third party. Data is processed in Knit'sapplication server and sent directly to your webhooks via event-based syncs,rather than being retained in a database. This directly addresses one of thebiggest third-party API security concerns covered in this guide — that avendor's data retention practices could expose your users' data even if yourown systems are secure. For security-conscious teams, this no-data-copyarchitecture removes an entire category of risk from the third-party API reviewchecklist.
Have a question that isn'tcovered here? Read all the FAQs in Knit's dedicated post on common API securityFAQs.
If you are dealing with a large number of API integrations and looking for smarter solutions, check out unified API solutions like Knit. Knit ensures that you have access to high quality data faster in the safest way possible.
We understand how crucial your data is. That's why we are always fine-tuning our security measures to offer maximum protection for your user data. Talk to one of our experts to learn more. If you are ready to build integrations at scale, get your API keys for free

API logging is the practice of recording every request and response that passes through yourAPI — including timestamps, status codes, and identifying details — so you have a complete,searchable history of what happened and when. Pair that with monitoring, which watches thisactivity in real time, and you get both the early-warning system and the audit trail you need tokeep an API reliable and secure.This guide covers what API logging is, what to capture, where logs typically live, the tools teamsuse, how monitoring builds on logging, and how Knit gives you a single logging and monitoringview across every third-party API your product connects to.
• What Is API Logging?
• What to Log: Key Data Points for Effective API Logs
• Where API Logs Are Stored
• API Logging Tools and Examples
• API Monitoring: How It Builds on Logging
• How Knit Centralizes Logging and Monitoring Across YourIntegrations
• FAQs
API logging is the process ofrecording details about every request made to an API and every response itreturns. Each log entry typically captures the endpoint called, the HTTPmethod, a timestamp, the response status code, the identity of the caller, andhow long the request took to process.
Think of it as a diary for yourAPI: every time a client calls an endpoint, a log entry records who did what,when, and what happened as a result. Over time, these entries build asearchable history you can use to debug a failed request from last week, demonstratecompliance during an audit, spot a client that's hitting rate limits, orunderstand which endpoints get the most traffic.
API logging is distinct from APImonitoring, which is about watching that activity in real time and reacting toit — covered later in this guide. Logging is the record; monitoring is theresponse.
Not all logging is usefullogging. A log entry that just says “request received” tells you little whenyou’re debugging an incident at 2am. At minimum, an API log entry shouldcapture:
• Timestamp — when the request was received and when theresponse was sent, which also gives you latency
• Endpoint and HTTP method — which resource was calledand how (GET, POST, PATCH, DELETE, etc.)
• Request and response status codes — 200, 401, 404, 429,500, and so on, the fastest way to spot patterns of failure
• Caller identity — an API key, user ID, or client ID(not raw credentials), so you can trace activity back to a specific integrationor user
• IP address and user agent — useful for spotting unusualaccess patterns or abuse
• Request and response size and latency — helps identifyslow endpoints or oversized payloads
• Error details — for failed requests, the error code anda human-readable message, not just a stack trace
One important best practice:never log sensitive data in plain text. Passwords, API secrets, access tokens,and personally identifiable information such as full names, emails, or paymentdetails should be masked or excluded entirely — logs are often retained formonths and accessed by more people than the production database.
Finally, decide on retention upfront. Many teams keep detailed logs for 30–90 days for debugging, then roll upto aggregated metrics — request counts, error rates — for longer-term trendanalysis. This keeps storage costs predictable while still preserving thehistory you need.
Where API logs live depends on the size and maturity of your setup. The three most common options:
• Application-level log files — the simplest approach:your API writes structured log lines, often as JSON, to stdout or a file. Thisworks fine for small services or local development but doesn’t scale well forsearching across many instances.
• Centralized log management platforms — tools like theELK stack (Elasticsearch, Logstash, Kibana), Grafana Loki, Datadog, or Splunkaggregate logs from every instance of your API into one searchable system, withdashboards, alerts, and retention policies built in. This is the standardapproach for production APIs at any meaningful scale.
• Cloud-native logging services — if your API runs on AWS, Google Cloud, or Azure, services like Amazon CloudWatch Logs, Google Cloud Logging, or Azure Monitor Logs capture logs automatically from yourinfrastructure with minimal setup and integrate with the rest of each cloud’s monitoring stack.
Most teams start withapplication-level logs during development, then move to a centralized orcloud-native platform once the API is in production and logs need to besearched, correlated, and alerted on across multiple services.
The right logging tool dependson your stack and budget. Broadly, tools fall into a few categories:
• Open-source log aggregation — the ELK stack and GrafanaLoki are widely used, self-hosted options that give you full control overstorage and retention, at the cost of running and maintaining theinfrastructure yourself.
• API-focused observability platforms — tools like Moesif and New Relic are built specifically around API traffic, with features like per-endpoint analytics, error-rate tracking, and customer-level usage breakdowns alongside raw logs.
• General application monitoring platforms — Datadog,Splunk, and similar platforms cover API logs as part of a broader observabilitystack that also includes infrastructure metrics, traces, and alerting.
• Cloud provider tools — AWS, Google Cloud, and Azure allinclude native logging (CloudWatch, Cloud Logging, Azure Monitor) that requireslittle setup if you’re already running on that cloud.
A simple API log entry, in JSON,might look like:
{
  "timestamp": "2026-06-11T10:32:01Z",
  "method": "GET",
  "endpoint": "/v1/contacts",
  "status": 200,
  "client_id": "acct_8821",
  "latency_ms": 142
}
That single entry — timestamp,method, endpoint, status, caller, and latency — is enough to answer most “whathappened and when” questions, and is the basis most logging tools builddashboards and alerts on top of.
Real-time monitoring provides an extra layer of protection by actively watching API traffic for any anomalies or suspicious patterns.
For instance -
In both cases, real-time monitoring can trigger alerts or automated responses, helping you take immediate action to safeguard your API and data.
Now, on similar lines, imagine having a detailed diary of every interaction and event within your home, from visitors to when and how they entered. Logging mechanisms in API security serve a similar purpose - they provide a detailed record of API activities, serving as a digital trail of events.
Logging is not just about compliance; it's about visibility and accountability. By implementing logging, you create a historical archive of who accessed your API, what they did, and when they did it. This not only helps you trace back and investigate incidents but also aids in understanding usage patterns and identifying potential vulnerabilities.
To ensure robust API security, your logging mechanisms should capture a wide range of information, including request and response data, user identities, IP addresses, timestamps, and error messages. This data can be invaluable for forensic analysis and incident response.
Where logging gives you a recordof what happened, monitoring watches that activity as it happens and flagsanything unusual. Real-time monitoring can, for example:
• Spot a sudden surge in requests from a single client,which could indicate a denial-of-service attempt or a runaway integration
• Detect repeated authentication failures in quicksuccession, which often signals a brute-force attempt or a misconfigured client
• Alert when error rates or latency for a specificendpoint spike - often the first sign of a deployment issue or a downstreamoutage
When monitoring flags something,your logs provide the context: what request triggered it, who made it, and whathappened immediately before and after. Logging without monitoring means youhave the history but may find out about problems too late; monitoring withoutlogging gives you an alert but no record to investigate it with. Mostproduction APIs need both.
Implementing the kind of loggingand monitoring described above is straightforward for one API. It gets harderwhen your product connects to dozens of third-party platforms — each with itsown auth, rate limits, and failure modes — and you need visibility across allof them.
This is where Knit’s Logs andIssues page comes in. Knit’s Unified API connects your product to 100+ HRIS,ATS, CRM, and other SaaS platforms through a single integration, and gives youone page that shows the history of every API call, webhook, and integratedaccount across all of them — with filters so you can drill into a specificcustomer, platform, or time range. Instead of building separate logging andmonitoring for each integration, you get one consolidated view from day one.
For platforms that don’t supportreal-time webhooks natively, Knit’s virtual webhooks deliver normalized changeevents to your application, so you’re not relying on logs alone to know whensomething changes upstream.
Want one view of logging and monitoring across every integration your product supports? Sign up for free andexplore Knit’s Logs and Issues page for yourself.
API logs are records of everyrequest and response that pass through an API, including the endpoint called,the HTTP method, timestamps, status codes, and the identity of the caller.Knit's Unified API generates this kind of log data automatically for everyconnected integration, surfacing it in a single Logs and Issues page ratherthan requiring you to build logging for each platform separately. A typical logentry might record that a GET request to /v1/contacts returned a 200 status in142ms for a specific client ID. Over time, these entries form a searchablehistory that teams use to debug failed requests, demonstrate compliance duringaudits, and understand usage patterns across their own API and the third-partyAPIs they depend on.
API logs are typically stored in one of three places: application-level log files for small or early-stageservices, centralized log management platforms such as the ELK stack, GrafanaLoki, or Datadog for production APIs at scale, and cloud-native loggingservices such as AWS CloudWatch Logs or Google Cloud Logging for APIs runningon those platforms. For teams managing logs across many third-partyintegrations rather than a single API, Knit's Logs and Issues page stores andsurfaces this history in one place automatically, covering every connectedplatform without separate log infrastructure per integration. Most teams startwith application-level logs during development and move to a centralized orcloud-native platform once logs need to be searched and correlated acrossservices.
At minimum, log the timestamp,endpoint, HTTP method, request and response status codes, caller identity suchas an API key or client ID, latency, and error details for failed requests.These fields are usually enough to answer most debugging questions: whathappened, when, to whom, and how long it took. Avoid logging sensitive datasuch as passwords, access tokens, or personally identifiable information inplain text, since logs are often retained for months and accessed more broadlythan production databases. If your product integrates with multiple third-partyAPIs, Knit's Unified API captures this level of detail for every connectedplatform automatically, so your team doesn't need to instrument loggingseparately for each integration you support.
API logging is the practice ofrecording what happened — every request, response, status code, and timestamp —building a historical record you can search later. API monitoring is watchingthat activity in real time and reacting to it, for example alerting when errorrates spike or when an unusual surge in requests suggests a problem. Loggingwithout monitoring means you have the history but may not notice an issue untilsomeone looks for it; monitoring without logging gives you an alert but norecord to investigate. Knit combines both for the integrations it connects: itsLogs and Issues page gives you the historical record, while virtual webhookssurface real-time change events for platforms that don't support webhooksnatively, so you get visibility and alerts together.
Good API logging practicesinclude capturing a consistent set of fields on every request — timestamp,endpoint, method, status code, caller identity, and latency — using astructured format like JSON so logs are easy to search and parse. Mask orexclude sensitive data such as passwords, tokens, and personal informationrather than logging it in plain text. Set a retention policy up front, forexample keeping detailed logs for 30-90 days and rolling up to aggregatedmetrics afterward to control storage costs. For teams supporting manythird-party integrations, Knit applies this kind of structured, consistentlogging automatically across every connected platform, so individual teamsdon't need to define and maintain their own logging standards per integration.
Common API logging tools fall into a few categories: open-source log aggregation platforms like the ELK stack and Grafana Loki, API-focused observability tools like Moesif and New Relic, broader application monitoring platforms like Datadog and Splunk, and cloud-native logging services such as AWS CloudWatch Logs, Google Cloud Logging, and Azure Monitor. Which one fits depends on your stack, scale, andwhether you need API-specific analytics or broader infrastructure monitoring alongside logs. If the logging you need is for third-party APIs your productconnects to rather than your own API, Knit's Logs and Issues page provides thisview natively across 100+ connected platforms, without requiring you to wire up a separate logging tool for each one.
Knit gives teams a single Logsand Issues page that shows the history of every API call, webhook, andintegrated account across all the platforms connected through Knit's UnifiedAPI — currently 100+ HRIS, ATS, CRM, and other SaaS tools. Instead of buildingseparate logging for each integration your product supports, you get oneconsolidated, filterable view from day one, covering specific customers,platforms, or time ranges. This is particularly useful for SaaS products thatsupport many customer-facing integrations, where debugging “why didn’t thissync” questions across dozens of platforms would otherwise mean checking dozensof different logging systems.
Yes. Knit provides virtualwebhooks that deliver normalized, real-time change events from connectedplatforms, including ones that don't support outbound webhooks natively — Knithandles the underlying polling and delivers a consistent event format to yourapplication either way. Combined with the Logs and Issues page, this means yourteam gets both a real-time signal when something changes or fails upstream, anda searchable historical record to investigate it. For products that depend ondozens of third-party integrations staying in sync, this removes the need tobuild custom monitoring and polling logic for each platform individually.
Building a ServiceNow integration is fundamentally different from every other API integration you've built — because there is no single ServiceNow. Every customer runs their own instance at a unique subdomain, with their own OAuth endpoints, their own permission model, and their own table customisations. Guides written for ServiceNow developers working inside an instance won't help you. This one is written for developers building a product that connects to their customers' ServiceNow instances.
Quick answer: Use the Table API (/api/now/table/{tableName}) for reading and writing incidents, users, groups, and requests. Authenticate via OAuth 2.0 — but collect the customer's instance URL first, since every OAuth endpoint is instance-specific. The five tables that cover 90% of ITSM product integration use cases areincident,sys_user,sys_user_group,sc_request, andchange_request.
This guide covers per-instance OAuth setup, Table API endpoints and query syntax, webhook configuration, rate limits, and three real-world integration patterns with working code — all from the perspective of an external developer connecting to a customer's ServiceNow instance.
If your product needs to support ServiceNow alongside other ITSM tools like Jira, Zendesk, or GitHub Issues, there's a unified approach worth knowing about — covered in the Building with Knit section.
ServiceNow exposes several API surfaces. The right one for your integration depends on what you're doing:
The Table API is the right choice for the vast majority of product integrations. It provides CRUD access to any ServiceNow table through a consistent URL pattern:
https://{instance}.service-now.com/api/now/table/{tableName}The Scripted REST API requires a ServiceNow developer to create custom endpoints inside the instance — you can't deploy these from outside. The Import Set API is for bulk historical data loads, not real-time integrations.
ServiceNow OAuth is standard OAuth 2.0 in mechanics, but the endpoints are not standard — they're instance-specific. This is the detail that trips most developers up when building a multi-tenant integration.
For a typical API (Slack, GitHub, HubSpot), you hardcode a single OAuth endpoint:
https://slack.com/api/oauth.v2.accessFor ServiceNow, every customer has their own:
https://{customer-instance}.service-now.com/oauth_token.do
https://{customer-instance}.service-now.com/oauth_auth.do
This means your integration must:
Here's what that looks like in practice:
Your onboarding UI needs to ask for the instance identifier — the [company] part of https://[company].service-now.com. This is what Knit's auth screen shows users when they connect ServiceNow.
def get_servicenow_endpoints(instance: str) -> dict:
    """
    Build instance-specific OAuth endpoints from the instance identifier.
    instance = "mycompany" (not the full URL)
    """
    base = f"https://{instance}.service-now.com"
    return {
        "base_url": base,
        "auth_url": f"{base}/oauth_auth.do",
        "token_url": f"{base}/oauth_token.do",
        "api_base": f"{base}/api/now/table"
}Before any OAuth flow can happen, the customer's ServiceNow admin must register your application as an OAuth provider in their instance: System OAuth > Application Registry > New > Create an OAuth API endpoint for external clients.
Required fields:
This is a one-time admin step per customer instance. Document it clearly in your onboarding instructions.
import requests
from urllib.parse import urlencode

def get_auth_url(instance: str, client_id: str, redirect_uri: str, state: str) -> str:
    """Redirect the customer's admin to this URL to initiate OAuth consent."""
    endpoints = get_servicenow_endpoints(instance)
    params = {
        "response_type": "code",
        "client_id": client_id,
        "redirect_uri": redirect_uri,
        "state": state  # CSRF protection — always validate on callback
    }
    return f"{endpoints['auth_url']}?{urlencode(params)}"


def exchange_code_for_tokens(instance: str, client_id: str, client_secret: str,
                              code: str, redirect_uri: str) -> dict:
    """Exchange the authorization code for access + refresh tokens."""
    endpoints = get_servicenow_endpoints(instance)
    response = requests.post(
        endpoints["token_url"],
        data={
            "grant_type": "authorization_code",
            "code": code,
            "redirect_uri": redirect_uri,
            "client_id": client_id,
            "client_secret": client_secret
        }
    )
    response.raise_for_status()
    tokens = response.json()
    # Store tokens["access_token"], tokens["refresh_token"], and instance per customer
return tokensServiceNow access tokens expire after 30 minutes by default (configurable by the admin). Build refresh logic before you hit your first expiry:
def refresh_access_token(instance: str, client_id: str, client_secret: str,
                          refresh_token: str) -> dict:
    endpoints = get_servicenow_endpoints(instance)
    response = requests.post(
        endpoints["token_url"],
        data={
            "grant_type": "refresh_token",
            "client_secret": client_secret,
            "client_id": client_id,
            "refresh_token": refresh_token
        }
    )
    response.raise_for_status()
    return response.json()  # New access_token and refresh_token
If you're building a product that integrates with ServiceNow alongside other ITSM tools — Jira, Zendesk, GitHub, Linear — building and maintaining per-instance OAuth for each one is significant infrastructure overhead. Knit handles ServiceNow's instance URL collection and OAuth flow per customer, so you get a single integration layer across all your supported tools. → getknit.dev/integration/servicenow
ServiceNow has hundreds of tables. For a B2B product integration, these five cover the vast majority of use cases:
All Table API requests follow the same pattern:
GET https://{instance}.service-now.com/api/now/table/{table}
Authorization: Bearer {access_token}
Accept: application/json
Content-Type: application/json
X-no-response-body: falseServiceNow's Table API uses sysparm_ prefixed query parameters for filtering, field selection, and pagination. Understanding these is essential — without them you'll either pull the entire table or struggle with pagination.
def get_incidents(instance: str, token: str,
                  state: str = None, assigned_to: str = None,
                  limit: int = 100, offset: int = 0) -> dict:
    """
    Fetch incidents from a ServiceNow instance.
    state codes: 1=New, 2=In Progress, 3=On Hold, 6=Resolved, 7=Closed
    """
    query_parts = []
    if state:
        query_parts.append(f"state={state}")
    if assigned_to:
        query_parts.append(f"assigned_to.user_name={assigned_to}")

    params = {
        "sysparm_limit": limit,
        "sysparm_offset": offset,
        "sysparm_fields": "sys_id,number,short_description,description,state,"
                          "priority,assigned_to,assignment_group,opened_at,"
                          "resolved_at,sys_created_on,sys_updated_on",
        "sysparm_exclude_reference_link": "true",
        "sysparm_display_value": "false"  # Raw values are easier to work with
    }
    if query_parts:
        params["sysparm_query"] = "^".join(query_parts)

    response = requests.get(
        f"https://{instance}.service-now.com/api/now/table/incident",
        headers={
            "Authorization": f"Bearer {token}",
            "Accept": "application/json"
        },
        params=params
    )
    response.raise_for_status()

    # Pagination: check X-Total-Count header for total record count
    total = int(response.headers.get("X-Total-Count", 0))
    return {
        "records": response.json()["result"],
        "total": total,
        "has_more": (offset + limit) < total
}def create_incident(instance: str, token: str,
short_description: str, description: str,
caller_id: str = None, priority: int = 3,
assignment_group: str = None) -> dict:
"""
Creates an incident. Priority: 1=Critical, 2=High, 3=Moderate, 4=Low.
caller_id and assignment_group are sys_id values from sys_user/sys_user_group.
"""
payload = {
"short_description": short_description,
"description": description,
"priority": str(priority),
"impact": str(priority), # Often mirrors priority
"urgency": str(priority)
}
if caller_id:
payload["caller_id"] = caller_id
if assignment_group:
payload["assignment_group"] = assignment_group
response = requests.post(
f"https://{instance}.service-now.com/api/now/table/incident",
headers={
"Authorization": f"Bearer {token}",
"Accept": "application/json",
"Content-Type": "application/json"
},
json=payload
)
response.raise_for_status()
result = response.json()["result"]
return {
"sys_id": result["sys_id"], # Use this for future updates
"number": result["number"], # Human-readable e.g. INC0012345
"state": result["state"],
"url": f"https://{instance}.service-now.com/nav_to.do?uri=incident.do?sys_id={result['sys_id']}"
}def update_incident(instance: str, token: str,
sys_id: str, **fields) -> dict:
"""
Update any incident fields by sys_id.
Common fields: state, assigned_to, assignment_group, work_notes, close_notes
"""
response = requests.patch(
f"https://{instance}.service-now.com/api/now/table/incident/{sys_id}",
headers={
"Authorization": f"Bearer {token}",
"Accept": "application/json",
"Content-Type": "application/json"
},
json=fields
)
response.raise_for_status()
return response.json()["result"]# Get a user by their email address (common lookup pattern)
def get_user_by_email(instance: str, token: str, email: str) -> dict | None:
response = requests.get(
f"https://{instance}.service-now.com/api/now/table/sys_user",
headers={"Authorization": f"Bearer {token}", "Accept": "application/json"},
params={
"sysparm_query": f"email={email}^active=true",
"sysparm_fields": "sys_id,name,email,user_name",
"sysparm_limit": 1,
"sysparm_exclude_reference_link": "true"
}
)
response.raise_for_status()
results = response.json()["result"]
return results[0] if results else None
# List all active groups
def list_groups(instance: str, token: str) -> list:
response = requests.get(
f"https://{instance}.service-now.com/api/now/table/sys_user_group",
headers={"Authorization": f"Bearer {token}", "Accept": "application/json"},
params={
"sysparm_query": "active=true",
"sysparm_fields": "sys_id,name,description,manager",
"sysparm_limit": 1000,
"sysparm_exclude_reference_link": "true"
}
)
response.raise_for_status()
return response.json()["result"]ServiceNow does not have native outbound webhooks that you configure from outside the instance. Real-time event notifications require a ServiceNow admin on the customer side to set up two things: a Business Rule (which triggers on record events) and an Outbound REST Message (which sends the payload to your server).
This is a key difference from APIs like GitHub or Slack where you register a webhook URL programmatically. For ServiceNow, you need to provide your customers' IT teams with setup instructions.
What the customer's admin configures:
Business Rule (System Definition > Business Rules):
incidentafter insert/update// ServiceNow Business Rule script
var message = new sn_ws.RESTMessageV2('Your Integration', 'POST incident');
message.setStringParameterNoEscape('sys_id', current.sys_id);
message.setStringParameterNoEscape('number', current.number);
message.setStringParameterNoEscape('state', current.state);
message.setStringParameterNoEscape('updated_at', current.sys_updated_on);
var response = message.execute();Outbound REST Message (System Web Services > Outbound > REST Message):
On your server, receive and process the payload:
from flask import Flask, request, abort
import hmac, hashlib

app = Flask(__name__)

@app.route("/webhook/servicenow", methods=["POST"])
def handle_servicenow_event():
    # ServiceNow doesn't send a standard signature header —
    # secure your endpoint via IP allowlisting or a shared secret
    # passed as a query param or custom header agreed with the admin
    payload = request.json
    sys_id = payload.get("sys_id")
    state = payload.get("state")

    # State codes: 1=New, 2=In Progress, 3=On Hold, 6=Resolved, 7=Closed
    if state in ("6", "7"):
        close_linked_item_in_your_product(sys_id)

    return "", 200
Because webhook setup requires admin access on the customer's instance, build your integration to work without webhooks first (polling) and offer webhook setup as an enhancement for customers whose admins can configure it.
ServiceNow rate limits are instance-configured, not globally fixed — your customer's IT admin controls them. This creates a situation you won't face with other APIs: two customers on the same plan can have different rate limits.
Unlike GitHub or Slack, ServiceNow does not return rate limit headers (X-RateLimit-Remaining etc.) on every response. You'll receive a 429 Too Many Requests when you hit the limit — build retry logic with exponential backoff:
import time

def servicenow_request(url: str, token: str, max_retries: int = 3, **kwargs) -> requests.Response:
    for attempt in range(max_retries):
        response = requests.get(url, headers={
            "Authorization": f"Bearer {token}",
            "Accept": "application/json"
        }, **kwargs)

        if response.status_code == 429:
            wait = 2 ** attempt * 10  # 10s, 20s, 40s
            time.sleep(wait)
            continue

        if response.status_code == 401:
            # Token likely expired — trigger refresh and retry once
            raise TokenExpiredError("Access token expired")

        response.raise_for_status()
        return response

    raise Exception(f"Max retries exceeded for {url}")
For sustained high-volume integrations, use a dedicated integration user account in ServiceNow rather than a human user's account — this ensures your rate limit isn't shared with the user's other API activity.
Pull all open incidents and keep them in sync with periodic polling:
def full_incident_sync(instance: str, token: str) -> list:
    """
    Full sync of all open and in-progress incidents.
    Run on initial connection; switch to delta sync (updatedAfter) for ongoing.
    """
    all_incidents = []
    offset = 0
    limit = 100

    while True:
        page = get_incidents(
            instance=instance,
            token=token,
            limit=limit,
            offset=offset
        )
        all_incidents.extend(page["records"])

        if not page["has_more"]:
            break
        offset += limit

    # Normalise ServiceNow state codes to your product's status model
    status_map = {
        "1": "open", "2": "in_progress", "3": "on_hold",
        "6": "resolved", "7": "closed"
    }

    return [
        {
            "external_id": i["sys_id"],
            "reference": i["number"],
            "title": i["short_description"],
            "status": status_map.get(str(i["state"]), "unknown"),
            "priority": i["priority"],
            "assignee_id": i.get("assigned_to"),
            "created_at": i["sys_created_on"],
            "updated_at": i["sys_updated_on"]
        }
        for i in all_incidents
]The common "escalate to IT" pattern — a user triggers an action in your product and it creates a ServiceNow incident:
Raw ServiceNow approach — you need to resolve the user's sys_id first, look up the right assignment group sys_id, then create the incident:
# Step 1: resolve caller sys_id from user's email
caller = get_user_by_email(instance, token, user_email)
caller_sys_id = caller["sys_id"] if caller else None

# Step 2: look up assignment group sys_id
groups = list_groups(instance, token)
group = next((g for g in groups if g["name"] == "IT Help Desk"), None)
group_sys_id = group["sys_id"] if group else None

# Step 3: create the incident
incident = create_incident(
    instance=instance,
    token=token,
    short_description=f"Alert from {your_product}: {alert_title}",
    description=alert_details,
    caller_id=caller_sys_id,
    assignment_group=group_sys_id,
    priority=2  # High
)
# Store incident["sys_id"] in your DB for future status sync
With Knit — skip the sys_id resolution steps. Knit's normalised endpoints return consistent IDs you can use directly:
# Get incidents already filtered and paginated
incidents = requests.get(
    "https://api.getknit.dev/v1.0/ticketing/tickets.list",
    headers={
        "Authorization": f"Bearer {knit_token}",
        "X-Knit-Integration-Id": integration_id
    },
    params={"status": "OPEN", "assignedToId": user_id}
)
# Update an incident's status
requests.post(
    "https://api.getknit.dev/v1.0/ticketing/ticket.update",
    headers={
        "Authorization": f"Bearer {knit_token}",
        "X-Knit-Integration-Id": integration_id
    },
    json={"ticketId": ticket_id, "status": "IN_PROGRESS", "assignedToId": agent_id}
)Many products need to know which ServiceNow users and groups a customer has, to map them to your product's access model:
def sync_users_and_groups(instance: str, token: str) -> dict:
    """
    Sync all active users and groups from ServiceNow.
    Used to populate assignee pickers and map access levels.
    """
    # Fetch users — paginate if the instance has many
    users_response = requests.get(
        f"https://{instance}.service-now.com/api/now/table/sys_user",
        headers={"Authorization": f"Bearer {token}", "Accept": "application/json"},
        params={
            "sysparm_query": "active=true",
            "sysparm_fields": "sys_id,name,email,user_name,department",
            "sysparm_limit": 1000,
            "sysparm_exclude_reference_link": "true"
        }
    )
    users = users_response.json()["result"]

    # Fetch groups
    groups = list_groups(instance, token)

    return {
        "users": [
            {"id": u["sys_id"], "name": u["name"],
             "email": u["email"], "username": u["user_name"]}
            for u in users
        ],
        "groups": [
            {"id": g["sys_id"], "name": g["name"]}
            for g in groups
        ]
}The two hardest parts of a ServiceNow product integration are both auth-related: collecting the instance URL from each customer, constructing per-instance OAuth endpoints, and managing token refresh independently per customer installation. These are real engineering problems that have nothing to do with the value you're delivering to users.
Knit handles ServiceNow authentication — including instance URL collection and per-customer OAuth — so your integration starts from a normalised API call rather than an auth infrastructure build. The same Knit headers work across all your ticketing integrations:
Authorization: Bearer {your-knit-token}
X-Knit-Integration-Id: {customer-integration-id}
This is especially valuable if your product also supports Jira, Zendesk, GitHub Issues, Linear, or Asana — Knit's same API surface covers all of them, so you write the integration logic once.
The Knit APIs available for ServiceNow:
Example: list open high-priority incidents via Knit
/
import requests

def get_open_high_priority_incidents(knit_token: str, integration_id: str) -> list:
    """
    No instance URL handling. No token refresh. No sysparm syntax.
    Works the same way for ServiceNow, Jira, Zendesk, and every other Knit-supported tool.
    """
    all_tickets = []
    cursor = None

    while True:
        params = {"status": "OPEN"}
        if cursor:
            params["cursor"] = cursor

        response = requests.get(
            "https://api.getknit.dev/v1.0/ticketing/tickets.list",
            headers={
                "Authorization": f"Bearer {knit_token}",
                "X-Knit-Integration-Id": integration_id
            },
            params=params
        )
        response.raise_for_status()
        data = response.json()["data"]
        all_tickets.extend(data["tickets"])

        cursor = data["pagination"].get("next")
        if not cursor:
            break

    return all_tickets
→ See the full ServiceNow integration on Knit: getknit.dev/integration/servicenow
→ Knit's ticketing API docs: developers.getknit.dev
mycompany, not https://mycompany.service-now.com).sysparm_fields from the start to avoid pulling data you don't need.sys_user and sys_user_group on integration setup and cache the results. These change infrequently and are needed to populate assignee pickers and resolve group names.incident with sysparm_query=sys_updated_on>javascript:gs.dateGenerate('YYYY-MM-DD','HH:mm:ss') to fetch only records changed since your last sync rather than re-pulling everything.
What is the ServiceNow Table API?
The ServiceNow Table API is the primary REST interface for reading and writing records across any ServiceNow table. It exposes endpoints at https://{instance}.service-now.com/api/now/table/{tableName} and supports GET, POST, PUT, PATCH, and DELETE operations. For product integrations, the most relevant tables are incident, sys_user, sys_user_group, sc_request, and change_request. The Table API supports powerful query filtering via the sysparm_query parameter.
How do I authenticate with the ServiceNow REST API?
ServiceNow supports OAuth 2.0 (recommended for production) and Basic Auth. For OAuth, the token endpoint is https://{instance}.service-now.com/oauth_token.do and the authorization endpoint is https://{instance}.service-now.com/oauth_auth.do — both are instance-specific, so you must collect the customer's instance URL before initiating the OAuth flow. Tokens expire after 30 minutes by default; use the refresh token to obtain new ones without user interaction.
What is sysparm_query in ServiceNow?
sysparm_query is the ServiceNow Table API's parameter for filtering records. It uses ServiceNow's encoded query syntax: field operators joined with ^ (AND) or ^OR (OR). Common operators include =, !=, IN, STARTSWITH, CONTAINS. Example: state=1^assigned_toISNOTEMPTY^opened_at>=javascript:gs.beginningOfLast30Days(). Build queries in the ServiceNow Filter Builder UI first, then copy the encoded query string to use in your API calls.
What are the ServiceNow API rate limits?
ServiceNow API rate limits are configured per instance by the customer's admin, not fixed globally. The default is typically 5,000 API requests per hour per user account, but enterprise instances can have this set differently. ServiceNow does not return standard rate limit headers on every response — watch for 429 Too Many Requests and implement exponential backoff. The API defaults to a maximum of 10,000 records per single Table API query (controlled by the glide.db.max_view_records system property — most instances leave this at the default).
How do ServiceNow webhooks work?
ServiceNow does not have native outbound webhooks that you register from outside the instance. Real-time event notifications are built using Business Rules (server-side scripts that fire on table record events) combined with Outbound REST Messages. This requires a ServiceNow admin on the customer's side to configure. For integrations where webhook setup isn't feasible, use delta polling: query the incident table with a sys_updated_on> filter on a schedule.
What is the difference between the ServiceNow Table API and Import Set API?
The Table API directly reads and writes records with immediate effect — the right choice for most product integrations. The Import Set API stages data in a temporary table first, then a transform map processes it into the target table. Use Import Sets only for bulk historical data migration. For real-time integrations involving incidents, users, and groups, always use the Table API.
Which ServiceNow tables should I use for an ITSM integration?
Focus on five tables: incident for IT incidents, sys_user for user records, sys_user_group for team assignments, sc_request for service catalog requests, and change_request for change management. The incident table's state field uses numeric codes — 1=New, 2=In Progress, 3=On Hold, 6=Resolved, 7=Closed — always map these explicitly in your code rather than relying on display values.
Is there a simpler way to integrate with ServiceNow without building per-instance OAuth for each customer?
Yes. Knit provides a unified ticketing API that handles ServiceNow authentication — including collecting the instance URL and managing the per-instance OAuth flow per customer. Instead of building dynamic OAuth endpoint logic, token refresh, and per-customer credential storage, your customers connect their ServiceNow instance once through Knit's auth layer. You then call Knit's normalised endpoints for incidents, accounts, contacts, users, and groups — the same interface that works across Jira, GitHub, Zendesk, and more. → getknit.dev/integration/servicenow

Think of the last time you wished your AI assistant could actually do something instead of just talking about it. Maybe you wanted it to create a GitHub issue, update a spreadsheet, or pull real-time data from your CRM. This is exactly the problem that Model Context Protocol (MCP) servers solve—they transform AI from conversational tools into actionable agents that can interact with your real-world systems.
An MCP server acts as a universal translator between AI models and external tools, enabling AI assistants like Claude, GPT, or Gemini to perform concrete actions rather than just generating text. When properly implemented, MCP servers have helped companies achieve remarkable results: Block reported 25% faster project completion rates, while healthcare providers saw 40% increases in patient engagement through AI-powered workflows.
Since Anthropic introduced MCP in November 2024, the technology has rapidly gained traction with thousands of community-built servers and adoption by major platforms including Microsoft, Google, OpenAI, and Block.This growth reflects a fundamental shift from AI assistants that simply respond to questions toward AI agents that can take meaningful actions in business environments.
To appreciate why MCP servers matter, we need to understand the integration challenge that has historically limited AI adoption in business applications. Before MCP, connecting an AI model to external systems required building custom integrations for each combination of AI platform and business tool.
Imagine your organization uses five different AI models and ten business applications. Traditional approaches would require building fifty separate integrations—what developers call the "N×M problem." Each integration needs custom authentication logic, error handling, data transformation, and maintenance as APIs evolve.
This complexity created a significant barrier to AI adoption. Development teams would spend months building and maintaining custom connectors, only to repeat the process when adding new tools or switching AI providers. The result was that most organizations could only implement AI in isolated use cases rather than comprehensive, integrated workflows.
MCP servers eliminate this complexity by providing a standardized protocol that reduces integration requirements from N×M to N+M. Instead of building fifty custom integrations, you deploy ten MCP servers (one per business tool) that any AI model can use. This architectural improvement enables organizations to deploy new AI capabilities in days rather than months while maintaining consistency across different AI platforms.
Understanding MCP's architecture helps explain why it succeeds where previous integration approaches struggled. At its foundation, MCP uses JSON-RPC 2.0, a proven communication protocol that provides reliable, structured interactions between AI models and external systems.
The protocol operates through three fundamental primitives that AI models can understand and utilize naturally. Tools represent actions the AI can perform—creating database records, sending notifications, or executing automated workflows. Resources provide read-only access to information—documentation, file systems, or live metrics that inform AI decision-making. Prompts offer standardized templates for common interactions, ensuring consistent AI behavior across teams and use cases.
The breakthrough innovation lies in dynamic capability discovery. When an AI model connects to an MCP server, it automatically learns what functions are available without requiring pre-programmed knowledge. This means new integrations become immediately accessible to AI agents, and updates to backend systems don't break existing workflows.
Consider how this works in practice. When you deploy an MCP server for your project management system, any connected AI agent can automatically discover available functions like "create task," "assign team member," or "generate status report." The AI doesn't need specific training data about your project management tool—it learns the capabilities dynamically and can execute complex, multi-step workflows based on natural language instructions.
Transport mechanisms support different deployment scenarios while maintaining protocol consistency. STDIO transport enables secure, low-latency local connections perfect for development environments. HTTP with Server-Sent Events supports remote deployments with real-time streaming capabilities. The newest streamable HTTP transport provides enterprise-grade performance for production systems handling high-volume operations.
The most successful MCP implementations solve practical business challenges rather than showcasing technical capabilities. Developer workflow integration represents the largest category of deployments, with platforms like VS Code, Cursor, and GitHub Copilot using MCP servers to give AI assistants comprehensive understanding of development environments.
Block's engineering transformation exemplifies this impact. Their MCP implementation connects AI agents to internal databases, development platforms, and project management systems. The integration enables AI to handle routine tasks like code reviews, database queries, and deployment coordination automatically.
Design-to-development workflows showcase MCP's ability to bridge creative and technical processes. When Figma released their MCP server, it enabled AI assistants in development environments to extract design specifications, color palettes, and component hierarchies directly from design files. Designers can now describe modifications in natural language and watch AI generate corresponding code changes automatically, eliminating the traditional handoff friction between design and development teams.
Enterprise data integration represents another transformative application area. Apollo GraphQL's MCP server exemplifies this approach by making complex API schemas accessible through natural language queries. Instead of requiring developers to write custom GraphQL queries, business users can ask questions like "show me all customers who haven't placed orders in the last quarter" and receive accurate data without technical knowledge.
Healthcare organizations have achieved particularly impressive results by connecting patient management systems through MCP servers. AI chatbots can now access real-time medical records, appointment schedules, and billing information to provide comprehensive patient support. The 40% increase in patient engagement reflects how MCP enables more meaningful, actionable interactions rather than simple question-and-answer exchanges.
Manufacturing and supply chain applications demonstrate MCP's impact beyond software workflows. Companies use MCP-connected AI agents to monitor inventory levels, predict demand patterns, and coordinate supplier relationships automatically.
The primary advantage of MCP servers extends beyond technical convenience to fundamental business value creation. Integration standardization eliminates the custom development overhead that has historically limited AI adoption in enterprise environments. Development teams can focus on business logic rather than building and maintaining integration infrastructure.
This standardization creates a multiplier effect for AI initiatives. Each new MCP server deployment increases the capabilities of all connected AI agents simultaneously. When your organization adds an MCP server for customer support tools, every AI assistant across different departments can leverage those capabilities immediately without additional development work.
Semantic abstraction represents another crucial business benefit. Traditional APIs expose technical implementation details—cryptic field names, status codes, and data structures designed for programmers rather than business users. MCP servers translate these technical interfaces into human-readable parameters that AI models can understand and manipulate intuitively.
For example, creating a new customer contact through a traditional API might require managing dozens of technical fields with names like "custom_field_47" or "status_enum_id." An MCP server abstracts this complexity, enabling AI to create contacts using natural parameters like createContact(name: "Sarah Johnson", company: "Acme Corp", status: "active"). This abstraction makes AI interactions more reliable and reduces the expertise required to implement complex workflows.
The stateful session model enables sophisticated automation that would be difficult or impossible with traditional request-response APIs. AI agents can maintain context across multiple tool invocations, building up complex workflows step by step. An agent might analyze sales performance data, identify concerning trends, generate detailed reports, create presentation materials, and schedule team meetings to discuss findings—all as part of a single, coherent workflow initiated by a simple natural language request.
Security and scalability benefits emerge from implementing authentication and access controls at the protocol level rather than in each custom integration. MCP's OAuth 2.1 implementation with mandatory PKCE provides enterprise-grade security that scales automatically as you add new integrations. The event-driven architecture supports real-time updates without the polling overhead that can degrade performance in traditional integration approaches.
Successful MCP server deployment requires choosing the right architectural pattern for your organization's needs and constraints. Local development patterns serve individual developers who want to enhance their development environment capabilities. These implementations run MCP servers locally using STDIO transport, providing secure access to file systems and development tools without network dependencies or security concerns.
Remote production patterns suit enterprise deployments where multiple team members need consistent access to AI-enhanced workflows. These implementations deploy MCP servers as containerized microservices using HTTP-based transports with proper authentication and can scale automatically based on demand. Remote patterns enable organization-wide AI capabilities while maintaining centralized security and compliance controls.
Hybrid integration patterns combine local and remote servers for complex scenarios that require both individual productivity enhancement and enterprise system integration. Development teams might use local MCP servers for file system access and code analysis while connecting to remote servers for shared business systems like customer databases or project management platforms.
The ecosystem provides multiple implementation pathways depending on your technical requirements and available resources. The official Python and TypeScript SDKs offer comprehensive protocol support for organizations building custom servers tailored to specific business requirements. These SDKs handle the complex protocol details while providing flexibility for unique integration scenarios.
High-level frameworks like FastMCP significantly reduce development overhead for common server patterns. With FastMCP, you can implement functional MCP servers in just a few lines of code, making it accessible to teams without deep protocol expertise. This approach works well for straightforward integrations that follow standard patterns.
For many organizations, pre-built community servers eliminate custom development entirely. The MCP ecosystem includes professionally maintained servers for popular business applications like GitHub, Slack, Google Workspace, and Salesforce. These community servers undergo continuous testing and improvement, often providing more robust functionality than custom implementations.
Enterprise managed platforms like Knit represent the most efficient deployment path for organizations prioritizing rapid time-to-value over custom functionality. Rather than managing individual MCP servers for each business application, platforms like Knit's unified MCP server combine related APIs into comprehensive packages. For example, a single Knit deployment might integrate your entire HR technology stack—recruitment platforms, payroll systems, performance management tools, and employee directories—into one coherent MCP server that AI agents can use seamlessly.
Major technology platforms are building native MCP support to reduce deployment friction. Claude Desktop provides built-in MCP client capabilities that work with any compliant server. VS Code and Cursor offer seamless integration through extensions that automatically discover and configure available MCP servers. Microsoft's Windows 11 includes an MCP registry system that enables system-wide AI tool discovery and management.
MCP server deployments introduce unique security challenges that require careful consideration and proactive management. The protocol's role as an intermediary between AI models and business-critical systems creates potential attack vectors that don't exist in traditional application integrations.
Authentication and authorization form the security foundation for any MCP deployment. The latest MCP specification adopts OAuth 2.1 with mandatory PKCE (Proof Key for Code Exchange) for all client connections. This approach prevents authorization code interception attacks while supporting both human user authentication and machine-to-machine communication flows that automated AI agents require.
Implementing the principle of least privilege becomes especially critical when AI agents gain broad access to organizational systems. MCP servers should request only the minimum permissions necessary for their intended functionality and implement additional access controls based on user context, time restrictions, and business rules. Many security incidents in AI deployments result from overprivileged service accounts that exceed their intended scope and provide excessive access to automated systems.
Data handling and privacy protection require special attention since MCP servers often aggregate access to multiple sensitive systems simultaneously. The most secure architectural pattern involves event-driven systems that process data in real-time without persistent storage. This approach eliminates data breach risks associated with stored credentials or cached business information while maintaining the real-time capabilities that make AI agents effective in business environments.
Enterprise deployments should implement comprehensive monitoring and audit trails for all MCP server activities. Every tool invocation, resource access attempt, and authentication event should be logged with sufficient detail to support compliance requirements and security investigations. Structured logging formats enable automated security monitoring systems to detect unusual patterns or potential misuse of AI agent capabilities.
Network security considerations include enforcing HTTPS for all communications, implementing proper certificate validation, and using network policies to restrict server-to-server communications. Container-based MCP server deployments should follow security best practices including running as non-root users, using minimal base images, and implementing regular vulnerability scanning workflows.
The MCP ecosystem offers multiple deployment approaches, each optimized for different organizational needs, technical constraints, and business objectives. Understanding these options helps organizations make informed decisions that align with their specific requirements and capabilities.
Open source solutions like the official reference implementations provide maximum customization potential and benefit from active community development. These solutions work well for organizations with strong technical teams who need specific functionality or have unique integration requirements. However, open source deployments require ongoing maintenance, security management, and protocol updates that can consume significant engineering resources over time.
Self-hosted commercial platforms offer professional support and enterprise features while maintaining organizational control over data and deployment infrastructure. These solutions suit large enterprises with specific compliance requirements, existing infrastructure investments, or regulatory constraints that prevent cloud-based deployments. Self-hosted platforms typically provide better customization options than managed services but require more operational expertise and infrastructure management.
Managed MCP services eliminate operational overhead by handling server hosting, authentication management, security updates, and protocol compliance automatically. This approach enables organizations to focus on business value creation rather than infrastructure management. Managed platforms typically offer faster time-to-value and lower total cost of ownership, especially for organizations without dedicated DevOps expertise.
The choice between these approaches often comes down to integration breadth versus operational complexity. Building and maintaining individual MCP servers for each external system essentially recreates the integration maintenance burden that MCP was designed to eliminate. Organizations that need to integrate with dozens of business applications may find themselves managing more infrastructure complexity than they initially anticipated.
Unified integration platforms like Knit address this challenge by packaging related APIs into comprehensive, professionally maintained servers. Instead of deploying separate MCP servers for your project management tool, communication platform, file storage system, and authentication provider, a unified platform combines these into a single, coherent server that AI agents can use seamlessly. This approach significantly reduces the operational complexity while providing broader functionality than individual server deployments.
Authentication complexity represents another critical consideration in solution selection. Managing OAuth flows, token refresh cycles, and permission scopes across dozens of different services requires significant security expertise and creates ongoing maintenance overhead. Managed platforms abstract this complexity behind standardized authentication interfaces while maintaining enterprise-grade security controls and compliance capabilities.
For organizations prioritizing rapid deployment and minimal maintenance overhead, managed solutions like Knit's comprehensive MCP platform provide the fastest path to AI-powered workflows. Organizations with specific security requirements, existing infrastructure investments, or unique customization needs may prefer self-hosted options despite the additional operational complexity they introduce.
Successfully implementing MCP servers requires a structured approach that balances technical requirements with business objectives. The most effective implementations start with specific, measurable use cases rather than attempting comprehensive deployment across all organizational systems simultaneously.
Phase one should focus on identifying a high-impact, low-complexity integration that can demonstrate clear business value. Common starting points include enhancing developer productivity through IDE integrations, automating routine customer support tasks, or streamlining project management workflows. These use cases provide tangible benefits while allowing teams to develop expertise with MCP concepts and deployment patterns.
Technology selection during this initial phase should prioritize proven solutions over cutting-edge options. For developer-focused implementations, pre-built servers for GitHub, VS Code, or development environment tools offer immediate value with minimal setup complexity. Organizations focusing on business process automation might start with servers for their project management platform, communication tools, or document management systems.
The authentication and security setup process requires careful planning to ensure scalability as deployments expand. Organizations should establish OAuth application registrations, define permission scopes, and implement audit logging from the beginning rather than retrofitting security controls later. This foundation becomes especially important as MCP deployments expand to include more sensitive business systems.
Integration testing should validate both technical functionality and end-to-end business workflows. Protocol-level testing tools like MCP Inspector help identify communication issues, authentication problems, or malformed requests before production deployment. However, the most important validation involves testing actual business scenarios—can AI agents complete the workflows that provide business value, and do the results meet quality and accuracy requirements?
Phase two expansion can include broader integrations and more complex workflows based on lessons learned during initial deployment. Organizations typically find that success in one area creates demand for similar automation in adjacent business processes. This organic growth pattern helps ensure that MCP deployments align with actual business needs rather than pursuing technology implementation for its own sake.
For organizations seeking to minimize implementation complexity while maximizing integration breadth, platforms like Knit provide comprehensive getting-started resources that combine multiple business applications into unified MCP servers. This approach enables organizations to deploy extensive AI capabilities in hours rather than weeks while benefiting from professional maintenance and security management.
Even well-planned MCP implementations encounter predictable challenges that organizations can address proactively with proper preparation and realistic expectations. Integration complexity represents the most common obstacle, especially when organizations attempt to connect AI agents to legacy systems with limited API capabilities or inconsistent data formats.
Performance and reliability concerns emerge when MCP servers become critical components of business workflows. Unlike traditional applications where users can retry failed operations manually, AI agents require consistent, reliable access to external systems to complete automated workflows successfully. Organizations should implement proper error handling, retry logic, and fallback mechanisms to ensure robust operation.
User adoption challenges often arise when AI-powered workflows change established business processes. Successful implementations invest in user education, provide clear documentation of AI capabilities and limitations, and create gradual transition paths rather than attempting immediate, comprehensive workflow changes.
Scaling complexity becomes apparent as organizations expand from initial proof-of-concept deployments to enterprise-wide implementations. Managing authentication credentials, monitoring system performance, and maintaining consistent AI behavior across multiple integrated systems requires operational expertise that many organizations underestimate during initial planning.
Managed platforms like Knit address many of these challenges by providing professional implementation support, ongoing maintenance, and proven scaling patterns. Organizations can benefit from the operational expertise and lessons learned from multiple enterprise deployments rather than solving common problems independently.
MCP servers represent a fundamental shift in how organizations can leverage AI technology to improve business operations. Rather than treating AI as an isolated tool for specific tasks, MCP enables AI agents to become integral components of business workflows with the ability to access live data, execute actions, and maintain context across complex, multi-step processes.
The technology's rapid adoption reflects its ability to solve real business problems rather than showcase technical capabilities. Organizations across industries are discovering that standardized AI-tool integration eliminates the traditional barriers that have limited AI deployment in mission-critical business applications.
Early indicators suggest that organizations implementing comprehensive MCP strategies will develop significant competitive advantages as AI becomes more sophisticated and capable. The businesses that establish AI-powered workflows now will be positioned to benefit immediately as AI models become more powerful and reliable.
For development teams and engineering leaders evaluating AI integration strategies, MCP servers provide the standardized foundation needed to move beyond proof-of-concept demonstrations toward production systems that transform how work gets accomplished. Whether you choose to build custom implementations, deploy community servers, or leverage managed platforms like Knit's comprehensive MCP solutions, the key is establishing this foundation before AI capabilities advance to the point where integration becomes a competitive necessity rather than a strategic advantage.
The organizations that embrace MCP-powered AI integration today will shape the future of work in their industries, while those that delay adoption may find themselves struggling to catch up as AI-powered automation becomes the standard expectation for business efficiency and effectiveness.
An MCP server is a backend program that acts as a standardised bridge between an AI model and an external tool or data source - such as a CRM, database, calendar, or API. It implements the Model Context Protocol specification to expose resources, tools, and prompts that an AI agent can call. When a user asks an AI assistant to update a record or pull live data, the MCP server handles the actual interaction with the external system and returns structured results to the AI. Knit provides MCP servers for B2B SaaS integrations, enabling AI agents to take actions across HRIS, CRM, ATS, and accounting platforms.
The Model Context Protocol (MCP) is an open standard introduced by Anthropic in November 2024 that defines how AI applications connect to external data sources and tools. Built on JSON-RPC 2.0, MCP replaces the previous approach of building custom one-off integrations for each AI-tool combination - reducing the N×M integration problem (where N AI models each need M custom connectors) down to N+M. An AI host (e.g. Claude) connects to MCP clients, which communicate with MCP servers that wrap specific tools or data sources. MCP is now supported by Microsoft, Google, and hundreds of community-built servers.
A traditional API is a fixed contract between two systems - it defines endpoints that a developer explicitly calls with predetermined logic. MCP is a protocol layer that sits above APIs, allowing an AI agent to dynamically discover what actions are available and decide at runtime which to call based on user intent. In other words, APIs are called by code; MCP tools are called by AI reasoning. An MCP server typically wraps existing REST or GraphQL APIs and exposes them as AI-callable tools with natural-language descriptions, without replacing the underlying API.
Yes. An AI agent (MCP host) can connect to multiple MCP servers simultaneously, giving it access to tools across several systems in a single session. For example, an agent could query a Workday MCP server for employee data, write to a HubSpot MCP server to update a CRM record, and create a Google Calendar event - all in one workflow. The MCP client layer manages connections to multiple servers and presents all available tools to the AI as a unified toolset. Tool namespacing prevents conflicts when multiple servers expose similarly named functions.
n8n supports MCP through its AI Agent node, which can act as an MCP client connecting to any compliant MCP server. To use MCP in n8n: add an AI Agent node to your workflow, configure it with an LLM (e.g. GPT-4 or Claude), and attach MCP Tool nodes pointing to your MCP server URLs. The agent will then be able to call tools exposed by those servers as part of its reasoning loop. Knit's MCP servers can be connected to n8n AI agents to give them access to actions across HRIS, CRM, calendar, and eSignature platforms — enabling multi-step automations that read and write to real business systems.
Key enterprise benefits: reduced integration complexity - one MCP server per tool instead of custom code per AI-tool pair; AI model portability - switch from GPT to Claude without rebuilding integrations; standardised security controls — authentication and permissions are enforced at the MCP server layer rather than duplicated in AI prompts; faster deployment of new AI capabilities - adding a new tool means deploying one MCP server, not modifying application logic; and consistent behaviour across AI providers, since all models interact with the same tool definitions.
Key MCP security considerations: authenticate every MCP server connection — never expose an MCP server to the public internet without OAuth or token-based auth; apply least-privilege tool design — each MCP server should only expose the specific actions the AI agent needs, not full API access; validate and sanitise all inputs from AI models before passing them to underlying systems, since prompt injection can cause AI agents to call tools with malicious parameters; audit tool call logs for anomalous patterns; and for enterprise deployments, run MCP servers inside your own infrastructure rather than relying on third-party hosted servers for tools that access sensitive data.
Where a REST API requires code that explicitly calls specific endpoints, MCP lets an AI agent dynamically discover what actions are available and decide at runtime which to invoke. REST APIs are called by predetermined code logic; MCP tools are called by AI reasoning responding to natural language intent. In practice, you can instruct an AI agent to "update the candidate status and send a rejection email" without writing any orchestration logic — the agent uses MCP to determine which tools to call and in what sequence. Knit's unified MCP server is built for exactly this pattern: combining multiple business system actions into AI-executable workflows without custom integration code.
How do I get started building with MCP servers?
Yes — OpenAI added native MCP support to ChatGPT and the Agents SDK in early 2025, following Anthropic's November 2024 release of the specification. ChatGPT can connect to any MCP-compliant server as a tool source, allowing it to call the same MCP servers that Claude or other AI agents use. This cross-model compatibility is one of MCP's core design goals: MCP servers built for one AI platform work with any other platform that implements the protocol. Knit's MCP servers work with ChatGPT, Claude, Cursor, and any other MCP-compatible AI host.
MCP is a standard plug socket for AI tools. Before MCP, every AI assistant needed a custom cable / connector - a bespoke integration - to connect to each external system. MCP defines one universal socket shape, so any AI that supports the protocol can plug into any MCP server (your CRM, HRIS, calendar, or file system) without custom wiring. For developers, it means building one server per tool instead of one integration per AI-tool combination. Knit via its MCP gives AI agents access to real business systems across HRIS, CRM, ATS, and accounting platforms through a single unified server.
To get started with MCP:
(1) review the official MCP specification at modelcontextprotocol.io and the Anthropic SDK for Python or TypeScript;
(2) choose an MCP host — Claude Desktop, Cursor, or n8n are common starting points for testing;
(3) run an existing open-source MCP server locally (GitHub, Slack, and filesystem MCP servers are widely used for experimentation);
(4) build your first custom MCP server by defining tools with JSON schemas and implementing the handler logic; (
5) connect it to your AI host and test tool calls.
For production B2B integrations, Knit's pre-built MCP servers provide ready-to-use tools across HRIS, CRM, ATS, and accounting platforms without building server infrastructure from scratch.

If you are looking to unlock 40+ HRIS and ATS integrations with a single API key, check out Knit API. If not, keep reading
Note: This is a part of our series on API Pagination where we solve common developer queries in detail with common examples and code snippets. Please read the full guide here where we discuss page size, error handling, pagination stability, caching strategies and more.
Ensure that the pagination remains stable and consistent between requests. Newly added or deleted records should not affect the order or positioning of existing records during pagination. This ensures that users can navigate through the data without encountering unexpected changes.
To ensure that API pagination remains stable and consistent between requests, follow these guidelines:
If you're implementing sorting in your pagination, ensure that the sorting mechanism remains stable.
This means that when multiple records have the same value for the sorting field, their relative order should not change between requests.
For example, if you sort by the "date" field, make sure that records with the same date always appear in the same order.
Avoid making any changes to the order or positioning of records during pagination, unless explicitly requested by the API consumer.
If new records are added or existing records are modified, they should not disrupt the pagination order or cause existing records to shift unexpectedly.
It's good practice to use unique and immutable identifiers for the records being paginated. T
This ensures that even if the data changes, the identifiers remain constant, allowing consistent pagination. It can be a primary key or a unique identifier associated with each record.
If a record is deleted between paginated requests, it should not affect the pagination order or cause missing records.
Ensure that the deletion of a record does not leave a gap in the pagination sequence.
For example, if record X is deleted, subsequent requests should not suddenly skip to record Y without any explanation.
Employ pagination techniques that offer deterministic results. Techniques like cursor-based pagination or keyset pagination, where the pagination is based on specific attributes like timestamps or unique identifiers, provide stability and consistency between requests.
Also Read: 5 caching strategies to improve API pagination performance
Pagination stability means a client paginating through a dataset gets consistent, complete results — no duplicates, no missing records — even if the underlying data is modified during the pagination session. Stable pagination is critical for integration sync use cases where completeness matters. Unstable pagination — most commonly caused by offset on mutable data — is one of the most frequent but hardest-to-debug data integrity issues in API integrations. Knit builds pagination stability into its sync engine using cursor-based and keyset pagination with checkpointing, so concurrent writes to platforms like Workday, BambooHR, or SAP SuccessFactors don't corrupt in-progress data fetches.
Offset pagination produces inconsistent results because it defines page boundaries by row position (skip N, return M) rather than by a stable record pointer. If a record is inserted into the dataset after page 1 is fetched, every record shifts forward by one — the record pushed from page 1 into page 2 territory gets skipped. Deletes cause the reverse: records shift backward and appear twice. Offset is only reliable for truly static datasets where no inserts, updates, or deletes occur between pagination requests. For any live dataset, cursor-based or keyset pagination is the correct approach.
Stable cursor-based pagination requires three things: a stable sort field (an indexed column like id or created_at that doesn't change once set), a cursor that encodes the last-seen value of that field (typically base64-encoded to prevent client manipulation), and a query that filters strictly after that value rather than using OFFSET. The server returns the cursor for the last record in each page; the client passes it back as the after parameter on the next request. To handle concurrent inserts, sort by a monotonically increasing field — auto-increment id is the most reliable, or a combination of created_at and id for tie-breaking when timestamps collide.
Keyset pagination (also called seek pagination) filters results using the actual values of one or more indexed columns rather than a row count offset. Instead of "skip 10,000 rows", a keyset query says "return records where id > 10000 ORDER BY id LIMIT 100". This is dramatically faster on large tables because the database uses an index seek rather than a full scan. Use keyset pagination when your dataset has millions of records, you need consistent performance across all pages (not just early ones), or deep pagination is a common access pattern. The main limitation is that it doesn't support jumping to an arbitrary page by number — access is sequential.
Deletes mid-sync are only a problem with offset pagination — cursor and keyset pagination are unaffected because they don't depend on row position. If you must use offset, mitigate deletes by: fetching in reverse order (newest first) so deletes push records toward earlier already-fetched pages; using soft-deletes where records are marked deleted but not removed, filtering them out after fetching; or using a change-data-capture approach where you consume a log of inserts, updates, and deletes rather than paginating the live table. For integration sync, delta-based fetching — pulling only records modified since the last sync, including delete events — avoids the full re-pagination problem entirely.
Cursor drift occurs when the sort field used for cursor pagination is not truly stable — for example, using updated_at as the cursor field when records can be re-updated between page requests. If a record from page 1 gets its updated_at timestamp bumped while you're fetching page 3, it will reappear in a later page (paginating by ascending updated_at) or be skipped (if descending). Prevent cursor drift by paginating on immutable fields: auto-increment id is the most reliable, or a combination of created_at and id for tie-breaking. If you need both creation-order and modification-order access, expose separate cursor-paginated endpoints for each rather than trying to serve both with one cursor.

Note: This is a part of our series on API Pagination where we solve common developer queries in detail with common examples and code snippets. Please read the full guide here where we discuss page size, error handling, pagination stability, caching strategies and more.
It is important to account for edge cases such as reaching the end of the dataset, handling invalid or out-of-range page requests, and to handle this errors gracefully.
Always provide informative error messages and proper HTTP status codes to guide API consumers in handling pagination-related issues.
Here are some key considerations for handling edge cases and error conditions in a paginated API:
Here are some key considerations for handling edge cases and error conditions in a paginated API:
When an API consumer requests a page that is beyond the available range, it is important to handle this gracefully.
Return an informative error message indicating that the requested page is out of range and provide relevant metadata in the response to indicate the maximum available page number.
Validate the pagination parameters provided by the API consumer. Check that the values are within acceptable ranges and meet any specific criteria you have defined. If the parameters are invalid, return an appropriate error message with details on the issue.
If a paginated request results in an empty result set, indicate this clearly in the API response. Include metadata that indicates the total number of records and the fact that no records were found for the given pagination parameters.
This helps API consumers understand that there are no more pages or data available.
Handle server errors and exceptions gracefully. Implement error handling mechanisms to catch and handle unexpected errors, ensuring that appropriate error messages and status codes are returned to the API consumer. Log any relevant error details for debugging purposes.
Consider implementing rate limiting and throttling mechanisms to prevent abuse or excessive API requests.
Enforce sensible limits to protect the API server's resources and ensure fair access for all API consumers. Return specific error responses (e.g., HTTP 429 Too Many Requests) when rate limits are exceeded.
Provide clear and informative error messages in the API responses to guide API consumers when errors occur.
Include details about the error type, possible causes, and suggestions for resolution if applicable. This helps developers troubleshoot and address issues effectively.
Establish a consistent approach for error handling throughout your API. Follow standard HTTP status codes and error response formats to ensure uniformity and ease of understanding for API consumers.
For example, consider the following API in Django
If you work with a large number of APIs but do not want to deal with pagination or errors as such, consider working with a unified API solution like Knit where you only need to connect with the unified API only once, all the authorization, authentication, rate limiting, pagination — everything will be taken care of the unified API while you enjoy the seamless access to data from more than 50 integrations.
Sign up for Knit today to try it out yourself in our sandbox environment (getting started with us is completely free)
The most common API pagination errors are: invalid or expired cursor tokens (the client retries a cursor that has timed out), missing records due to offset drift (inserts between pages shift results, silently skipping records), duplicate records on consecutive pages (a record updated between requests appears twice), out-of-range page requests returning 400 or empty responses, and inconsistent total counts when the dataset is modified mid-pagination. The root cause of most pagination bugs is using offset on mutable data — switching to cursor-based or keyset pagination eliminates the majority of these issues. Knit handles these edge cases internally when syncing from enterprise HRIS and ATS platforms, retrying expired cursors and surfacing sync errors clearly rather than silently dropping records.
Missing records in paginated API responses are almost always caused by offset pagination on a dataset that was modified between page requests. When a record is deleted from page 1 after you've fetched it, every subsequent record shifts one position forward - the first record of page 2 is now the last record of page 1, and your client skips it entirely. The fix is to switch to cursor-based or keyset pagination, which uses a stable pointer that doesn't shift when records are inserted or deleted. If you must use offset, fetch records in reverse chronological order so insertions push records toward earlier already-fetched pages rather than creating gaps later.
When a pagination cursor expires or becomes invalid, the API should return a clear error — typically HTTP 400 with a descriptive code like cursor_expired or invalid_cursor — rather than silently returning wrong results. On the client side, handle this by restarting pagination from the beginning or from the last known good checkpoint, depending on whether your use case tolerates re-fetching records. Set cursor TTLs based on realistic client behaviour — cursors that expire in minutes will frustrate developers paginating large datasets. Knit implements automatic cursor retry and pagination checkpointing when syncing from enterprise APIs, so a single expired cursor doesn't trigger a full resync.
Paginated APIs should use standard HTTP status codes: 400 for invalid pagination parameters (bad page number, malformed cursor, page size exceeding maximum), 404 if the resource being paginated no longer exists, 422 for semantically invalid parameters (negative offset, zero page size), and 429 for rate limit exceeded on rapid page-through requests. Avoid returning 200 with an empty results array for genuinely invalid requests — it masks errors from clients. Always include a machine-readable error code in the response body alongside the human-readable message, so clients can programmatically distinguish cursor_expired from invalid_page_size without parsing strings.
Duplicate records across paginated responses occur when offset pagination is used on a dataset where records can move between pages due to concurrent writes. The reliable fix is cursor-based or keyset pagination, where each page starts from a stable pointer that doesn't shift. If you cannot change the pagination method, track seen record IDs on the client and deduplicate before processing — but this is a workaround, not a fix. Knit uses cursor-based pagination internally to prevent duplicates when syncing employee records from platforms like Workday and BambooHR, where the underlying dataset changes continuously. If sort order can change mid-pagination, document this explicitly so integrators know to expect and handle duplicates.
APIs that return 400 errors for large page numbers are enforcing a maximum offset or page depth limit. Deep pagination with offset (e.g. OFFSET 10,000,000) is expensive on the database — it requires scanning and discarding millions of rows before returning results, and many APIs cap this to protect performance. If you need to access deep into a large dataset, the correct approach is cursor-based pagination, which fetches records from a stable pointer rather than skipping rows. If you're building an API and need to support deep access, implement cursor or keyset pagination and document the maximum supported offset clearly in your API reference.

Note: This is a part of our series on API Pagination where we solve common developer queries in detail with common examples and code snippets. Please read the full guide here where we discuss page size, error handling, pagination stability, caching strategies and more.
There are several common API pagination techniques that developers employ to implement efficient data retrieval. Here are a few useful ones you must know:
This technique involves using two parameters: "offset" and "limit." The "offset" parameter determines the starting point or position in the dataset, while the "limit" parameter specifies the maximum number of records to include on each page.
For example, an API request could include parameters like "offset=0" and "limit=10" to retrieve the first 10 records.
GET /aCpi/posts?offset=0&limit=10
Instead of relying on numeric offsets, cursor-based pagination uses a unique identifier or token to mark the position in the dataset. The API consumer includes the cursor value in subsequent requests to fetch the next page of data.
This approach ensures stability when new data is added or existing data is modified. The cursor can be based on various criteria, such as a timestamp, a primary key, or an encoded representation of the record.
For example - GET /api/posts?cursor=eyJpZCI6MX0
In the above API request, the cursor value `eyJpZCI6MX0` represents the identifier of the last fetched record. This request retrieves the next page of posts after that specific cursor.
Page-based pagination involves using a "page" parameter to specify the desired page number. The API consumer requests a specific page of data, and the API responds with the corresponding page, typically along with metadata such as the total number of pages or total record count.
This technique simplifies navigation and is often combined with other parameters like "limit" to determine the number of records per page.
For example - GET /api/posts?page=2&limit=20
In this API request, we are requesting the second page, where each page contains 20 posts.
In scenarios where data has a temporal aspect, time-based pagination can be useful. It involves using time-related parameters, such as "start_time" and "end_time", to specify a time range for retrieving data.
This technique enables fetching data in chronological or reverse-chronological order, allowing for efficient retrieval of recent or historical data.
For example - GET/api/events?start_time=2023-01-01T00:00:00Z&end_time=2023-01-31T23:59:59Z
Here, this request fetches events that occurred between January 1, 2023, and January 31, 2023, based on their timestamp.
Keyset pagination relies on sorting and using a unique attribute or key in the dataset to determine the starting point for retrieving the next page.
For example, if the data is sorted by a timestamp or an identifier, the API consumer includes the last seen timestamp or identifier as a parameter to fetch the next set of records. This technique ensures efficient retrieval of subsequent pages without duplication or missing records.
To further simplify this, consider an API request GET /api/products?last_key=XYZ123. Here, XYZ123 represents the last seen key or identifier. The request retrieves the next set of products after the one with the key XYZ123.
Also read: 7 ways to handle common errors and invalid requests in API pagination
API pagination is a technique for splitting large datasets into smaller, sequential chunks (pages) so clients can retrieve them incrementally rather than fetching everything at once. Without pagination, a single API request on a large dataset can time out, exhaust memory, or return millions of records the client doesn't need. Pagination controls - like page numbers, offsets, or cursors - let the client request exactly the range of data it needs, keeping response times fast and server load manageable.
The main API pagination techniques are: offset and limit (skip N records, return the next M), page-based (request page 3 of 10), cursor-based (use an opaque pointer to the last-seen record), time-based (fetch records created/updated after a given timestamp), and keyset/seek pagination (filter by the value of a sortable indexed column). Each suits different use cases - cursor-based is best for real-time feeds and large datasets, offset works for simple sorted results, and time-based is ideal for incremental data sync.
The five most common types are:
(1) Offset pagination - uses offset and limit parameters, simple to implement but degrades on large datasets due to full table scans;
(2) Page-based pagination - uses page and per_page, conceptually simple but has the same performance limitations as offset;
(3) Cursor-based pagination - uses an opaque cursor token pointing to the last record, stable and performant even on large or frequently-updated datasets;
(4) Time-based pagination - fetches records within a time window using since and until parameters;
(5) Keyset pagination - filters by the value of an indexed column, combining the stability of cursors with direct SQL efficiency.
To implement pagination on an API: choose a pagination style (offset, cursor, or keyset depending on your dataset size and update frequency), add the relevant query parameters to your GET endpoint (e.g. ?limit=100&offset=0 or ?after=cursor_token), return pagination metadata in the response (total count, next cursor or next page URL), and handle the last page by returning an empty next cursor or a has_more: false flag. On the client side, follow the next link or cursor in each response until no further pages are returned.
Cursor-based pagination has three key advantages over offset:
- Stability - if records are inserted or deleted between page requests, offset pagination skips or duplicates records; cursors point to a specific position so page boundaries remain consistent;
- Performance - offset pagination requires the database to scan and discard all preceding rows, which is slow on large tables; cursor-based queries use indexed lookups;
- Consistency at scale - cursor pagination works reliably on datasets with millions of records where offset becomes prohibitively slow.
The tradeoff is that cursor pagination doesn't support random page access or total record counts as easily.
Key best practices: use cursor-based or keyset pagination for large or frequently-updated datasets rather than offset; always return a next cursor or link in the response so clients don't need to calculate the next page themselves; set a sensible default and maximum page size (e.g. default 100, max 1000) to prevent unbounded requests; include a has_more boolean or empty next to signal the final page clearly; use consistent parameter names (limit, after, before) so clients don't need to re-learn the interface per endpoint; and document the pagination model explicitly, since different endpoints on the same API sometimes use different styles.
Time-based pagination is best suited for incremental data sync use cases - where you want to fetch only records created or updated after a specific timestamp, rather than fetching all records from scratch on each run. It's commonly used in webhook alternative patterns, audit log retrieval, and integration sync loops. The main limitation is that it assumes records have reliable, indexed created_at or updated_at timestamps, and it can miss records if clock skew or delayed writes cause them to land before the since boundary.
Pagination style significantly affects integration performance. Offset pagination becomes slow on large tables and can produce inconsistent results under concurrent writes - a common problem when syncing employee data from HRIS platforms that update frequently. Cursor-based pagination is more reliable for integration sync loops because it handles insertions and deletions between pages gracefully. When building integrations against third-party APIs, always check which pagination style they use and implement retry logic with backoff for rate-limited page requests. Knit manages all kinds of pagination for you when you're running syncs on Knit so you don't have to worry about how different apps might behave.

If you are looking to unlock 40+ HRIS and ATS integrations with a single API key, check out Knit API. If not, keep reading
Note: This is our master guide on API Pagination where we solve common developer queries in detail with common examples and code snippets. Feel free to visit the smaller guides linked later in this article on topics such as page size, error handling, pagination stability, caching strategies and more.
In the modern application development and data integration world, APIs (Application Programming Interfaces) serve as the backbone for connecting various systems and enabling seamless data exchange.
However, when working with APIs that return large datasets, efficient data retrieval becomes crucial for optimal performance and a smooth user experience. This is where API pagination comes into play.
In this article, we will discuss the best practices for implementing API pagination, ensuring that developers can handle large datasets effectively and deliver data in a manageable and efficient manner. (We have linked bite sized how-to guides on all API pagination FAQs you can think of in this article. Keep reading!)
But before we jump into the best practices, let’s go over what is API pagination and the standard pagination techniques used in the present day.
API pagination refers to a technique used in API design and development to retrieve large data sets in a structured and manageable manner. When an API endpoint returns a large amount of data, pagination allows the data to be divided into smaller, more manageable chunks or pages.
Each page contains a limited number of records or entries. The API consumer or client can then request subsequent pages to retrieve additional data until the entire dataset has been retrieved.
Pagination typically involves the use of parameters, such as offset and limit or cursor-based tokens, to control the size and position of the data subset to be retrieved.
These parameters determine the starting point and the number of records to include on each page.
By implementing API pagination, developers as well as consumers can have the following advantages -
Retrieving and processing smaller chunks of data reduces the response time and improves the overall efficiency of API calls. It minimizes the load on servers, network bandwidth, and client-side applications.
Since pagination retrieves data in smaller subsets, it reduces the amount of memory, processing power, and bandwidth required on both the server and the client side. This efficient resource utilization can lead to cost savings and improved scalability.
Paginated APIs provide a better user experience by delivering data in manageable portions. Users can navigate through the data incrementally, accessing specific pages or requesting more data as needed. This approach enables smoother interactions, faster rendering of results, and easier navigation through large datasets.
With pagination, only the necessary data is transferred over the network, reducing the amount of data transferred and improving network efficiency.
Pagination allows APIs to handle large datasets without overwhelming system resources. It provides a scalable solution for working with ever-growing data volumes and enables efficient data retrieval across different use cases and devices.
With pagination, error handling becomes more manageable. If an error occurs during data retrieval, only the affected page needs to be reloaded or processed, rather than reloading the entire dataset. This helps isolate and address errors more effectively, ensuring smoother error recovery and system stability.
Some of the most common, practical examples of API pagination are:
There are several common API pagination techniques that developers employ to implement efficient data retrieval. Here are a few useful ones you must know:
Read: Common API Pagination Techniques to learn more about each technique
When implementing API pagination in Python, there are several best practices to follow. For example,
Adopt a consistent naming convention for pagination parameters, such as "offset" and "limit" or "page" and "size." This makes it easier for API consumers to understand and use your pagination system.
Provide metadata in the API responses to convey additional information about the pagination.
This can include the total number of records, the current page, the number of pages, and links to the next and previous pages. This metadata helps API consumers navigate through the paginated data more effectively.
For example, here’s how the response of a paginated API should look like -
Select an optimal page size that balances the amount of data returned per page.
A smaller page size reduces the response payload and improves performance, while a larger page size reduces the number of requests required.
Determining an appropriate page size for a paginated API involves considering various factors, such as the nature of the data, performance considerations, and user experience.
Here are some guidelines to help you determine the optimal page size.
Read: How to determine the appropriate page size for a paginated API
Provide sorting and filtering parameters to allow API consumers to specify the order and subset of data they require. This enhances flexibility and enables users to retrieve targeted results efficiently. Here's an example of how you can implement sorting and filtering options in a paginated API using Python:
Ensure that the pagination remains stable and consistent between requests. Newly added or deleted records should not affect the order or positioning of existing records during pagination. This ensures that users can navigate through the data without encountering unexpected changes.
Read: 5 ways to preserve API pagination stability
Account for edge cases such as reaching the end of the dataset, handling invalid or out-of-range page requests, and gracefully handling errors.
Provide informative error messages and proper HTTP status codes to guide API consumers in handling pagination-related issues.
Read: 7 ways to handle common errors and invalid requests in API pagination
Implement caching mechanisms to store paginated data or metadata that does not frequently change.
Caching can help improve performance by reducing the load on the server and reducing the response time for subsequent requests.
Here are some caching strategies you can consider:
Cache the entire paginated response for each page. This means caching the data along with the pagination metadata. This strategy is suitable when the data is relatively static and doesn't change frequently.
Cache the result set of a specific query or combination of query parameters. This is useful when the same query parameters are frequently used, and the result set remains relatively stable for a certain period. You can cache the result set and serve it directly for subsequent requests with the same parameters.
Set an expiration time for the cache based on the expected freshness of the data. For example, cache the paginated response for a certain duration, such as 5 minutes or 1 hour. Subsequent requests within the cache duration can be served directly from the cache without hitting the server.
Use conditional caching mechanisms like HTTP ETag or Last-Modified headers. The server can respond with a 304 Not Modified status if the client's cached version is still valid. This reduces bandwidth consumption and improves response time when the data has not changed.
Implement a reverse proxy server like Nginx or Varnish in front of your API server to handle caching.
Reverse proxies can cache the API responses and serve them directly without forwarding the request to the backend API server.
This offloads the caching responsibility from the application server and improves performance.
To handle pagination in APIs: check the response for a next cursor, next page URL, or has_more flag; follow that pointer in your next request rather than constructing the URL manually; loop until no next pointer is returned; and implement retry logic with exponential backoff for rate limit responses (HTTP 429). For large datasets, store intermediate results as each page arrives rather than accumulating all pages in memory before processing. Always respect the page size limits the API enforces - attempting to set limit beyond the maximum usually returns an error or silently caps the value.
Key API pagination best practices: use cursor-based pagination for large or frequently-updated datasets rather than offset; use consistent, standard parameter names (limit, after, before, page, per_page) so callers don't need to learn a new interface per endpoint; always include pagination metadata in responses (has_more, next_cursor, total_count where feasible); set a sensible default page size and document the maximum; signal the last page clearly with an empty next cursor or has_more: false; sort results on a stable, indexed field to ensure consistent ordering across pages; and document the pagination model at the API reference level.
It depends on the API. Page-based pagination most commonly starts at 1 (page=1 is the first page). Offset-based pagination starts at 0 by convention - offset=0 means skip zero records and return from the beginning. Cursor-based pagination has no page numbers at all you start with no cursor and follow the next cursor returned in each response. Always check the specific API documentation, as inconsistencies exist: some APIs use page=0 as the first page, which can cause off-by-one errors if assumed to start at 1.
No! API pagination is still essential and widely used. For user interfaces, infinite scroll has replaced traditional page numbers in many consumer apps, but the underlying API still uses pagination. For developer APIs, pagination is the standard way to handle large datasets safely, and cursor-based pagination is actively preferred over older offset approaches. What has changed is the preferred style: cursor-based and keyset pagination are now recommended over offset for performance and consistency reasons.
There is no universal ideal page size - it depends on the payload size per record, the client's use case, and server capacity. Common defaults are 20–100 records per page for general APIs; data-heavy payloads warrant smaller pages. A default of 100 with a maximum of 1,000 is a reasonable starting point for most REST APIs. Let callers set their own limit up to the maximum rather than fixing page size, since a batch sync job benefits from larger pages while a UI displaying a list benefits from smaller ones.
Return pagination metadata in a consistent envelope alongside your data array. At minimum include: a next cursor or next page URL (null or absent when on the last page), a has_more boolean, and optionally a total_count. Use a standard structure - e.g. { data: [...], pagination: { next_cursor: '...', has_more: true } } - so clients can reliably parse it. Avoid returning pagination state only in HTTP Link headers, as many clients don't parse headers.
Signal the last page clearly so clients know when to stop. For cursor-based pagination, return next_cursor: null or omit the field entirely on the last page. For page-based pagination, return has_more: false or compare current_page to total_pages. Clients should treat a missing or null next pointer as the termination signal - avoid relying on an empty data array as the only signal, since some APIs return a final page with fewer records than the limit, which is not necessarily empty.
Common mistakes: using offset pagination on large, frequently-updated datasets - records can be skipped or duplicated as underlying data shifts between page requests; not sorting on a stable indexed field - inconsistent ordering breaks cursor-based pagination; omitting total_count when clients genuinely need it for progress tracking; setting fixed page sizes with no limit parameter; not documenting the pagination model, leaving callers to guess whether pages start at 0 or 1; and forgetting to handle the last page signal, causing infinite loops in client sync code when next_cursor is null.
In conclusion, implementing effective API pagination is essential for providing efficient and user-friendly access to large datasets. But it isn’t easy, especially when you are dealing with a large number of API integrations.
Using a unified API solution like Knit ensures that your API pagination requirements is handled without you requiring to do anything anything other than embedding Knit’s UI component on your end.
Once you have integrated with Knit for a specific software category such as HRIS, ATS or CRM, it automatically connects you with all the APIs within that category and ensures that you are ready to sync data with your desired app.
In this process, Knit also fully takes care of API authorization, authentication, pagination, rate limiting and day-to-day maintenance of the integrations so that you can focus on what’s truly important to you i.e. building your core product.
By incorporating these best practices into the design and implementation of paginated APIs, Knit creates highly performant, scalable, and user-friendly interfaces for accessing large datasets. This further helps you to empower your end users to efficiently navigate and retrieve the data they need, ultimately enhancing the overall API experience.
Sign up for free trial today or talk to our sales team

Note: This is a part of our API Security series where we solve common developer queries in detail with how-to guides, common examples, code snippets and a ready to use security checklist. Feel free to check other articles on topics such as authentication methods, rate limiting, API monitoring and more.
Every API has limits - and hitting them is one of the most common and disruptive problems developers encounter when building integrations at scale. Rate limiting controls how many requests a client can make in a given time window. Throttling slows requests down instead of blocking them outright. Together, they're the mechanisms that keep APIs stable under load - and the ones your integration code needs to handle gracefully.
This guide covers 10 implementation best practices developers need in 2026: choosing the right algorithm, handling 429 errors correctly, implementing exponential backoff, and how tools like Knit abstract rate limit handling automatically across 50+ third-party APIs.
API rate limiting is a technique that restricts how many requests a client can make to an API within a defined time window - for example, 100 requests per minute per API key. When a client exceeds the limit, the API returns an HTTP 429 Too Many Requests error. Rate limiting protects API infrastructure from abuse, ensures fair usage across clients, and prevents any single integration from degrading performance for others. Most third-party APIs - including Workday, ADP, Salesforce, and QuickBooks - enforce rate limits that developers must handle explicitly in their integration code.
With rate limiting, you define the maximum number of requests a client can make to your API within a specified time window, such as requests per second or requests per minute.
If a client exceeds this limit, they are temporarily blocked from making additional requests, ensuring that your API's resources are not overwhelmed.
Throttling is like controlling the flow of traffic at a toll booth. Instead of completely blocking a client when they exceed the rate limit, throttling slows down their requests, spreading them out more evenly over time.
This helps prevent abrupt spikes in traffic and maintains a steady, manageable flow.
Now, let's talk about why rate limiting is so crucial in the realm of API security.
Rate limiting acts as a shield against abuse and malicious attacks. It prevents one client from bombarding your API with a barrage of requests, which could lead to system overload or denial-of-service (DoS) attacks.
Rate limiting ensures fair access for all clients, regardless of their size or importance. It prevents a single client from monopolizing your API's resources, allowing everyone to enjoy a smooth and equitable experience.
By maintaining control over the rate of incoming requests, you can ensure the reliability and availability of your API. This is especially critical when dealing with limited resources or shared infrastructure.
Rate limiting can also be an effective tool in identifying and mitigating potential API security threats. It helps you spot unusual patterns of behavior, such as repeated failed login attempts, which could indicate a brute-force attack.
There are two steps here -
Ensure that clients are properly authenticated, so you can track their usage individually. OAuth tokens, API keys, or user accounts are commonly used for client identification.
Read: Top 5 API Authentication Methods
If a client exceeds their rate limit, you have several options:
Ensure that rate limits reset at the end of the defined time window. Clients should regain access to the API once the time window expires.
Implement comprehensive logging to keep track of rate-limiting events and identify potential abuse or anomalies and set up monitoring tools and alerts to detect unusual patterns or rate-limit exceedances in real-time.
Include rate-limiting information in the HTTP response headers, such as "X-RateLimit-Limit," "X-RateLimit-Remaining," and "X-RateLimit-Reset," so clients can be aware of their rate limits.
Thoroughly test your rate-limiting implementation to ensure it works as expected without false positives or negatives and monitor the effectiveness of your rate-limiting strategy and adjust it as needed based on actual usage patterns and evolving requirements.
There are two options here -
If you choose to implement throttling, slow down requests for clients who exceed their rate limits rather than blocking them entirely. This can be achieved by delaying request processing or using a queue system.
Unified APIs like Knit can absolve your rate limiting problem by making sure data sync happens smoothly even during bulk transfer.
For example, Knit has a couple of preventive mechanisms in place to handle rate limits of for all the supported apps.
These retry and delay mechanisms ensure that you don't miss out on any data or API calls because of rate limits. This becomes essential when we handle data at scale. For example, while fetching millions of applications in ATS or thousands of employees in HRIS.
Along with rate limits, Knit has other data safety measures in place that lets you sync and transfer data securely and efficiently, while giving you access to 50+ integrated apps with just a single API key. Thus, helping you scale your integration strategy 10X faster.
Learn more or get your API keys for a free trial
What is API rate limiting?
API rate limiting is a mechanism that restricts how many requests a client can make to an API within a defined time window — for example, 100 requests per minute per API key. When a client exceeds the limit, the server returns an HTTP 429 Too Many Requests response. Rate limiting protects API infrastructure from abuse, ensures fair usage across all clients, and prevents any single consumer from degrading performance for others. Most third-party APIs — including Workday, Salesforce, GitHub, and QuickBooks — enforce rate limits that developers need to handle explicitly in their integration code.
What is the difference between rate limiting and throttling?
Rate limiting sets a hard cap on request volume within a time window - requests above the limit are rejected with a 429 error. Throttling is softer: instead of rejecting requests outright, it slows them down by introducing delays, queuing excess requests, or deprioritizing them behind lower-volume traffic. Rate limiting is generally better suited for programmatic API access where clients are expected to implement backoff logic. Throttling is better for user-facing endpoints where a hard failure would degrade the experience - slowing a response down is preferable to returning an error.
How would you handle rate limiting in an API?
The standard pattern for handling rate limits as an API consumer: catch 429 responses, read the Retry-After header for the exact wait time, implement exponential backoff with jitter if no header is present, and queue non-urgent requests rather than retrying immediately. Use idempotency keys on retried requests to avoid duplicate writes. For APIs you control, return clear rate limit headers (X-RateLimit-Limit, X-RateLimit-Remaining, X-RateLimit-Reset) and document your limits explicitly — it significantly reduces support burden. Tools like Knit handle this automatically when consuming third-party APIs like Workday, ADP, or Salesforce, abstracting per-provider retry logic so application code stays clean.
What is a good API rate limit?
There's no universal number - the right rate limit depends on your infrastructure capacity, the cost of each request, and your client mix. Common starting points for production REST APIs: 60–300 requests per minute for general endpoints, 10–30 RPM for expensive write or search operations, and 1,000–5,000 RPM for lightweight read endpoints with caching. Enterprise APIs like Salesforce typically allow 100,000 API calls per 24 hours per org; GitHub allows 5,000 requests per hour per authenticated token. Whatever limits you set, expose them via response headers and version your limits clearly in documentation so clients can plan around them.
How do you handle 429 Too Many Requests errors?
On receiving a 429:
(1) check the Retry-After header - it tells you exactly how many seconds to wait before retrying;
(2) if there's no Retry-After header, use exponential backoff starting at 1–2 seconds, doubling each attempt with added random jitter;
(3) cap retries at 3–5 attempts and surface a proper error if all fail - never drop the request silently;
(4) if 429s are happening frequently, the real fix is upstream: audit your request volume, implement a queue, or reduce polling frequency.
Knit handles 429 retry logic automatically for all third-party integrations it supports, so developers building on top of HR, payroll, or CRM APIs don't need to implement this per provider.
How long does a 429 Too Many Requests error last?
It depends on the API's rate limit window - most use fixed windows of 1 minute, 15 minutes, or 1 hour. The Retry-After response header will give you the exact duration in seconds. Once the window resets, your request quota refreshes and calls will succeed again. Some APIs use sliding windows instead of fixed ones, which means the reset time shifts with each request rather than resetting at a fixed interval. If you're seeing persistent 429s that last much longer than expected, check whether the provider has implemented temporary bans for clients that retry too aggressively - some APIs (including OpenAI) will extend the backoff period if they detect rapid retry loops.
What are the best algorithms for API rate limiting?
The four most commonly used algorithms are:
Fixed Window — simplest to implement, counts requests in a fixed period but allows burst spikes at window boundaries;
Sliding Window — smoother than fixed window, tracks a rolling time period to prevent boundary bursts;
Token Bucket — allows controlled bursts by accumulating tokens up to a cap, with each request consuming one token; best for APIs that want to tolerate natural traffic variation.
Leaky Bucket — processes requests at a fixed constant rate regardless of incoming volume, smoothing traffic completely but rejecting all bursts.
Token bucket is the most widely used for REST APIs because it handles bursty-but-bounded traffic patterns without penalizing clients for low activity periods.
.webp)
Merge.dev is a popular unified API provider, offering simplified integrations for SaaS companies across HRIS, ATS, CRM, accounting, and more. However, businesses with specialized requirements—such as real-time sync, enhanced security, flexible authentication, or unique integration needs—are increasingly seeking alternative platforms better suited to their tech stack and scalability goals.
One standout option is Knit, a webhook-based unified API platform built for real-time data synchronization and zero data storage. Knit supports a wide range of integration categories, making it a top choice for organizations that prioritize performance and compliance
Overview: Knit offers a webhook-based, event-driven unified API that eliminates polling. With support for 12+ integration categories and a zero data storage model, it's built for real-time sync and top-tier security.
Key Features:
Ideal For: Security-conscious and real-time-first organizations in HRtech, Marketing and Sales Tech
Pricing: Starts at $399/month; transparent, scalable pricing
Overview: Finch is purpose-built for employment-related data, offering seamless integrations for HRIS, payroll, and benefits platforms.
Key Features:
Limitations:
Ideal For: HR tech, payroll software, benefits platforms
Pricing: From $35/connection/month (read-only); custom pricing for write access
Overview: Apideck focuses on delivering a unified API for HRIS and CRM Platforms
Key Features:
Limitations:
Ideal For: Teams balancing developer control and end-user simplicity
Pricing: Starts at $250 /month for 10K API Calls
Overview: Workato is an embedded iPaaS platform with a low-code, visual workflow builder that simplifies integration deployment. Workato also offers unified API on top of its workflow platform
Key Features:
Limitations:
Ideal For: Companies needing visual tools and where things change for each deployment
Pricing: Custom pricing by number of customers/integrations
Consider the following when choosing your unified API platform:
Merge.dev remains a trusted unified API provider, but it isn’t one-size-fits-all. Knit stands out for real-time architecture and zero data storage and flexible pricing plans
Recommendation: Demo 2–3 top options to find the best fit for your use case.
A unified API connects multiple SaaS apps via a single, consistent interface—simplifying third-party integrations for developers.
All listed alternatives support custom integrations. Nango and Knit offer the most flexibility.
Nango offers a free open-source option. Knit provides predictable pricing for growing teams.
All providers offer SOC 2 compliance. Knit leads with zero data storage; others rely on caching or temporary storage.

Software development is not a piece of cake.
With new technologies, stacks, architecture and frameworks coming around almost every week, it is becoming ever more challenging. To thrive as a software developer, you need an ecosystem of those who have similar skills and interests, who you can network with and count on when you are in a fix. The best developer communities help you achieve just that.
If you have been searching for top developer communities to learn about coding best practices, knowledge sharing, collaboration, co-creation and collective problem solving – you have come to the right place.
We made this list of 25+ most engaging and useful developer communities to join in 2026, depending on your requirements and expectations. The list has been updated to reflect communities that are active today -— including new additions in AI/ML and Discord-first communities
Pro-tip: Don’t limit yourself to one community; rather, expand your horizon by joining all that are relevant. (For ease of understanding, we have divided the list into a few categories to help you pick the right ones.)

Following is a list of developer communities that are open to all and have something for everyone, across tech stacks and experience. Most of these communities have dedicated channels for specific tech stack/ language/ architecture discussion that you should consider exploring.
One of the top developer communities and a personal choice for most software developers is StackOverflow. With a monthly user base of 100 Mn+, StackOverflow is best known for being a go-to platform for developers for any questions they may have i.e. a platform for technical knowledge sharing and learning. Cumulatively, it has helped developers 45 Bn+ times to answer their queries. It offers chatOps integrations from Slack, Teams, etc. to help with asynchronous knowledge sharing. It is for all developers looking to expand their knowledge or senior industry veterans who wish to pay forward their expertise.

Be a part of StackOverflow to:
One of the best developer communities for blogging is Hashnode. It enables developers, thought leaders and engineers to share their knowledge on different tech stacks, programming languages, etc. As a free content creation platform, Hashnode is a great developer community for sharing stories, showcasing projects, etc.

Be a part of Hashnode to:
HackerNoon is one of those top developers communities for technologists to learn about the latest trends. They currently have 35K+ contributors with a readership of 5-8 million enthusiasts who are curious to learn about the latest technologies and stacks.

Be a part of HackerNoon to:
If you are looking for a code hosting platform and one of the most popular developer communities, GitHub is the place for you. It is a community with 100 Mn+ developers with 630Mn+ projects and enables developers to build, scale, and deliver secure software.

You should join GitHub to:
Hacker News is a leading social news site and one the best developer communities for latest news on computer science and entrepreneurship. Run by the investment fund and startup incubator, Y Combinator, is a great platform to share your experiences and stories. It allows you to submit a link to the technical content for greater credibility.

You should join Hacker News to:
One of the fastest-growing developer communities online, DEV Community (dev.to) is a free platform for developers to write posts, share projects, ask questions, and discuss anything across the stack — from JavaScript and Python to AI, DevOps, and career advice. It's consistently ranked among the most beginner-friendly and inclusive developer communities available, with a culture that actively discourages elitism and gatekeeping.
Be a part of DEV Community to:
If you are looking for a network of communities, Reddit is where you should be. You can have conversations on all tech stacks and network with peers. With 121 million+ daily active users (as of Q4 2025), Reddit is ideal for developers who want to supplement technical discussions with others on the sidelines like those about sports, books, etc. Just simply post links, blogs, videos or upvote others which you like to help others see them as well.

Join Reddit to:
As the tagline says, for those who code, CodeProject is one of the best developer communities to enhance and refine your coding skills. You can post an article, ask a question and even search for an article on anything you need to know about coding across web development, software development, Java, C++ and everything else. It also has resources to facilitate your learning on themes of AI, IoT, DevOpS, etc.

Joining CodeProject will be beneficial for those who:
While the above mentioned top developer communities are general and can benefit all developers and programmers, there are a few communities which are specific in nature and distinct for different positions, expertise and level of seniority/ role in the organization. Based on the same, we have two types below, developer communities for CTOs and those for junior developers.
Here are the top developer communities for CTOs and technology leaders.
CTO Craft is a community for CTOs to provide them with coaching, mentoring and essential learning to thrive as first time technology leaders. The CTOs who are a part of this community come from small businesses and global organizations alike. This community enables CTOs to interact and network with peers and participate in online and offline events to share solutions, around technology development as well as master the art of technology leadership.

As a CTO, you should join the CTO Craft to:
While you can get started for free, membership at £200 / month will get you exclusive access to private events, networks, monthly mentoring circles and much more.
As a community for CTOs, Global CTO Forum, brings together technology leaders from 40+ countries across the globe. It is a community for technology thought leaders to help them teach, learn and realize their potential.

Be a part of the Global CTO Forum to:
As an individual, you can get started with Global CTO Forum at $180/ year to get exclusive job opportunities as a tech leader, amplify your brand with GCF profile and get exclusive discounts on events and training.
The following top developer communities are specifically for junior developers who are just getting started with their tech journey and wish to accelerate their professional growth.
Junior Dev is a global community for junior developers to help them discuss ideas, swap stories, and share wins or catastrophic failures. Junior developers can join different chapters in this developer community according to their locations and if a chapter doesn’t exist in your location, they will be happy to create one for you.

Join Junior Dev to:
Junior Developer Group is an international community to help early career developers gain skills, build strong relationships and receive guidance. As a junior developer, you may know the basics of coding, but there are additional skills that can help you thrive as you go along the way.

Junior Developer Group can help you to:
Let’s now dive deep into some communities which are specific for technology stacks and architectures.
Pythonista Cafe is a peer to peer learning community for Python developers. It is an invite only developer community. It is a private forum platform that comes at a membership fee. As a part of Pythonista Cafe, you can discuss a broad range of programming questions, career advice, and other topics.

Join Pythonista Cafe to:
Reactiflux is a global community of 200K+ React developers across React JS, React Native, Redux, Jest, Relay and GraphQL. With a combination of learning resources, tips, QnA schedules and meetups, Reactiflux is an ideal community if you are looking to build a career in anything React.

Join Reactiflux if you want to:
Java Programming Forums is a community for Java developers from all across the world. This community is for all Java developers from beginners to professionals as a forum to post and share knowledge. The community currently has 21.5K+ members which are continuously growing.

If you join the Java Programming Forums, you can:
PHP Builder is a community of developers who are building PHP applications, right from freshers to professionals. As a server side platform for web development, working on PHP can require support and learning, which PHP Builder seeks to provide.

As a member of PHP Builder, you can:
Kaggle is one of the best developer communities for data scientists and machine learning practitioners. With Kaggle, you can easily find data sets and tools you need to build AI models and work with other data scientists. With Kaggle, you can get access to 300K+ public datasets and 1.8M+ public notebooks

As a developer community, Kaggle can help you with:
CodePen is an exclusive community for 1.8 million+ front end developers and designers by providing a social development environment. As a community, it allows developers to write codes in browsers primarily in front-end languages like HTML, CSS, JavaScript, and preprocessing syntaxes. Most of the creations in CodePen are public and open source. It is an online code editor and a community for developers to interact with and grow.

If you join CodePen, you can:
Hugging Face has become the central community hub for AI and machine learning practitioners. It hosts the world's largest repository of open-source models (800K+ models), datasets, and Spaces — interactive ML demos you can run in a browser. The community forums and Discord server are highly active for researchers, practitioners, and developers building AI-powered products.
Join Hugging Face to:
The fast.ai community is a peer-learning forum built around the fast.ai deep learning course — one of the most respected free ML curricula available. The forums are active, beginner-tolerant, and technically rigorous. They're particularly good for those making the transition from software development into machine learning.
Join the fast.ai community to:
Finally, we come to the last set of the top developer communities. This section will focus on developer communities which are exclusively created for tech founders and tech entrepreneurs. If you have a tech background and are building a tech startup or if you are playing the dual role of founder and CTO for your startup, these communities are just what you need.
Indie Hackers is a community of founders who have built profitable businesses online and brings together those who are getting started as first time entrepreneurs. It is essentially a thriving community of those who build their own products and businesses. While seasoned entrepreneurs share their experiences and how they navigated through their journey, the new ones learn from these.

Joining Indie Hackers will enable you to:
If you are an early stage SaaS founder or an entrepreneur planning to build a SaaS business, the SaaS Club is a must community to be at. The SaaS Club has different features that can help founders hit their growth journey from 0 to 1 and then from 1 to 100.

Be a part of the SaaS Club to:
You can join the waitlist for the coaching program at $2,000 and get access to course material, live coaching calls, online discussion channel, etc.
Growth Mentor is an invite only curated community for startup founders to get vetted 1:1 advice from mentors. With this community, founders have booked 25K+ sessions so far and 78% of them have reported an increase in confidence post a session. Based on your objective to validate your idea, go to market, scale your growth, you can choose the right mentor with the expertise you need to grow your tech startup.

You should join Growth Mentor if you want to:
The pricing for Growth Mentor starts at $30/ mo which gives you access to 2 calls/ month, 100+ hours of video library, access to Slack channel and opportunity to join the city squad. These benefits increase as you move up the membership ladder.
Founders Network is a global community of tech startup founders with a goal to help each other succeed and grow. It focuses on a three pronged approach of advice, perspective, and connections from a strong network. The tech founders on Founders Network see this as a community to get answers, expand networks and even get VC access. It is a community of 600+ tech founders, 50% of whom are serial entrepreneurs with an average funding of $1.1M.

Be a part of the Founders Network to:
Get exclusive access to founders-only forums, roundtable events, and other high-touch programs for peer learning across 25 global tech hubs
Founders Network is an invite only community starting with a membership fee of $58.25/mo, when billed annually. Depending on your experience and growth stage, the pricing tiers vary giving your greater benefits and access.
If you are a developer, joining the right communities can meaningfully accelerate your growth — whether you're learning your first language, specialising in AI, or leading an engineering team. The landscape has shifted considerably since this list was first published: Discord has overtaken Slack for real-time developer conversation, AI and ML communities have exploded in size and relevance, and some long-standing communities have closed. Choose communities that match where you are now, not just where you want to be. Most of these are free - and even the ones that charge are worth treating as a career investment.
Q1: What are the best developer communities to join in 2026?
The most active developer communities in 2026 are Stack Overflow (technical Q&A), GitHub (open source collaboration), DEV Community / dev.to (blogging and discussion), Reddit (r/programming, r/webdev, r/learnprogramming), Hashnode (developer blogging), Hacker News (tech news and discussion), and Discord servers for real-time conversation. The right choice depends on your goals: Stack Overflow and GitHub for problem-solving and code collaboration; DEV Community and Hashnode for writing and networking; Discord for real-time peer interaction.
Q2: What are the best developer communities for beginners?
The best developer communities for beginners are freeCodeCamp (structured learning and forums), DEV Community (welcoming and beginner-friendly discussions), Reddit's r/learnprogramming (supportive Q&A, over 4 million members), GitHub (for contributing to projects tagged 'good first issue'), and the Junior Developer Group on Facebook and LinkedIn. Stack Overflow is valuable for specific questions but can be less welcoming to beginner-level queries — the alternatives above are more forgiving for exploratory questions early in a developer's career.
Q3: What are the best developer communities on Discord?
The most active developer Discord communities include The Programmer's Hangout (general programming, one of the largest servers), Reactiflux (React and JavaScript, 200,000+ members), Python Discord (Python-specific, very active), and various language and framework-specific servers. Discord has become a primary platform for real-time developer interaction — unlike Slack, it doesn't charge per member, making it more accessible for community organizers and open to large, free developer communities across any technology stack.
Q4: What are the best developer communities for learning to code?
The best communities for learning to code are freeCodeCamp (structured curriculum and forums), Codecademy Community (learner support around its courses), Reddit's r/learnprogramming, The Odin Project Discord (web development, project-based learning), and GitHub's open source ecosystem for applying new skills. For data science, Kaggle provides competitions and notebooks alongside active discussion forums. Stack Overflow is useful for specific debugging questions once you have enough context to formulate a clear, reproducible question.
Q5: What developer communities are best for CTOs and engineering leaders?
The best communities for CTOs and engineering leaders are CTO Craft (curated Slack community with peer mentoring and events), the Global CTO Forum (senior engineering leadership network), Rands Leadership Slack (engineering management focused), and LeadDev (articles and events for engineering managers). These communities focus on leadership, hiring, architecture decisions, and team scaling — the challenges that distinguish engineering leadership from individual contributor work. LinkedIn Groups for Software Engineering Managers are also useful for broader professional networking.
Q6: What are the best developer communities for specialised languages and frameworks?
For Python: Python Discord and Pythonista Cafe. For JavaScript and React: Reactiflux (200,000+ members). For Java: the Java Programming Forums and r/java. For PHP: PHP Builder and r/PHP. For data science and machine learning: Kaggle and fast.ai forums. For frontend: CodePen. Platform-specific communities — Apple Developer Forums for iOS, Google Developer Groups (GDGs) for Android and Google Cloud — are highly active for their respective ecosystems and provide official support alongside community discussion.
Q7: What are the best online communities for tech founders and indie hackers?
The best communities for tech founders are Indie Hackers (bootstrapped products, revenue transparency, detailed founder interviews), Product Hunt (product launches and feedback), Hacker News (Y Combinator's forum, high signal for tech news and founder discussion), SaaS Club (SaaS-specific growth and strategy), and GrowthMentor (matched 1:1 mentorship with experienced founders). For SaaS founders building with third-party integrations, Knit's developer resources at developers.getknit.dev provide technical depth on HRIS, ATS, and ERP API integration.
Q8: What are the best developer forums for asking technical questions?
The best developer forums for technical Q&A are Stack Overflow (largest by volume, covers nearly all languages and frameworks), Stack Exchange network sites for specialised topics (Database Administrators, Server Fault, Security), GitHub Discussions (for open source project-specific questions), and Reddit subreddits like r/webdev and r/learnprogramming — less formal than Stack Overflow and better for exploratory questions. Hacker News Ask HN posts work well for broader architectural or career questions where context and nuance matter more than a precise, reproducible example.
Model Context Protocol is not a framework, not an orchestration layer, and not a replacement for REST. It is a protocol - a specification for how AI agents communicate with external tools and data sources. Anthropic open-sourced it in November 2024 and the current stable version is the 2025-11-25 spec. Since March 2025, when OpenAI adopted it for their Agents SDK, it has become the closest thing to a universal standard the AI tooling world has.
The protocol defines three core primitives. Resources are read-only data that a server exposes - think a file, a database record, or a paginated API response. Tools are callable functions - create a ticket, send a message, fetch an employee. Prompts are reusable templates with parameters, useful when you want the server to provide structured instruction patterns. Most production MCP use centers on Tools, because that is what agents actually invoke.
The mechanics work like this: an MCP client - Claude Desktop, Cursor, Cline, or whatever agent runtime you're using - opens a session with an MCP server by sending an initialize request. The server responds with its capabilities. The client then calls tools/list to get the full schema of every available tool, including their names, descriptions, and input schemas. The agent uses this schema to decide which tools to call and how to call them. Critically, this discovery happens at runtime, not at design time. The developer does not pre-wire which tools an agent will use - the agent figures it out from the schema.
That runtime discovery is the meaningful difference from a REST API. When you integrate a REST API, you write code that calls specific endpoints. When an agent uses an MCP server, it reads what's available and makes decisions. The same agent code can work with a completely different MCP server and route its calls correctly, because the capability description travels with the server. This is what makes MCP composable in a way that hardcoded REST integrations are not.
What MCP is not worth confusing with: it does not replace your REST API. Every MCP server wraps a REST API (or a database, or a filesystem) underneath. The MCP layer sits between the agent and the underlying system — it provides the agent-readable schema and handles session state. The actual work still happens via HTTP calls, SQL queries, or filesystem reads.
The current spec (2025-11-25) introduced Streamable HTTP as the preferred transport for remote servers, replacing the older HTTP+SSE approach. Local servers still use stdio. If you're reading an older MCP tutorial that mentions SSE, the underlying mechanics are the same but the transport has been updated.
The question engineers ask when they first encounter MCP is whether it replaces the tools they already have. The short answer is no — but the longer answer explains when MCP actually earns its overhead.
A REST API is stateless and synchronous. You call an endpoint, you get a response, you close the connection. The developer who writes the integration knows exactly which endpoints exist, what parameters they take, and how to handle the response. This works perfectly when a human writes the code — the developer is the decision-maker. The problem is that AI agents are not great at reading OpenAPI specs and reasoning about which of 200 endpoints to call for a given task. REST is built for developers, not for agents.
An SDK wraps a REST API in a language-specific client. It makes the developer's job easier — instead of hand-rolling HTTP calls, you call client.employees.list(). But the agent is still in the same position: it needs the developer to pre-select which SDK calls are available. You can expose SDK methods as LangChain tools or LlamaIndex tools, but that's just another way of hardcoding the capability list at design time.
MCP changes the design contract. The capability list is defined on the server and discovered at runtime. You write the MCP server once — you define what tools exist, what they do, and what parameters they accept. Every MCP client that connects to it gets that schema automatically. You don't need a new SDK per client runtime, and you don't need to update client code when you add a new tool to the server.
The practical implication: use MCP when the agent is making dynamic decisions about which tools to call. Use direct REST calls when the logic is deterministic — your code always calls the same endpoint with predictable parameters. Building a background job that syncs payroll data nightly does not benefit from MCP overhead. Building an agent that answers questions about your employees by deciding whether to query the HRIS, the payroll system, or the ATS — that is where MCP earns its place.
One cost to be honest about: MCP sessions are stateful, which means your infrastructure needs to maintain session state. Stateless REST calls are easier to scale horizontally. For high-throughput production systems, stateful MCP sessions add operational complexity. Most hosted MCP infrastructure (Composio, Pipedream, Knit) handles this for you — but if you're self-hosting MCP servers at scale, session management is an architectural decision, not a solved problem.
The MCP ecosystem has three distinct layers that are worth keeping separate in your mental model.
The client layer is where agents live — the applications that connect to MCP servers and invoke their tools. The dominant clients in 2026 are IDE-based coding agents: Cursor, Cline (a VS Code extension), Windsurf, and VS Code's native agent mode. Claude Desktop is the most widely known, but engineering teams working with MCP day-to-day are usually inside their IDE. Goose, Block's open-source CLI agent, is worth knowing for terminal-native workflows. Continue.dev serves teams that want an open-source coding assistant with MCP support inside VS Code or JetBrains IDEs.
Most production agent work with MCP happens in Cursor. If you're picking a client to test against first, start there.
The server layer is where tools are exposed. This is a function the developer writes — you define what the server can do, implement the handlers, and expose it over stdio (for local use) or HTTP (for remote/hosted use). An MCP server can wrap a single API (a Slack MCP server), a category of APIs (all HRIS systems), or an internal system (your company's database). The MCP SDK for TypeScript and Python makes building a basic server a few hours of work. Over 12,000 servers across public registries cover most common developer tools as of April 2026.
The infrastructure layer is what most teams actually need to think about carefully: who is running the MCP servers, how are OAuth tokens managed, and how does your agent authenticate with the underlying services? This is where managed platforms enter. Running a community MCP server from GitHub for a personal project is fine. Connecting your production agent to your customers' Workday, Salesforce, and Greenhouse instances — each requiring OAuth, token refresh, and data normalization — is an infrastructure problem that takes weeks to build and months to maintain.
The infrastructure landscape breaks down like this:
Zapier launched Zapier MCP in 2025, which exposes Zapier actions as MCP tools. The 8,000+ app and 40,000+ action count is impressive and probably the widest in terms of apps supported, however its not the best fit for everyone. In practice, Zapier actions are surface-level automations - form submissions, email triggers, basic record creation - not deep API operations with full schema normalization. Engineers building production agents find the abstraction too shallow.
Pipedream is event-driven workflow infrastructure that now exposes workflows as MCP tools. If your use case is event-triggered automation — a webhook fires, some processing happens, a notification goes out — Pipedream's model maps naturally to that. Where it gets awkward is when agents need to make dynamic decisions about which workflows to invoke. Pipedream's sequential trigger model and agent tool-calling are philosophically different patterns.
Knit (mcphub.getknit.dev) takes the opposite approach: vertical depth over horizontal breadth. The covered verticals are HRIS, ATS, CRM, Payroll, and Accounting - 150+ pre-built servers where the differentiator is not just OAuth proxying but depth of coverage and a robuld Access control layer which is critical to enterprise integrations
Setup takes under 10 minutes: log in at mcphub.getknit.dev, select the tools to include, name the server, and receive a URL and token. Two lines of JSON in your Claude Desktop or Cursor config and the server is live — no OAuth plumbing, no token refresh logic, no API version maintenance.
The 12,000+ community MCP servers across public registries cover an enormous surface area, but most production agent work falls into a handful of verticals. Here is how to think about the build-vs-use decision for each.
Developer tooling — GitHub, Linear, Jira, Notion, Slack — has well-maintained official or near-official MCP servers. GitHub's official MCP server handles repository operations, pull request management, and code search. Linear's MCP server exposes issue creation, filtering, and status updates. For this category, use existing servers. Building your own GitHub MCP server is wasted work.
Business data — HR, payroll, and ATS — is where the build decision gets expensive quickly. Connecting to Workday requires an enterprise API agreement. Connecting to BambooHR, Rippling, Greenhouse, Lever, ADP, and Gusto each requires separate OAuth integrations, different field naming conventions, and ongoing maintenance as providers update their APIs. A team building an HR assistant agent that needs to answer "who manages this person", "when was their last performance review", and "what's their current compensation" needs to pull from three different systems that each return employee IDs differently. This is the problem Knit's unified schema solves — one get_employee tool call returns the same normalized object regardless of whether the underlying system is Workday or BambooHR.
Internal data systems — your company's database, internal APIs, proprietary data stores — are the one case where self-hosting is justified. If you're building an MCP server that wraps your internal PostgreSQL analytics database, you should host that yourself. No managed platform will have your internal schema, and you shouldn't be sending your internal data through a third-party proxy.
Communication and productivity tools — Slack, Gmail, Google Drive, Notion — have good first-party or community servers. The main maintenance concern is OAuth token lifecycle and API version changes. Composio or Nango are reasonable choices for managing token refresh on these.
A note on server count: the instinct when discovering MCP is to connect as many servers as possible. Resist it. Every MCP server connected to your agent adds its tool list to the context window. An agent with 40 MCP servers and 500 available tools wastes tokens on tools/list responses, risks poor tool selection from name collisions, and adds latency to every agent turn. The right architecture is purpose-specific: a coding agent has GitHub + Linear + Slack. An HR analytics agent has Knit's HRIS and payroll servers. Build focused agents, not Swiss Army knife agents.
When you have an internal system, a proprietary data source, or an API that no managed server covers, building your own MCP server is a straightforward process. The official TypeScript SDK is the most mature option.
Install the SDK:
# v1.x — current stable production release
npm install @modelcontextprotocol/sdk
A minimal MCP server that exposes one tool looks like this:
import { Server } from "@modelcontextprotocol/sdk/server/index.js";
import { StdioServerTransport } from "@modelcontextprotocol/sdk/server/stdio.js";
import {
  ListToolsRequestSchema,
  CallToolRequestSchema
} from "@modelcontextprotocol/sdk/types.js";

const server = new Server(
  { name: "internal-hr-server", version: "1.0.0" },
  { capabilities: { tools: {} } }
);

server.setRequestHandler(ListToolsRequestSchema, async () => ({
  tools: [
    {
      name: "get_employee",
      description: "Fetch an employee record by their internal ID",
      inputSchema: {
        type: "object",
        properties: {
          employee_id: {
            type: "string",
            description: "The employee's internal system ID"
          }
        },
        required: ["employee_id"]
      }
    }
  ]
}));

server.setRequestHandler(CallToolRequestSchema, async (request) => {
  if (request.params.name === "get_employee") {
    const { employee_id } = request.params.arguments as { employee_id: string };

    // Replace with your actual data source call
    const employee = await fetchFromInternalHRSystem(employee_id);

    return {
      content: [{ type: "text", text: JSON.stringify(employee, null, 2) }]
    };
  }

  throw new Error(`Unknown tool: ${request.params.name}`);
});

const transport = new StdioServerTransport();
await server.connect(transport);
For local use (Claude Desktop, Cursor), stdio transport is sufficient. The client launches the server as a subprocess and communicates over stdin/stdout. You register the server in your Claude Desktop config (claude_desktop_config.json) or Cursor settings:
{
  "mcpServers": {
    "internal-hr-server": {
      "command": "node",
      "args": ["/path/to/your/server/dist/index.js"]
    }
  }
}
For remote use - when you need the server accessible over the network, shared across a team, or running on managed infrastructure — use the HTTP transport. The 2025-11-25 spec introduced Streamable HTTP as the preferred approach:
import { StreamableHTTPServerTransport } from "@modelcontextprotocol/sdk/server/streamableHttp.js";
import express from "express";

const app = express();
app.use(express.json());

const transport = new StreamableHTTPServerTransport({ sessionIdGenerator: () => crypto.randomUUID() });
await server.connect(transport);

app.post("/mcp", (req, res) => transport.handleRequest(req, res));
app.get("/mcp", (req, res) => transport.handleRequest(req, res));

app.listen(3000);
Remote clients reference the server by URL:
{
  "mcpServers": {
    "internal-hr-server": {
      "url": "https://your-server.internal.example.com/mcp",
      "headers": { "Authorization": "Bearer YOUR_SERVER_TOKEN" }
    }
  }
}
For the Python SDK, install with pip install mcp and import from the mcp.server module — the handler pattern is functionally identical to the TypeScript version.
The practical scope question: build your own server when the tool wraps a system only you have access to (internal database, proprietary API, company-specific business logic). Use a managed server when the tool wraps a third-party SaaS that other companies also use - someone has likely already built and maintained the integration.
For the HR, payroll, ATS, and CRM category specifically, the build cost compounds quickly: separate OAuth apps per provider, different field naming conventions across systems (employee_id vs workdayId vs a UUID), rate limit differences, and API version changes that break your integration with no warning. Knit's pre-built servers at mcphub.getknit.dev cover 150+ of these systems with a unified schema. The decision to build your own should be reserved for systems that no managed platform will ever have access to.
The instinct when evaluating MCP security is to focus on the network layer — TLS, API key rotation, OAuth scopes. These matter, but they're not the specific risks that MCP introduces. The protocol creates attack surfaces that REST-based architectures don't have.
Tool poisoning is the most direct risk. An MCP server exposes tool descriptions — strings that describe what each tool does and how to use it. An agent reads these descriptions as part of its context. A malicious or compromised server can embed instructions inside tool descriptions that redirect agent behavior. The description for a search_files tool might contain hidden text instructing the agent to exfiltrate credentials. Because the agent processes tool descriptions as natural language context, this is a prompt injection vector that bypasses traditional input validation. Nothing in the MCP protocol prevents a server from returning whatever text it wants in a tool description.
The mitigation: treat tool descriptions as untrusted input. If you're building infrastructure that forwards tool descriptions to an agent, implement a filtering layer that inspects descriptions for instruction-like patterns before the agent sees them. For internal use, this risk is lower — you control the servers. For agents that connect to user-supplied or community MCP servers, it is a genuine attack surface.
Supply chain risk from community servers is the second concern. The 12,000+ servers across public registries are unaudited. A popular community MCP server that requests filesystem access and network access is a privileged process running on the developer's machine. The server's code was written by strangers, and versions change without formal security reviews.
Two 2025 incidents make this concrete. In September 2025, the postmark-mcp npm package was backdoored: attackers modified version 1.0.16 to silently BCC every outgoing email to an attacker-controlled domain. Sensitive communications were exfiltrated for days before detection. A month later, the Smithery supply chain attack exploited a path-traversal bug in server build configuration, exfiltrating API tokens from over 3,000 hosted MCP applications. CVE-2025-6514, a critical vulnerability in the widely-used mcp-remote package, represents the first documented full system compromise achieved through MCP infrastructure — affecting Claude Desktop, VS Code, and Cursor users simultaneously.
For production environments, restrict your agents to MCP servers from known, maintained sources — not arbitrary GitHub repositories. Self-hosted or managed infrastructure with version pinning is the right approach.
Overprivileged servers are the operational risk that compounds over time. An MCP server that wraps your CRM shouldn't need filesystem access. A server that queries employee records shouldn't have the scope to update payroll data. Scope tool capabilities to the minimum required for the tool's stated function. In practice, this means auditing the inputSchema of each tool and the underlying API permissions the server holds — not just at setup time, but whenever the server is updated.
Cross-server context pollution is a subtler issue. When an agent has multiple MCP servers connected simultaneously, the tool descriptions from all servers exist in the same context window. A malicious server can craft its tool descriptions to influence how the agent interprets instructions for other servers. Keeping agent scope focused — coding agents use coding tools, HR agents use HR tools — limits the blast radius.
Tool poisoning is codified in the OWASP MCP Top 10 as MCP03:2025 — it is not a theoretical threat. For teams running agents against customer data, the operational requirements are: log every tool call with full parameters and responses; bind tool permissions to the narrowest scope available; alert on anomalous tool call patterns (an HR agent suddenly making filesystem calls is a signal, not a coincidence). The OWASP MCP Top 10 is the right starting point for a formal threat model.
Managed, vertically-scoped infrastructure reduces the attack surface in a specific way: you know in advance what each server can touch. A Knit HRIS server has access to employee data — and nothing else. There is no filesystem access, no shell execution, no access to systems outside the declared scope. You are connecting to a defined server with a published schema, not running arbitrary code from the internet. The tool poisoning risk still exists (any server could return malicious text in descriptions), but the supply chain risk — the npm backdoor, the compromised registry — is substantially lower when you're using infrastructure with clear ownership, versioning, and a support contact. The OWASP MCP Top 10 is still the right framework for your threat model regardless of which infrastructure you choose.
What is the Model Context Protocol (MCP)?
MCP (Model Context Protocol) is an open protocol created by Anthropic that standardizes how AI agents communicate with external tools and data sources. Instead of developers pre-wiring specific API calls, MCP servers expose a discoverable tool schema at runtime — the agent calls tools/list, sees what's available, and decides which tools to invoke autonomously. Knit uses MCP to let agents connect to HRIS, payroll, ATS, and CRM systems through a single normalized interface.
How is MCP different from a REST API?
A REST API is stateless and consumed by developer-written code that calls specific endpoints. MCP is a stateful protocol where an AI agent discovers available tools at runtime via tools/list and decides which to call — without the developer hardcoding the routing logic. MCP servers typically wrap REST APIs underneath; the protocol layer sits between the agent and the underlying system.
What MCP clients are available in 2026?
The major MCP clients are: Claude Desktop (Anthropic), Cursor, Cline (VS Code extension), Windsurf (Codeium), VS Code (native agent mode), Goose (Block), Zed, and Continue.dev. Most production agent work with MCP happens inside IDE-based clients — Cursor and Cline are the most commonly used by engineering teams.
What is a managed MCP server and when do I need one?
A managed MCP server is hosted infrastructure that wraps third-party APIs with MCP-compatible schemas and handles OAuth token management. You need one when your agent needs to connect to third-party SaaS tools that require OAuth flows, schema normalization, or ongoing API maintenance — for example, connecting to your customers' HRIS or payroll systems. Knit provides managed MCP servers for 150+ HRIS, ATS, CRM, payroll, and accounting tools.
How many MCP servers should I connect to one agent?
As few as the task requires. Each connected MCP server adds its full tool list to the agent's context window. Connecting 40 servers with 500 aggregate tools wastes tokens on tools/list responses, increases tool selection errors, and adds latency. The right architecture is purpose-specific: a coding agent uses GitHub + Linear + Slack; an HR assistant uses HRIS and payroll servers. Build focused agents.
What are the main security risks with MCP?
The two MCP-specific risks that don't exist in standard REST integrations are: (1) tool poisoning — a server embeds malicious instructions inside tool descriptions, which the agent processes as context, and (2) supply chain attacks — unaudited community MCP servers requesting elevated permissions (filesystem, network) run as privileged processes. Mitigate by using managed, versioned MCP infrastructure rather than arbitrary community servers, and filtering tool descriptions for instruction-like patterns before they reach the agent.
Can I build my own MCP server?
Yes. The official TypeScript SDK (@modelcontextprotocol/sdk) and Python SDK (mcp) make it straightforward. You implement two handlers: ListToolsRequestSchema (returns your tool schema) and CallToolRequestSchema (executes the tool). Build your own server when wrapping an internal database or proprietary API. For third-party SaaS integrations that other companies also use, a managed server from Knit or Composio saves months of OAuth plumbing and maintenance work.
Payroll API integration is the process of programmatically connecting your software to a third-party payroll system - such as ADP, Gusto, or Rippling - to read or write employee compensation data. It replaces manual CSV exports with an automated, real-time data flow between systems.
In practice, a payroll API integration reads employee compensation data - pay statements, deductions, tax withholdings, pay periods - from your customer's payroll system and pipes it into your product. If you're building benefits administration software, an expense management tool, a workforce analytics platform, or an ERP, you need this data. Your customers expect it to just work.
The problem is that there is no single "payroll API." ADP, Gusto, Rippling, Paychex, and Workday each built their own data model, their own authentication scheme, and their own rate limiting rules - independently, over different decades. ADP launched its Marketplace API program in 2017, layering a modern REST interface over decades of legacy infrastructure. Gusto launched its developer API with modern REST conventions from the start. Rippling came later with a cleaner OAuth 2.0 implementation. The result is a landscape where the same concept - a pay statement - has a different shape in every system you touch.
There are three broad types of payroll integration you can build: API-based integrations (where you query the provider's endpoints directly), file-based integrations (SFTP or CSV uploads, still common with legacy providers), and embedded iPaaS (where a middleware layer handles the connection). This guide focuses on API-based integrations — the most maintainable approach for a B2B SaaS product - against the four providers your customers are most likely to use.
If your product serves mid-market B2B customers, you need to integrate with most of these. Here's a quick orientation before going deep on each:
Building and maintaining each integration separately is not a one-time cost - each provider deprecates endpoints, changes schema, and rotates authentication requirements. You're signing up for ongoing maintenance on code that has nothing to do with your core product. If you're evaluating whether to build or buy these integrations, skip to the Building vs Buying section first.
Across all payroll providers, you'll work with roughly the same conceptual objects. The challenge is that the field names, nesting, and ID schemes are inconsistent.
Employees are the starting point. Every subsequent query is scoped to a specific employee. Gusto uses a numeric id for employees. Rippling uses a UUID-style string. ADP uses an associateOID — an opaque identifier that has no relationship to the employee's SSN or internal HR ID. If you're joining payroll data with your own user table, you need an explicit mapping for each provider.
Pay periods define the time window for a payroll run. Gusto models these as pay_schedule objects with a start_date and end_date. Paychex calls them payperiods with a periodStartDate and periodEndDate. They model the same concept, but you can't reuse the same parsing code.
Pay statements (or pay stubs) contain the actual compensation breakdown. In Gusto's API, the payroll totals object includes gross_pay and net_pay as string decimals: "gross_pay": "2791.25". The individual breakdowns live in an employee_compensations array, where fixed compensation items have the shape { "name": "Bonus", "amount": "0.00", "job_id": 1 }. Rippling uses camelCase throughout — grossPay, netPay — while ADP nests pay data several levels deep under a payData wrapper with its own sub-arrays for reportedPayData and associatePayData.
Deductions are where it gets complicated. Pre-tax deductions (401k contributions, HSA, FSA), tax withholdings, and post-tax deductions are often represented in separate arrays with no standard naming. One provider's deductionCode is another's deductionTypeId. If you're building a benefits product that needs to verify contribution amounts, you will spend significant time normalizing this.
Bank accounts are frequently rate-limited or require elevated API scopes. Gusto restricts bank account access to specific partnership tiers. ADP requires explicit consent flows for financial data.
Authentication is where most teams lose their first two weeks on a payroll API integration. Here's the reality for each provider.
Gusto uses OAuth 2.0. You register an application in the Gusto developer portal to get a client_id and client_secret. For system-level access (your server reading a customer's payroll data after they've authorized your app), you exchange credentials for a system access token:
curl -X POST https://api.gusto.com/oauth/token \
  -H "Content-Type: application/x-www-form-urlencoded" \
  -d "grant_type=system_access&client_id=YOUR_CLIENT_ID&client_secret=YOUR_CLIENT_SECRET"
Gusto's access tokens expire after 2 hours. Build token refresh into your client from day one - discovering this expiry in production when a payroll sync fails at 2am is unpleasant.
import requests
import time

class GustoClient:
    TOKEN_URL = "https://api.gusto.com/oauth/token"

    def __init__(self, client_id: str, client_secret: str):
        self.client_id = client_id
        self.client_secret = client_secret
        self._token = None
        self._token_expiry = 0

    def get_token(self) -> str:
        if time.time() >= self._token_expiry - 60:  # refresh 60s before expiry
            self._refresh_token()
        return self._token

    def _refresh_token(self):
        resp = requests.post(self.TOKEN_URL, data={
            "grant_type": "system_access",
            "client_id": self.client_id,
            "client_secret": self.client_secret,
        })
        resp.raise_for_status()
        data = resp.json()
        self._token = data["access_token"]
        self._token_expiry = time.time() + data["expires_in"]  # 7200 seconds
Rippling supports both OAuth 2.0 (authorization code flow, for user-facing integrations) and API key authentication (Bearer token, for server-to-server). API keys are generated in the Rippling developer portal and need to be scoped to the correct permissions.
curl https://api.rippling.com/platform/api/employees \
  -H "Authorization: Bearer YOUR_API_KEY"
Rippling tokens expire after 30 days of inactivity. Unlike Gusto's 2-hour hard expiry, Rippling's expiry is activity-based — but don't rely on it staying alive for long-running background jobs. Implement token validation before any scheduled sync run.
ADP is where most teams encounter their first real surprise: ADP requires mutual TLS (mTLS) in addition to standard OAuth 2.0. You need to generate a Certificate Signing Request (CSR), submit it to ADP through their developer portal, receive a signed client certificate, and configure your HTTP client to present that certificate on every request. This is not optional, and it's not mentioned prominently in most payroll API integration guides.
The process: generate a CSR with a 2048-bit RSA key, submit via the ADP developer portal, wait 1–3 business days for the signed certificate, then configure your HTTP client:
import requests

session = requests.Session()
# ADP requires both the client certificate AND your OAuth token
session.cert = ("client_cert.pem", "client_key.pem")

# Then get your OAuth token
token_resp = session.post(
    "https://accounts.adp.com/auth/oauth/v2/token",
    data={
        "grant_type": "client_credentials",
        "client_id": YOUR_CLIENT_ID,
        "client_secret": YOUR_CLIENT_SECRET,
    }
)
access_token = token_resp.json()["access_token"]

# All subsequent API calls require both the cert AND the token
resp = session.get(
    "https://api.adp.com/hr/v2/workers",
    headers={"Authorization": f"Bearer {access_token}"}
)
Beyond mTLS, ADP requires a formal developer agreement before you can access production APIs. This involves a legal review, a data processing addendum, and an approval queue - budget 2–4 weeks. The certificate itself also has an expiry date, which means you'll need a renewal process in production before it lapses.
Paychex uses OAuth 2.0 client_credentials grant with a base URL of https://api.paychex.com. The authentication call is standard:
curl -X POST https://api.paychex.com/auth/oauth/v2/token \
  -d "grant_type=client_credentials&client_id=YOUR_CLIENT_ID&client_secret=YOUR_CLIENT_SECRET"
One important quirk: Paychex has no global worker namespace. Every call to fetch employee or payroll data requires a companyId, which you resolve first with GET /companies. The companyId is then used as a path parameter — workers are at /companies/{companyId}/workers, and pay periods at /companies/{companyId}/payperiods.
const axios = require("axios");

async function getPaychexPayrolls(accessToken, companyId, payPeriodId) {
  const resp = await axios.get(
    `https://api.paychex.com/companies/${companyId}/payperiods/${payPeriodId}/payrolls`,
    {
      headers: { Authorization: `Bearer ${accessToken}` }
    }
  );
  return resp.data.content; // Paychex wraps responses in a 'content' array
}Here's what a payroll API integration actually looks like in practice - three operations you'll run on every provider: listing employees, fetching the latest pay run, and handling multi-company structures.
Gusto uses page-based pagination. Each request returns a page of employees; you stop when you receive fewer results than the page size:
def get_all_employees(client: GustoClient, company_id: str) -> list:
    employees = []
    page = 1
    while True:
        resp = requests.get(
            f"https://api.gusto.com/v1/companies/{company_id}/employees",
            headers={"Authorization": f"Bearer {client.get_token()}"},
            params={"page": page, "per": 100}
        )
        resp.raise_for_status()
        batch = resp.json()
        employees.extend(batch)
        if len(batch) < 100:
            break
        page += 1
    return employees
Rippling uses cursor-based pagination with a next cursor returned in the response body. Max page size is 100 records. Always check the next field rather than counting results — relying on result count is fragile if the API returns exactly 100 items on the last page:
def get_all_rippling_employees(api_key: str) -> list:
    employees = []
    url = "https://api.rippling.com/platform/api/employees"
    params = {"limit": 100}
    while url:
        resp = requests.get(url, headers={"Authorization": f"Bearer {api_key}"}, params=params)
        resp.raise_for_status()
        data = resp.json()
        employees.extend(data.get("results", []))
        url = data.get("next_link")  # full URL to next page; None when exhausted
        params = {}  # pagination cursor is encoded in next_link
return employeesFor Gusto, filter by processing_statuses=processed and sort descending to get the most recent completed payroll:
curl "https://api.gusto.com/v1/companies/{company_id}/payrolls?processing_statuses=processed&include=employee_compensations" \
  -H "Authorization: Bearer YOUR_TOKEN"
The include=employee_compensations parameter is required to get the individual pay breakdown — it's not returned by default. Leaving it off is a common mistake that leads to incomplete sync data.
Any customer that operates more than one legal entity — a holding company with subsidiaries, a company that went through an acquisition, or a business with separate payroll entities per state - will have a multi-EIN payroll structure. Gusto, Rippling, and Paychex all support this but handle it differently. In Gusto, each legal entity is a separate company_id and you need explicit authorization per company. In Paychex, multiple companies share a single auth context but each requires a separate companyId scoped in the URL path on every request. This is worth testing with a multi-entity customer early in development — it's a common source of missing data bugs that only surface with specific customer configurations.
Here is the part of payroll API integration that most guides skip: nearly every payroll provider's rate limits are undocumented, and you discover them by hitting HTTP 429 responses in production.
Paychex is the only major provider that returns a Retry-After header on 429 responses. For every other provider, you need an exponential backoff strategy with jitter:
import time
import random

def request_with_backoff(fn, max_retries=5):
    for attempt in range(max_retries):
        try:
            return fn()
        except requests.HTTPError as e:
            if e.response.status_code == 429 and attempt < max_retries - 1:
                wait = (2 ** attempt) + random.uniform(0, 1)
                time.sleep(wait)
            else:
                raise
Beyond rate limits, consider data freshness. Payroll data is not real-time - most companies run payroll bi-weekly or semi-monthly. Syncing payroll data every 5 minutes is wasteful and will exhaust undocumented rate limits quickly. A reasonable sync cadence is every 4–6 hours for employee data (which changes more frequently due to new hires and terminations) and nightly for pay statements (which are static once a payroll run is processed).
For pay statement records, implement deduplication using the provider's payroll ID as an idempotency key. Gusto's payroll objects have a stable payroll_uuid field. Paychex uses a payrollId. Store these in your database and skip records you've already processed — payroll APIs don't guarantee exactly-once delivery, particularly when a payroll run is corrected after initial processing.
The real cost of building payroll API integrations is not the initial development time - it's the ongoing maintenance. Here's a rough breakdown for building a production-quality integration against a single payroll provider:
For five providers - ADP, Gusto, Rippling, Paychex, and one more - you're looking at 6+ months of initial work and a recurring maintenance burden from engineers who would rather be building your core product.
Knit's unified payroll API normalizes all of these providers - field names, auth flows, pagination, and rate limit handling - into a single endpoint. The same request that fetches pay statements from Gusto works unchanged for Rippling, Paychex, and ADP:
curl --request GET \
     --url https://api.getknit.dev/v1.0/hr.employees.payroll.get \
       -H "Authorization: Bearer YOUR_KNIT_API_KEY" \
  -H "X-Knit-Integration-Id: CUSTOMER_INTEGRATION_ID"
The response uses a consistent schema regardless of the underlying provider:
{
  "success": true,
  "data": {
    "payroll": [
      {
        "employeeId": "e12613dsf",
        "grossPay": 11000,
        "netPay": 8800,
        "processedDate": "2023-01-01T00:00:00Z",
        "payDate": "2023-01-01T00:00:00Z",
        "payPeriodStartDate": "2023-01-01T00:00:00Z",
        "payPeriodEndDate": "2023-01-01T00:00:00Z",
        "earnings": [
          {
            "type": "BASIC",
            "amount": 100000
          },
          {
            "type": "LTA",
            "amount": 10000
          }
        ],
        "contributions": [
          {
            "type": "PF",
            "amount": 10000
          },
          {
            "type": "MEDICAL_INSURANCE",
            "amount": 10000
          }
        ],
        "deductions": [
          {
            "type": "PROF_TAX",
            "amount": 200
          }
        ]
      }
    ]
  }
}
You write this integration once. Knit handles the ADP certificate renewal, the Gusto token refresh, the Rippling schema changes, and the Paychex pagination quirks. See the Knit payroll API documentation to connect your first provider.
What is a payroll API integration?
A payroll API integration connects your software to a payroll provider's system to read employee compensation data - pay statements, deductions, tax withholdings - programmatically. It replaces manual CSV exports and allows your product to stay in sync with your customers' payroll data automatically.
How do I connect to the Gusto API?
Register an application at the Gusto developer portal to get a client_id and client_secret. Use OAuth 2.0 to obtain an access token via POST /oauth/token with grant_type=system_access. Include the token in the Authorization: Bearer header on all API requests. Tokens expire every 2 hours, so implement a refresh mechanism.
What payroll systems have developer APIs?
The major US payroll providers with public or partner APIs include: Gusto (developer.gusto.com), Rippling (developer.rippling.com), ADP Workforce Now (developers.adp.com), Paychex Flex (developer.paychex.com), Workday (requires partner agreement), and QuickBooks Payroll (developer.intuit.com).
Does ADP Workforce Now require more than standard OAuth 2.0?
Yes - ADP Workforce Now requires mutual TLS (mTLS) in addition to OAuth 2.0. You must generate a Certificate Signing Request, submit it to ADP's developer portal, receive a signed client certificate, and present that certificate on every API request alongside your OAuth token. Knit handles ADP's mTLS setup and certificate lifecycle for you, so engineering teams access ADP payroll data through Knit's unified API without managing certificates or renewals directly. The mTLS process, combined with ADP's formal developer agreement and approval queue, typically adds 2 to 4 weeks to any direct ADP integration.
How long does it take to build a payroll integration?
A single production-quality payroll API integration against one provider typically takes 4–8 weeks, depending on the provider. ADP adds time due to its mTLS certificate requirement, developer agreement, and legal review process. Building against 4–5 providers in parallel is a 6+ month investment.
How do I handle rate limits when integrating with payroll APIs?
Most payroll providers - Gusto, Rippling, and ADP - do not publish specific rate limit values, so integrations discover limits by hitting HTTP 429 errors in production. Knit manages rate limit handling and retry logic internally across all connected payroll providers, so calls to Knit's unified API do not require provider-specific backoff implementations. For direct integrations, implement exponential backoff with jitter for Gusto, Rippling, and ADP; Paychex is the only major provider that returns a Retry-After header on 429 responses, which your client can use to determine the correct wait interval before retrying.
What is a unified payroll API?
A unified payroll API sits in front of multiple payroll providers and exposes a single normalized endpoint. Instead of building separate payroll API integrations for Gusto, Rippling, ADP, and Paychex - each with different auth flows, field names, and rate limits - you build one integration against the unified API, which handles the provider-specific complexity for you.

Note: This is a part of our API Security series where we solve common developer queries in detail with how-to guides, common examples, code snippets and a ready to use security checklist. Feel free to check other articles on topics such as authentication methods, rate limiting, API monitoring and more.
Securing your APIs is not a one-time effort but a journey that begins at the very inception of your API idea and continues throughout its entire lifecycle.
While much attention is often devoted to the creation and maintenance of APIs, the process of API lifecycle management and decommissioning is sometimes overlooked, though it is a vital component of any organization's IT strategy. Neglecting this phase can lead to security vulnerabilities, data privacy issues, and operational headaches. In this article, we will discuss the reasons behind API decommissioning, best practices for doing so, and the significance of a well-executed exit strategy to ensure that your API landscape remains secure, efficient, and resilient from inception to retirement.
Following are some of the key phases in a API’s lifecycle —
Security should be a foundational consideration in the design phase. Consider access controls, data encryption, and authentication mechanisms right from the start. This is where you lay the groundwork for a secure API.
Read: API Security 101 where we discussed all these in details
During development, follow secure coding practices and conduct code reviews to catch potential vulnerabilities. Implement input validation, sanitize user inputs, and enforce least privilege principles to reduce attack surfaces.
As you deploy your API, configure security settings, such as firewalls, intrusion detection systems, and access controls. Use HTTPS to encrypt data in transit and ensure secure server configurations.
Continuously monitor your API in production. Implement real-time security monitoring and logging to detect and respond to threats promptly. Regularly update dependencies and patches to keep your API secure against known vulnerabilities.
Even when an API is no longer in active use, its data and code may still pose a security risk. Securely decommission APIs by revoking access, deleting sensitive data, and disabling unnecessary endpoints. This phase ensures that the legacy of your API doesn't become a liability.
The retirement of an API is often overlooked but is just as critical to security as its deployment. Think of it as responsibly dismantling a building to prevent accidents. Securely decommissioning APIs involves a systematic process to minimize potential risks:
By considering security at every phase of the API lifecycle and ensuring secure decommissioning, you not only protect your digital assets but also demonstrate a commitment to safeguarding sensitive data and maintaining the trust of your users and partners.
API lifecycle management is the end-to-end process of overseeing an API from initial design through to retirement - covering planning, development, testing, deployment, monitoring, versioning, and decommissioning. The goal is to ensure APIs remain secure, performant, and aligned with business needs at every stage of their existence.
Unlike managing individual APIs ad hoc, lifecycle management provides a structured governance framework that scales across an organisation's full API portfolio. This matters especially as API sprawl grows and teams need visibility into version status, deprecation timelines, and consumer dependencies.
For SaaS companies building integrations with third-party platforms, Knit manages the integration lifecycle across all supported HRIS, CRM, ATS, and accounting platforms — handling authentication, schema versioning, and API changes so your engineering team doesn't need to track individual provider API versions.
The API lifecycle consists of five core stages:
1. Design — Define endpoints, data models, request/response formats, authentication scheme, and error handling. Key output: an API specification (typically OpenAPI/Swagger format).
2. Development — Build and test the API against the design specification. Includes unit, integration, and security testing.
3. Deployment — Release to production, configure API gateways, set rate limits, and publish documentation.
4. Operations — Ongoing monitoring of performance, uptime, and usage; managing versioned updates; iterating based on consumer feedback and security requirements.
5. Retirement — Deprecating and eventually decommissioning the API when it is replaced or no longer needed.
Skipping or rushing stages — particularly design and deprecation — creates technical debt and downstream integration failures that are disproportionately expensive to fix.
The API design phase is where teams define the API's contract before writing a single line of code. Every subsequent stage builds on decisions made here — endpoint structure, data models, authentication method, error codes, pagination strategy.
A well-designed API is easier to implement, test, and document. More importantly, it minimises breaking changes during the operations phase. Breaking changes are expensive in B2B contexts: every consumer integration must be updated, often on their own development timeline.
Key inputs include consumer research (what do integrators actually need?), consistency with existing APIs, and adherence to standards like REST, OpenAPI Specification (OAS 3.x), or GraphQL. Tools like Swagger Editor, Stoplight, and Postman are widely used to define and validate API contracts before development begins.
API versioning is the practice of managing changes to an API while preserving backward compatibility for existing consumers who cannot immediately update their integrations.
Within the lifecycle, versioning occurs during the operations stage. As the API evolves, versioning determines how changes are delivered without forcing all consumers to update simultaneously.
Common strategies:
/v1/, /v2/ (most common; explicit and easy to route)?api-version=2 (simple but can pollute query strings)A clear versioning policy - defining what constitutes a breaking change and how long old versions will be supported — is the foundation of a responsible deprecation and decommissioning process.
These two terms are related but distinct and are often confused.
Deprecation is a signal, not a shutdown. A deprecated API remains fully operational but is officially marked as no longer recommended. Consumers receive notice that the API will eventually be retired and should begin migrating. Deprecation starts a countdown — not a shutdown.
Decommissioning is the final act - removing access entirely. After decommissioning, calls to the endpoint return errors rather than valid responses.
The sequence is always: deprecation → transition period → decommissioning. The transition window depends on the API's audience (typically 6–12 months for public APIs; shorter for internal ones). Skipping deprecation and jumping straight to decommissioning turns a manageable migration into an emergency incident for every consumer simultaneously.
API decommissioning done poorly breaks integrations without warning. Best practices to avoid this:
Deprecation and Sunset response headers so consuming applications can detect the timeline programmatically.Deprecation without breakage requires communication, tooling, and time:
Deprecation: <date> and Sunset: <date> headers to responses from deprecated endpoints. Consuming apps can parse these programmatically to surface warnings to their developers.The most common cause of integration breakage during deprecation is insufficient notice time combined with no migration tooling - even well-documented deprecations fail when the consuming organisation has limited engineering bandwidth to react.
For SaaS products that integrate with third-party platforms - HRIS, CRM, ATS, payroll, accounting - API lifecycle events at the provider level are a constant operational reality. Every time a provider upgrades their API version, deprecates an endpoint, or changes an authentication model, every integration using that version is affected.
The impact cascades: a deprecation notice triggers an engineering scoping exercise; the sunset deadline creates a hard deadline for the update; any integration not updated by decommissioning date starts returning errors for end customers. The overhead scales linearly with the number of integrated platforms.
Knit manages API version compatibility across all supported platforms. When a provider updates or deprecates their API, Knit handles the migration - your application continues calling Knit's unified API without changes, and your customers' integrations remain operational through the provider's version transition.

Note: This is a part of our API Security series where we solve common developer queries in detail with how-to guides, common examples, code snippets and a ready to use security checklist. Feel free to check other articles on topics such as authentication methods, rate limiting, API monitoring and more.
Authentication and authorization are fundamental concepts in API security. These methods are pivotal in safeguarding data, preventing unauthorized access, and maintaining the integrity and privacy of the information exchanged between applications and their APIs. Let’s discuss these in detail.
Authentication is the process of verifying the identity of a user or system trying to access an API. It ensures that the entity making the request is who they claim to be.
Strong authentication mechanisms, such as API keys or OAuth tokens, are crucial because they provide a secure way to confirm identity, reducing the risk of unauthorized access.
Authorization, on the other hand, comes into play after authentication and determines what actions or resources a user or system is allowed to access within the API.
This is where role-based access control and granular authorization shine.
They allow you to define fine-grained permissions, restricting access to only the necessary functions and data, minimizing potential risks.
Knit now allows role-based access control through its User Management feature where you can decide who gets access to what while ensuring managing the health of your integrations as a team via the same dashboard.
Two-factor authentication (2FA) adds an extra layer of security by requiring users to provide two forms of identification before gaining access, typically something they know (like a password) and something they have (like a mobile device or security token).
It significantly enhances security by thwarting unauthorized access even if login credentials are compromised.
API authentication protocols are the gatekeepers that ensure only authorized users and systems gain access to the valuable resources offered by these APIs.
In this article, we will explore some of the best API authentication protocols that provide both developers and users with the confidence that their data and interactions remain protected in today’s interconnected world.
There are various methods you can use to ensure secure authorization to your API, each with its own strengths and use cases. Below are some of the widely used and effective authentication protocols that you can choose from based on your use case:
P.S. We have included a comparison chart later in this post for you. Keep reading!
OAuth is an industry-standard authentication protocol that allows secure access to resources on behalf of a user or application.
It is commonly used to grant third-party applications limited access to user data from other services(such as social media platforms or cloud storage) without exposing user credentials with the third party.
The core concept of OAuth is the access token. Access tokens are short-lived, temporary credentials that are issued by an OAuth authorization server. These tokens grant limited access to specific resources on the user's behalf. They are used to authenticate and authorize API requests.
It also allows for the specification of scopes, which determine the level of access granted to an application. For example, an application might request read-only access to a user's email or the ability to post on their social media feed.
Bearer tokens are a simple way to authenticate API requests. They serve as proof of authorization and grant access to specific resources or services. They are typically long, random strings of characters that are generated by an authorization server. They can be cryptographically signed to ensure their integrity and validity.
They are stateless, meaning the server or API that receives the token doesn't need to keep track of the token's status or maintain any session state. The token itself contains the necessary information to determine the scope of access.
A bearer token is included in the request header, and if it's valid, the request is processed without the need for further authentication. It's crucial to protect bearer tokens, as anyone with access to them can use the API.
API keys are often used for authentication, especially for server-to-server communication.
They are a form of secret key that must be included in the API request header to gain access. While simple to implement, they should be handled securely to prevent misuse. They should never be hard-coded into publicly accessible code or shared openly. Instead, they should be stored securely, often in environment variables or a configuration file.
API keys often come with usage limits to prevent abuse. This helps ensure fair use and protects the API server from overloading due to excessive requests from a single key.
JWTs are a popular authentication method because of their simplicity, portability, and flexibility. It is a token-based authentication method, as it relies on the exchange of tokens for authentication rather than traditional methods like username and password.
JWTs consist of three parts: a header, a payload, and a signature. The header specifies the type of token and the signing algorithm used. The payload contains claims, which are statements about the user or application. Claims can include user identification, roles, and more. The signature is generated using the header, payload, and a secret key, ensuring the token's integrity.
They can also be configured to include expiration times claims, which enhances security by limiting the token's validity and ensuring it is used only for its intended purpose.
The compact, self-contained nature and support for open standards of JWTs makes them suitable for modern microservices architectures and APIs that require decentralized identity and access control.
Basic Authentication involves sending a username and password in the API request header in the form of Base64-encoded credentials. Base64 encoding is used to obscure the credentials during transmission, however it's not a secure encryption method, as the encoded string can be easily decoded.
To enhance security, it's crucial to use HTTPS (TLS/SSL) to encrypt the entire communication between the client and the server.
While straightforward, it is not the most secure method, especially if not used over HTTPS, as credentials can be easily intercepted.
To summarize:
Choosing the right protocol depends on your specific use case and security requirements, but it's always essential to prioritize strong authentication and granular authorization to safeguard your API effectively.
Knit, being a unified API, takes care of all your authentication needs for all integrated accounts. Here's what you can expect from Knit:
If you are building multiple integration, unified APIs like Knit can dramatically free up your bandwidth by allowing 1:many connection — with just one API key, you can seamlessly integrate with 50+ application across HRIS, ATS, CRM and Accounting. With an API aggregator like this, the time you would spend building and maintaining your integrations can come down to just a few hours from few weeks or even months.
If ready to build, get started for free or talk to our team to learn more
API authentication is the process of verifying the identity of a client or application before granting it access to an API's resources. It answers the question "who are you?" - establishing the caller's identity using credentials such as an API key, access token, or cryptographic certificate before any data is returned or action taken.
Authentication is the first layer of API security. Once identity is confirmed, authorisation determines what the caller is allowed to do. Without authentication, any application could call your API and access sensitive data unchecked.
When building integrations with third-party SaaS platforms, Knit handles authentication with each connected provider on behalf of your customers - managing credential exchange, token storage, and rotation so your integration code never holds raw credentials.
Authentication verifies identity - "who is making this request?" - by checking credentials such as an API key, OAuth token, or certificate. If authentication fails, the request is rejected before any resource access occurs.
Authorisation verifies permissions - "what is this caller allowed to do?" After authentication succeeds, the API checks whether the identity holds the right permissions for the requested resource or action. A successfully authenticated caller can still be unauthorised for specific endpoints or data.
Both operate together in practice. OAuth 2.0, for example, handles both: the flow authenticates the user and issues an access token that carries authorisation scopes defining what the token holder can read or write.
Knit manages both layers per integration - authenticating to the provider's API and enforcing customer-scoped access so your product only receives data the customer has explicitly authorised.
The five most widely used methods are:
OAuth 2.0 - the dominant standard for enterprise SaaS APIs. Enables delegated access without sharing passwords; used by Google, Microsoft, Salesforce, and most HRIS/CRM platforms.
API keys - unique strings passed in headers or query parameters. Simple to implement; suitable for server-to-server calls from a single trusted application.
JWT (JSON Web Tokens) - signed, self-contained tokens encoding claims. Stateless and efficient; commonly used as the token format within OAuth 2.0 flows.
Basic authentication - Base64-encoded username:password in the Authorization header. Simplest method; should only be used over HTTPS for internal or legacy APIs.
Bearer tokens - HTTP authorisation scheme where an access token is passed as a header value; used as the delivery mechanism for OAuth and JWT tokens.
Most modern enterprise platforms use OAuth 2.0. Knit handles OAuth flows for all supported integrations, so your application never manages token exchange or refresh directly.
OAuth 2.0 is the most widely adopted API authentication and authorisation protocol. It powers access to Google, Microsoft 365, Salesforce, Workday, HubSpot, and most enterprise SaaS platforms — wherever a user must grant a third-party application access to their account without sharing their password.
For simpler cases - internal services, developer tooling, read-only pipelines — API keys remain common due to ease of implementation. However, API keys don't support user-level scoping, making them unsuitable for customer-facing integrations where different users need different permissions.
JWT is frequently used alongside OAuth 2.0 as the access token format. Basic auth is generally limited to legacy or development environments. For customer-facing SaaS integrations where your product connects to your users' third-party accounts, OAuth 2.0 is the standard.
OAuth 2.0 (defined in RFC 6749) is an authorisation framework allowing users to grant a third-party application access to their account - on a service like Google or Workday - without sharing their password.
The Authorization Code flow works as follows:
Your app redirects the user to the API provider's authorisation server.
The user authenticates and approves the requested permission scopes.
The authorisation server returns an authorisation code to your redirect URI.
Your app exchanges the code for an access token (and typically a refresh token).
The access token is included as a Bearer token in subsequent API requests.
Access tokens are time-limited (typically 1 hour). Refresh tokens allow your app to obtain a new access token without user interaction when the original expires.
Knit handles the complete OAuth 2.0 flow for all supported platforms — token exchange, storage, and automatic refresh — so your integration calls Knit's unified API rather than managing each provider's OAuth endpoint separately.
A JSON Web Token (JWT), defined in RFC 7519, is a compact, signed token that encodes claims — such as user ID, expiry time, and authorisation scopes - in a Base64URL-encoded JSON payload.
A JWT has three parts: header (algorithm and token type), payload (the claims), and signature (generated with the issuer's private key or shared secret), joined as header.payload.signature.
In API authentication, a server issues a JWT after verifying credentials. The client includes it in the Authorization header (as a Bearer token) on subsequent requests. The API validates the JWT by verifying the signature - no database lookup required - making JWTs well-suited for stateless, distributed architectures.
JWTs are commonly used as the access token format within OAuth 2.0 flows. Security considerations: set short expiry (exp claim), use asymmetric signing (RS256 or ES256) in production, and avoid storing sensitive data in the payload since it is encoded, not encrypted.
The choice depends on whether your integration acts on behalf of a specific user or operates as a trusted server-to-server call.
Use API keys when:
All requests originate from your own server with a single identity
You're integrating with developer tools, analytics APIs, or internal services
The API provider doesn't offer OAuth (common with simpler or legacy APIs)
Use OAuth 2.0 when:
Your integration accesses data on behalf of individual users (customer-facing integrations)
The API requires user-level permission scoping
You're connecting to enterprise SaaS platforms - Salesforce, Google, Microsoft, Workday, HubSpot all require OAuth for customer-facing access
Most HRIS, CRM, ATS, and accounting APIs in B2B SaaS integrations require OAuth 2.0. Knit handles OAuth flows for all supported platforms, removing the need to implement per-provider OAuth logic in your codebase.
Quick answer: Software integrations for B2B SaaS are the connections between your product and the business systems your customers already use - HRIS, ATS, CRM, accounting, ticketing, and others. The right strategy is not to build every integration customers request. It is to identify the categories closest to activation, retention, and expansion, then choose the integration model - native, unified API, or embedded iPaaS - that fits the scale and workflow you actually need. Knit's Unified API covers HRIS, ATS, payroll, and other categories so SaaS teams can build customer-facing integrations across an entire category without rebuilding per-provider connectors.
Software integrations mean different things depending on who is asking. For an enterprise IT team, it might mean connecting internal systems. For a developer, it might mean wiring two APIs together. For a B2B SaaS company, it usually means something more specific: building product experiences that connect with the systems customers already depend on.
This guide is for that third group. Product teams evaluating their integration roadmap are not really asking "what is a software integration?" They are asking which integrations customers actually expect, which categories to support first, how to choose between native builds and third-party integration layers, and how to scale coverage without the roadmap becoming a connector maintenance project.
In this guide:
Software integrations are connections that let two or more systems exchange data or trigger actions in support of a business workflow.
For a B2B SaaS company, that means your product connects with systems your customers already use - and that connection makes your product more useful inside the workflows they run every day. The systems vary by product type: an HR platform connects to HRIS and payroll tools, a recruiting product connects to ATS platforms, a finance tool connects to accounting and ERP systems.
The underlying mechanics are usually one of four things: reading data from another system, writing data back, syncing changes in both directions, or triggering actions when something in the workflow changes.
What matters more than the mechanics is the business reason. For B2B SaaS, integrations are tied directly to onboarding speed, activation, time to first value, product adoption, retention, and expansion. When a customer has to manually export data from their HRIS to use your product, that friction shows up in activation rates and churn risk - not in a bug report.
This distinction matters more than most integration experts acknowledge and confuses most people looking at inegrations for the first time
Customer-facing integrations are harder to build and own because the workflow needs to feel like part of your product, not middleware. Your customers expect reliability. Support issues surface externally. Field mapping and data model problems become visible to users. Every integration request has product and revenue implications.
That is why customer-facing integrations should not be planned the same way as internal automation. The bar for reliability, normalization, and support readiness is higher - and the cost model is different. See The True Cost of Customer-Facing SaaS Integrations for a full breakdown of what production-grade customer-facing integrations actually cost to build and maintain.
Most B2B SaaS products do not need every category — but they do need clarity on which categories are closest to their product workflow and their customers' buying decisions.
The right category to prioritize usually depends on where your product sits in the customer's daily workflow - not on which integrations come up most often on sales calls.
The clearest way to understand software integrations is to look at the product workflows they support.
The useful question is not "what integrations do other products have?" It is: which workflows in our product become materially better when we connect to customer systems?
Once you know which category matters, the next decision is how to build it. There are three main models - and they solve different problems.
Native integrations make sense when the workflow is deeply custom, provider-specific behavior is central to your product, or you only need a few strategic connectors. The tradeoff is predictable: every connector becomes its own maintenance surface, your roadmap expands one provider at a time, and engineering ends up owning long-tail schema and API changes indefinitely.
A unified API is the better fit when customers expect broad coverage within one category, you want one normalized data model across providers, and you want to reduce the repeated engineering work of rebuilding similar connectors. This is usually the right model for categories like HRIS, ATS, CRM, accounting, and ticketing - where the use case is consistent across providers but the underlying schemas and auth models are not. Knit's Unified API covers 60+ HRIS, ATS, payroll, and other platforms with normalized objects, virtual webhooks, and managed provider maintenance so your team writes the integration logic once.
Embedded iPaaS is usually best when the main problem is workflow automation — customers want configurable rules, branching logic, and cross-system orchestration. It is powerful for those use cases, but it solves a different problem than a unified customer-facing category API. See Native Integrations vs. Unified APIs vs. Embedded iPaaS for a detailed comparison.
The point is not that one model wins everywhere. The model should match the product problem - specifically, whether you need control, category scale, or workflow flexibility.
The right starting point is not the longest customer wishlist. It is the integrations that most directly move the metrics that matter: activation, stickiness, deal velocity, expansion, and retention.
That usually means running requests through four filters before committing to a build.
1. Customer demand - How often does the integration come up in deals, onboarding conversations, or churn risk reviews? Frequency of request is a signal, but so is the seniority and account size of the customers asking.
2. Workflow centrality - Does the integration connect to the system that is genuinely central to the customer's workflow — the HRIS, the CRM, the ticketing system — or is it a peripheral tool that would be nice to have?
3. Category leverage - Will building this integration unlock a whole category roadmap, or is it one isolated request? A single Workday integration can become a justification to cover BambooHR, ADP, Rippling, and others through a unified API layer. One Salesforce integration can open CRM coverage broadly. Think in categories, not connectors.
4. Build and maintenance cost - How much engineering and support load will this category create over the next 12–24 months? The initial build is visible; the ongoing ownership cost is usually not. See the full cost model before committing.
Score each potential integration across these four dimensions and use the output to sort your roadmap.
Then group your roadmap into three buckets: build now, validate demand first, and park for later. The common mistake is letting the loudest request become the next integration instead of asking which integration has the highest leverage across the whole customer base.
The teams that scale integrations without roadmap sprawl usually follow the same pattern.
They start by identifying the customer systems closest to their product workflow - not the longest list of apps customers have mentioned, but the ones where an integration would change activation rates, time to value, or retention in a measurable way.
They group requests into categories rather than evaluating one app at a time. A customer asking for a Greenhouse integration and another asking for Lever are both asking for ATS coverage - and that category framing changes the build vs. buy decision entirely.
They decide on the integration model before starting the build - native, unified API, or embedded iPaaS - based on how many providers the category requires, how normalized the data needs to be, and how much ongoing maintenance the team can carry.
They build for future category coverage from the start, not just one isolated connector. And they instrument visibility into maintenance, support tickets, and schema changes from day one, so the cost of the integration decision is visible before it compounds.
That is how teams avoid turning integrations into a maintenance trap.
The most common mistake is treating software integrations as a feature checklist - optimizing for the number of integrations on the product page rather than for the workflows they actually support.
A long integrations page may look impressive. It does not tell you whether those integrations support the right workflows, share a maintainable data model, improve time to value, or help the product scale. A team that builds 15 isolated connectors using native integrations has 15 separate maintenance surfaces - not an integration strategy.
The better question is not: how many integrations do we have? It is: which integrations make our product meaningfully more useful inside the systems our customers already rely on - and can we build and maintain that coverage without it consuming the roadmap?
Software integrations for B2B SaaS are product decisions, not just engineering tasks.
The right roadmap starts with customer workflow, not connector count. The right architecture starts with category strategy, not one-off requests. And the right model — native, unified API, or embedded iPaaS — depends on whether you need control, category scale, or workflow flexibility.
If you get those three choices right, integrations become a growth lever. If you do not, they become a maintenance trap that slows down everything else on the roadmap.
What are software integrations for B2B SaaS?Software integrations for B2B SaaS are connections between your product and the business systems your customers already use - HRIS, ATS, CRM, accounting, ticketing, and others. Knit's Unified API lets SaaS teams build customer-facing integrations across entire categories like HRIS, ATS, and payroll through a single API, so the product connects to any provider a customer uses without separate connectors per platform.
Why do B2B SaaS companies need software integrations?B2B SaaS companies need integrations because customers expect your product to work inside the workflows they already run. Without integrations, customers face manual data exports, duplicate data entry, and friction that delays activation and creates churn risk. Integrations tied to the right categories - the systems that are genuinely central to the customer's workflow - directly improve onboarding speed, time to first value, and retention.
What are the main integration categories for SaaS products?The most common integration categories for B2B SaaS are HRIS and payroll, ATS, CRM, accounting and ERP, ticketing and support, and calendar and communication tools. Knit covers the HRIS, ATS, and payroll categories across 60+ providers with a normalized Unified API, so SaaS teams building in those categories can launch coverage across all major platforms without building separate connectors per provider.
How should a SaaS company prioritize which integrations to build?Prioritize integrations using four filters: customer demand (how often it comes up in deals and churn risk), workflow centrality (is it the system actually central to the customer's workflow), category leverage (does it unlock a whole category or just one isolated request), and build and maintenance cost over 12–24 months. This usually means focusing on the category closest to activation and retention first, rather than the most-requested individual app.
What is the difference between native integrations, unified APIs, and embedded iPaaS?Native integrations are connectors your team builds and maintains per provider - highest control, highest maintenance burden. A unified API like Knit gives you one normalized API across all providers in a category - HRIS, ATS, CRM - so you write the integration logic once and it works across all covered platforms. Embedded iPaaS provides customer-configurable workflow automation across many systems. The right choice depends on whether you need control, category scale, or workflow flexibility. See Native Integrations vs. Unified APIs vs. Embedded iPaaS for a detailed comparison.
When does it make sense to use a unified API for SaaS integrations?A unified API makes sense when you need coverage across multiple providers in the same category, when the same integration pattern repeats across customer accounts using different platforms, and when owning per-provider connectors would create significant ongoing maintenance overhead. Knit's Unified API covers HRIS, ATS, payroll, and other categories - so teams write integration logic once and it works whether a customer uses Workday, BambooHR, ADP, Greenhouse, or 60+ other platforms.
If your team is deciding which customer-facing integrations to build and how to scale them without connector sprawl, Knit connects SaaS products to entire categories - HRIS, ATS, payroll, and more - through a single Unified API.
Welcome to our comprehensive guide on troubleshooting common Salesforce integration challenges. Whether you're facing authentication issues, configuration errors, or data synchronization problems, this FAQ provides step-by-step instructions to help you debug and fix these issues.
Building a Salesforce Integration? Learn all about the Salesforce API in our in-depth Salesforce Integration Guide
Resolution: Refresh your token if needed, update your API endpoint to the proper instance, and adjust session or Connected App settings as required.
Resolution: Correct any mismatches in credentials or settings and restart the OAuth process to obtain fresh tokens.
Resolution: Integrate an automatic token refresh process to ensure seamless generation of a new access token when needed.
Resolution: Reconfigure your Connected App as needed and test until you receive valid tokens.
Resolution: Adjust your production settings to mirror your sandbox configuration and update any environment-specific parameters.
Resolution: Follow Salesforce’s guidelines, test in a sandbox, and ensure all endpoints and metadata are exchanged correctly.
Resolution: Correct the field names and update permissions so the integration user can access the required data.
Resolution: Adjust your integration to enforce proper ID formatting and validate IDs before using them in API calls.
Resolution: Update user permissions and sharing settings to ensure all referenced data is accessible.
Resolution: Choose REST for lightweight web/mobile applications and SOAP for enterprise-level integrations that require robust transaction support.
Resolution: Integrate the Bulk API using available libraries or custom HTTP requests, ensuring continuous monitoring of job statuses.
Resolution: Ensure the JWT is correctly formatted and securely signed, then follow Salesforce documentation to obtain your access token.
Resolution: Develop your mobile integration with Salesforce’s mobile tools, ensuring robust authentication and data synchronization.
Resolution: Refactor your integration to minimize API calls and use smart retry logic to handle rate limits gracefully.
Resolution: Develop a layered logging system that captures detailed data while protecting sensitive information.
Resolution: Establish a robust logging framework for real-time monitoring and proactive error resolution.
Resolution: Adopt middleware that matches your requirements for secure, accurate, and efficient data exchange.
Resolution: Enhance your data sync strategy with incremental updates and conflict resolution to ensure data consistency.
Resolution: Use secure storage combined with robust access controls to protect your OAuth tokens.
Resolution: Strengthen your security by combining narrow OAuth scopes, IP restrictions, and dedicated integration user accounts.
Resolution: Follow Salesforce best practices to secure credentials, manage tokens properly, and design your integration for scalability and reliability.
If you're finding it challenging to build and maintain these integrations on your own, Knit offers a seamless, managed solution. With Knit, you don’t have to worry about complex configurations, token management, or API limits. Our platform simplifies Salesforce integrations, so you can focus on growing your business.
Stop spending hours troubleshooting and maintaining complex integrations. Discover how Knit can help you seamlessly connect Salesforce with your favorite systems—without the hassle. Explore Knit Today »

NetSuite just made its REST Web Services API generally available across 140-plus record types and promoted OAuth 2.0 to the default authentication flow. This 2025.1-ready guide walks you through authentication, CRUD operations, SuiteQL improvements, and hard-won best practices.
| Requirement | Details |
|---|---|
| NetSuite role | REST Web Services + OAuth 2.0 Authorized Applications |
| API client | Postman, curl, or any library with OAuth 2.0 (or legacy TBA) |
| Core skills | JSON, HTTP verbs, NetSuite record terminology |
Heads-up — the old “REST Record Service (Beta)” checkbox is gone: REST is GA.
REST Web Services – 2025# Authorize
GET https://<ACCOUNT>.suitetalk.api.netsuite.com/services/rest/auth/oauth2/v1/authorize.nl?client_id=...&redirect_uri=...&response_type=code&scope=rest_webservices
# Exchange code → token
POST /services/rest/auth/oauth2/v1/token
grant_type=authorization_code&code=...&redirect_uri=...
# Use it
Authorization: Bearer <access_token>
https://<ACCOUNT_ID>.suitetalk.api.netsuite.com/services/rest/record/v1/# List
GET /customer
# Retrieve one
GET /customer/123
# Create
POST /customer
{
"companyName": "Robbie Test Company",
"subsidiary": { "id": "1" }
}
# Update
PATCH /customer/123
{ "comments": "Best customer ever" }
# Retrieve
GET /salesorder/456

# Create
POST /salesorder
{
  "entity": { "id": "123" },
  "items": { "items": [ { "item": { "id": "108" }, "quantity": 1 } ] }
}

# Update existing line
PATCH /salesorder/456
{
  "items": { "items": [ { "line": 1, "quantity": 2 } ] }
}
Gotcha — omit "line" and NetSuite adds, rather than updates, a line.
/services/rest/query/v1/suiteqlhasMore, totalResults, nextPOST /services/rest/query/v1/suiteql
Prefer: transient
{
"q": "SELECT id, email FROM customer WHERE isinactive = 'F' ORDER BY id LIMIT 50"
}
If hasMore: true, follow the next URL until exhausted.
| Goal | 2025 Method |
|---|---|
| Quick slice | ?limit=<n> |
| Full export | Follow next header |
| > 100 K rows | Use SuiteAnalytics Connect |
expires_in.| 2022.2 | 2025.1 |
|---|---|
| REST Beta flag | GA by default |
| Token-Based Auth default | OAuth 2.0 recommended |
Manual offset maths | next header simplifies paging |
| ≈ 70 record types | 140 + GA record types |
| No AI endpoints | Early AI helper preview |
Need deeper help? Email support@getknit.dev — we ❤️ tough NetSuite integrations.

In 2025's rapidly evolving AI landscape, integrating external tools and data sources with large language models (LLMs) has become essential for building competitive B2B SaaS applications. The Model Context Protocol (MCP) has emerged as a game-changing standard that dramatically simplifies this integration process.
This comprehensive guide explores how Knit's integration platform can help you leverage MCP to enhance your product integrations and deliver superior customer experiences.
The Model Context Protocol (MCP) functions as a universal interface for AI applications—essentially serving as a universal connector to connect with third party applictions for AI tools. It standardizes how applications provide context to LLMs, eliminating the need for custom implementations that create fragmentation in the AI ecosystem.
Technical Advantages:
Business Impact:
If you're keen you could also read Complete Guide to B2B Integration Strategies
Understanding MCP's client-server architecture is crucial for successful implementation:
MCP Clients (Hosts): These are AI applications like Anthropic's Claude, Cursor AI IDE, or your custom application that initiate connections to access external data sources.
MCP Servers: Lightweight programs that expose specific capabilities via the standardized protocol, connecting to local data sources or remote business services like CRMs, accounting systems, and HR platforms.
Knit's platform simplifies this process by providing ready-to-use MCP servers that connect with 100+ popular business applications. Our LLM Ready Tools framework is specifically designed to help your AI agents take actions across popular SaaS applications—without requiring complex custom integration work.
When integrated with Knit's platform, MCP enables powerful automation workflows:
1. Intelligent Data Retrieval
2. Advanced Document Processing
3. Workflow Automation
4. Cross-Platform Integration
You can read more about our customers and their experience with knit
Implementing MCP with Knit is straightforward and can be completed in under a week:
Our platform supports 100+ managed MCP servers with enterprise-grade authentication and exhaustive tool coverage, allowing you to automate complex workflows without extensive setup procedures.
Ready to enhance your B2B SaaS product with powerful AI integrations? Knit's MCP solutions can help you:
Contact our team today to learn how Knit can help you implement MCP in your B2B SaaS application or AI agent and stay ahead of the competition.

